
Top 2 New Methods to Bypass FRP Galaxy J6, J6 Plus All Android Version
We have updated this post with another great and newest method of this year to bypass frp Galaxy J6, J6 Plus Android 10,9,8 (All Android Versions), and we would recommend you to try Method-1 first, and we hope, you will not need to try any other method, this new method will work on all android version of Samsung J6, J6 Plus in just few minutes.
Warning: Do not try this frp method on a stolen phone, this is a serious crime, if you are trying to bypass frp Samsung on a stolen phone, you may also be jailed, this process is for device owner and for educational purpose only.
| Method 1: Remove FRP Galaxy J6, J6 Plus (Android 10, 9, 8) New |
| Method 2: Remove FRP Galaxy J6, J6 Plus (Android 10) |
Method 1: Bypass FRP Galaxy J6, J6 Plus [New]
There is another best tool has been launched in March-2022, and this tool is working tremendously on so many Samsung devices, so if you Samsung J6 or J6 Plus android device with any android version, you can apply this (Amazing FRP Tool) on that device with few steps.
How this tool work actually?, that is pretty simple, with few steps, you can easily with single click, just connect device with PC and RUN the tool, and click to (RUN) button from the tool, this will show you a popup window to enter a code from Galaxy J6, and once enter that code the (ADB) will be enabled automatically, and your device will be bypassed from FRP account completely, so lets follow all steps on Galaxy J6 device.
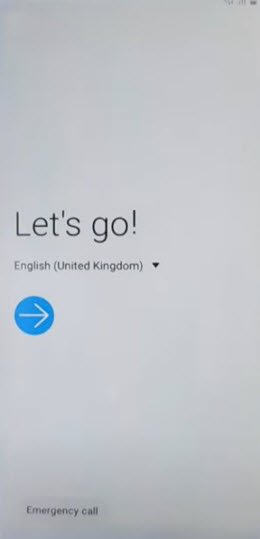
-Firstly Turn on Samsung device, and connect WiFi, after that put your device back to first homescreen.
-Now lets get back to Computer screen, and download below tool in your computer using any browser.
⇒ Amazing FRP Tool 2022 [DOWNLOAD]
Pass: techeligible.com
-Once downloading process done, just turn off your windows defender @ntivirus software or also turn off all active @antivirus software, because, otherwise you won’t be able to use this tool.
-Extract the tool from WinRAR archive using 7-Zip or WinRAR software.
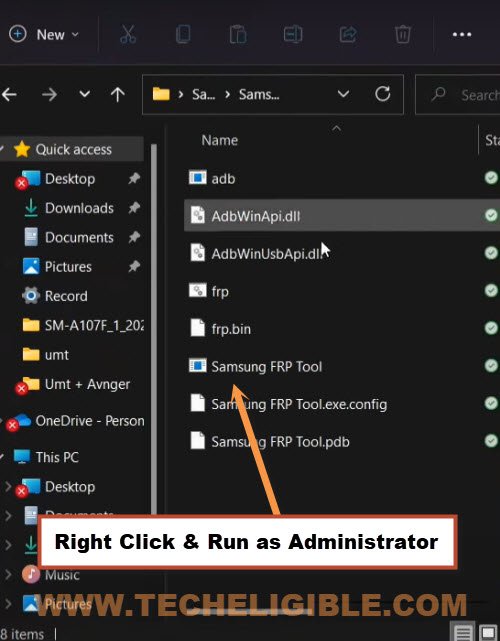
-Afterwards, go inside the tool folder, and from there right click on “Samsung FRP Tool“, and run as administrator.
Note: Do make sure, you have installed all relevant USB drivers in your PC, so that you may not face any connectivity issue with your device.
-Connect device with computer using USB Cable.
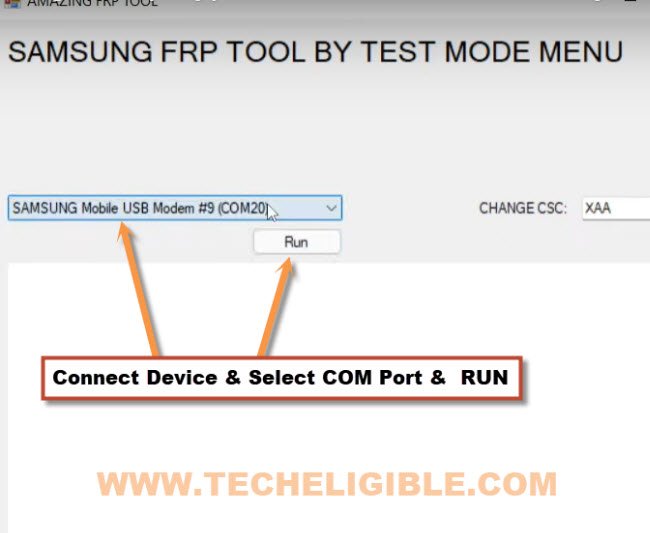
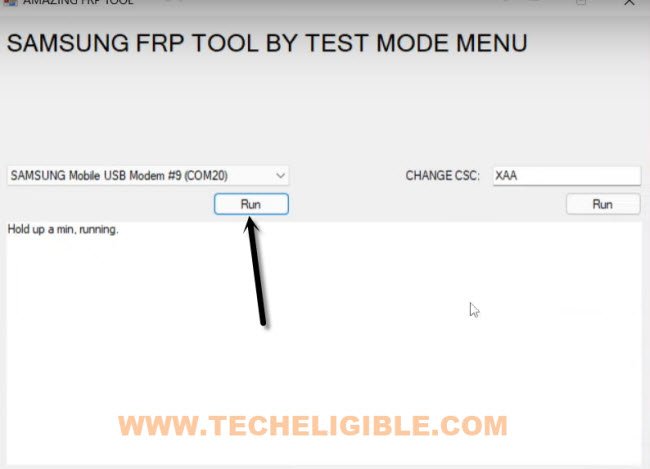
-From the software, click to drop down arrow, and select your Samsung device com port, after that click on “RUN” button.
-You will receive a popup window in the software, there are some instructions to dial a code in Samsung device.

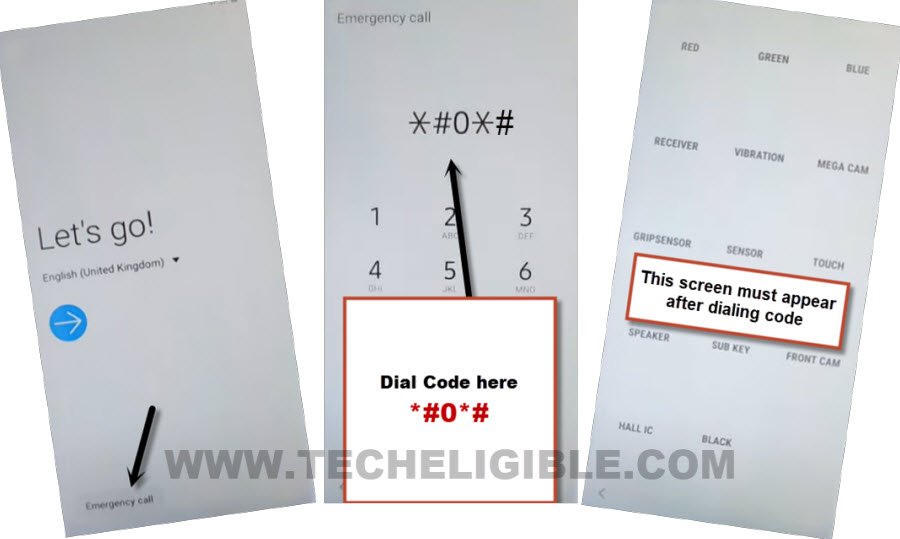
-So tap on “Emergency” option from your Galaxy J6, J6 Plus device, and the dial code *#0*#, After dialing this code, you will get there a screen with some small white boxes same as shown in below image, if this screen appeared on your device as well, that means this tool will work perfectly.
-Get back to software, and click on “RUN” button again.
-You will get a (USB Debugging) popup message in your J6 device screen, just check mark option (Always Allow from this computer), and then click to “Allow” button again

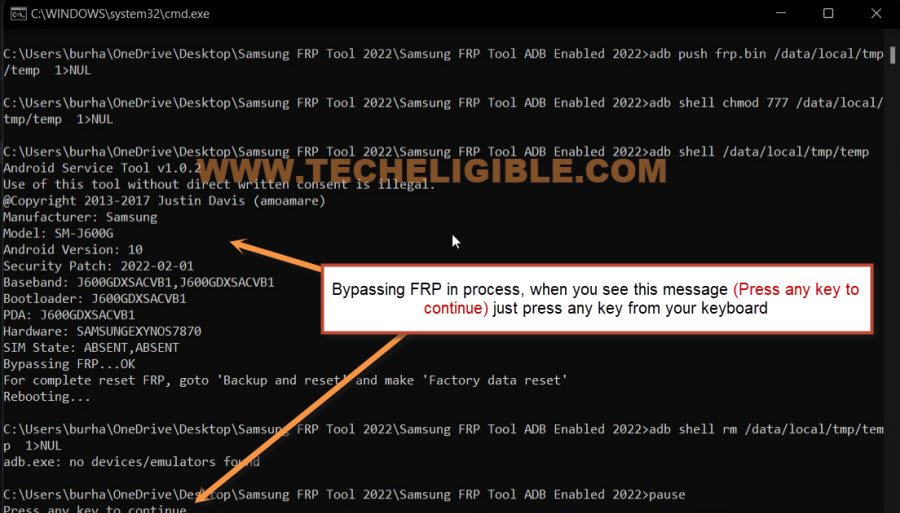
-A CMD screen will be opened in your computer, and there you will some texting of frp bypassing…, just wait there, as soon as you see a message (Press any key to continue…), just press any random key from your keyboard to finish this process, the FRP will bypassed in few 30-60 seconds, after that your device will be restarted automatically, once the device is restart, just disconnect it from PC, now you can easily finish setup wizard on your own.
Method 2: Bypass FRP Galaxy J6, J6 Plus Android 10
Through new method, we can Bypass Google Account on Samsung Galaxy J6 Android 10, and Galaxy J6 Plus using our pin locked sim card, and also with secure folder option, if you do not have that option, then we will use smart switch app method, all steps has been described below, so you don’t need to be confused now. just follow steps.
-Firstly, connect Wi-Fi.
-Go to screen of “Verify your account”.
-Tap on “Email or Phone” field to bring keyboard.
-Now tap on “Settings gear icon”, and then tap on “Swipe, Touch and Feedback”.
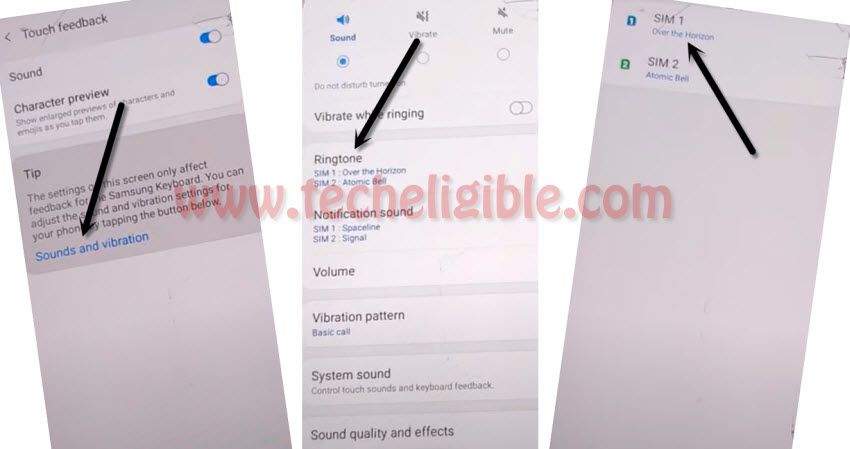
-Select “Touch Feedback”.
![]()
-Tap on “Sound & Vibration”.
-Tap on “Ringtone” .
-Select “SIM 1”.
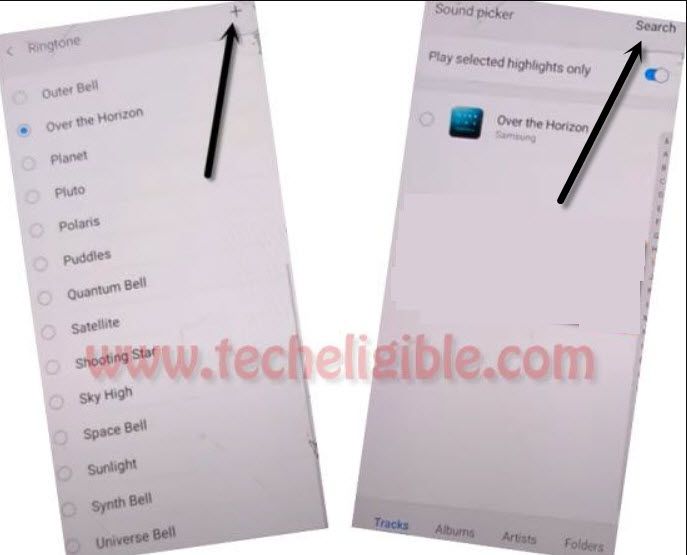
-Now tap on “+” sign from top right corner, and then tap on “Search” from there.
-Insert your 4 digits pin locked SIM card.
Note: if your sim card has not any PIN lock code, so you can setup PIN code using other device.
-After inserting the sim card, wait few seconds, and then start tapping on “Mic icon” from top right corner, keep tapping on mic icon until you see a window of “Enter SIM Card PIN”.
-Now enter your correct 4 digits pin code, and then tap on “OK”.
-Quickly Swipe date & time to right and do not lift up your finger keep holding date and time to right side, and with other finger quickly hit on “Lock icon”.
-Quickly drag down the “Not Signed in” popup window, and then it will bring top bar menu.
-Fastly tap 3-4 times on “Setting gear icon” from top right corner of the top bar menu.
Note: You have to do this very quickly, with one of your finger swipe date and time to right, while keeping it swiped, just tap on “Lock icon” with other of your finger, and quickly drag down (Not Signed in) screen to get top bar menu options (See Below image).
![]()
Connect Bluetooth Pods or Headphone to Galaxy J6:
-We need to make a Bluetooth pair with our any Bluetooth headphone or pods.
-Before doing this, wait until you get Samsung error screen in the background of top bar menu, same as shown in below image.
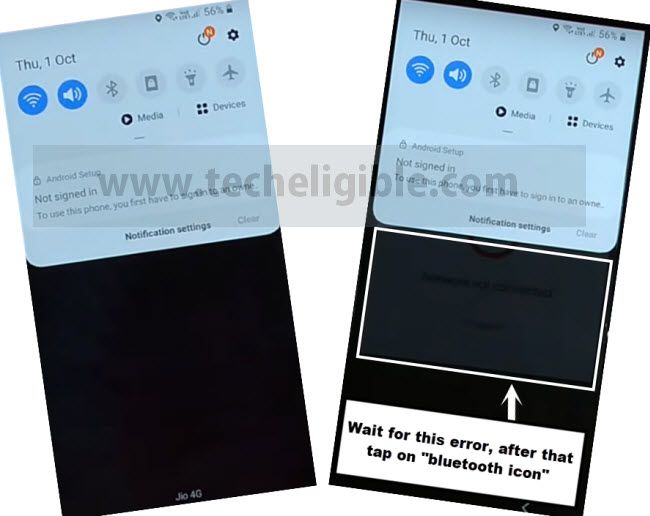
-After that, tap on “Bluetooth icon”.
-Make pair with your any new generation (Bluetooth Pods / Headphone) for Bypass frp Galaxy J6 Android 10.
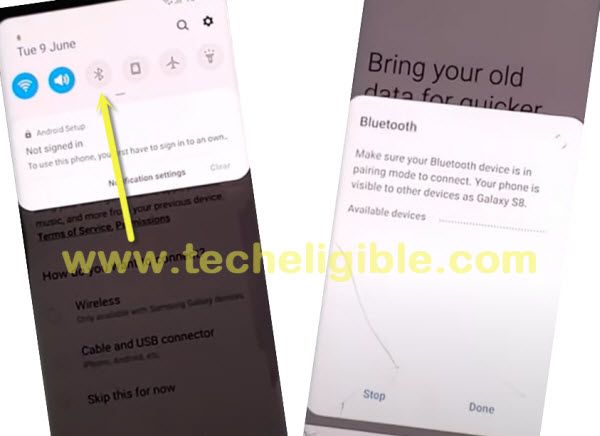
-After making pair successfully, press power button 3 times from your connected Bluetooth pods or headphone, this will open a dialog box for you, from there, tap on “Mic icon”, and then speak loudly “Open Settings”.
-This will redirect you to your Samsung Galaxy J6 settings.
Final Steps to Bypass frp:
-We are going to show you 2 methods from here, one is with (Secure Folder) option, and 2nd method is with (Smart Switch) option, because in some device, secure folder option is not available, so to bypass frp successfully, you are supposed to go to Samsung Smart Switch App method. for that.
-Let’s check, do you have (Secure Folder) option, or not, for that tap on “Biometrics & Security”.
-If you have “Secure Folder” option there, then you can easily bypass frp with Samsung account.
-Tap on “Secure Folder”, and then tap on “Agree”.
-Enter your any “Samsung Account” there to sign in with, if you do not have Samsung account, you can create that easily with any other android device or laptop etc.

-After signing in successfully, you are all done, you don’t need follow extra steps from below.
–If you do not have “Secure Folder”, then you are required some extra tools.
1- Other Android Device.
2- OTG Connector.
-Make sure your other android device is on same Wi-Fi connection.
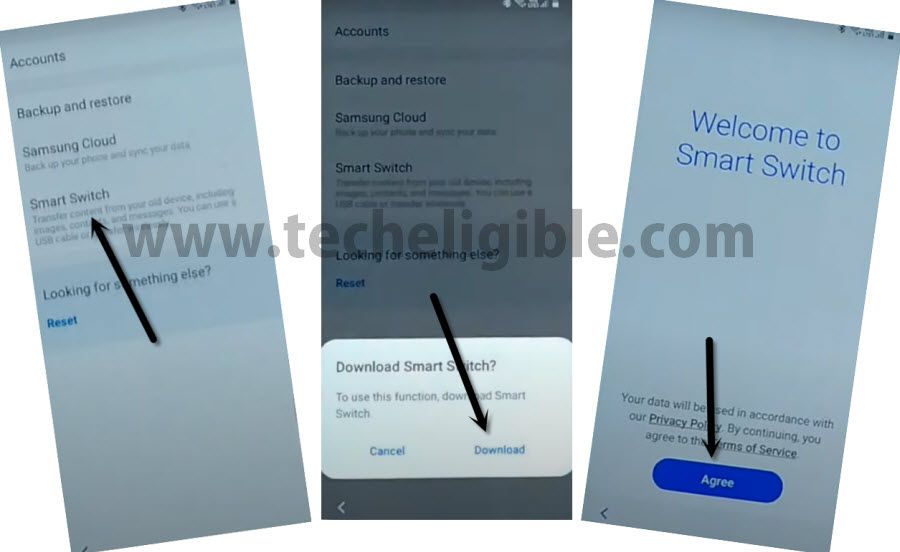
-In your Galaxy J6, tap on “Accounts & Backup”.
-Tap on “Smart Switch”, and then tap on “Downloads”.
-Wait few minutes until downloading finish.
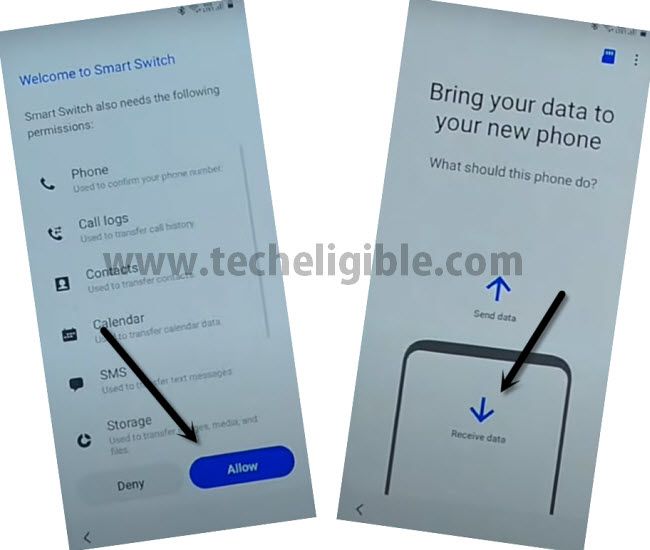
-After that, you will automatically get new screen of “Welcome Smart Switch”, and then tap on “Agree” button.
-Tap on > Allow > Receive Data > Galaxy/Android > Cable.
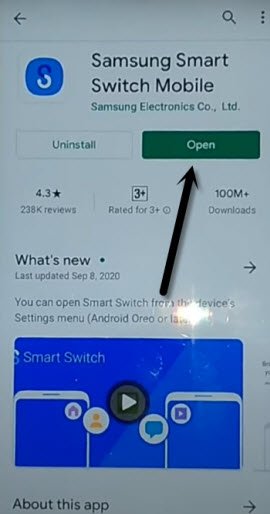
-In your Other Android Device, just open Google Play Store, and then download and install “Samsung Smart Switch Mobile” app.
-After that, tap on > OPEN > Let’s Go > Cable.
-Connect (OTG connector) in your frp locked phone Galaxy J6.
-Connect (USB Cable) in your other android device.
-Tap on “Back Arrow” in your other android device.
-After that, tap on “Allow” from your galaxy J6 phone.
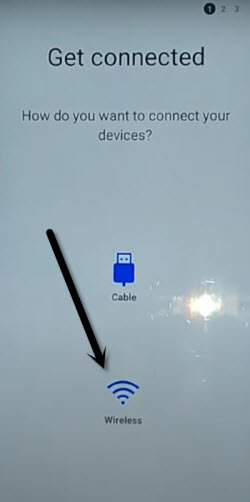
-in your Galaxy J6, just tap on “Back Arrow”, and then tap on > Smart Switch > Receive Data > Galaxy/Android > Wireless.
-in other android device, tap on “Wireless” as well.
Note: if you see a popup window in your galaxy j6, just tap on “Settings”, and then tap on “Back Arrow”, after that it will show you same screen as shown in below image.
-Now your galaxy j6 will start connecting to your other android device to receive data.
-Through that, we can send Gmail account of our other android device to our Samsung Galaxy J6, this will bypass frp easily.
-In other android device, You will receive a dialog box of invitation to connect, just tap on “Accept”.
-In your Galaxy J6, you will be asked to choose data, that you want to bring from other android device.
-deselect all item from top left corner circle icon.
-Now go inside “Apps”.
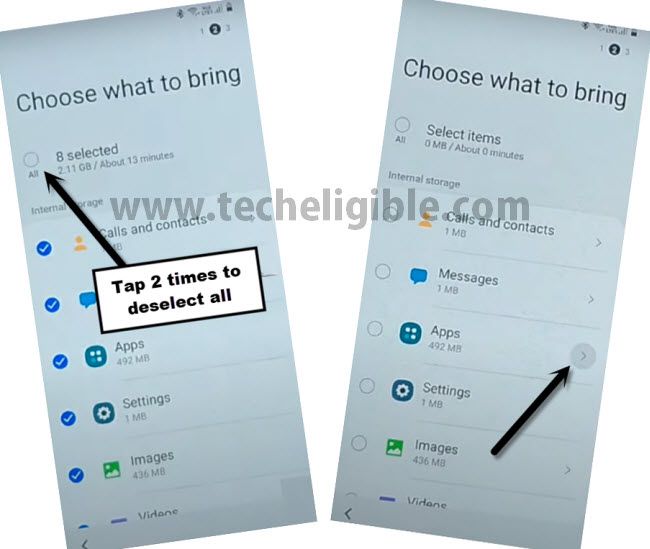
-Deselect all items by tapping on “circle icon” from top left corner.
-Select only “Drive”, and then tap on “DONE”.

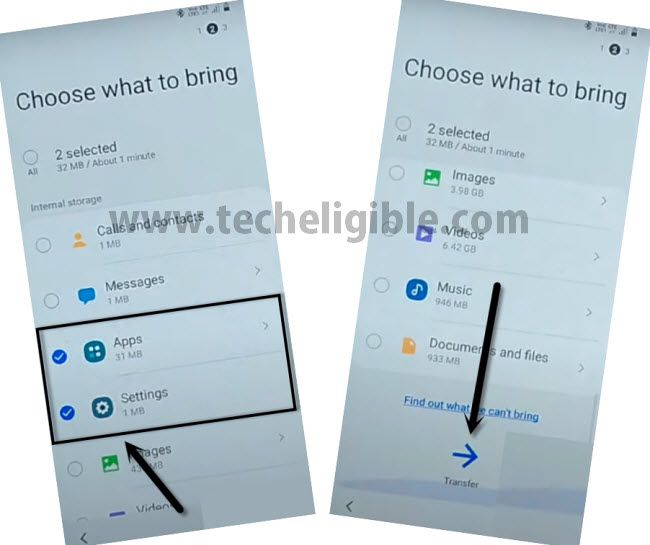
-Select “Settings” as well.
-Now you have selected two options, 1st is “Apps”, and 2nd is “Settings”.
-Go down and tap on “Transfer”.
-In your other android device, just tap on “COPY” button, and then give screen lock password, the one that is already setup.
-Select option in both android device (Keep Screen on).
-This will start transferring data to your Samsung Galaxy J6 to bypass frp.
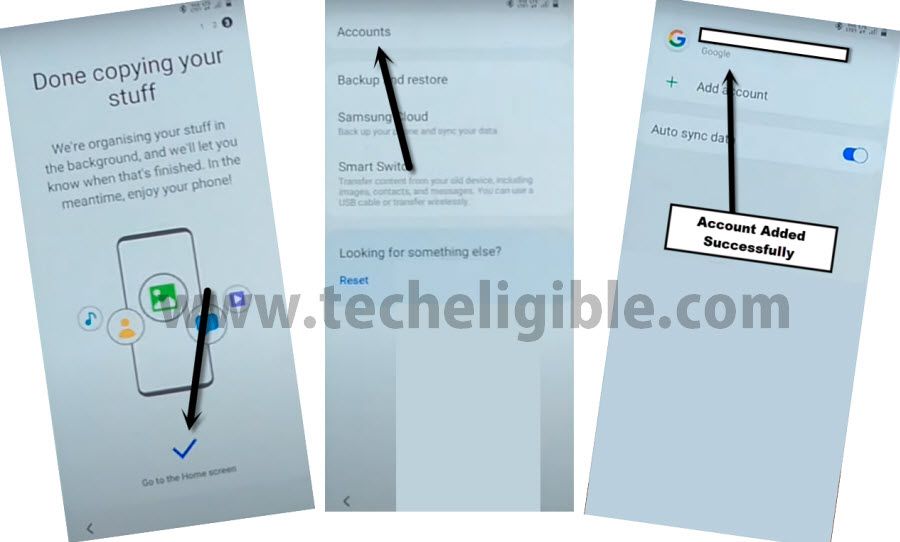
-Once it is done, just tap on “Go to the HOME SCREEN” in your Galaxy J6.
-Tap on “Accounts”, and there you will have your Gmail account, the one that you have in other android device, so you have successfully added your Gmail account and you are all done from Bypass FRP Galaxy J6, J6 Plus Android 10.
More FRP Methods on Relevant Android Devices: