
Samsung Galaxy S20, S20 Plus, Ulra Android 10 – Bypass FRP Acc
As you know, there are 3 methods to Remove Google FRP GALAXY S20 Ultra, S20 Plus, S20 Android 10, so that is why we decided to share with you all best 3 methods on just (Android 10), if you fail with 1 method so you can easily go for 2nd methods without searching anymore and wasting your time, because we want you to bypass frp and get your phone back.
Note: If your device has latest Android 11, and latest security patch level, then try this our latest method. [Click Here]
Warning: These methods are only for device owner and for educational purpose only.
3 Best Methods below to Remove FRP Galaxy S20 | S20 Plus | S20 Ultra:
| 1st Method |
| 2nd Method |
| 3rd Method |
1st Method: FRP Delete GALAXY S20 Ultra, S20 Plus, S20
Note: This method has successfully been applied on “Galaxy S20 Ultra 1st feb sec patch level”.
-Connect WiFi first in your phone.
-Go to the screen “Verify Your Account”, where are you asked to enter gmail account.
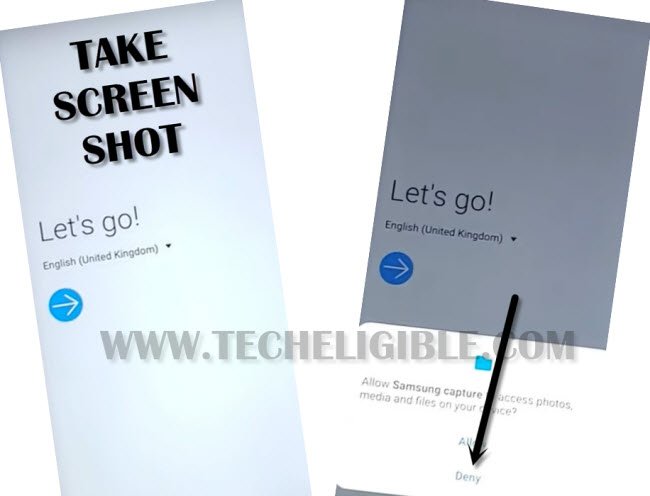
-Take screen shot of the screen by Pressing together both (Volume Down + Power).
-After taking screen shot, you will be shown a dialog box, just tap on “Deny”.
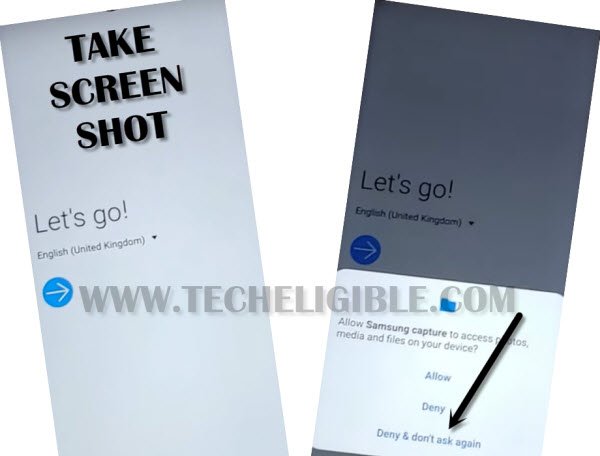
-Take screen shot again, and then tap on “Deny & Don’t Ask again”.
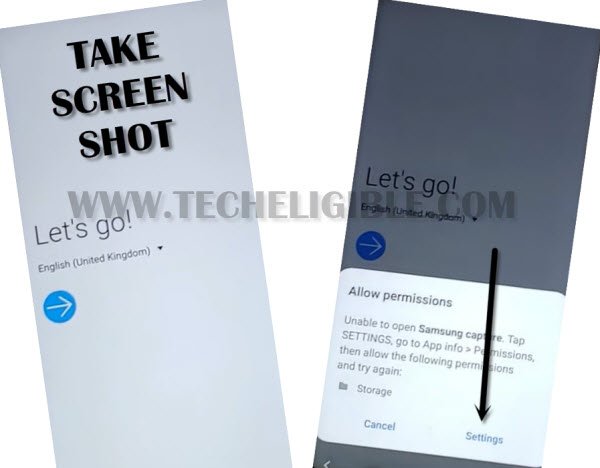
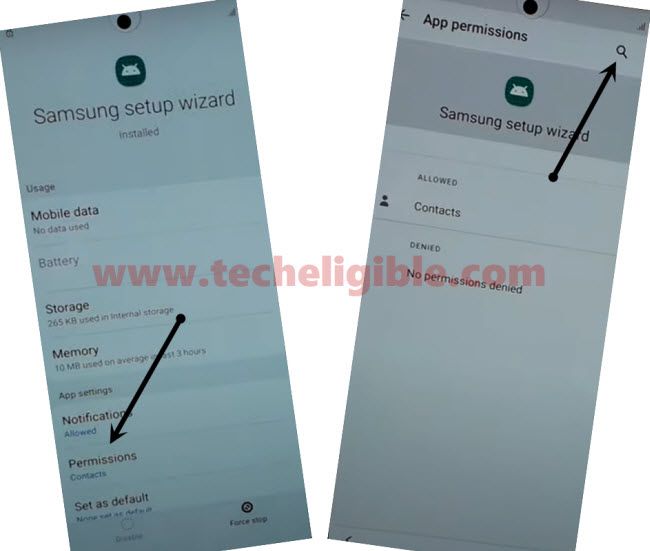
-Now take screen shot final time, and this you will have a popup window of (Allow Permission), just tap on “Settings”.
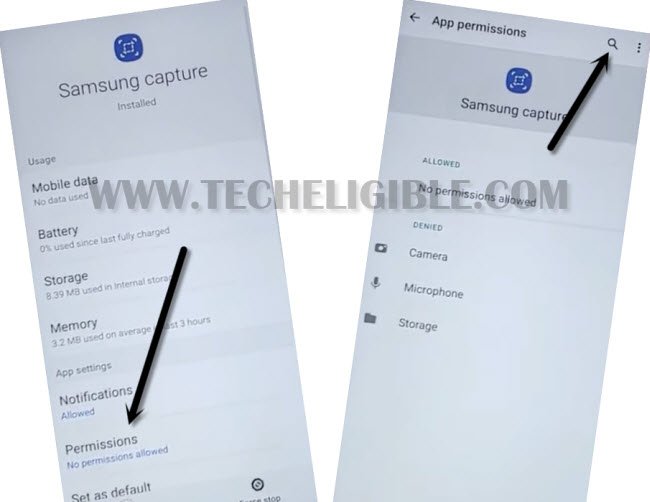
-Tap on “Permission”.
-Now tap on “Search icon” from top right corner, and type “Chrome”.
-After that, tap on “Chrome” from searched result.
-Tap on “Open” from the bottom left corner.
-Tap on > Accept & Continue > Next > No Thanks.
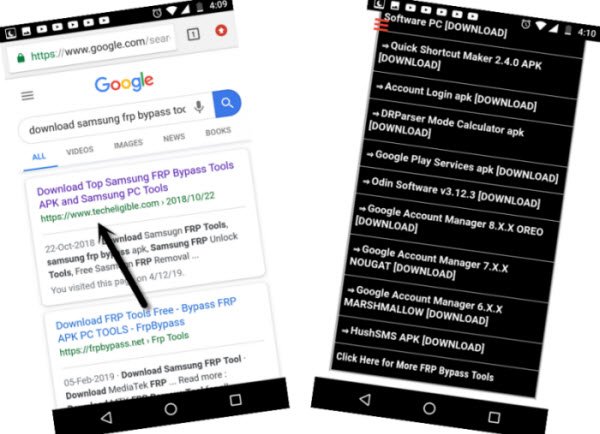
-Type in search bar “Download Top Samsung frp tools“.
-Go to the searched result of our site same as shown in below image.
-Scroll down, and download “Apex Launcher” apk app.
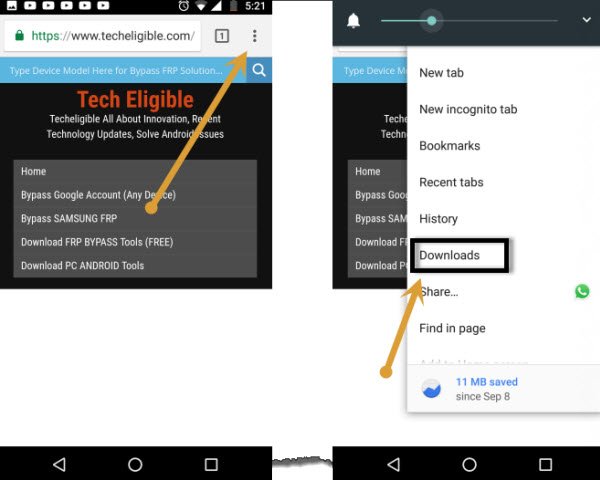
-Go top of the page, and tap “3 dots” from top right corner of the browser, and after that tap on “Downloads”.
-Tap on “Apex Launcher”, and then tap on “Settings” from popup window, and enable option “Allow from this source”.
-Afterwards, tap on “Back Arrow” from bottom left corner.
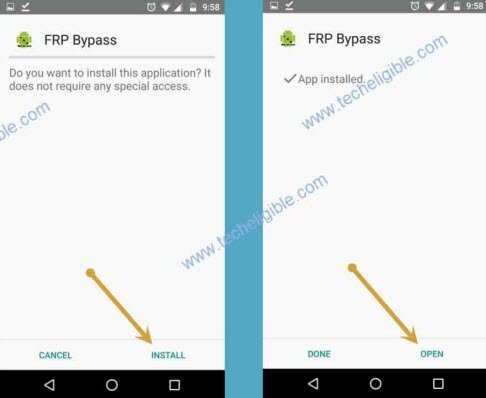
-Tap to “Install”, and then tap “Open” to launch apex launcher.
-After that, tap on “Continue”, and then tap on “OK”.
Final Step to Bypass FRP:
-Go to > MENU > Settings > Other Security Settings > Device Admin app > Find My Device > Deactivate this device admin app.
-After successfully disabling Find My Device, lets get back to “MENU” by tapping on back arrow.
-From the menu, just tap on “Chrome” app, and you will be shown previously opened link of “Top Samsung frp tools“.
-Download from there 2 more apps to Remove Google FRP GALAXY S20 Ultra, S20 Plus, S20.
1st app: Google Account Manager 8.
2nd app: Account Login.
-Go to the top of the browser, and tap 3 dots from top right corner, and then tap to “Downloads”.
-There you will see both downloaded app.
-Tap on “Google Account Manager”, and then tap on “Install”, after that tap on “Done.
-Now tap on > Account Login > Install > Open.
-Tap “3 dots from top right corner, and then tap on “Browser Sign-in” option to Remove Google FRP GALAXY S20 Ultra, S20 plus, S20.
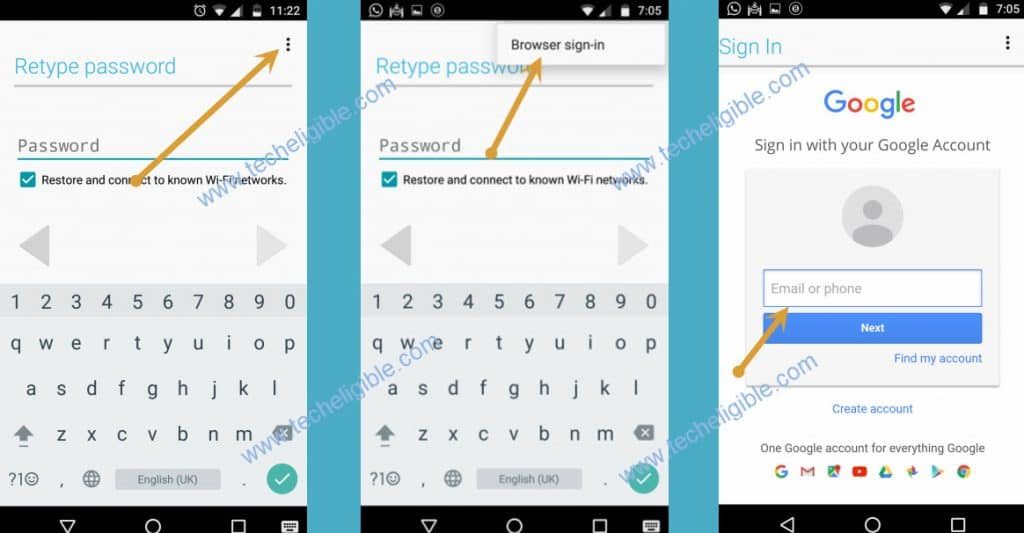
-Sign in with your any Gmail Account to completely bypass frp.
-Once you signed in successfully, lets restart your phone and complete initial setup to get access into your phone easily.
2nd Method: Remove Google FRP GALAXY S20 Ultra, S20 Plus, S20
This is the 2nd method that we are going to share with you, this method has successfully been applied on S20 Ultra SM-G988U (Android 10), but this will also work with your S20 plus and S20, so you can apply this method right now without having any hesitation.
-Lets start the 2nd frp method by turning on Galaxy S20, and connect WiFi first.
-Now go to the screen “Verify Your Account” where you are supposed to enter your previously synced gmail Account.
-Tap on “Email or Phone” field, and you will have keyboard there.
-Tap “3 dots” from top right of the keyboard, and then tap on “Samsung Pass”, and then hit on > Continue > Update.

-Select “i have read and agree to all of the above”, and then tap on “Agree”.
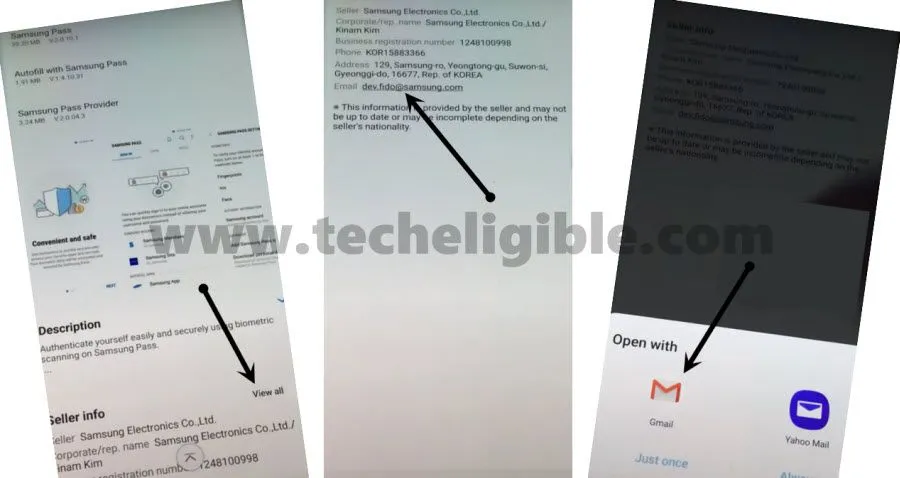
-Scroll down, and tap on “View all”, and there you will see an email account “[email protected]“, just tap on that email address.
-Tap on “Gmail” icon to open with.
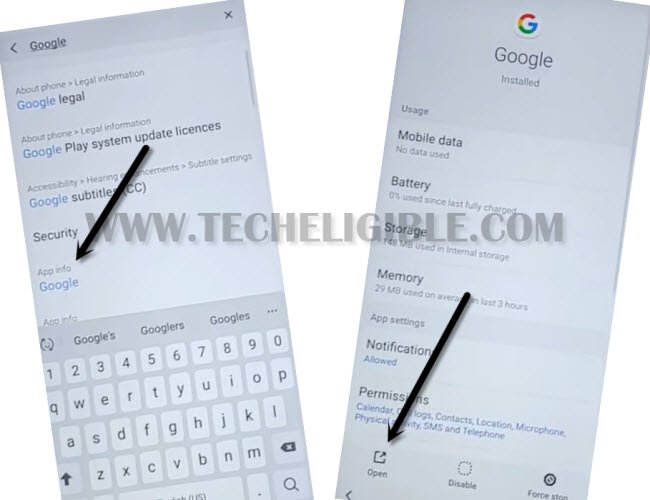
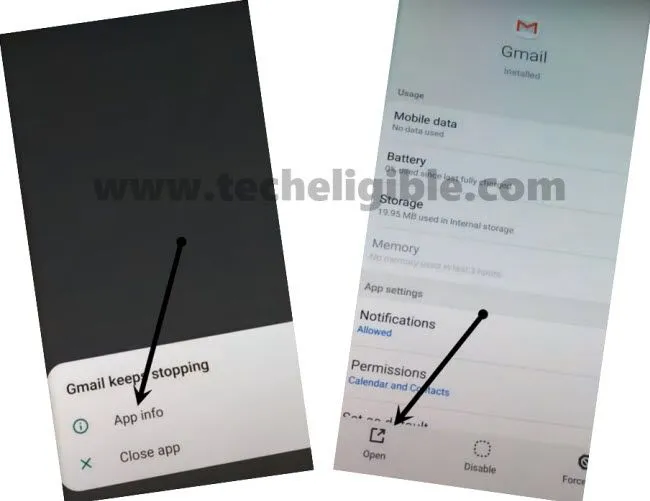
-You will be displayed an error there of (Gmail keeps stopping), so you only have to tap on “App info” from there.
-After that, just tap on “Open”.
-Go down and tap on > Got it > Add an email address > Other.
-Type your “Microsoft Account” there, and then tap on “Sign in” for FRP Google Bypass on Samsung S20, S20 Plus, S20 Ultra.
Note: If you do not have Microsoft Account, so you can easily create that account by going into “Microsoft Website”, and click on “Sign in” from top right corner of the website, and then tap “Create one!” from bottom of the sign in box.
-Tap > Next > Next > Take me to Gmail.
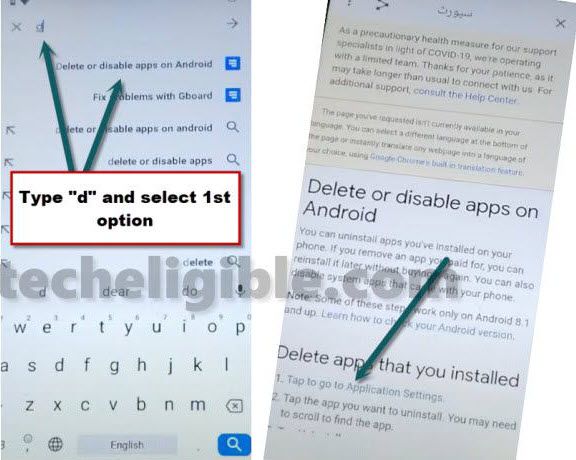
-Tap “Menu icon” from top left corner, and select “Help & feedback”.
![]()
-Type in the search box “delete”, and then tap on “Delete or disable apps on android” from the searched result.
-Hit on hyperlink named “Tap to go the application settings”.
-Find and and tap on “Google” icon”, and after that tap “Open”, this will launch google app for you, and we can easily get into our device settings to Remove Google FRP GALAXY S20 Ultra, S20 Plus, S20.
Setup Pattern Lock:
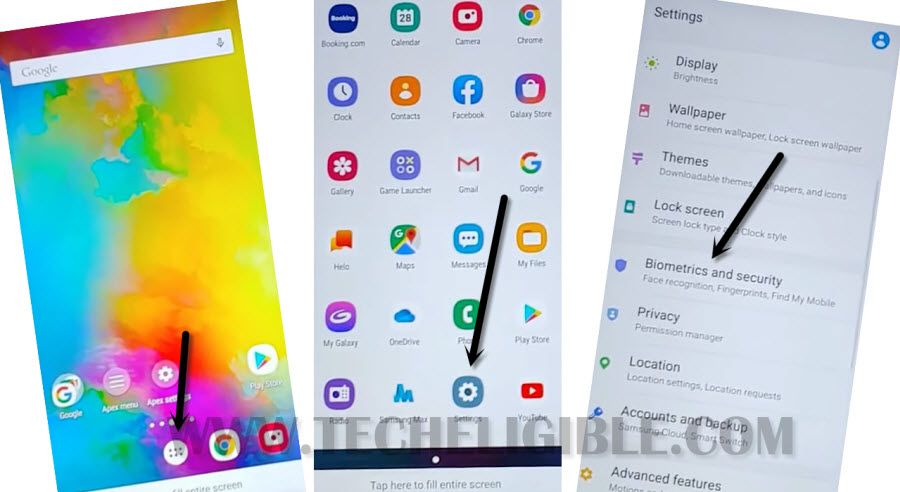
-Type in search box “Settings”, and then tap on “Settings gear icon” from the result below.
-Scroll down, and tap on > Biometrics & Security > Other Security Settings.
-Turn on “Pin Windows”.
-After that, tap on “PIN WINDOWS”.
-Tap on “Use screen lock type to unpin”, and then select “Pattern”.
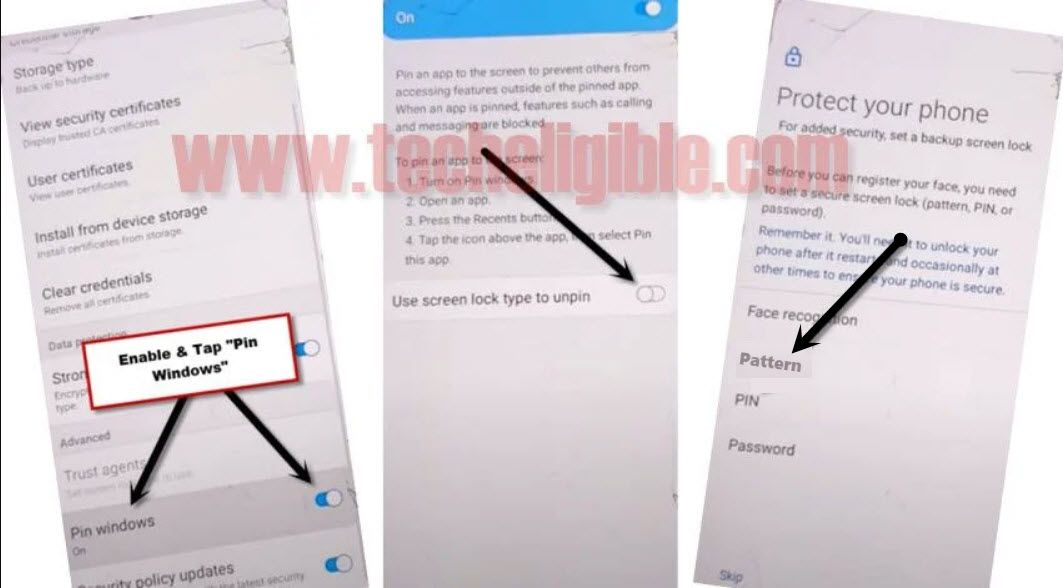
-Draw your any remembered pattern twice time, and then tap on “Confirm”.
-Now you are all done to Remove Google FRP GALAXY S20 Ultra, only we have to get back to very first screen by tapping on “Back Arrow” multiple times.
-You can easily bypass verify your account screen by using pattern code.
-After drawing your pattern code, you will be able to skip the “verify your google account” screen.
3rd Method: Remove Google FRP GALAXY S20 Ultra, S20 Plus, S20
-Connect Wifi, and get back to first “Let’s Go” screen.
-Tap on “Next Arrow” button.
-Select option “i have read and agree all of the above”, and then tap to “Next”.
-There you will have a screen of “Connect to a WiFi Network”.
-Now we have to tap two options at the same using our two fingers together.
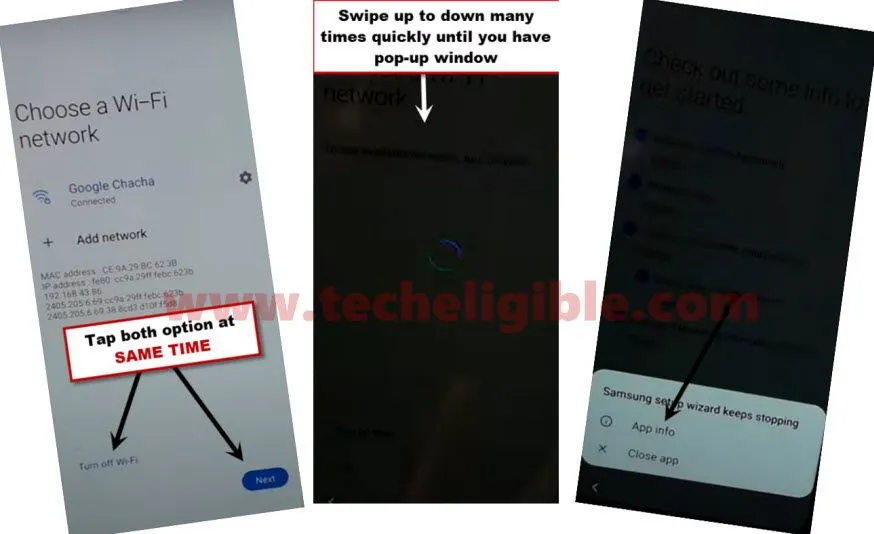
-Tap together both options “Turn off WiFi” & “Next“.
-After hitting both options at same time successfully, you will have a black screen, before the black screen disappear, just keep trying to bring top bar menu by swiping form up to down very quickly and multiple times, by doing this you will have a popup window bottom of the screen.
-If you did not swipe the screen from up to down multiple times at the black screen, you will not be able to have a popup window.
Note: If you see “Checking for Update” screen, after hitting both options, that means you failed in your attempt, just go back to same screen (Connect to a WiFi Network), and (Turn on WiFi), and again try by tapping both options at same time, just keep trying you will succeed. You will successfully be able to have black screen at 5-6 attempts, and that could be more.
-Tap on “App info” option from the bottom popup window.
-Now hit on “Permission”, and then tap “search icon” from top right corner.
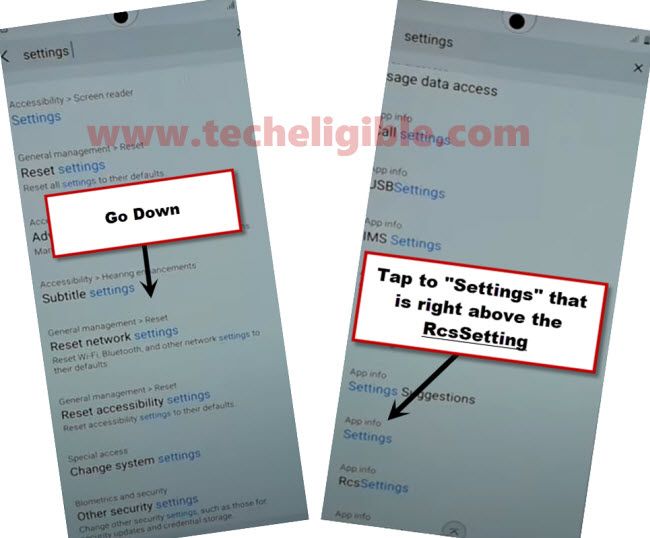
-Type there “Settings” and then tap on “search icon” from your keyboard to start searching.
-Go all the way down, and then tap on “Settings” that is right above the RcsSettings option. (See Below image).
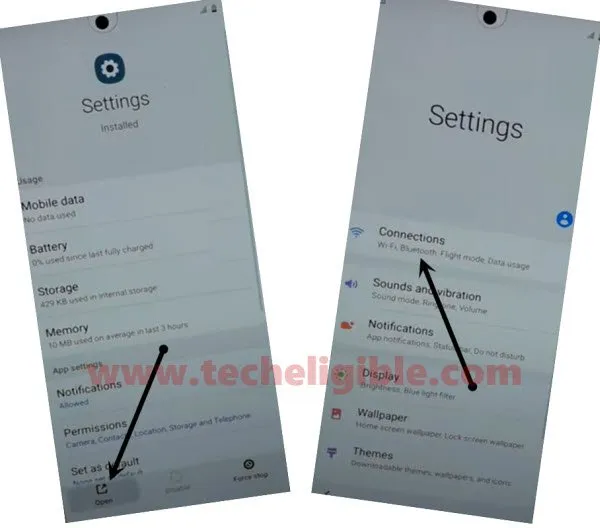
-After hitting on “Settings”, you will get “Open” option from bottom left corner, just tap on that.
-Tap on “Connection”, and then turn on WiFi.
-Once the wifi is connected, now we can go for next steps to Remove Google FRP GALAXY S20 Ultra, S20 Plus, S20.
-Tap on “Back Arrow” to get back to phone settings.
-Scroll down, and tap on > Biometrics & Security > Other Security Settings.
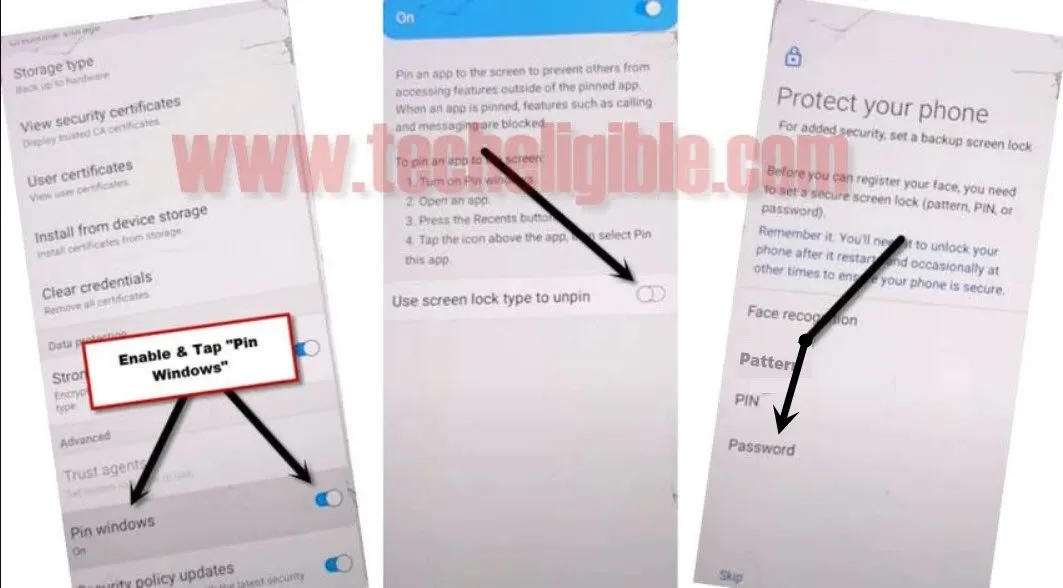
-Turn on “Pin Windows”.
-After that, tap on “PIN WINDOWS”.
-Tap on “Use screen lock type to unpin”, and then select “Password”.
-Setup your any 4 digits password there.
-Go back to very first “Let’s Go!” screen by tapping on Back Arrow multiple times.
-Tap on “Next Arrow” button.
-Select option “i have read and agree all of the above”, and then tap to “Next”, again tap on “Next”.
-It will show you Checking for update… screen, and after that you will be asked to enter password.
-Just give your already setup password there, and then tap on “Next”.
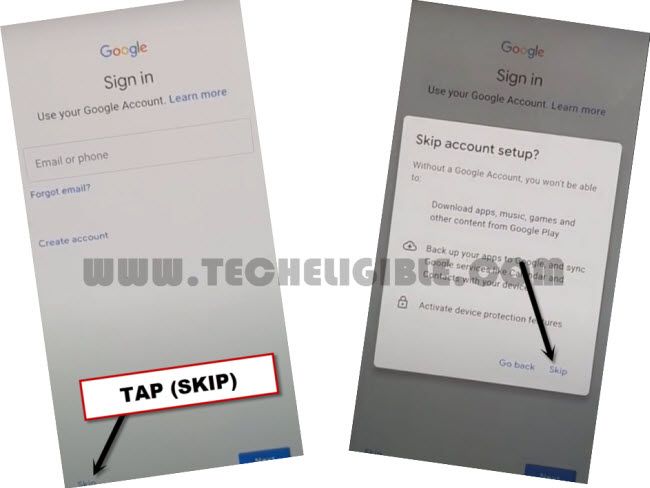
-Tap on “Skip” from the verify your google account screen to easily Remove Google FRP GALAXY S20 Ultra.
More FRP Ways on a Relevant Devices:
Samsung GALAXY S20, S20 plus, S20 ultra (Android 11)
Samsung Galaxy S20, S20 Plus, S20 Ultra (Android 12 | 11) New