
Samsung A12 Delete FRP Account Android 10 Without PC
This method is individually described to Samsung A12 Delete FRP Account Android 10 phone only, you may have followed multiple methods to get your phone back, and you may have failed, but we hope this will work for you fluently.
Warning: Do not try this frp method on a stolen phone, this is a serious crime, if you are trying to bypass frp on a stolen phone, you may also be jailed.
Let’s Start Samsung A12 Delete FRP Account:
-You are required a PC or Laptop for this method, because you have to install small size software in your PC to send a popup message in your Phone. So get back to your PC and download below Software.
Step 1: Download & Open “Easy Samsung FRP Tools” in your PC.
⇒ Easy SASMSUNG frp Tools 2020 [DOWNLOAD].
Step 2: Connect WiFi in your Galaxy A12 device & Connect with PC through USB Cable.
Note: Do make sure your phone has been detected to your PC successfully.
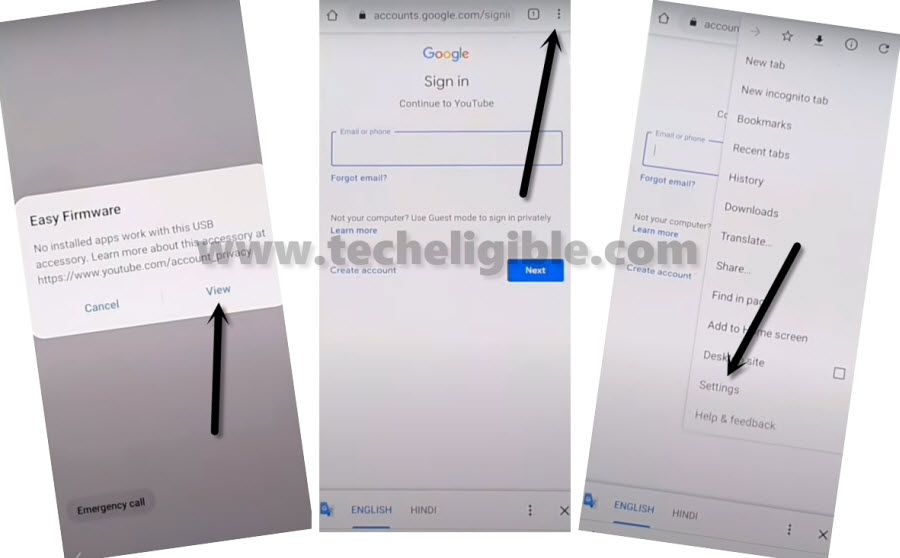
Step 3: Click on “Bypass FRP” button from the software and then tap on “OK”, and then tap on “View” from popup message in your Galaxy A12 device.
Step 4: Accept & Continue > Next > No Thanks > 3 dots > Settings.
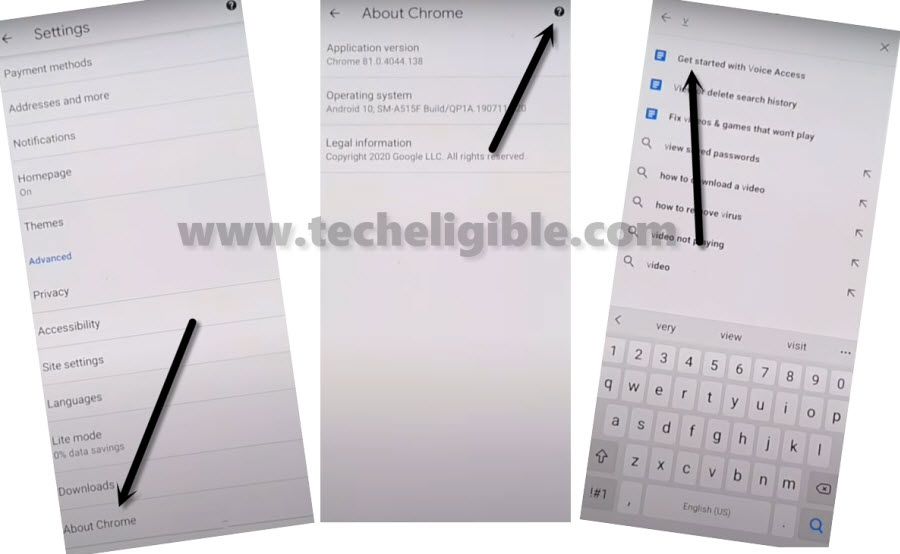
Step 5: Go all the way down and hit on > About Chrome > Question Mark Sign > Search “V” > Get Start with voice access.
Step 6: Go little bit down & hit on > Change Google App Settings > iPhone & iPad > Privacy & Security. (Follow below screen)
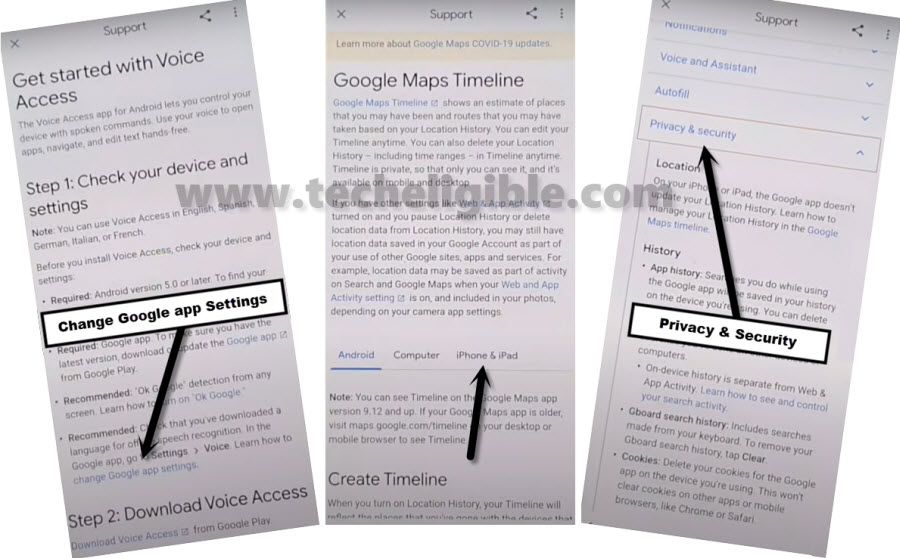
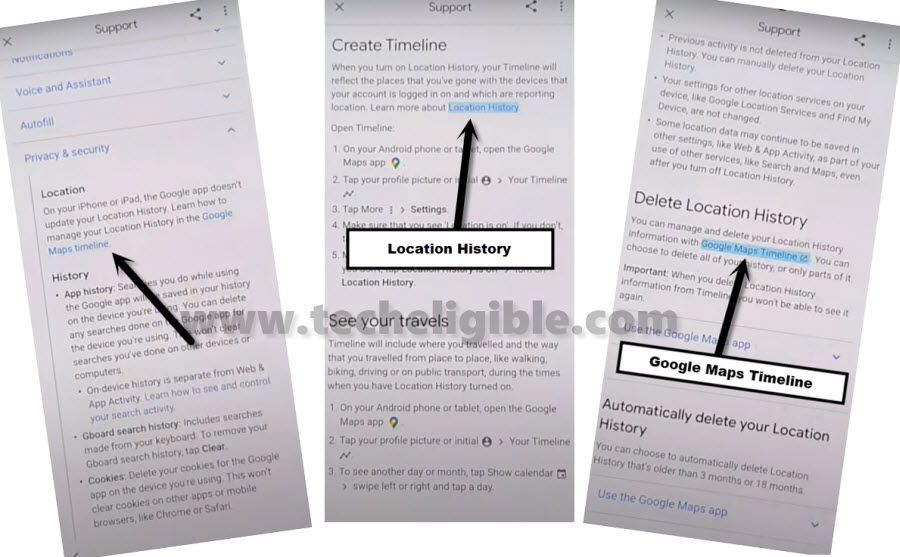
Step 7: Google Maps Timelines > Location History > Google Maps Timelines. (Follow below screen)
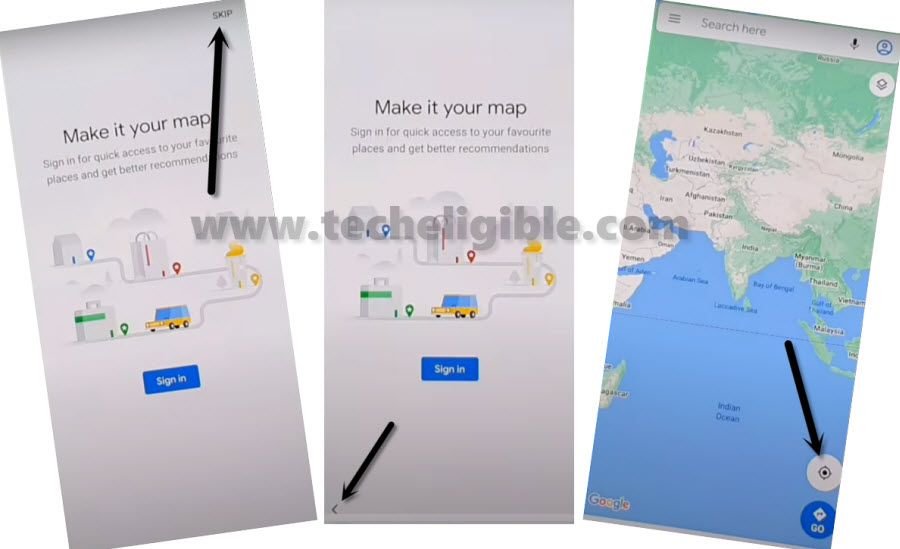
Step 8: Google MAPs will be launched for you, hit on > SKIP > Back Arrow > Point Location icon > OK.
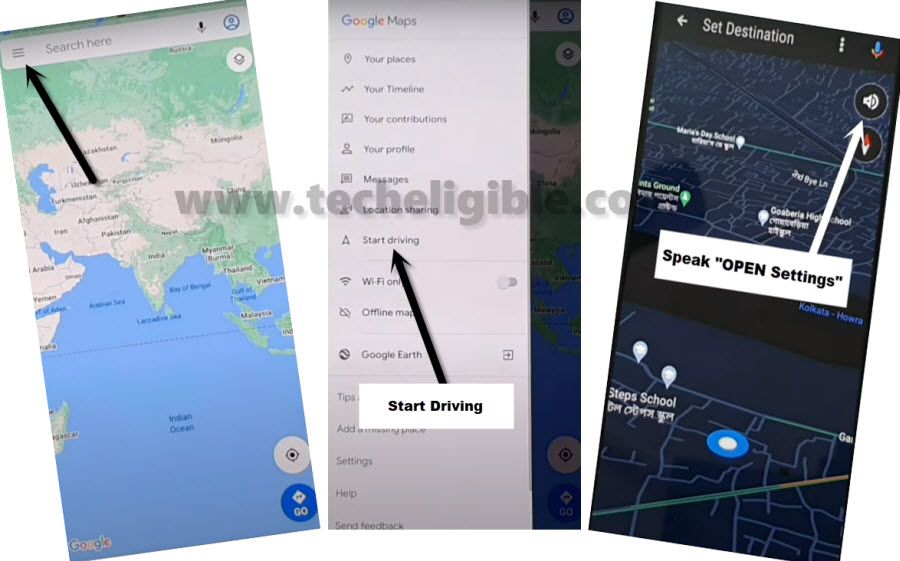
Step 9: There is a menu button at the top left corner, so hit on > MENU Button > Start driving > Got it > Mic icon, speak there loudly “OPEN Settings”.
Connect 2 Android Devices Together:
-Here, we are required any other android device, that needs to be connected together through a OTG Cable, in below step you will required a (Other Android Phone + OTG Cable + USB Cable).
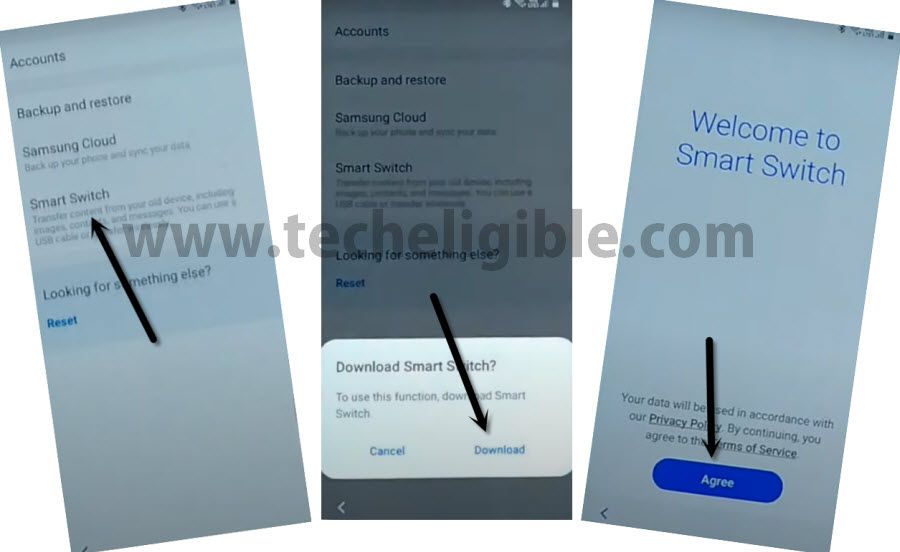
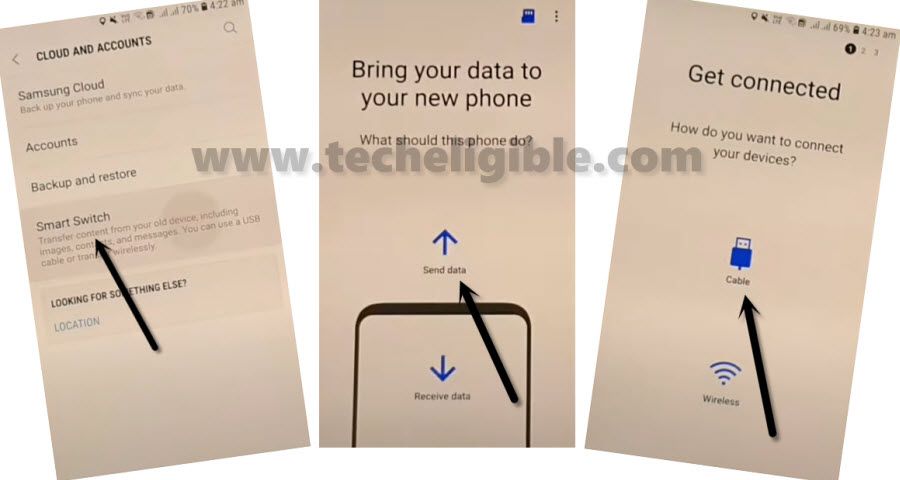
Step 10: Accounts & Backup > Smart Switch > Downloads, wait for several minutes until downloading process done, and then hit on “AGREE”.
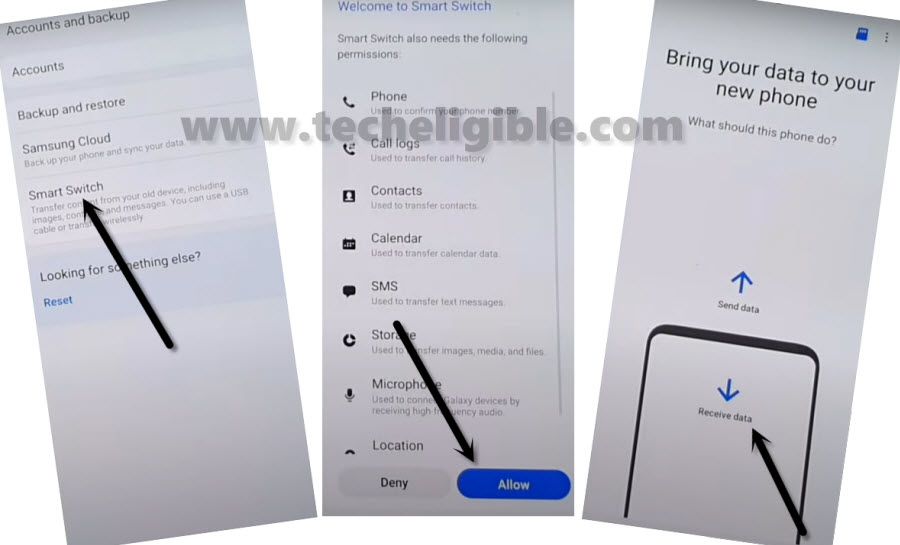
Step 11: Smart Switch > Allow > Receive Data.
Step 12: Galaxy Android > Cable.
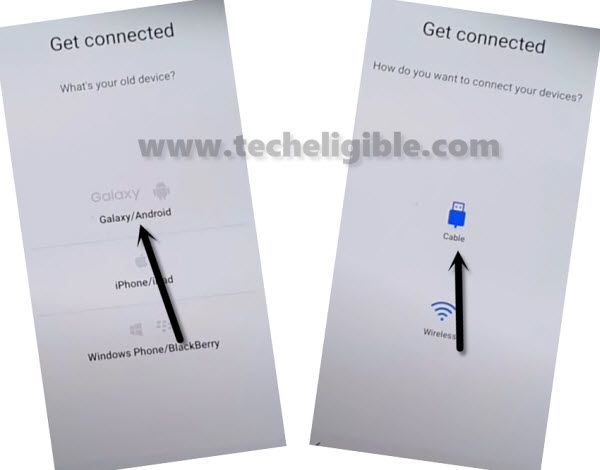
-We will install Smart Switch App in in our other android phone as well, because through this app you will be able to connect both device together to send Gmail Account from your other android phone to the Galaxy A12, by doing this way, we will be able to Samsung A12 Delete FRP Account Android 10.
Step 13: Install & open “Smart Switch App” in other android device through Google Play Store, after that, hit on > Send Data > Cable.
Step 14: Connect OTG in your “Samsung Galaxy A12”, and other end of USB Cable should be in your other android android device.
Note: Do make sure, OTG should be connected in your Galaxy A12 (FRP Locked) device”.
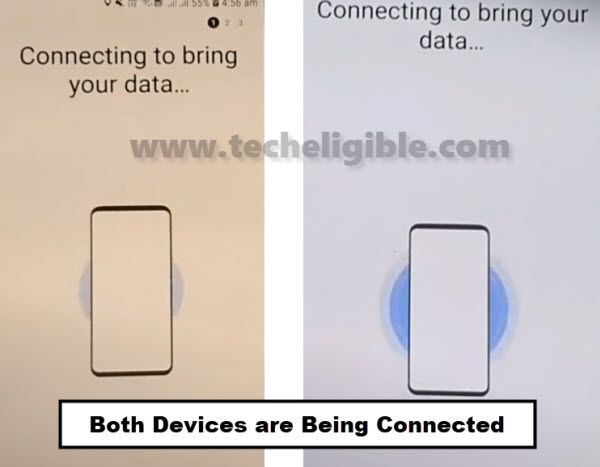
Step 15: Tap to “OK” from popup window in your frp locked device, and then tap to “Allow”, Now both phone will start connecting each other to Samsung A12 Delete FRP Account.
Step 16: Select only “Settings”, and then tap to “Transfer” button from Samsung Galaxy A12.
![]()
Step 17: After that, tap on “COPY” from your Other Android phone.
Note: This will start copying Gmail Account in your Galaxy A12, so do make sure you remember your Gmail Account, which is in your Other Android device.
Step 18: Once the process finish, just hit on “Go to the Home Screen” button from Galaxy A12, and disconnect both device, because you are all done from bypass frp GalaxyA12 Android 10.
Finish your Samsung Setup Wizard to access the phone normally.
Read More: