
Lost your already-signed-in Google account details and are stuck on the Google verification screen? This indicates that you have locked yourself and are protected by FRP as the owner. However, you still have the chance to Bypass FRP Sony Xperia 1V/Xperia 1 (Android 13 & Android 10 versions) by creating new pattern lock on this device. You can do this all without paying for any services.
With the help of 2 frp removal guidelines, you can access back to your device easily. Follow the guideline from below. Choose any 1 method according to your Sony Xperia 1/1V android version.
| Method 1: Bypass FRP Sony Xperia 1V [Android 13] |
| Method 2: Bypass FRP Sony Xperia [Android 10] |
Method 1: Bypass FRP Sony Xperia 1V [Android 13]
-Get full guide now by turning on device and Connect WiFi properly.
-Go back to first (Welcome) screen. Insert SIM card in your device.
-You have to dial any emergency number on screen by tapping on “Emergency information” option. After that, you can dial simply (112) or any other emergency number.
-From calling screen, if you see (Exclamation error) symbol. That means, you will have to disconnect the call and reconnect call again to get there (Google Map) preview.
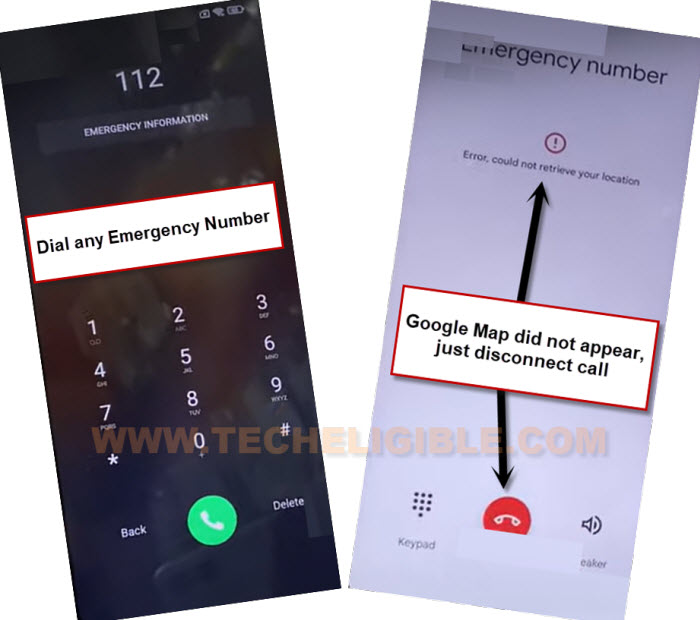
Note: Don’t worry, after 5-10 tries, you will be able to see (Google Map) preview on dialing screen same as shown in below image.
-Finally, after some tries, you will have a (Google Map) there same as shown in below image. Let’s quickly, hit over the “Google Map” from there.
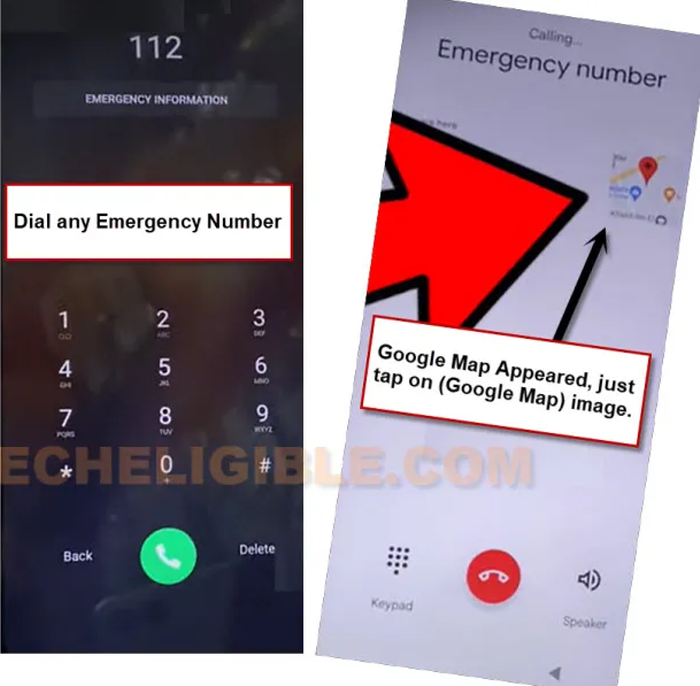
-After reaching to google map page, just go to “Skip” option. You are successfully inside google map now. Let’s disconnect your connected call by ejecting your sim card from the device.

-Search “Restaurant” from google map. After that, hit over the “Call” option from restaurant searched result.

-You will be redirected to the (Dialing screen). Insert your SIM card in your device.

-Hit on > 3 dots > Add wait > Send a message.

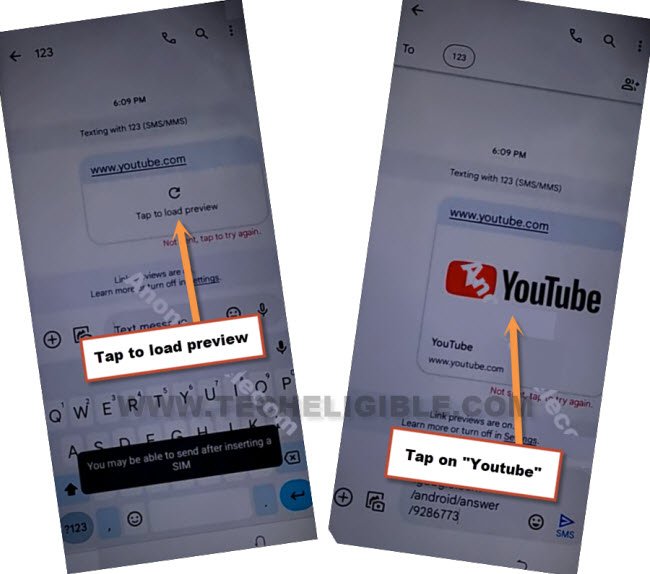
-The URL www.youtube.com must be typed into a text message and sent to any random number. The URL will become a hyperlink after it has been successfully sent.
-Go to “Tap to load preview” from there to Bypass FRP Sony Xperia 1V.
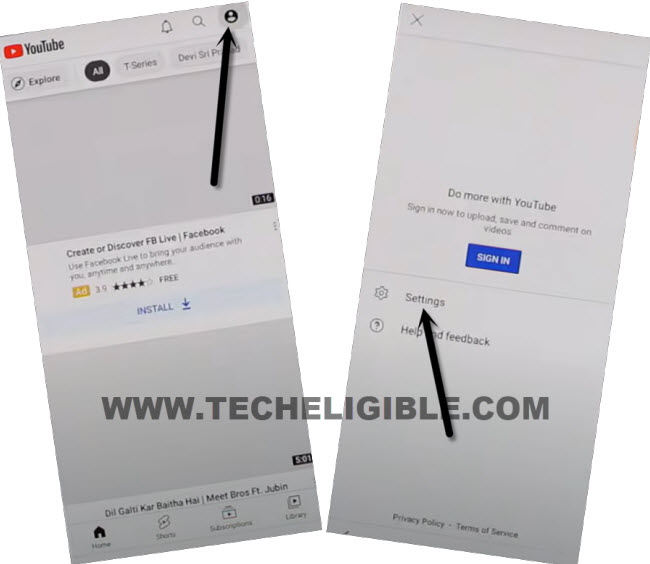
-We have to hit over the “Human” circle icon from top corner and go over the “Settings” option.
-We have to reach to google chrome browser by tapping at > History and Privacy > Youtube terms of service.
-Once you reach over the chrome browser, just tap to > Accept & Continue > No Thanks.
Go to the Security Protection Setup Screen on Phone:
-Let’s search in chrome browser with “techeligible“. After that, tap on 1st searched result from there to reach to official techeligible site.
-Tap to “Menu” icon from top corner and go to “Download FRP Tools“.

-We can easily access to pattern lock setup screen by tapping on e “Set Pattern Lock” option from frp tools page same as shown in below guiding image.

Setup New Pattern Lock on Xperia 1V:
-Go to “Pattern” option. After that, draw pattern and go to “Next”.
-Draw same pattern again and go to “Confirm” button from bottom corner.
Note: You may return on frp tools page or have blank white screen. That means, the pattern is not setup yet. We have to repeat steps for about 5-10 times to setup pattern lock successfully.
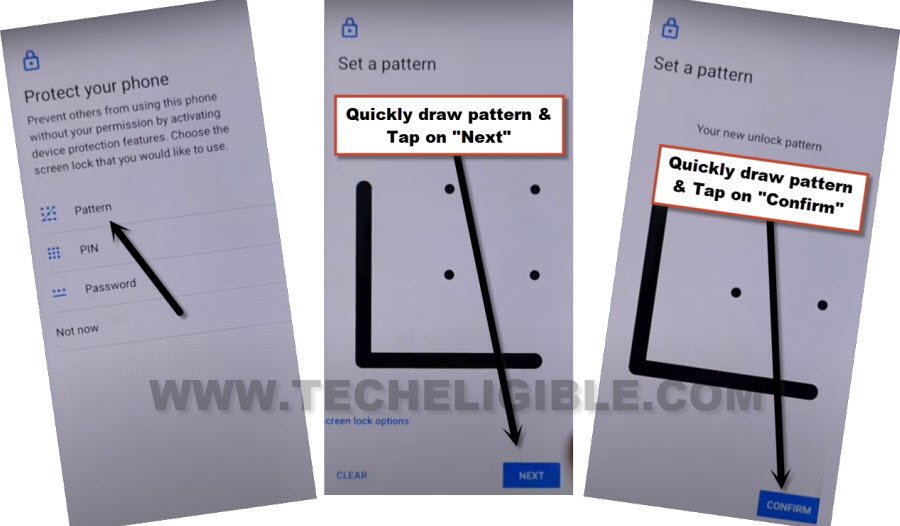
Repeat Very Fast: Tap again on “Pattern”. Setup your desire pattern quickly by following below image.
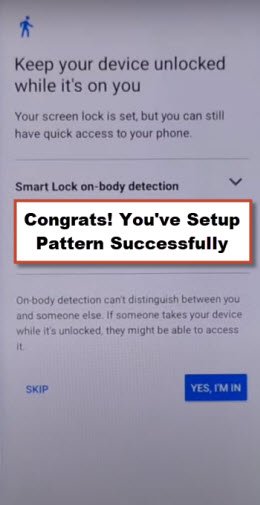
-After some attempts, once you get the screen (Keep your device unlocked while its on you). That means, the patter lock has been acknowledged by the device to Bypass FRP Sony Xperia 1V.
-Go to “Skip” option from there.
-We’ve to reach back to first startup page by tapping at back arrow icon. From there, tap to > Get Started > Accept.
-Wait on a (Just a sec…) screen. After 30 seconds wait, you just eject sim card & restart your device.

-After that, from (Welcome) startup screen, tap over the > Get Started > Accept. Wait again on a (Just a sec….) screen.
-After few seconds wait, you will have a (Connect to Mobile Network) screen, from there, hit on “Skip” option.
-Go to “Accept” and tap to “Don’t Copy”.
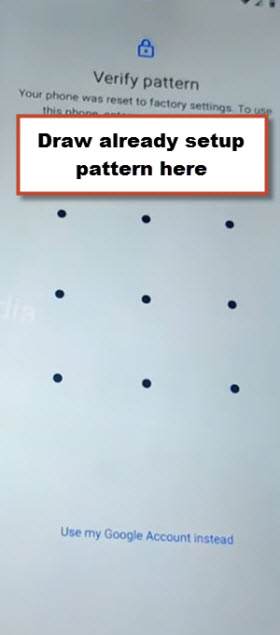
-You will reach on a (Verify pattern) screen. Let’s draw pattern that was recently setup. This time, your device will accept your pattern lock and you can easily finish up setup wizard steps.
-After few seconds wait over the (Checking info.) screen, you will be taken to google sign-in screen.
-After accessing to the google sign in screen. From there, hit over the “Skip”. From popup window, hit again on “Skip”.
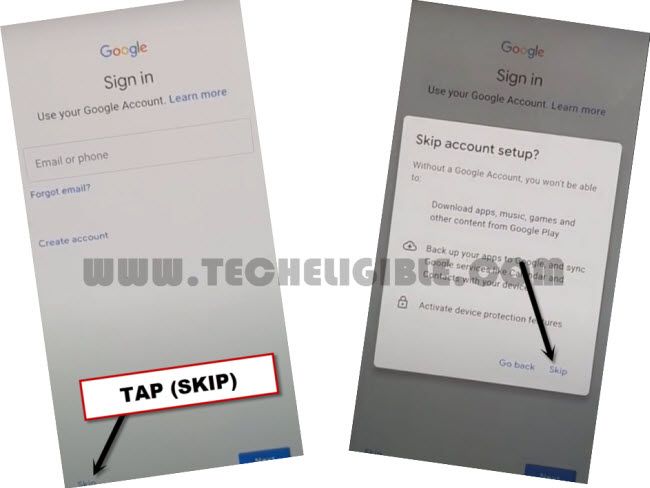
-You have succeeded to Bypass FRP Sony Xperia 1V. All remaining steps can be completed easily without any extra help. Finish up remaining steps and reach to your device main home-screen.
Method 2: Remove Google FRP Sony Xperia 1 [Android 10]
Through this way, you can bypass frp Sony Xperia 1 (Android 10) without using PC, we will setup new pattern lock, after that, we will erase all data from settings. Once you did this, the forgotten google account will be removed as well, that means, the device is free from FRP, and you will be able to setup new google account after completing setup wizard.
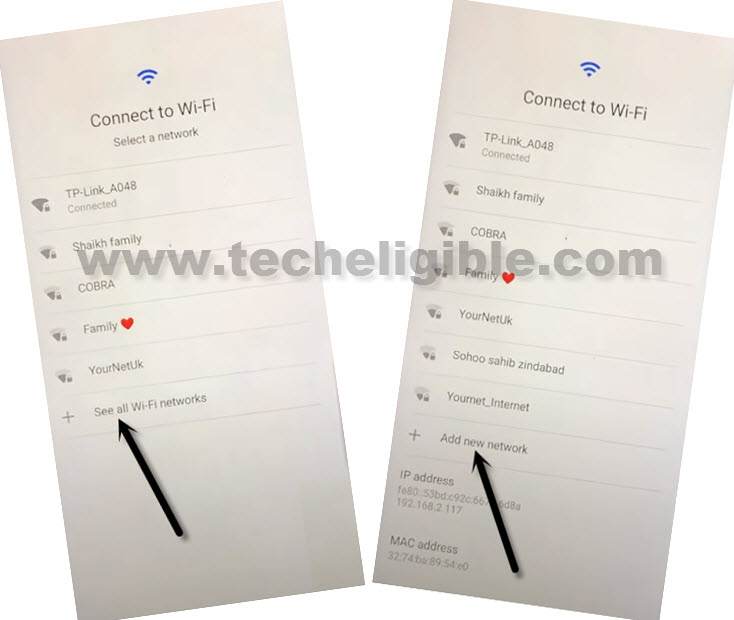
-First of all, turn on device, and connect WiFi first, after that, from same (Connect to WiFi) screen, tap on “See All WiFi Network”.
-Go to “Add New Network”.
-Now tap on > Mic icon > Deny.
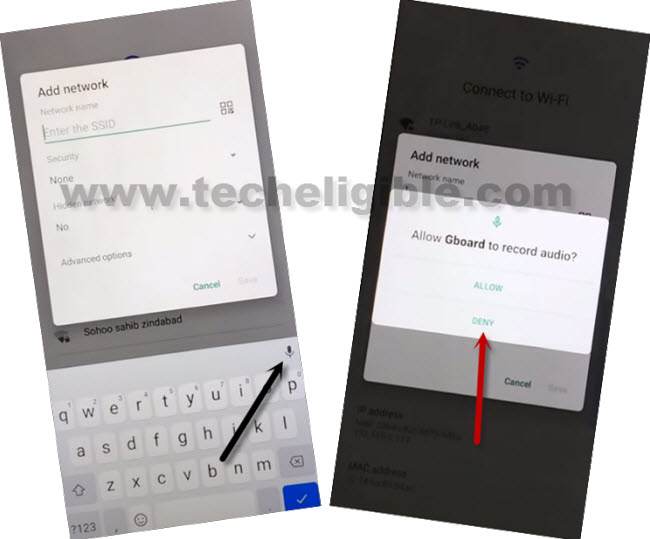
-Again hit on > Mic icon > Deny.
-This time, you have to nit on > Mic icon > Allow.
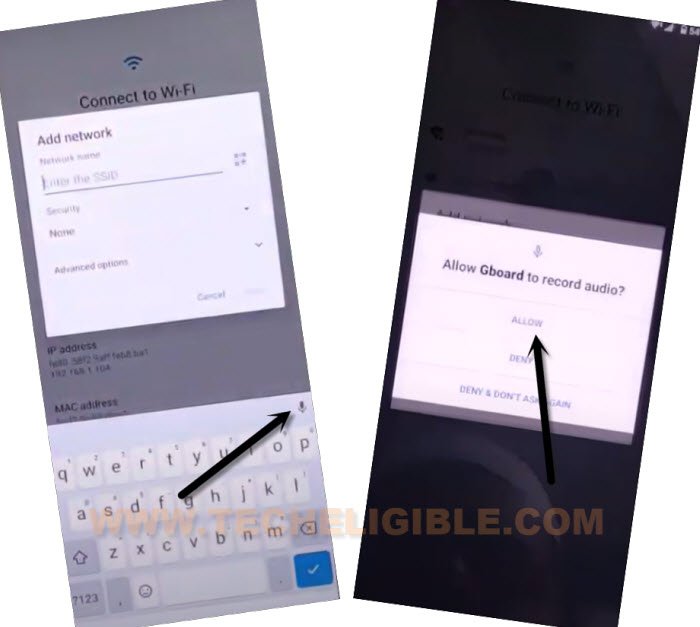
-After that, tap once “Back Arrow” from bottom left corner to just close keyboard.
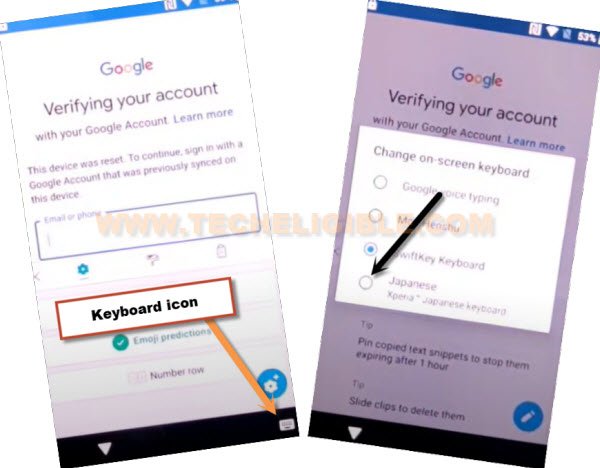
-Hit again on “Enter the SSID” tab to bring keyboard, and this time you will see another small icon of “Keyboard” at the bottom right corner same as shown in below image.
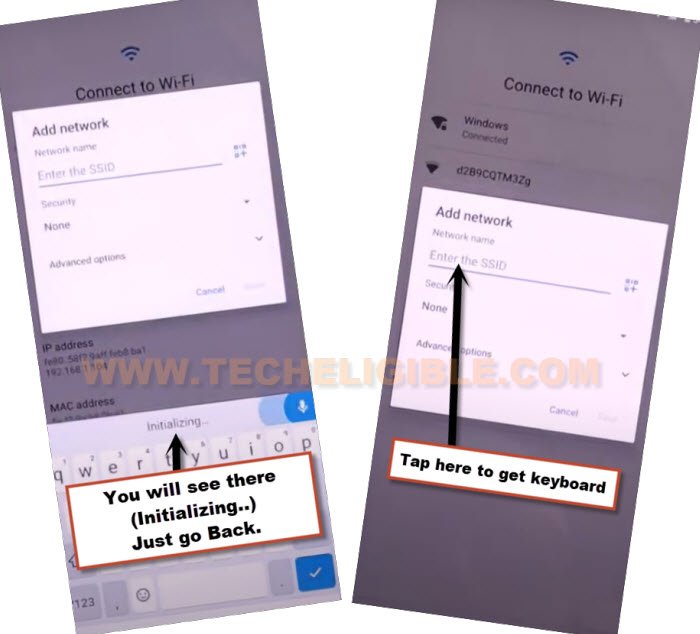
-Tap on that “Keyboard” icon, after that select “Japanese” option.
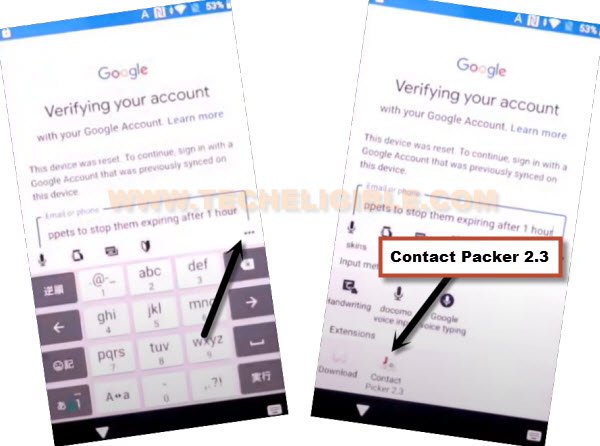
-Tap “3 dots” from top corner of the keyboard, after that, hit on “Contact Packer 2.4”.
-Go to > Contacts > 3 Dots > Help & Feedback.
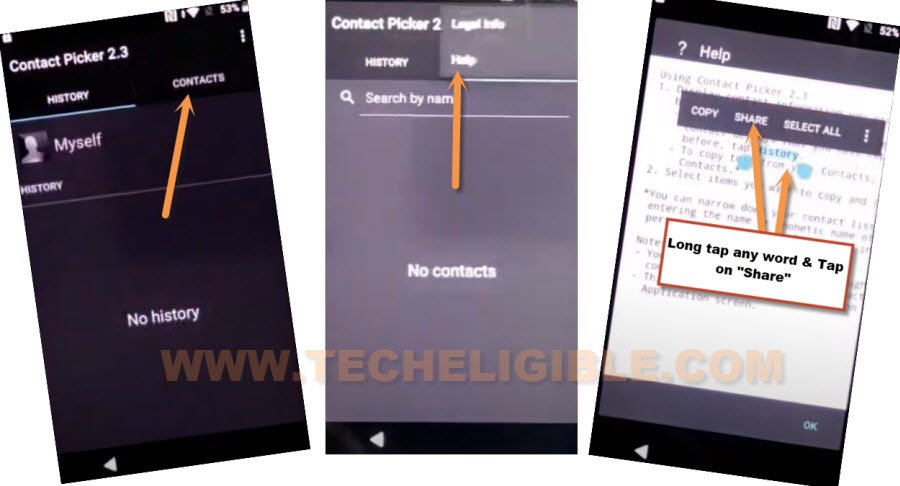
-Long tap at any text, and tap on “Share”.
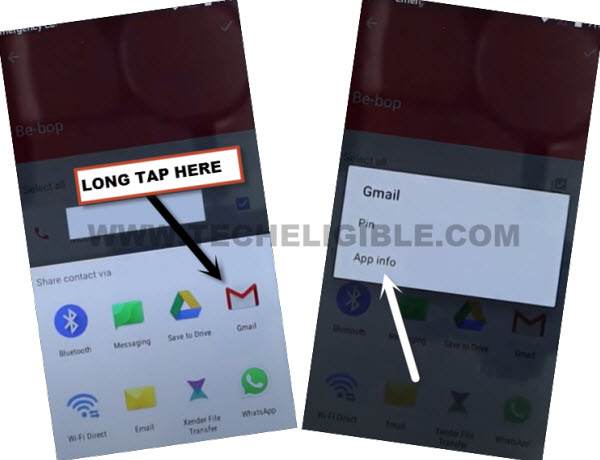
-Long hit on “Gmail”, and then, hit on “App info” from popup.
–Tap to > Notification > Advanced > Additional Settings in the App.
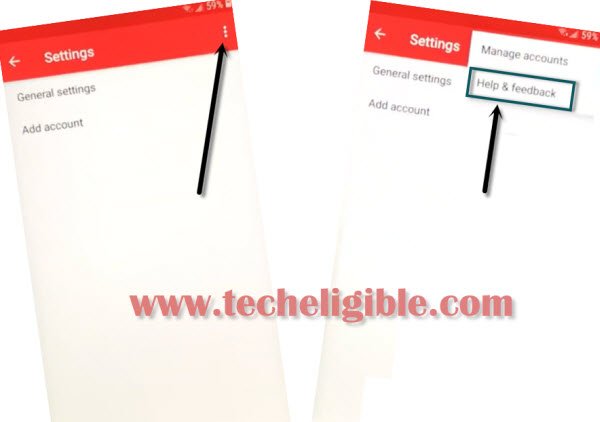
–Hit on > 3 Dots > Help & Feedback.
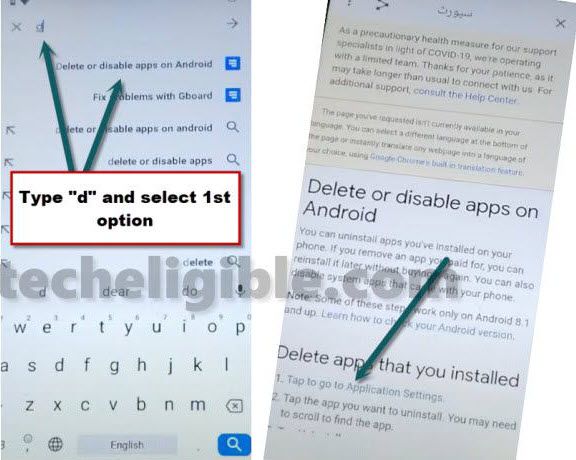
-You will have there a search box, just Search there “d”‘, and then tap to searched result (Delete or disable app on android).
–Now hit over blue link, so tap to “Tap to go to application Settings”.
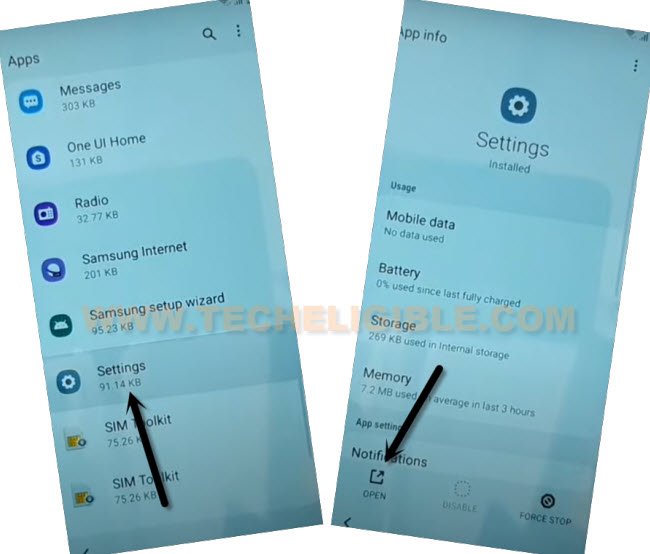
-There you will see a big app list, just find and tap to > Settings > open.
-From there tap to > Security > Advanced.
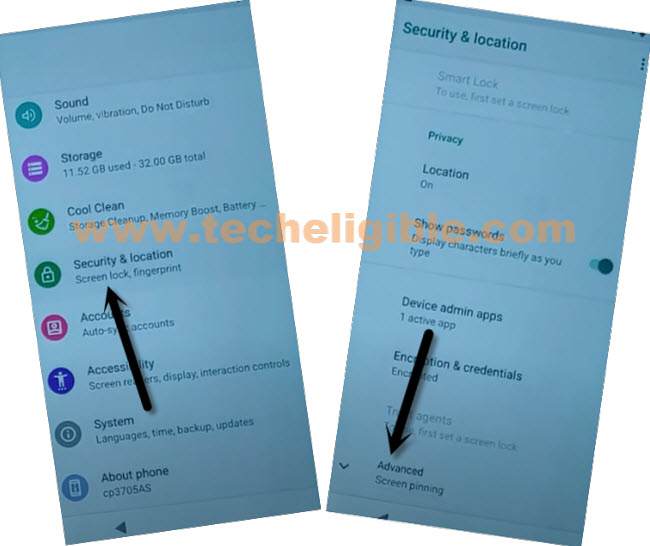
-After that, tap to > Screen Pinning > Turn on.
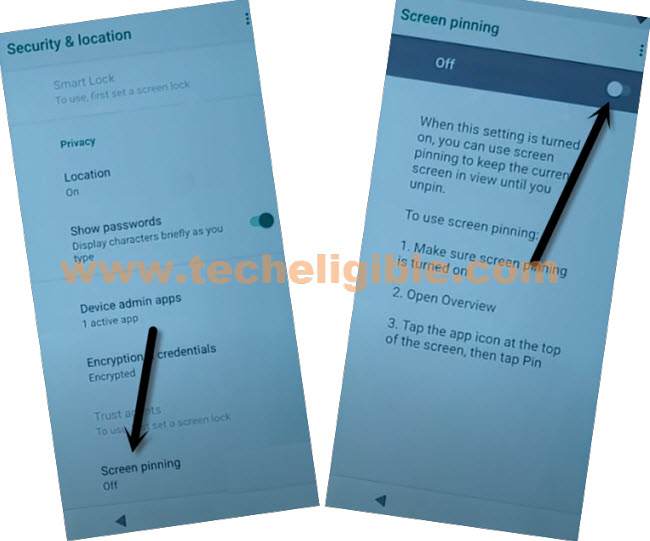
-Turn on also “Lock Device When unpinning”.
-Select “Fingerprint + Pattern”, after that, draw your any desire pattern there, and tap to “Confirm” button.
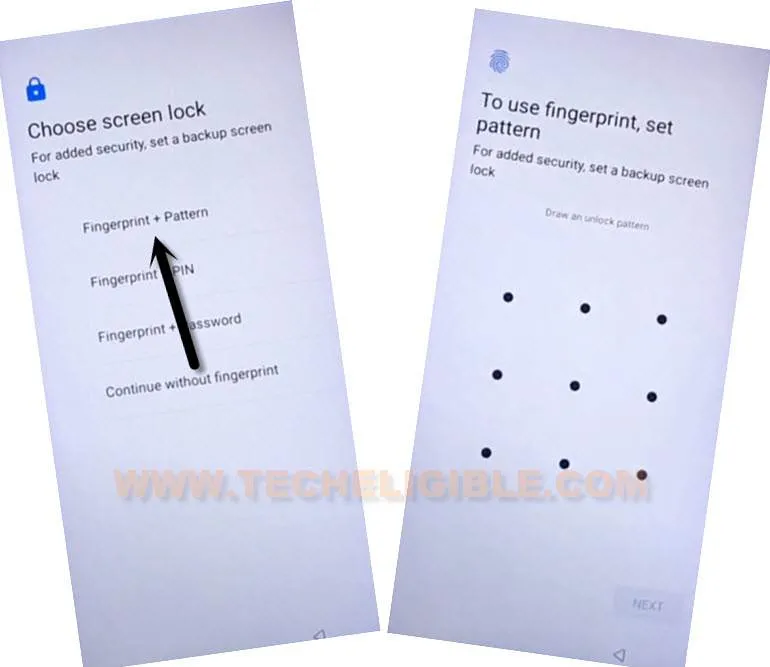
-Tap on “Back” arrow from bottom on a (Before Starting) screen.
-Press “Power button” once to just turn off screen only, now press again “Power button” to wakeup the screen, and you will be asked to draw “Pattern lock”, just draw your already setup pattern lock to unlock the screen, that means the pattern lock has successfully been setup on this device, now we can easily Bypass FRP Sony Xperia 1.
-Go all the way back on “Welcome” screen by tapping on back arrow multiple times.
-Go to “Verify your Account” screen.
Repeat All Steps to Reach back inside Settings:
-Tap on that “Keyboard” icon, after that select “Japanese” option.
-Tap “3 dots” from top corner of the keyboard, after that, hit on “Contact Packer 2.4”.
-Go to > Contacts > 3 Dots > Help & Feedback.
-Long tap at any text, and tap on “Share”.
-Long hit on “Gmail”, and then, hit on “App info” from popup.
–Tap to > Notification > Advanced > Additional Settings in the App.
–Hit on > 3 Dots > Help & Feedback.
-You will have there a search box, just Search there “d”‘, and then tap to searched result (Delete or disable app on android).
–Now hit over blue link, so tap to “Tap to go to application Settings”.
-There you will see a big app list, just find and tap to > Settings > open.
Let’s Reset device completely:
-Go down, and tap to > System > Reset Option.
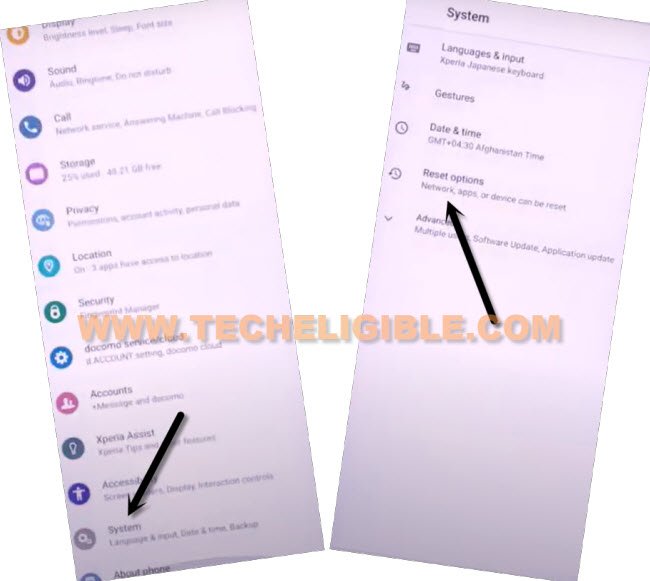
-Go to “Erase all data (Factory Reset)” to Bypass FRP Sony Xperia 1.
-After that, hit on “Erase all data” option.
-You will be asked to draw pattern lock before erasing data, draw previously setup pattern lock.
-Hit again on “Erase all data”, and this will take few minute to erase all data including previously setup google account.
-After that, you can easily complete setup wizard without facing any verify your account screen.
Read More: