
Getting stuck again and again on the (Google Sign-in) screen while finish up the setup wizard after doing a hard reset on the phone? This is because, your phone is protected with the frp lock protection. The FRP is actually linked with the previously setup Gmail account. If you’ve forgotten your account completely, then, check out steps here to Bypass FRP Tecno POP 10C & Tecno Pop 10 (Android 14) with tested guide.
Remember: Do not try this frp method on a stolen phone, this is a serious crime, if you are trying to bypass frp on a stolen phone, you may also be jailed, this process is for device owner and for educational purpose only.
Let’s Start to Bypass FRP Tecno POP 10C & 10 (Android 14)
-Begin easy steps by turning on the phone and connect to WiFi network.
-You will be redirected to next screen (User agreement and services page) after connecting to WiFi network. From that screen, hit on link “Privacy Policy of personalized recommendations”.
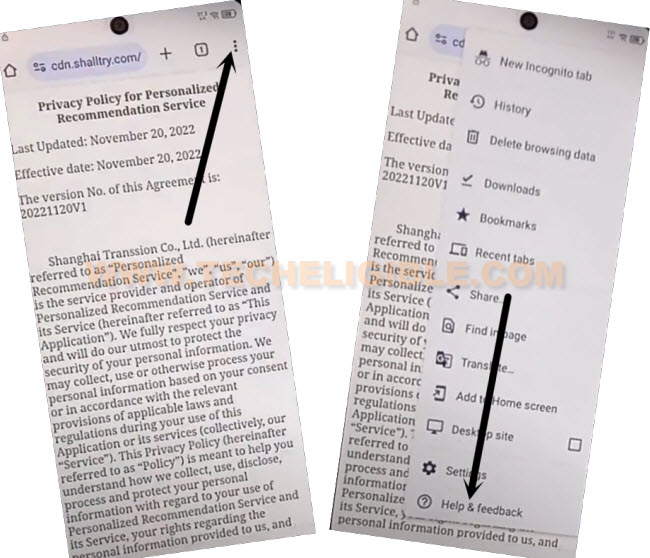
-The link will take you to the chrome browser directly, just choose option > Use without an account > No Thanks.

-From top corner of the browser page, go to “kebab menu” same as shown in below image. Then, hit on “Help & Feedback”.
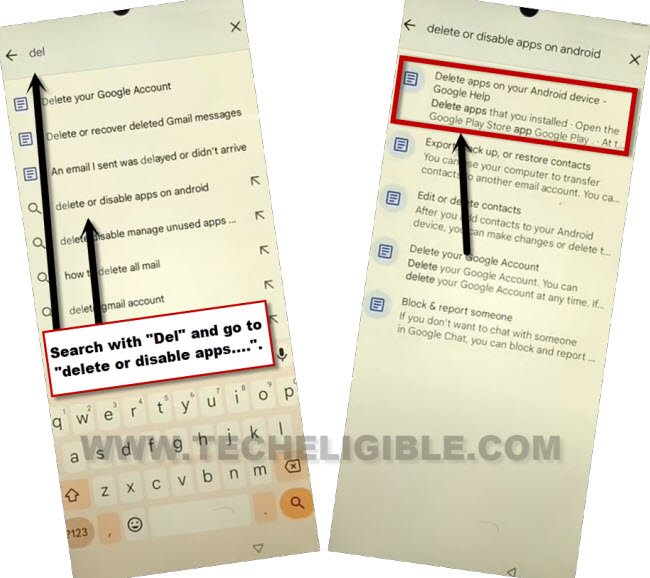
-Open up the search bar by tapping on “Search help” box and type there “Delete”.
-You will be displayed relevant searched result, just go to “Delete or disable apps on android” .
-From next page, hit once again on “Delete or disabled apps on android device”.
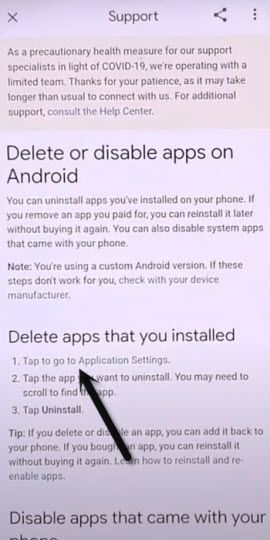
-Once you reach at the disable apps page, just tap on link “Tap to go to application settings”. The link will take you to the (App list) screen.
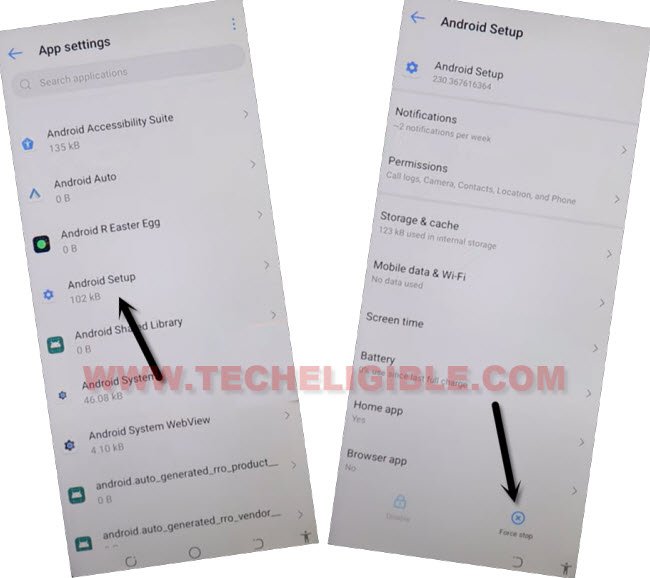
Let’s Disable & Force Stop 2 Installed Apps
-Find and go to “Android Setup” app same as mentioned in below image.
-After that, tap over the > Force Stop > Ok.
-Once its done accordingly, go back to app list by tapping on “back arrow” from bottom.
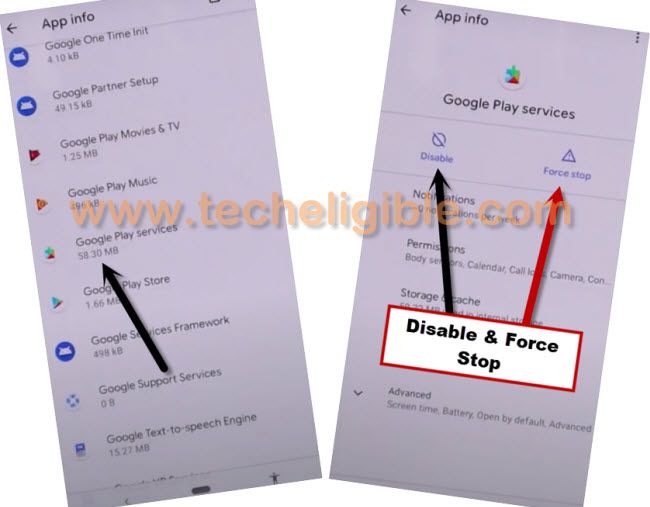
-Find and tap at “Google Play Services” application.
-Simply, disable & force stop this app as well.
-Get back on the app list page by tapping the “Back Arrow” option again from bottom.
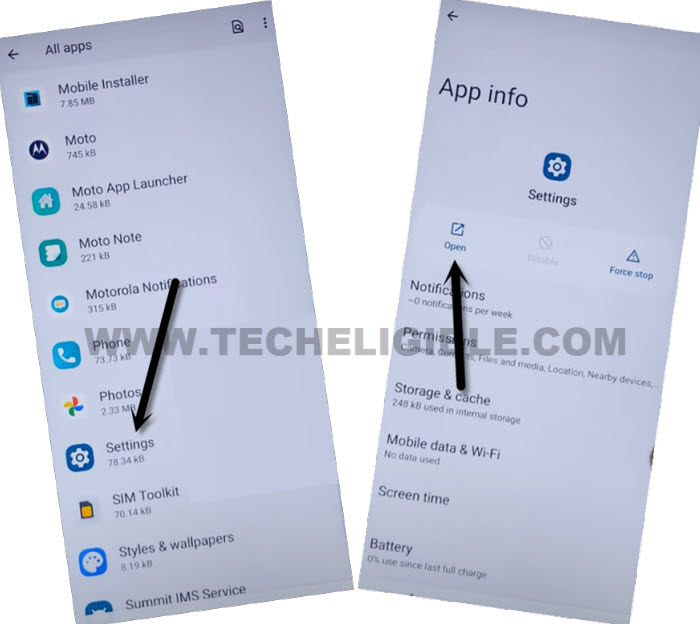
-Get into the main settings page by finding and tapping on > Settings > Open.
Turn on Accessibility Feature on Phone:
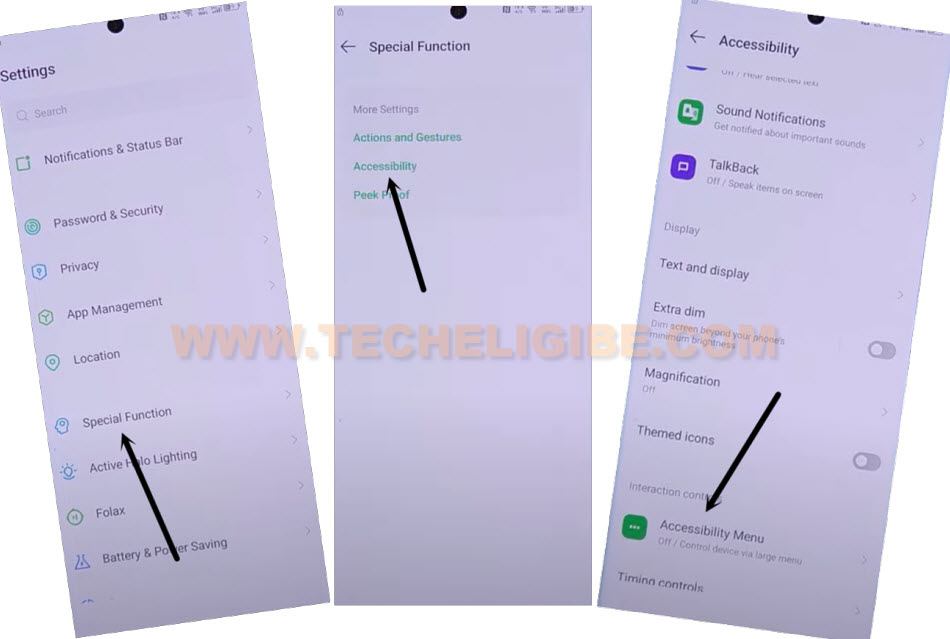
-We have to enable the accessibility function from the primary settings page. Just tap to > Special function > Accessibility > Accessibility Menu.
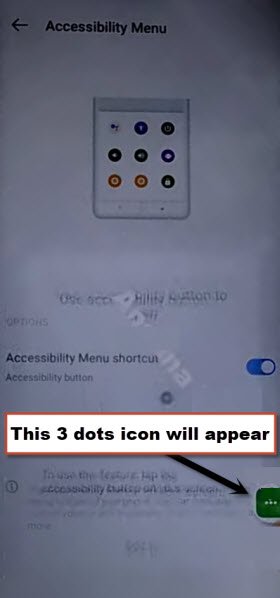
-Simply, switch on the option of “Accessibility Menu Shortcut” to enable this function.
-You will see a prompt window, just tap on > Allow > Got it, right after that, the (3 dots) icon will placed over the right edge of your phone screen.
| Note: If you don’t see any 3 dots icon, just tap again on a “Accessibility Menu Shortcut” function and check mark “Tap accessibility button” box from there. After that, hit on a “Save” option. |
Its time to Go back User agreement and services page:
-Keep tapping on the “Back Arrow” option until you reach on (User agreement and services) page.
-Tap at “Next” option and wait for a minute until the next loading screen is completed.
-After that, you will see (Copy apps & data) screen. Just hit on a “Don’t Copy” option.
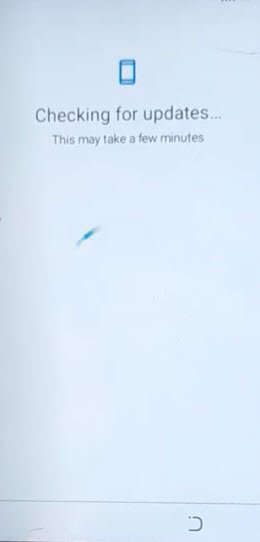
-Wait for a minute on a (Checking for updates….) loading page.

Enable Again the (Google Play Services) App
-To complete the setup wizard steps and bypass frp tecno pop 10C & 10, we need to enable again google play services application. For this, we will get help of the recently enabled (Accessibility menu shortcut) button.
-Tap on the “Accessibility menu shortcut” button and go to “Accessibility Settings”.
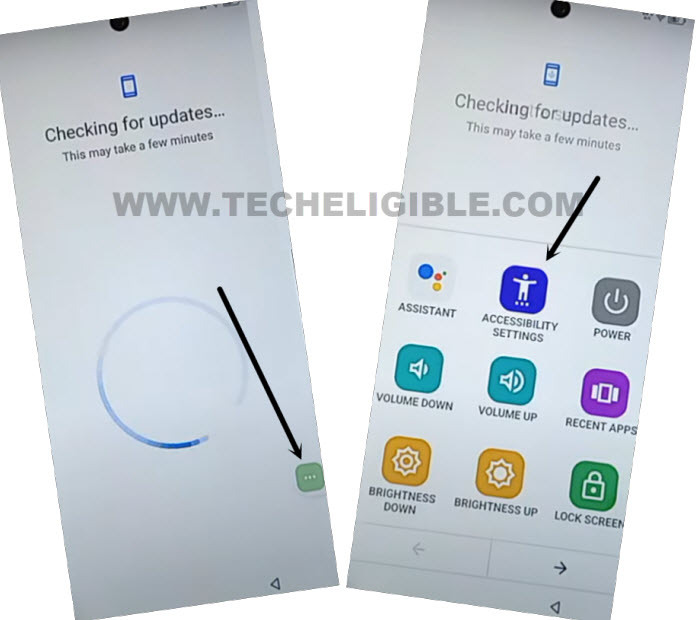
-After successfully accessing over the (Accessibility) screen, tap again on “Accessibility Menu Shortcut” button and go to “Assistant”.

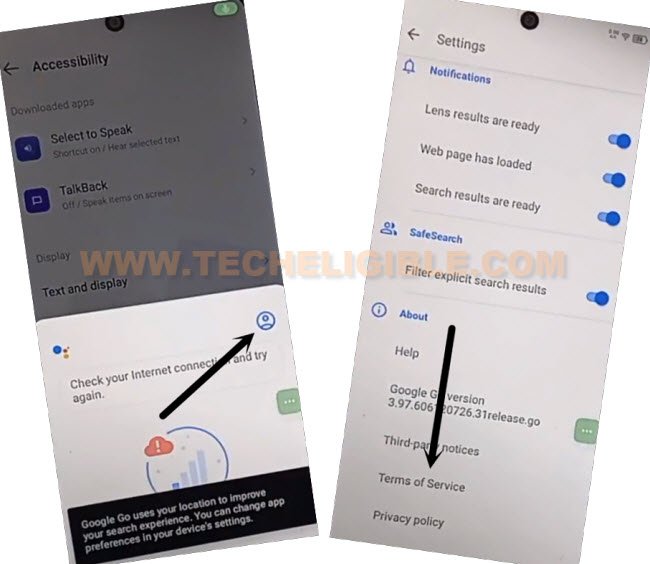
-Choose the > Use without a google account > English > Done.
-Another popup will be shown up, just tap at “‘Profile” icon and then “Terms of services”.
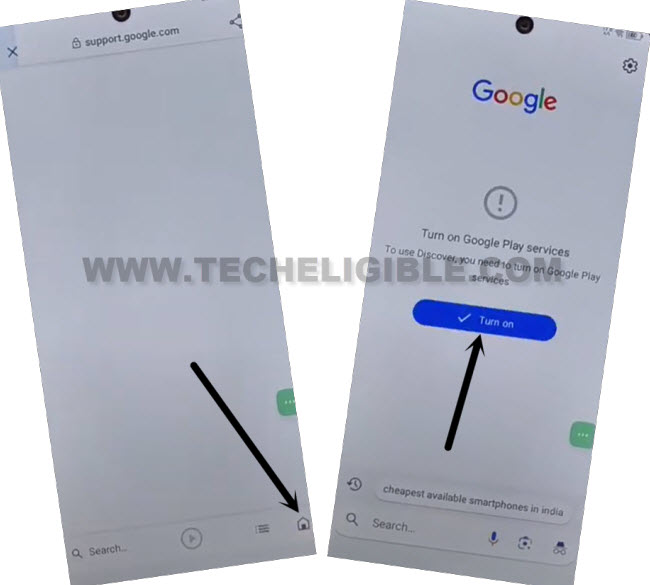
-You will find the (Home Button) bottom of the browser page, just go to that. After that, hit on “Turn on” option to enable the disabled google play services application.
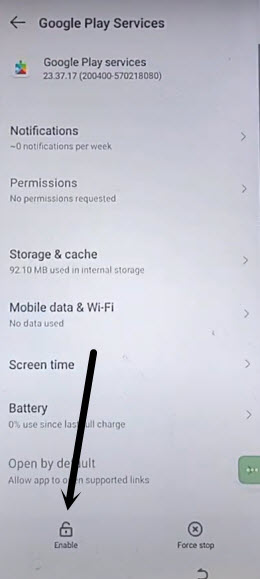
-Hit again on “Enable” button from bottom. This will fully activate back this application and we can complete setup wizard steps easily.
-Tap few times on back arrow icon until you get back on the (Checking for update….) screen. Within a seconds, this loading page will complete and take you to next page of (Google Services).
-From there, go to > More > More > Accept.
-Complete the remaining setup steps by tapping on > Ok > Skip > Ok > Skip > Skip.
-Finally, you are on a finalized page, which is (HiOS). From that page, tap at “Next” icon.

The Bottom Line:
Applied easy steps by turning on phone and connected WiFi. Then, tap to link from (User Agreement…) page to reach on chrome browser. After that, we reached at the (Help & feedback) page, from there launched the (App list) screen and disabled some apps. Once its done, we reached on the (Main Settings) page of the phone.
Enabled the (Accessibility menu Shortcut) option and while completing the setup wizard, we enabled back the (Google Play Services) application, finally, completed setup wizard steps successfully.