
If you guys got the frp lock protection on your phone because forgetting the logged in Gmail id and you’ve done factory reset it through android recovery mode. In this case, your phone will be inaccessible and it will continuously to complete the verification process by login back with previously setup gmail account. The problem arise, when you completely forget your gmail account along with the recovery options as well. In this case, you can check procedure here for Bypass FRP Infinix Smart 10 Plus, Smart 10 (Android 15).
We used a PC tool named (BFT Tool) and installed drivers on PC Windows. After that, with one click, we bypassed the frp and accessed back to the infinix phone main home-screen
Disclaimer: It is strongly advised that you utilize this technique solely on your own device. If you are not the legitimate owner or have come across this information elsewhere, you must return it to the rightful owner. This technique is intended for instructional purposes only.
Bypass FRP Infinix Smart 10 Plus, Smart 10:
-Get the below tool on your PC and install it. Before downloading this tool, do make sure, you have already turned off the @ntivirus software from your PC.
| ⇒ BFT Tool V1.7 [DOWNLOAD]. |
-After its downloading process completed, extract and install it on PC.
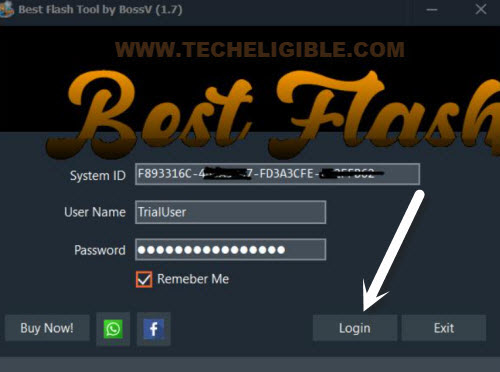
-Launch the tool, while launching the tool, the first popup window will appear up with the login details instructions, just click on “Login” button.
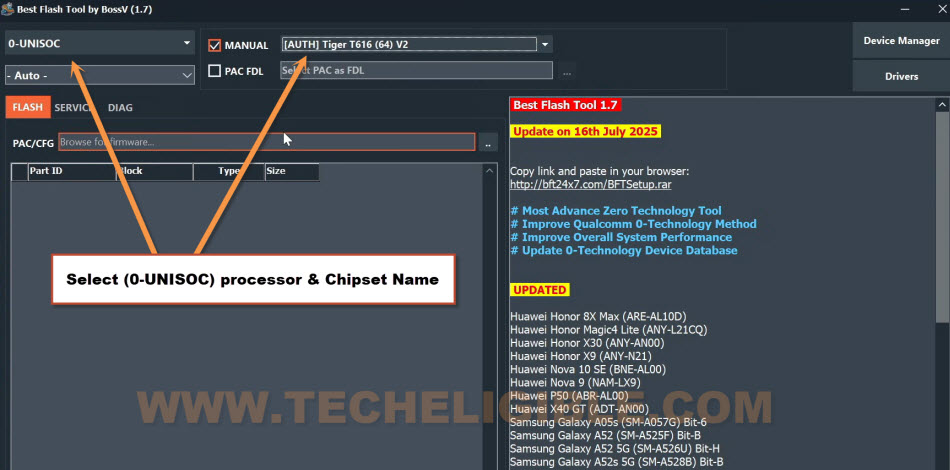
-Make some changes to match with our device specification, select the processor “0-UNISOC” from top left corner.
-You also have to choose the chipset name “[AUTH] Tiger T616 (64) V2“.
-After its done, let’s move on for drivers installation process.
Let’s install SPD + LibUSB Drivers
-By clicking over the top right corner button “Driver”, you will be shown drivers name list. From there, choose “Install SPD Driver“.
-Wait until download is done, then, install this driver on your computer.
-Click again on “Driver” and choose “Install LibUSB Filter Driver“.
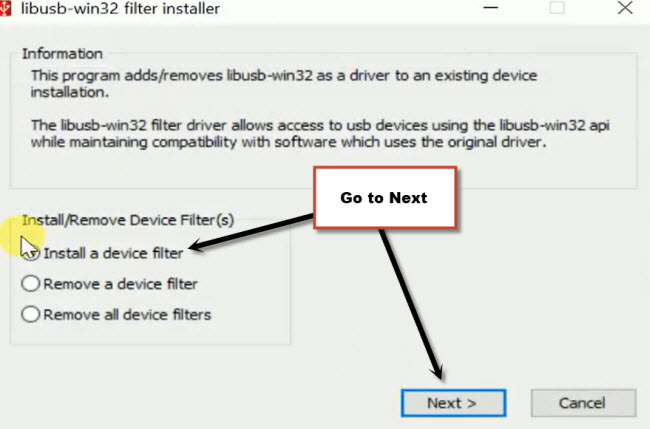
-Install this as well on your PC and you will see a popup window of (libusb-win32).

-From this window, select option “Install a device filter”.
-After that, click on “Next” option.
-For installing the proper driver, you have to turn off the phone.
-Connect the phone with PC while long holding both buttons (Volume UP+DOWN). Keep holding the phone volume buttons until its detected by the PC and libUSB.
Repeat: Keep holding both (Volume up/down) buttons and connect it to PC using USB Cable.

-After that, you will have a popup of new drivers detection on the prompt window of (libusb-win32). This driver need to be installed, just select that driver and click to “install” option.
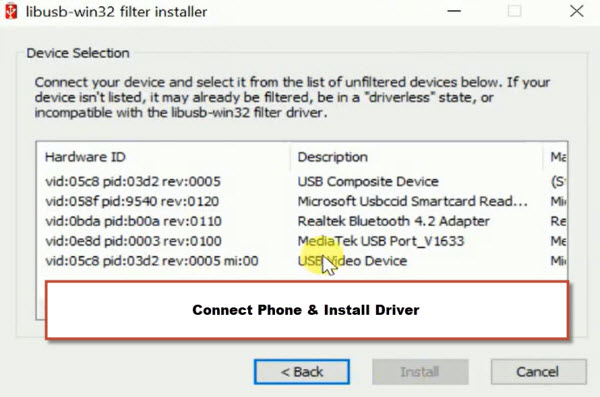
-Finally, we have installed all proper drivers for our Infinix Smart 10 Plus, Smart 10 phone. Let’s disconnect the phone.
Note: If you are facing issue in downloading and installing driver directly through BFT tool. You can install it manually from below.
|
Click to (FRP Reset) Option from the tool
-Click on “Service” option.
-After that, click to “Reset FRP” button to continue erasing frp lock protection.
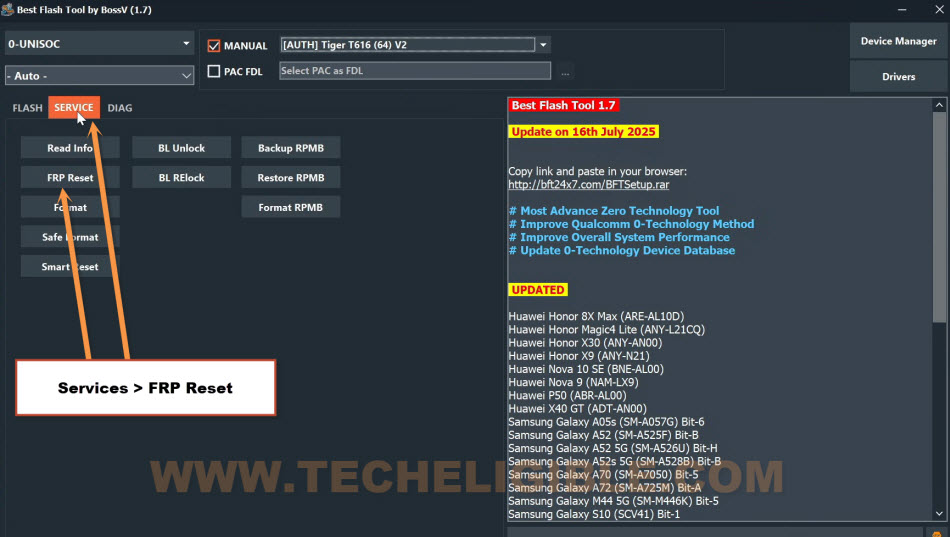
-Turn off your device and reconnect to PC while long holding both (Volume UP + Down) buttons.
-At last, your phone will be detected and the process will begin to bypass frp infinix smart 10 plus and infinix smart 10.
| Note: FRP is not being bypassed, getting sync error or something, restart BFT program and try by selecting these chipset name [Tiger T610 (64)] or [Tiger T606 (64) V2]. After that, click reconnect phone and click again on “Reset FRP”.
|

-Once the FRP is bypassed, you must get a message on the program screen (FRP Reset END).
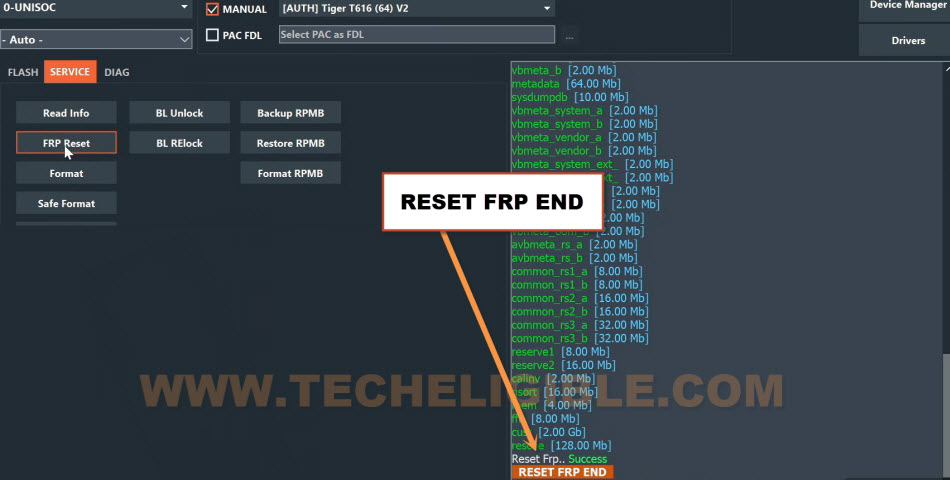
Disconnect Phone & Finish up Setup Wizard Steps
-We have to finish up the all setup wizards now, disconnect the phone from PC.
-Your phone will auto restart, just tap on the “Next icon”. Hit again on “Next”.

-Go to > Next > Skip > Next > Next.
-Once you see the loading screen of (Getting your phone ready..), just, tap at “Back Arrow” icon from bottom.
-After that, you will reach on the (User Agreement and Services), just tap on “Back Arrow” icon from top left corner, this will take you back on the (Connect to WiFi) page.

-Long hold connected WiFi network and forget it. After that, tap again > Next > Next > Skip.
-Your phone may stuck on a (Just a sec…) loading screen.

Factory Reset Phone
-Turn off your phone now.
-Put the device into the (Android Recovery Mode) by long holding both (Volume Down + Power) key simultaneously.
-Once you get the (Infinix logo), quickly release only “Power key” while keep holding the “Volume Down” button.
-Choose the “Wipe Data/factory reset” option using the volume up/down and power key.

-From next screen, choose the “Factory Data Reset” option.
Finish up Setup Wizard Step Again
-Wait until the hard reset process is completed. After that, complete your startup steps again by hitting on > Next > Next. Choose region and click to “Next”.
-Tap at > Skip > Skip, then, check mark “i have read and agree” and then, tap to “Next”.
-From the (Unlock Method) screen, tap at “Skip”.
-From the google services page, just go to > More > More > Accept > Skip > Next.

-You will see the final screen of (Get Ready), just tap at “Next” icon and boom, you have accessed to your phone successfully and completely bypassed frp lock protection.

Conclusion
Downloaded a free pc tool named (Best Flash Tool V1.7) and installed proper drivers as well on PC. Once its setup successfully, we just launch the tool and make some changes in the default settings to match with processor and chipset name of infinix smart 10 plus and smart 10. Finally, we connected the phone to PC and then, click on the “FRP Reset” button from the tool.
Once the frp bypass process is done, we just disconnected the phone and hard reset it by getting into the (Android Recovery Mode). After that, completed setup wizard steps conveniently.