
Is FRP lock security triggered on your Cubot device after carrying out a hard reset? If so, you will require the same Gmail account for login that was configured before the hard reset. If you do not have this, you will persistently encounter the Google sign-in screen and will not succeed in getting past it. If you own the device, you can follow a different straightforward guide to CUBOT P20 by using FRP bypass applications.
Disclaimer: We highly recommend you to apply this method only on your own device, if you are not owner of this device, or you found this from some where, you must return to its real owner.
Let’s Start to Bypass FRP Cubot P20
– Power on the device and link it to a WiFi network.
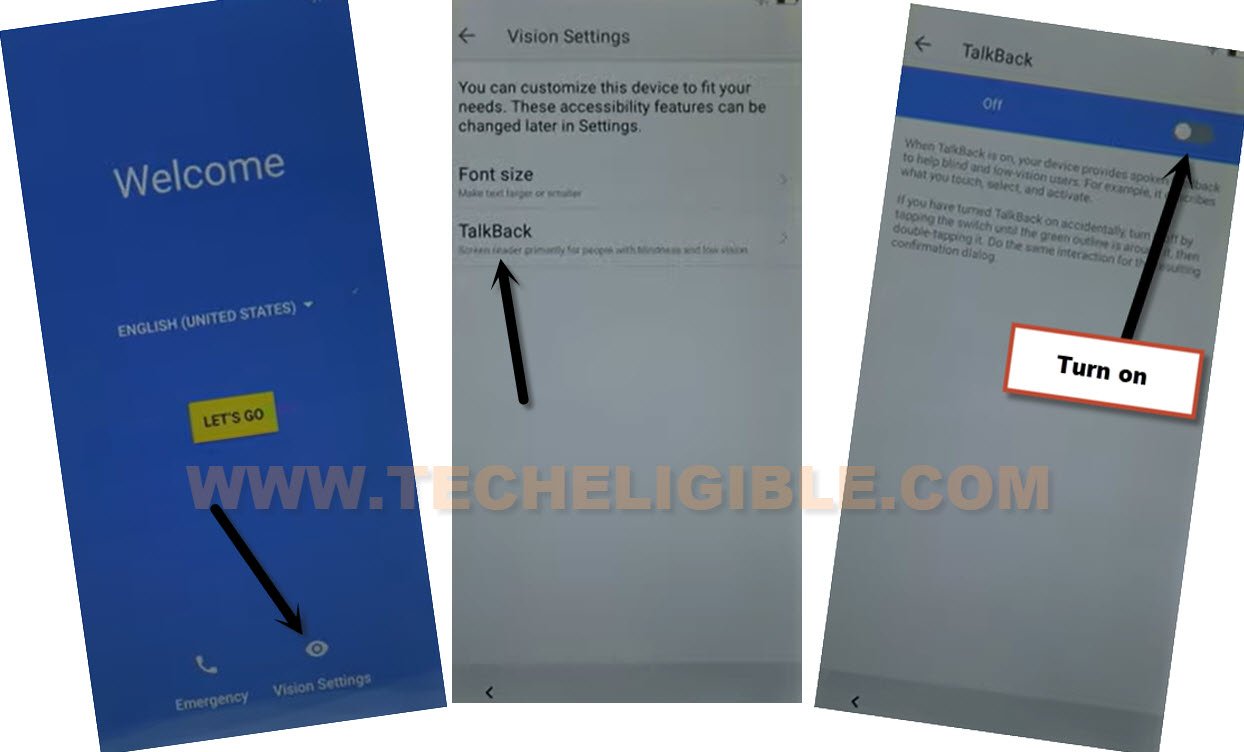
– The procedure is straightforward; return to the initial (Welcome) screen. Subsequently, you will activate the talkback feature first.
– To enable talkback, from the first setup page, navigate to > Vision Settings > Talkback > Turn on.
– On the talkback tutorial page, simply swipe down and swipe right same as displayed in the below image.
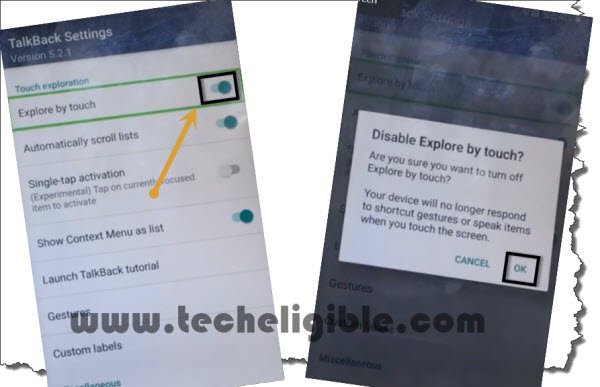
-After that, double tap on the “Talkback Settings” from the popup window.

-Go down using two fingers and double hit over the “Explore by touch” option to turn it off.
Go to Youtube Video Page
-We need to select “Help & Feedback” from the same page. After that, choose “Get Started with voice access”.

– Press the “Play icon” on the video screen. Next, tap on the video title (Get started with voice…).
– If you encounter the (Youtube Update) screen, opt for the second choice “Not Now”.

– Once you reach the youtube webpage, pull down the playing youtube video and hit on the “Profile icon/three dots” from upper corner of the video screen.
-Go to “Settings” option.

– After that, navigate to > About > Google Privacy Policy.
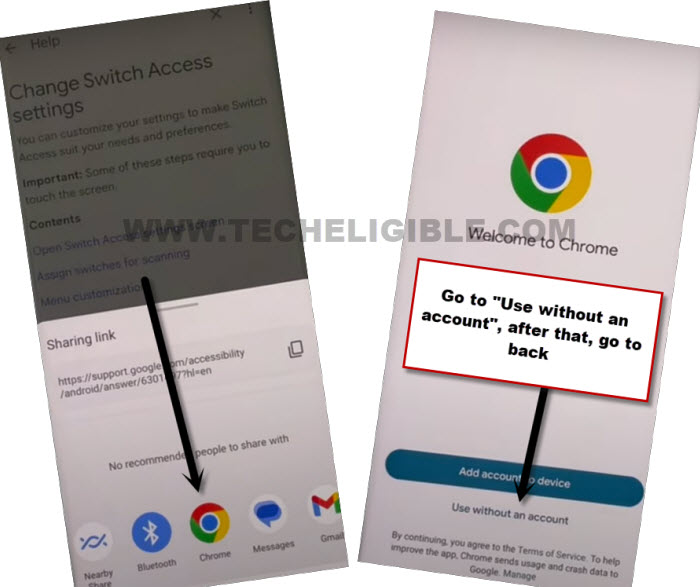
– A popup window will show up, just double tap on “Chrome” browser to open it.
-Press options > Accept & Continue > No Thanks.
Go to Downloading FRP Apps Page
– Enter “Techeligible” into the search bar at the top of the browser. After that, proceed to the first result shown in the screen below.
– Once you land on the techeligible official site, tap on the “Menu” icon and select “Download FRP Tools”.

– Download the application named “Google Play Services” from there.
– Wait a while until the download is finished.
– Now, for the next app, download “Apex Launcher 4.9.2“.
Note: If this version does not function for you, consider downloading a different version. Apex Launcher 4.0.2 works well too.
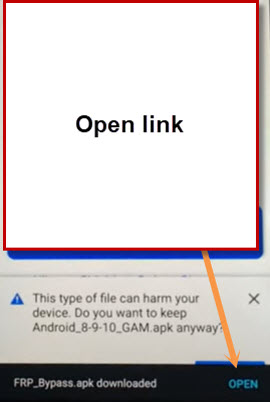
– After the download is finished, you should see a notification bar at the bottom of your browser, just select the “Open” option from there.
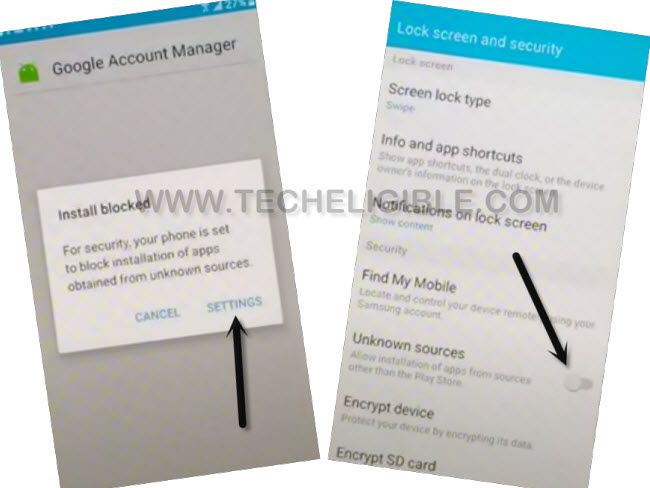
-You may be asked to give permission first to this app for fully installation. For this, go to “Settings” from prompt window.
-Then, turn on the option “Unknown Sources”.
Install & Launch the Apex Launcher
– Return to the FRP tools page and download the “Apex Launcher” app again.
– Once the downloading process is done, you will receive a notification; click on the “Open” link once more.
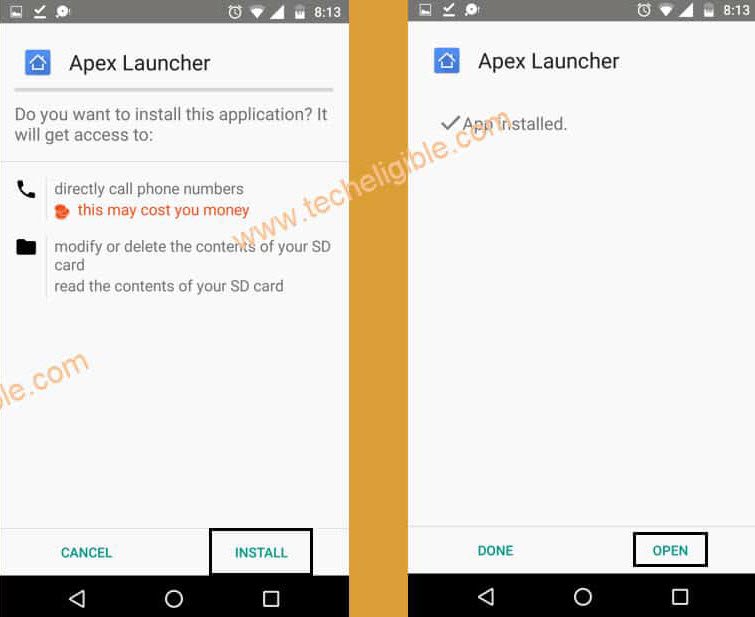
– After that, install and launch the application on your device, simply tap > Install > Open.
– Once you select the (Open) option from the apex launcher app, it will be installed and grant you full access to the main home screen of your phone.
-We are going to the main “Settings” page from the main menu of your device. After that, scroll down and select the “Security” option.

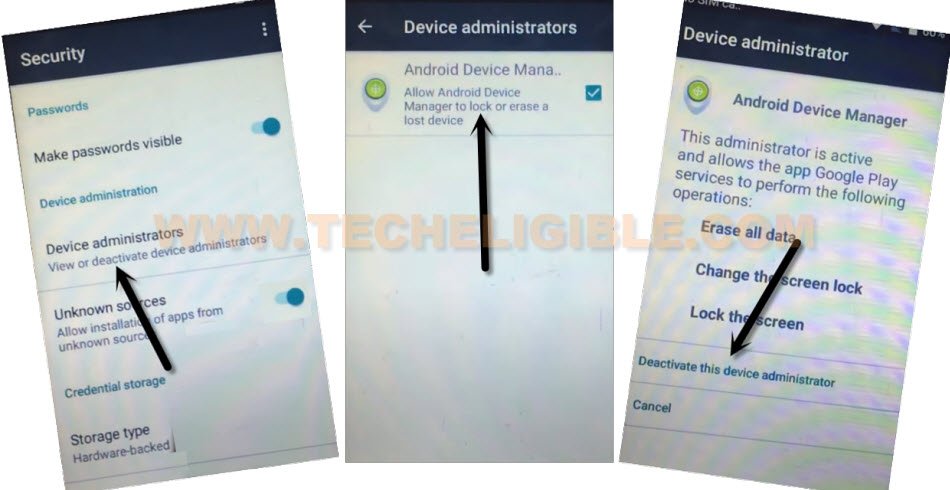
– Tap on “Device Administrator” from the upcoming display, navigate to “Android Device Manager,” then select “Deactivates this device administrator.”
Disable Some Apps on Cubot Phone
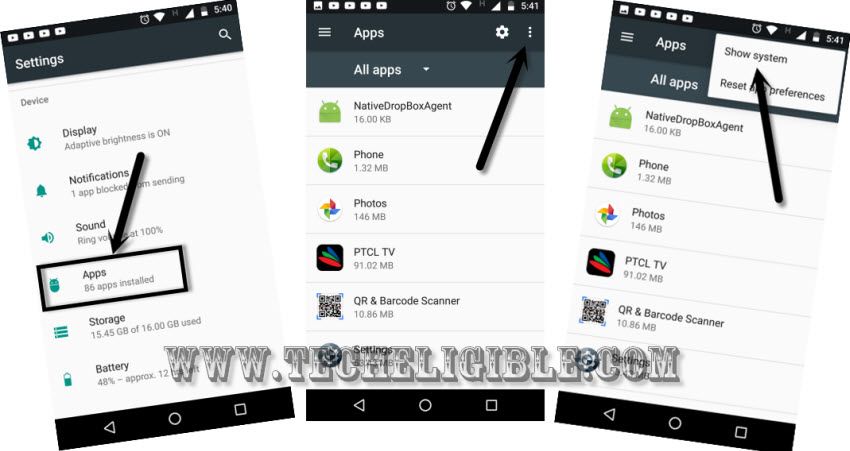
-Return to the main settings page. From here, select “Apps”.
-You might have some concealed applications as well; to reveal these apps on the list, simply navigate to the > 3 dots > Show system.
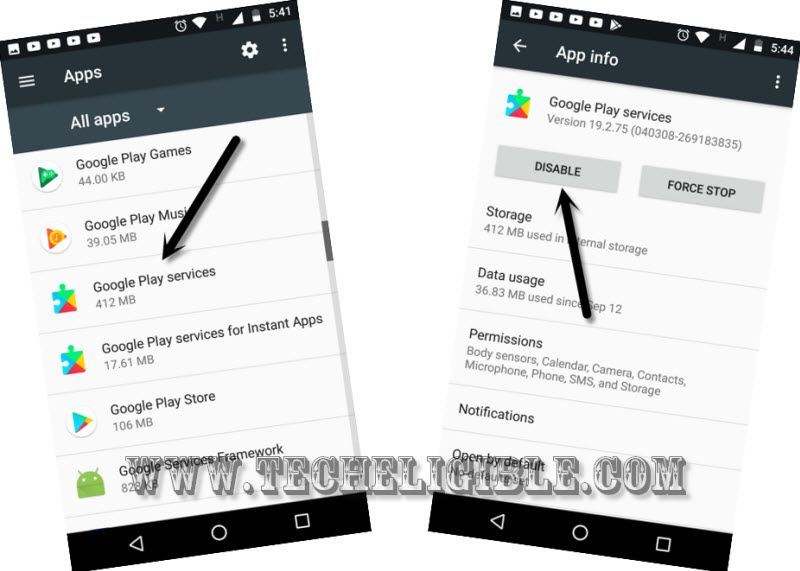
-On the application list page, scroll down, locate and select > Google Play Services > Disable > Disable app.
-Return to the application list page, then find and select > Google Account Manager > Disable > Disable App.
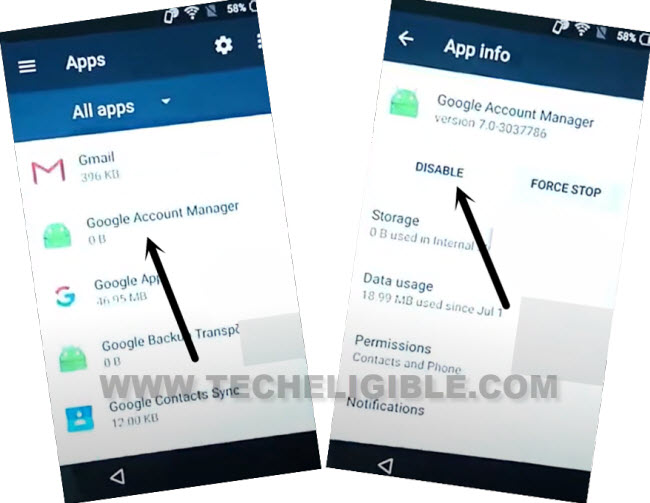
-Return to the application list once more.
-Next, go to > Google Services Framework > Disable > Disable App.
-We are going to download an additional application so that we can set up a new Gmail account on this device.
Install Google Play App Manually
-We need to install our recently downloaded app (Google Play Services). For this, you have to reach to the download folder. Just, open up your phone meu, from there, tap to “File Manager” app.
-After that, hit on “Internal Storage” and tap to “Download” to see your recently downloaded app.
Note: In your case, the download folder path can be different.
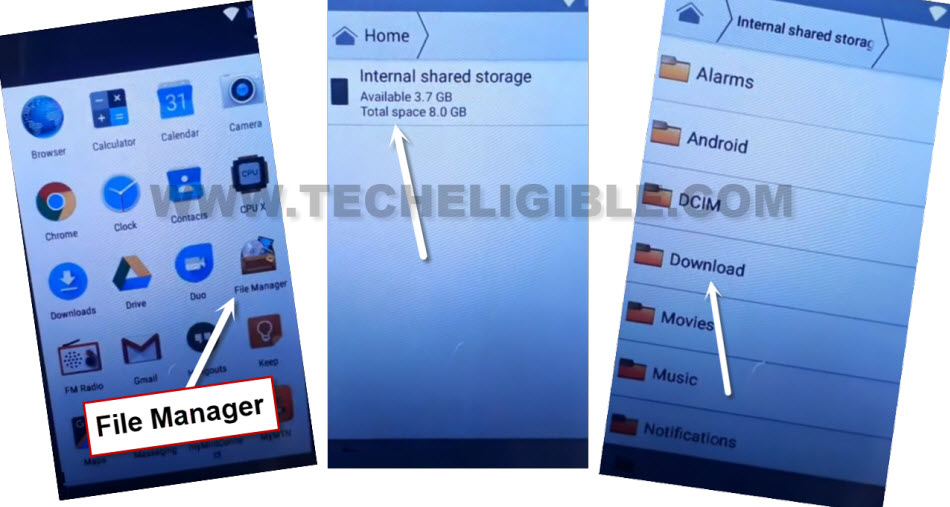
-Select > Google Play Services > Next > Install > Done.
-We can effortlessly set up a new Gmail account on the Cubot Cheetah 2 phone. For this purpose, return to the (Settings) screen of the device.
Shift FRP Locking feature to New Account
-From there, scroll down and select “Accounts.”
-Tap on > Add Account > Google.
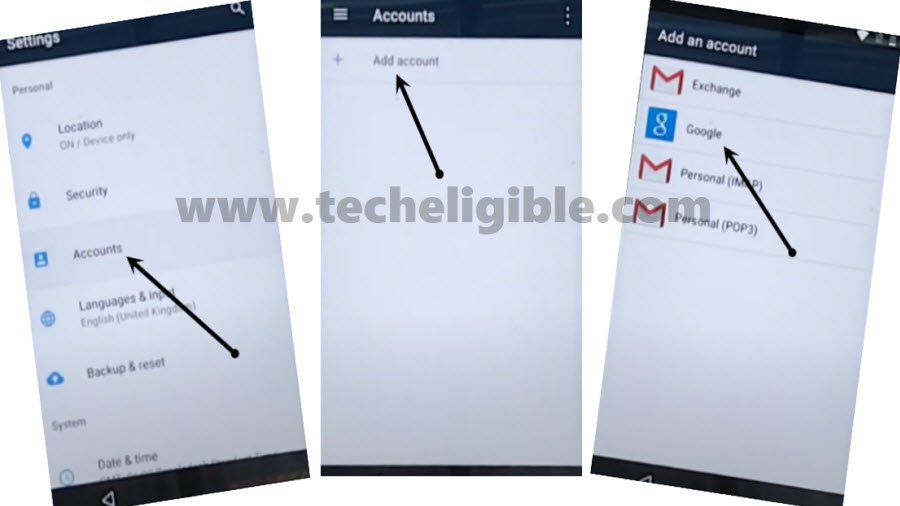
-The login interface will appear; simply log in using another Google account that you remember to bypass FRP.
-Once you have successfully set up the new Google account, you can restart the phone and easily complete the startup steps.
Final Words
Once we activated the Talkback Function, we arrived at the main settings page of YouTube. From that point, we efficiently downloaded and set up the Apex Launcher application, which allowed us to access the main home screen of the Cubot device without configuring the device first. Ultimately, we turned off certain applications manually and added a new Google account to this device in order to complete the FRP verification process.