
We can resolve your device FRP problem in case of forgetting already synced Gmail account. To get this fixed and skip google verification screen, just go through this method to Remove Google FRP Coolmintt A7. We will access to this device main app info page directly to disable google play services. Afterwards, we will be able to complete setup wizard without stuck in google verification process.
Warning: Do not try this frp method on a stolen phone, this is a serious crime, if you are trying to bypass frp on a stolen phone, you may also be jailed, this process is for device owner and for educational purpose only.
Let’s Start to Remove Google FRP Coolmintt A7:
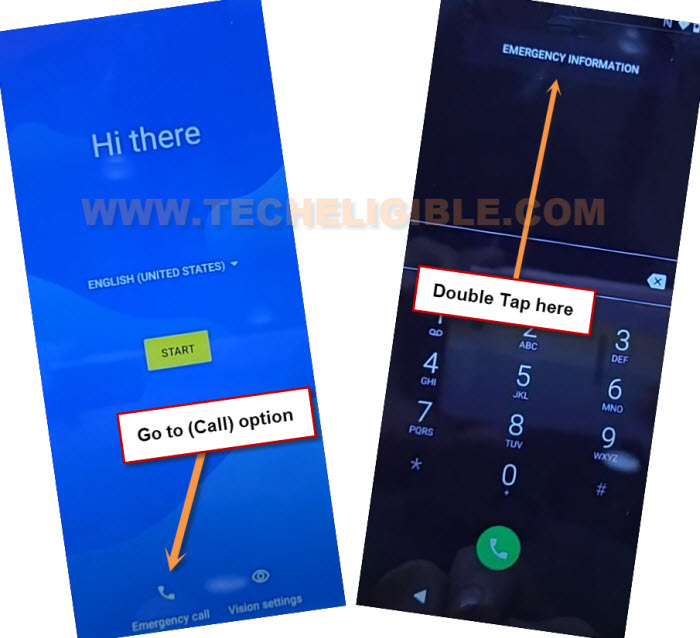
-Start process by connecting WiFi. Afterwards, go all the way back on (Hi there) page by hitting back arrow from bottom. From there, go to “Call” icon. After that, tap twice on “Emergency information”.
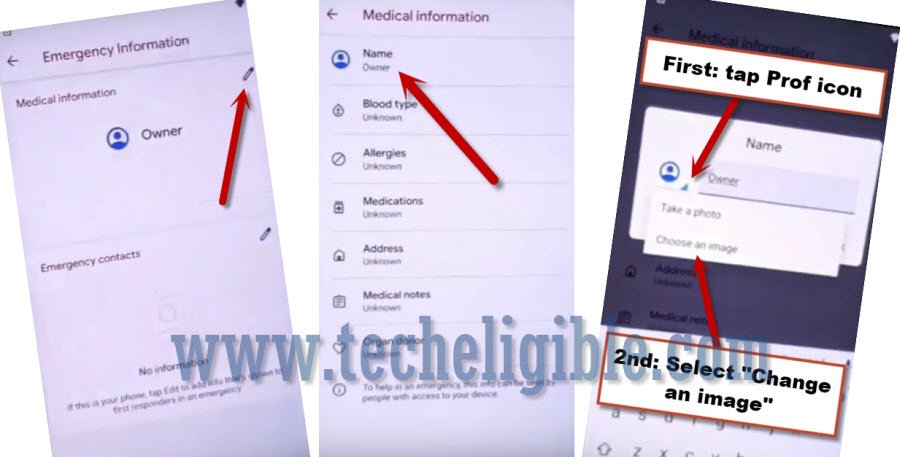
-Go to “Pencil” icon from top corner & Tap on “Name”.
-Tap to “Down” arrow from human circle, and go to “Choose an image”.
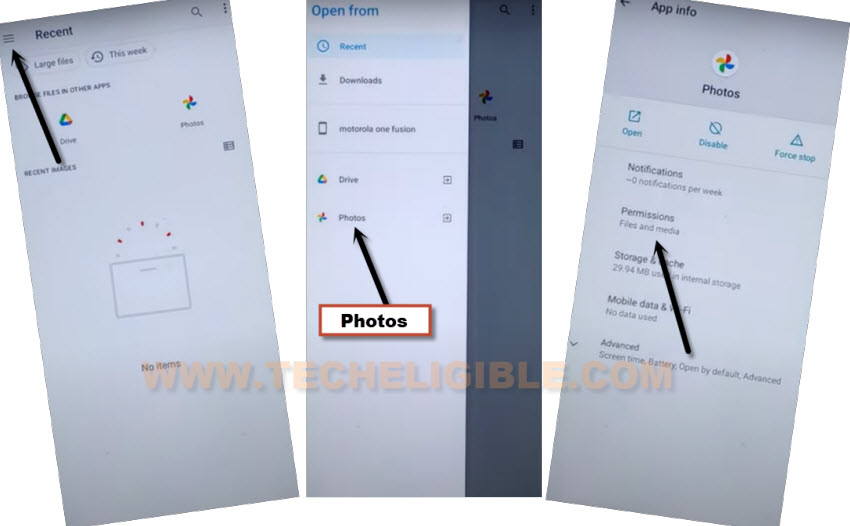
-Bring up sidebar menu by tapping “3 lines” from top corner.
-Long tap on “Photos” and go to “Permissions”.
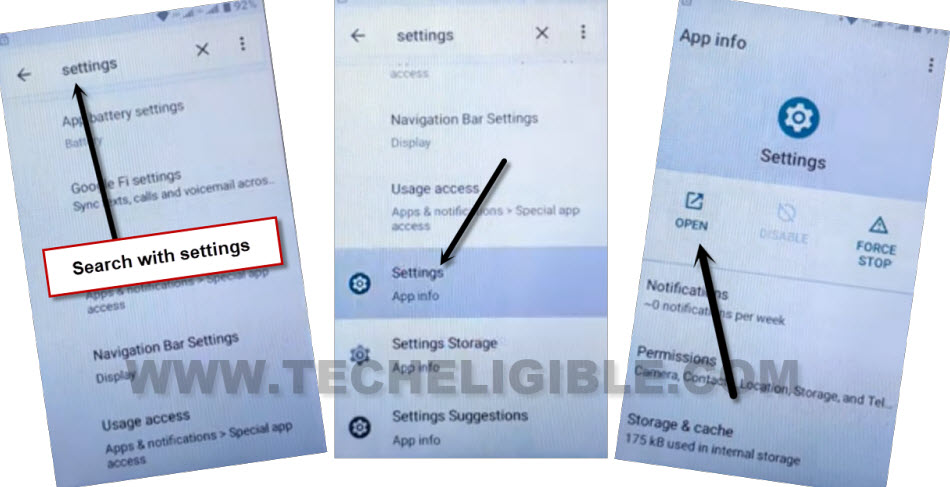
-Go to “Search” icon from top of the page. Search there “Settings”. After that, tap to “Settings” gear icon from searched result.
| Note: If you don’t get same (Settings) option as shown in below image, go back and re-search “Settings”. After few tries, you will be able to see “Settings” of your device, just tap on Settings” |
-Let’s this device main settings page by hitting on “Open”.
-Go to > Apps > See All Apps.

Disable Google Play Services App:
-After accessing your device app info page. From there, we have to get displayed all hidden apps just by going to > 3 dots > Show system.
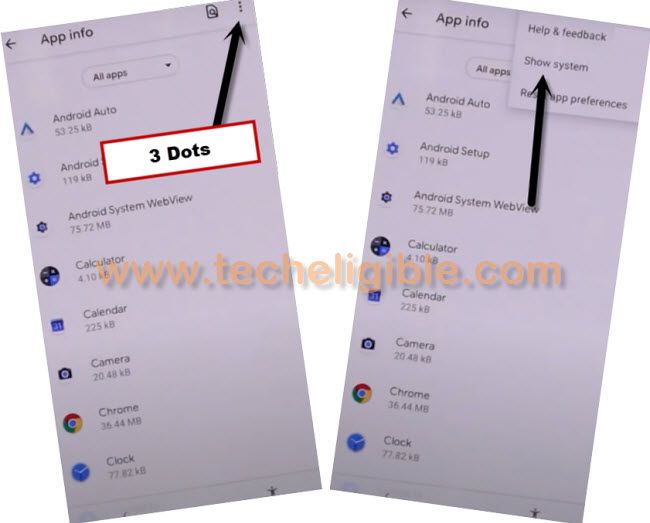
-Scroll and find out gear icon > Android Setup > Force Stop > Ok.
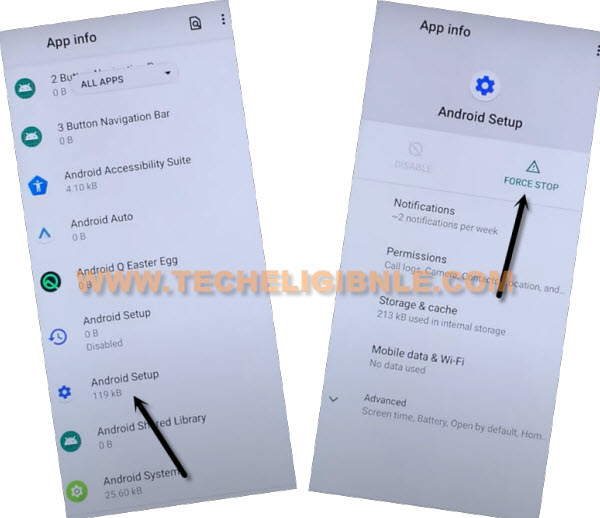
-Go back to app list page again. Find out another app and tap to > Carrier Services > Force Stop > Ok.
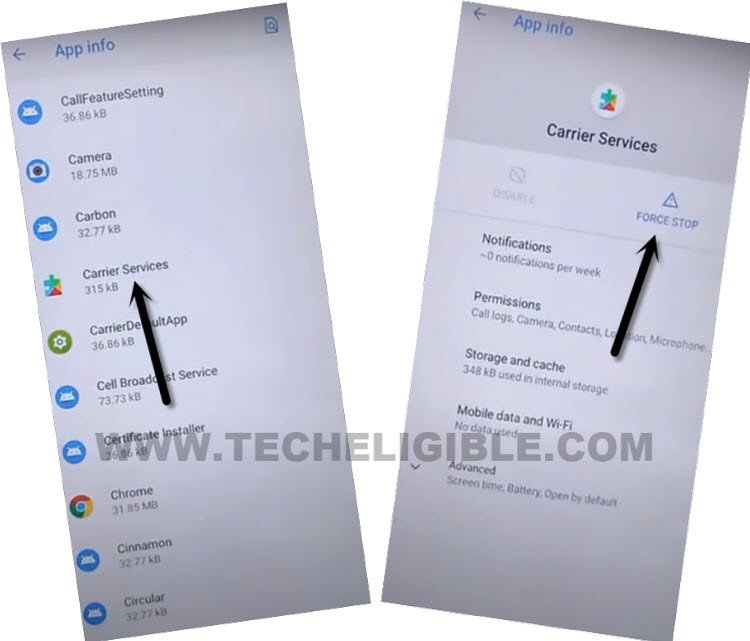
-Let’s disable final and important app by going to > Google Play Services > Force Stop > Ok.
-After that, hit on > Disable > Disable App to Remove Google FRP Coolmintt A7.
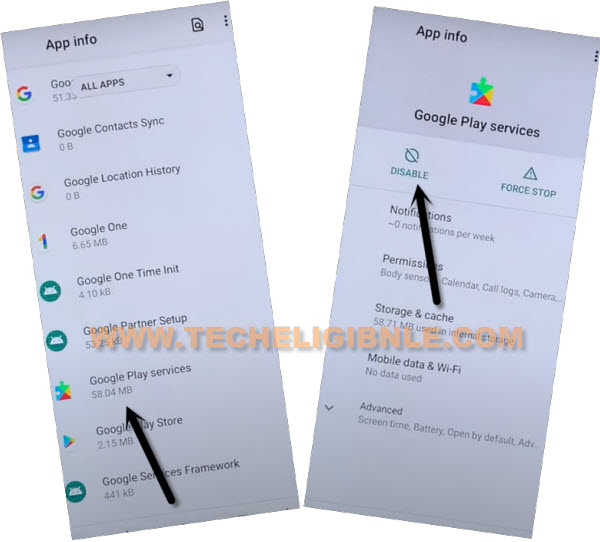
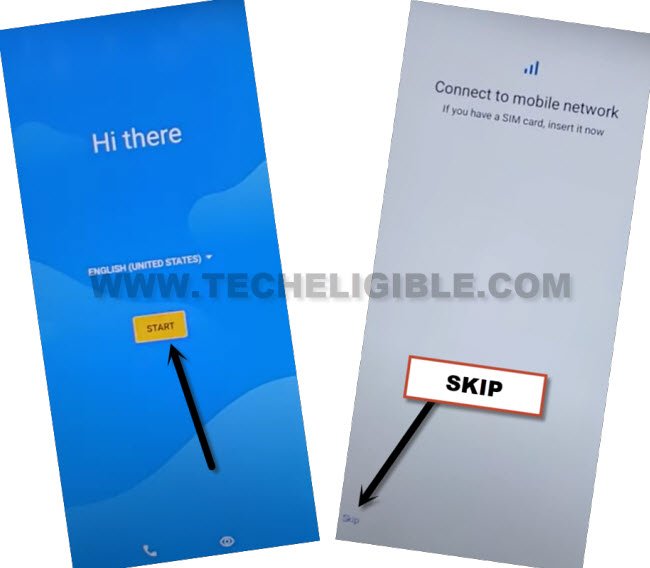
-By hitting back arrow for several times, just reach back main (Hi there) page. After that, tap to > Start > Skip. When you have loading page, just hit on “Back Arrow” from there.
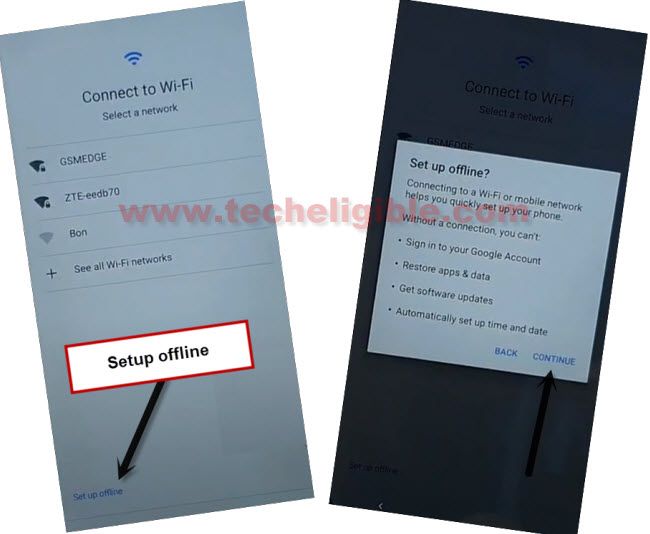
-You will be taken on WiFi page. From there, go to > Setup offline > Continue.
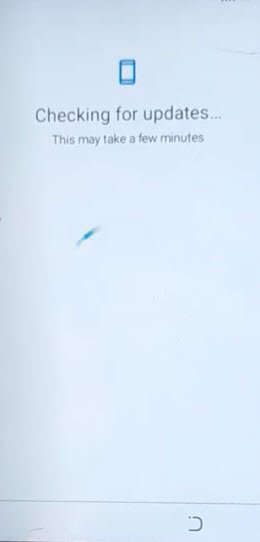
-Afterwards, you will notice that, your device will stuck on (Checking for update….) page. This will not complete until we reach back to device app list page and enable google play services application.
Repeat Steps & Enable Google Play Services:
-Start process by connecting WiFi. Afterwards, go all the way back on (Hi there) page by hitting back arrow from bottom. From there, go to “Call” icon. After that, tap twice on “Emergency information”.
-Go to “Pencil” icon from top corner & Tap on “Name”.
-Tap to “Down” arrow from human circle, and go to “Choose an image”.
-Bring up sidebar menu by tapping “3 lines” from top corner.
-Long tap on “Photos” and go to “Permissions” to Remove Google FRP Coolmintt A7.
-Go to “Search” icon from top of the page. Search there “Settings”. After that, tap to “Settings” gear icon from searched result.
| Note: If you don’t get same (Settings) option as shown in below image, go back and re-search “Settings”. After few tries, you will be able to see “Settings” of your device, just tap on Settings. |
-Let’s this device main settings page by hitting on “Open”.
-Go to > Apps > See All Apps.
Disable Google Play Services App:
-After accessing your device app info page. From there, we have to get displayed all hidden apps just by going to > 3 dots > Show system.
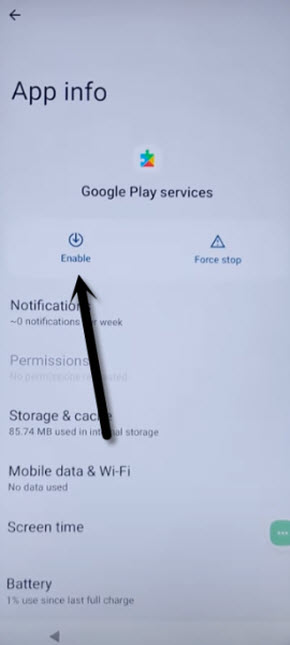
Let’s find out again “Google Play Services” app. After that, tap to “Enable” option to turn on this app. So that, we could easily finish up setup wizard.
-Let’s get back to (Hi there) page. Tap to > Start > Skip > Back Arrow.
-From WiFi page, just hit again on > Setup offline > Continue.
-You are all done from Remove Google FRP Coolmintt A7 without getting help of any paid frp bypass tool.
-You can complete all remaining steps on your own without facing any issue.