
If you are stuck on google verification process due to hard reset your device without knowing your current Gmail ID. In this case, you might be facing FRP protection issue. You can get guideline from here to Bypass Google FRP ITEL P17 Pro without using any PC. We will access to main settings page using talkback feature. After that, we can easily get into our own device without signing in with forgotten Google account.
Warning: This method is only for a real device owner, who has lost his/her Gmail account after hard reset. If you are unknown to this phone & trying to gain access, you will be jailed once the device is traced. This is a serious crime & Sin. You must return this phone to its real owner.
Let’s Start to Bypass Google FRP ITEL P17 Pro:
-First of all, turn on your device & Connect WIFI first.
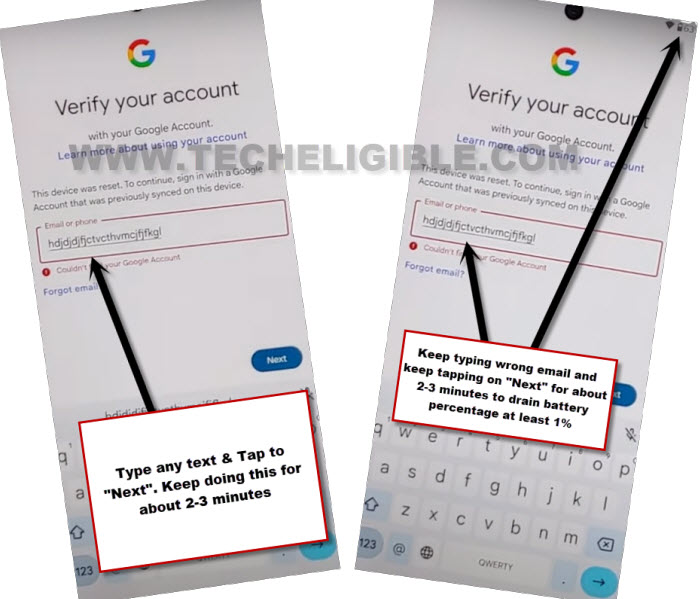
-After that, go to “Google verification” page.
-We have to drain at least 1% of battery by typing any random text in email address filed tab and keep tapping at next option. Do this for about 2-3 minutes.
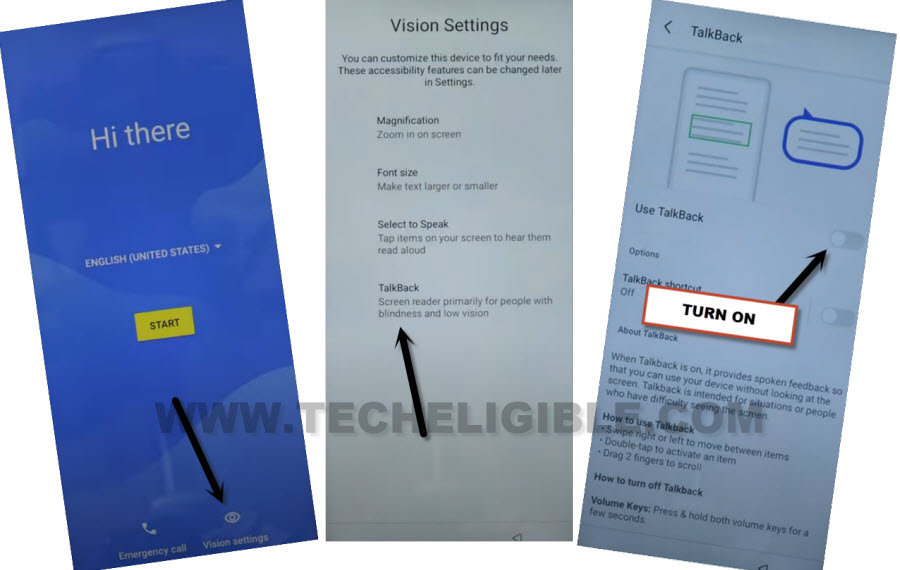
-Afterwards, go back to main (Hi there) screen.
-Tap tap on > Vision Settings > Talkback.
-Turn on “Use Talkback” option.
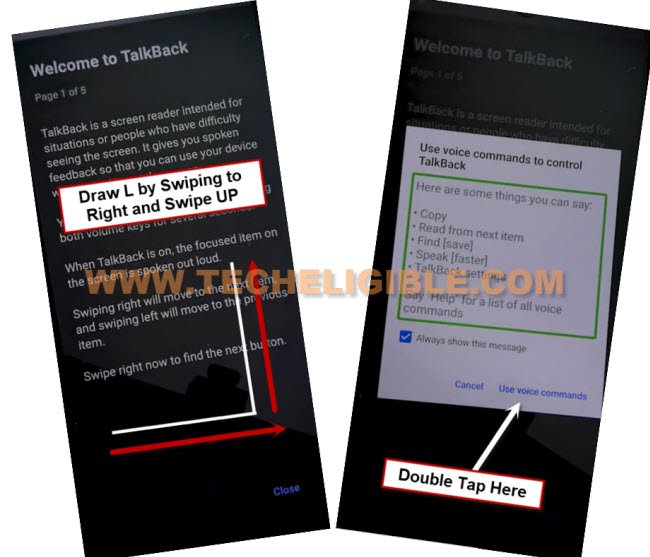
-You will be shown (Welcome to talkback) page. You have to swipe right and swipe up to get voice command popup window. (See below image to make same gesture)
| Note: As the talkback has been enabled successfully, So, we will have to tap single option twice times. |
-Lets double tap to > While using the app > Use Voice Commands.
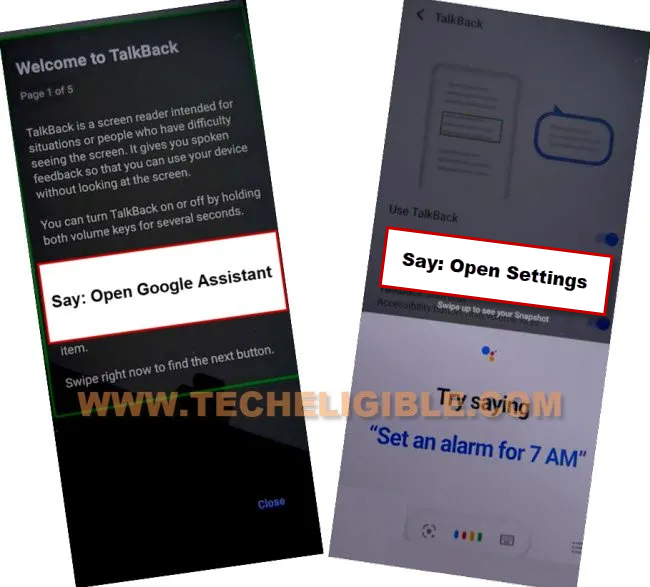
-Once you get green colored boarder on screen, say loudly “Open Google Assistant”.
-After that, you will be displayed google assistant popup box. Just say loudly there as well “Open Settings”.
-Congrats, we are inside main settings page, lets turn off talkback functionality. Go all the way down and double tap on “System”.
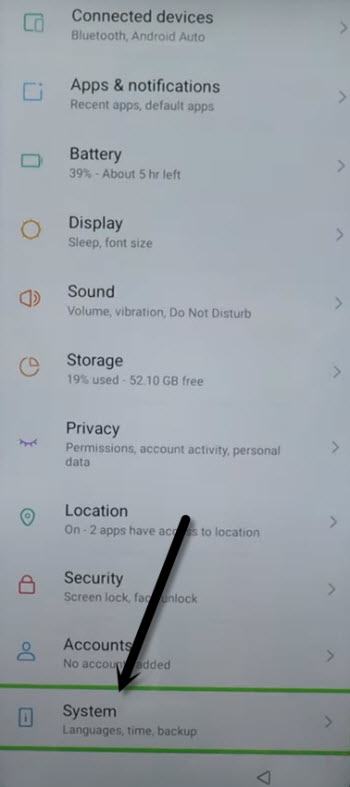
-Go to “Accessibility” option. Afterwards, tap over “Use talkback” option.
-Form there, we are have to toggle off “Use talkback” option to successfully turn off talkback function.

-Go back to main “Settings” page by hitting back arrow from bottom.
-Let’s enable (Accessibility shortcut menu function).
-Go to > Accessibility > Accessibility MENU. After that, switch on “Accessibility Menu Shortcut” option same shown in below image.
-Give some permissions by tapping at > Allow > Ok.
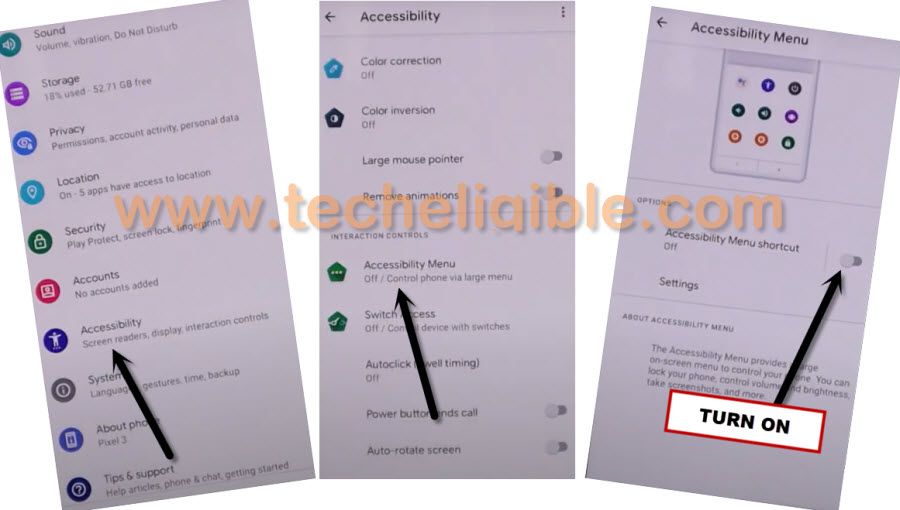
-You will be displayed a small (Human) icon at the bottom edge corner of your device once the accessibility feature is enabled.
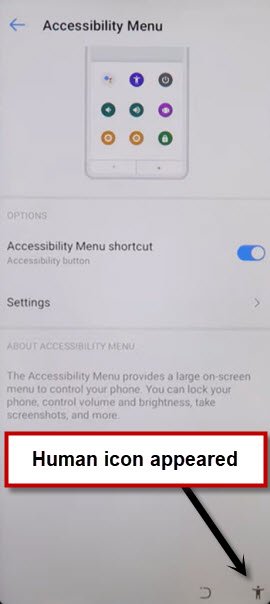
-Let’s go back to main “Settings” page again. From there, tap to “Battery” option.
-Hit over > 3 dots > Battery Usage.

-You must have there (Google Play Services + Android Setup) application. This app (Google Play Services) we are seeing here just because, we spent 1-2 minutes on (Google Sign in page) in an activity of typing random text and tapping next option.
-We can now easily force and disable both apps to Bypass Google FRP ITEL P17 Pro.
-Lets hit on > Android Setup > Force Stop.

-After that, go back and tap to > Google Play Services > Force Stop > Ok.
-Afterwards, tap to > Disable > Disable app.

-Let’s go back to main (Hi there) screen by hitting back arrow several times.
-Tap on “Start” button. After that, wait for few second and hit on “Don’t copy” option.

-You will stuck on checking for update… loading state. To get this fixed, we have to reach back to google play services page and enable back that app to finish up setup wizard steps.
-Let’s use talkback function here to get back to main settings page directly.
-Tap to “Human” icon from bottom corner, after that, tap on “Assistant”
-Say loudly “Open Settings”, you will be redirected inside your device main settings page.

-Lets go to battery option to enable back google app. For that, go to > Battery > 3 dots > Battery usage.
-You will be displayed again both apps there, go to > Google Play Services > Enable.

-Congrats, we have successfully enabled back google play services application. Now, we can easily Bypass Google FRP ITEL P17 Pro without signing with forgotten account.
-Go back to loading page again by hitting on “Back Arrow” for few times. Once you see (Loading) screen, just wait there until its done.
-Afterwards, tap to > more > more > accept.
-Tap on > Skip > Skip > Ok > Agree.
-Choose any country from country list page, after that, hit on > Next > Next. Congrats, you have successfully reached inside the device main home-screen. Its all done from frp bypass side. Don’t forget to setup new security lock and gmail account. Thanks for visiting us.