Factory reset protection helps keeping your device data secure from any type unauthorized access. Sometimes people just try accessing the device data from stolen phone. In this case, this FRP function works great and do not allow an unknown person accessing your device data even after hard reset. But, this be a big challenge for the device owner as well. If he forgets his logged in google ID. To resolve this issue, you can go for FRP Bypass ASUS ZenPad 3S 10 (Z500M) / ZenPad 3S 10 (Z500KL)
Disclaimer: We highly recommend you to apply this method only on your own device, if you are not owner of this device, or you found this from some where, you must return to its real owner. This process is just for educational purpose to assist device owner, how to approach on their own FRP locked ASUS ZenPad 3S 10.
Enable Talkback First for FRP Bypass ASUS ZenPad 3S 10:
To bypass frp from our ASUS ZenPad 3S 10 device, we just enabled talkback function after connecting WiFi. After that, reach at chrome browser screen using the talkback function. From there, search and accessed to (frp tools) page. After that, download & installed FRP removal applications on our ASUS ZenPad 3S 10 device. Check out all FRP Bypass Stepwise guideline from below.
Let’s Start FRP Bypass Guide on ASUS Tablet:
-Turn on your ASUS zenpad device and connect WiFi. After that, put your device back on first startup screen (Welcome) page.
-Hit on “Settings” icon from top corner to get into the vision settings option. From there, hit on “Talkback”.
-Toggle on button from top corner to turn on talkback function.
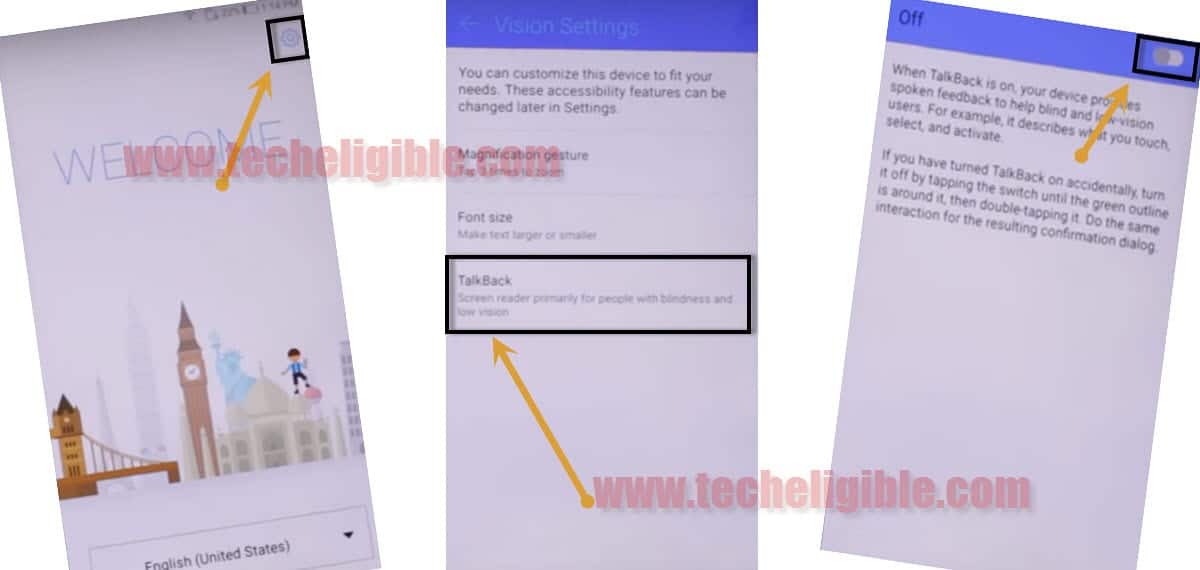
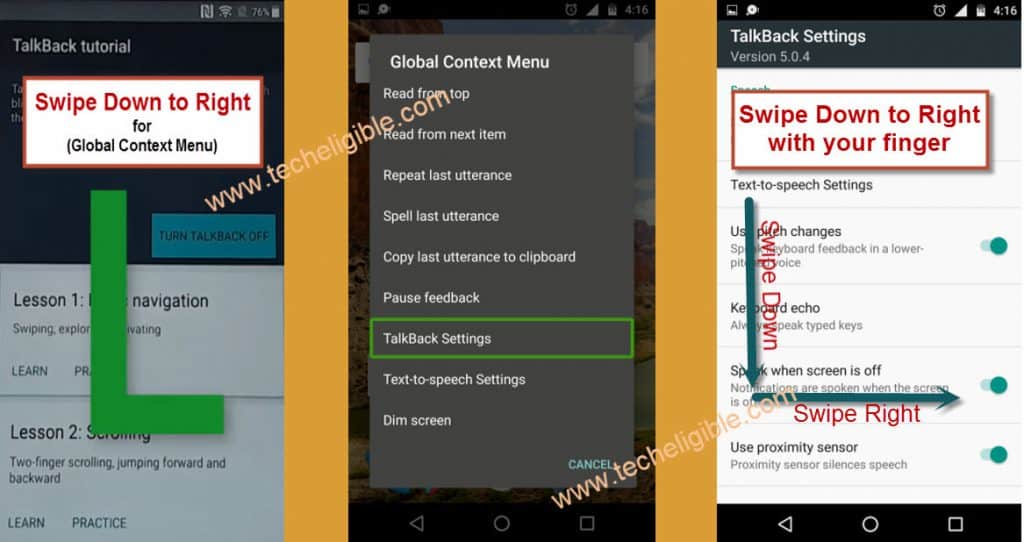
-You have to make “L” shape on ASUS screen by swiping down and then swipe right.
-After making L shape, another display will popup, from there, double hit on “Talkback Settings”.
-After reaching at (Talkback Settings) screen. From there, you have make L shape again by swiping down and then swipe right.
Pause Talkback Function:
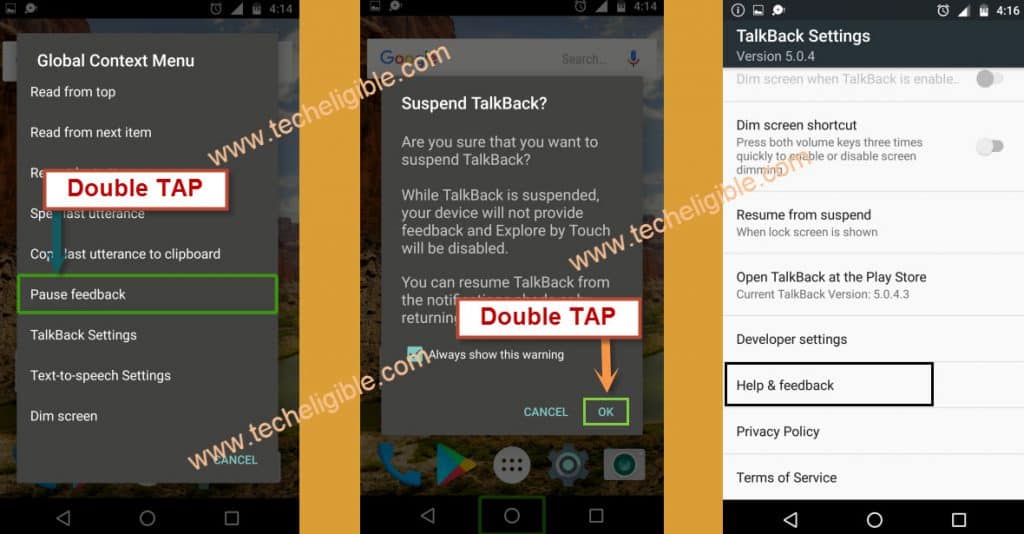
-From (Global Context Menu) popup window, just double tap on > Pause Feedback > Ok.
-Its all done, we have successfully disabled talkback function. Let’s move on next FRP bypass steps for Google FRP Bypass ASUS ZenPad 3S 10.
-You have to go to “Help & Feedback” option.
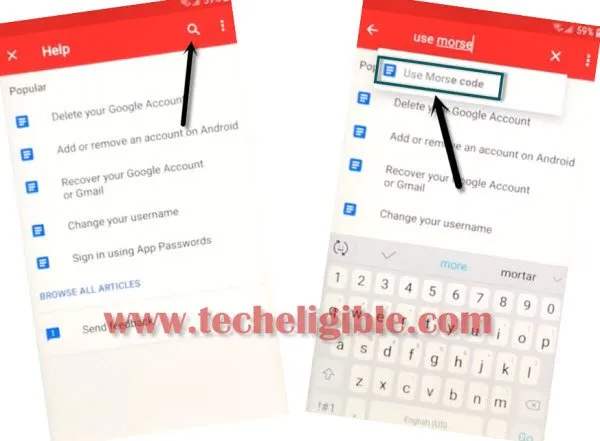
-Hit over the “Search” icon from top corner and then search there “Morse”.
-You must be displayed use morse code article in searched result, just tap on that article “Use Morse Code”.
-Tap to “Play button” from youtube video. After that, hit on “3 dots” icon from the video top corner.
-After that, go to “Watch later” option to access youtube website directly on ASUS ZenPad 3S 10

-You will be shown a popup window of chrome, just double tap on “Chrome” icon from there.
-Go to > Accept & Continue > Next.

-Tap on “Just once” from popup screen of chrome.

-You will be displayed chrome browser search bar at the top. We will search there frp bypass applications to download.
Download FRP Apps on ASUS ZenPad 3S 10:
-Let’s go to techeligible site by searching in browser with “Techeligible“. After that, visit first searched result same as shown in below image.
-Afterwards, you have to hit over the “Menu” icon from top corner. Tap to “Download FRP Tools”.

-Download from there below 2 applications on your Asus tablet for Google FRP Bypass ASUS ZenPad 3S 10.
1st: Google Play Services.
2nd: Development Settings.
-After downloading both above app successfully, let’s scroll up from frp tools page.
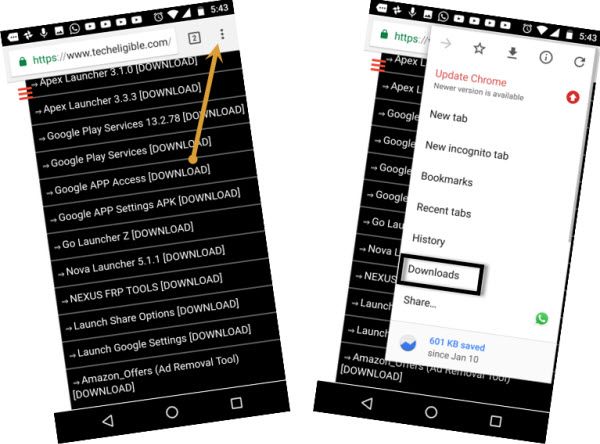
-Go to “3 dots” icon from top corner and tap on “Download” option from sidebar menu of the chrome browser to get into the download folder page.
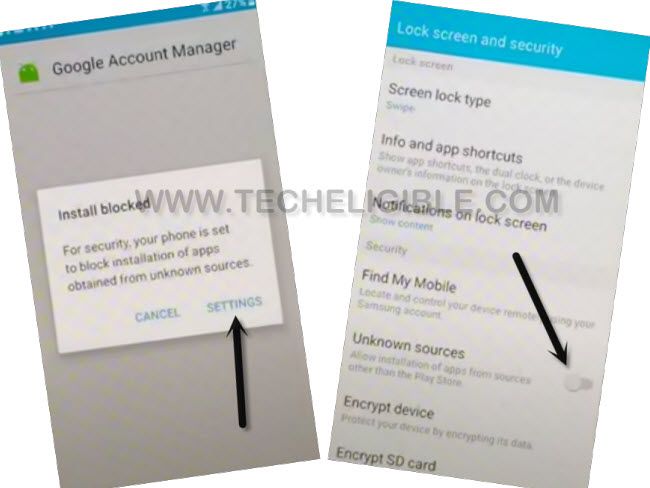
-Tap on downloaded app “Google Play Services”. You will face a installation blocked popup screen, from there, tap to “Settings”. After that, turn on “Unknown Sources” option. After enabling this, we will be able to complete installation process of this google play services app.
-Go back to download folder again, from there, hit again on > Google Play Services > Install > Done.
-From same download folder screen, you have to install & open development settings app too to reach your device main settings interface directly.
-Tap on > Development Settings > Install > Open.

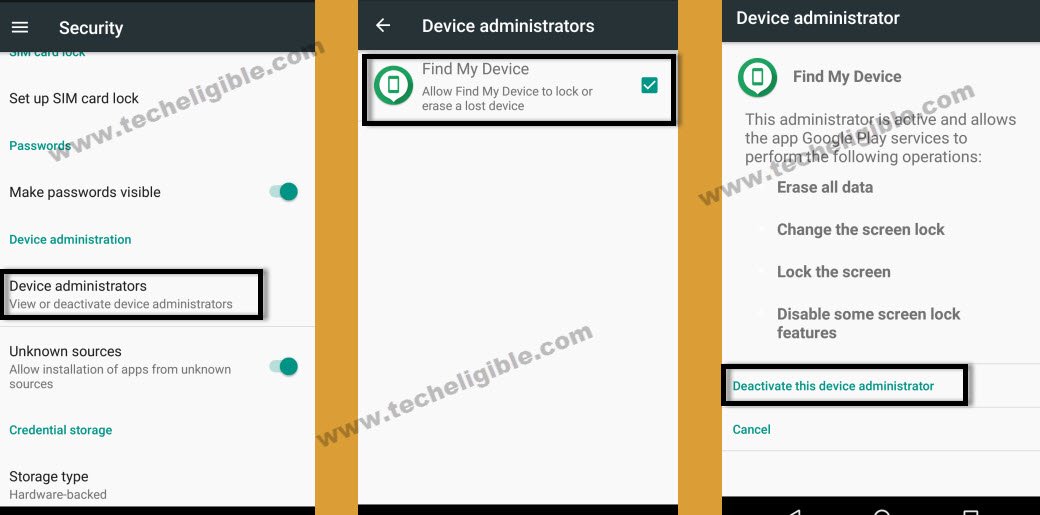
-After reaching at security screen, from there, you need go on Settings > Security > Device Administrators > Find My Device > Deactivate this device administrator.
Disable Some Apps to Successfully Bypass FRP:
-Go back over the main settings page of your ASUS device. From there, tap to “S
-Go back to > Settings > Apps.
-We need to get displayed all hidden apps on our app list page, after reaching to app list screen, just tap on “3 dots” option from top corner and hit on a “Show System”.
-Scroll down from app list screen, find and go to “Google Account Manager” application.
-Tap to “Disable” button from google account manager application. Hit again on “Disable this app” from popup window. This will disable google account manager application from ASUS ZenPad 3S 10.
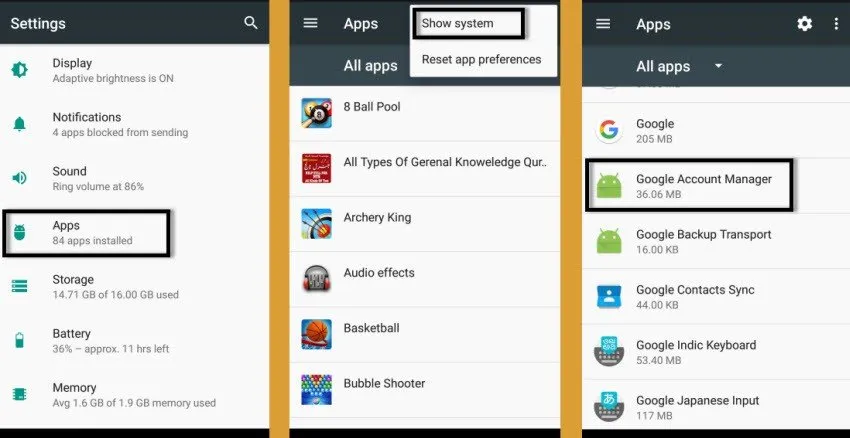
-Go back to app list page again. From there, find and go to “Google Play Services” application.
-Let’s disable & force stop this app completely. After that, we will be able to bypass frp from ASUS ZenPad 3S 10.

Add Google Account on ASUS ZenPad 3S 10:
-After disabling both apps successfully, get back to main settings screen. From there, scroll down and tap on an option “Accounts”.
-Go to > Add Account > Google.
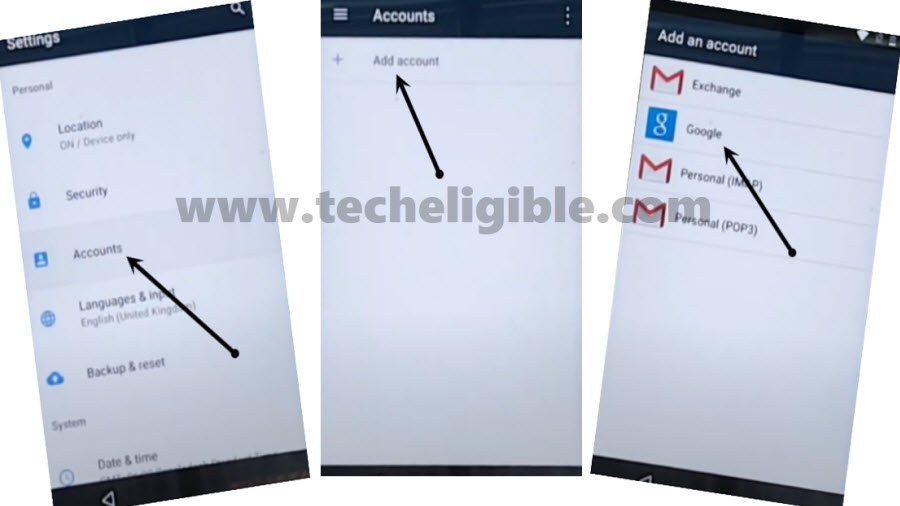
-Let’s setup your new google account on ASUS ZenPad 3S 10 to bypass frp account.
-After successfully signing-in with your Gmail account, we have to enable back our both recently disabled apps in order to use back ASUS ZenPad 3S 10 smoothly.
Enable Back both Disabled Apps.
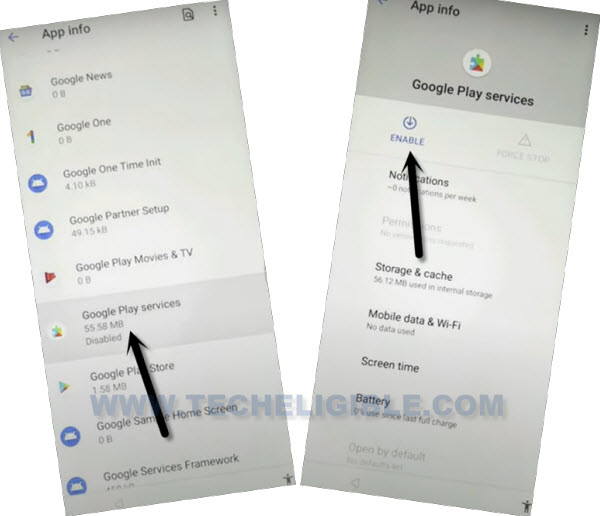
-You have to return to settings screen. From there, tap on “Apps” option.
-Enable back both disabled app from app list. Find and tap to “Google Account Manager” application.
-After that, hit on “Enable” button.
-Go back to app list page. From there, find and tap to > Google Play Services > Enable.
Conclusion:
Congrats, your new google account has been added successfully. You are all done from Google FRP Bypass ASUS ZenPad 3S 10 without using any paid tool. You can use your Asus Tablet again after completing setup wizard steps. This is the easiest way to fix up your device accessing issue. We just used talkback function to reach to chrome browser. From there, accessed to frp tools screen and disabled 2 apps (Google Play Services & Google Account Manager). After that, logged in with new google account.