
Remove FRP Account UMIDIGI A7, A7 Pro Android 10 Remove Google Account
Remove FRP Account UMIDIGI A7, A7 Pro Android 10 with help of creating new PIN or Pattern lock in your device, after that, you will get (SKIP) option on google verification screen, so that means you can easily go for next step just by skipping that screen, no need to sign in with google account, we reach to device settings from (Emergency Call) option.
Everything has been mentioned below of this post with screen shot, so you can follow up all steps from below easily and if you find any difficulty in understanding any step, you can comment us as well, we will try to reach you as soon as possible, and will help you to bypass frp from your own device.
Note: This method is only for device owner and for educational purpose only.
Let’s Begin to Remove FRP Account UMIDIGI A7, A7 Pro:
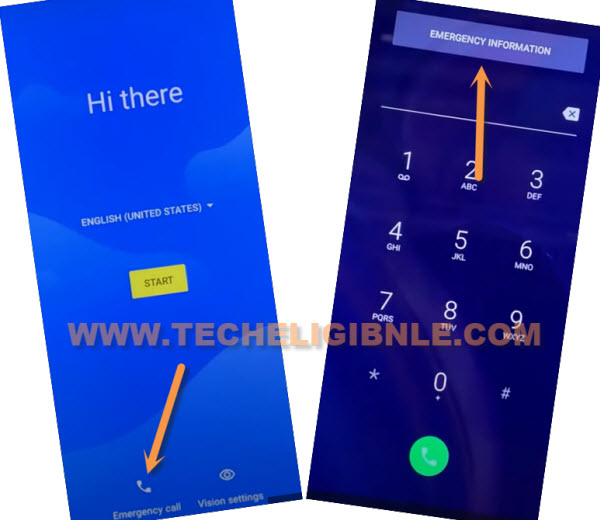
-Connect WiFi, and double tap to “Emergency Call” option from hello screen.
-Double tap on “Emergency information”.
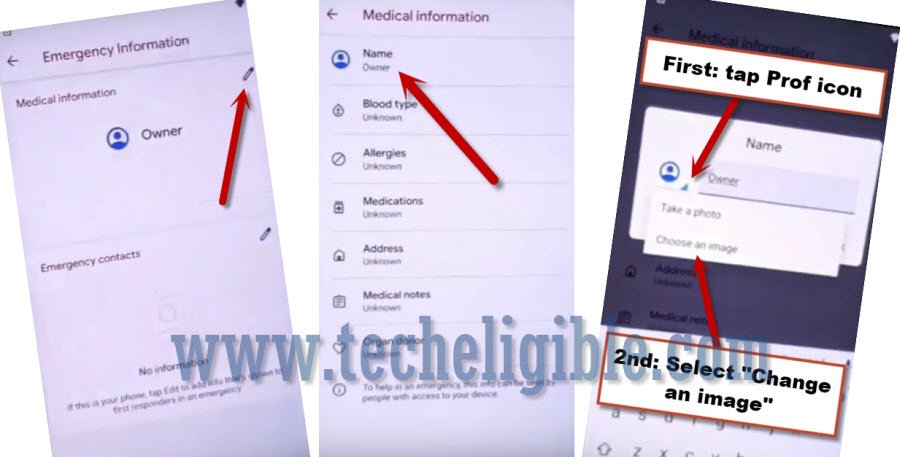
-Tap “Pencil icon”, and then tap on “NAME”, and hit on a “Small Down Arrow” which is right bottom of the profile icon (See below image).
-Tap on “Choose an image”.
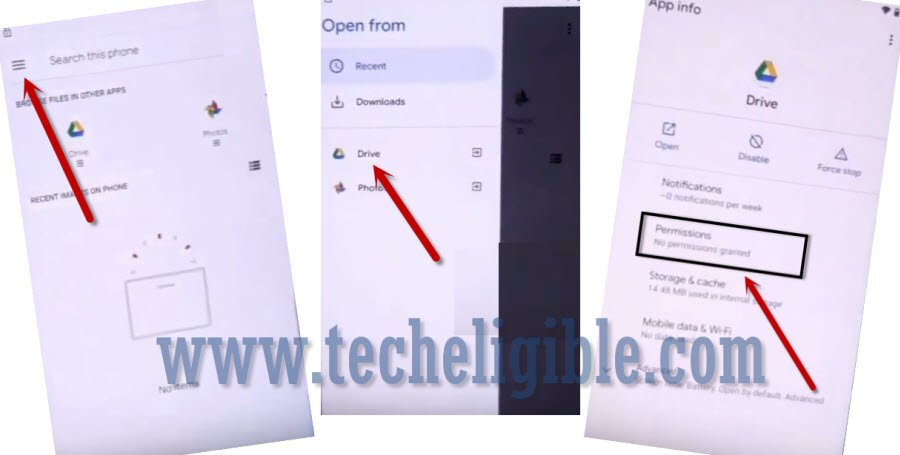
-Go to > MENU icon > Drive > Permissions.
-Tap on “Search icon” from top corner, and search there “Settings”.
-Go down and tap on blue color “Settings App info” icon, and then hit on “OPEN”.

Setup New PIN/PATTERN in UMIDIGI:
-Go to “Security”.
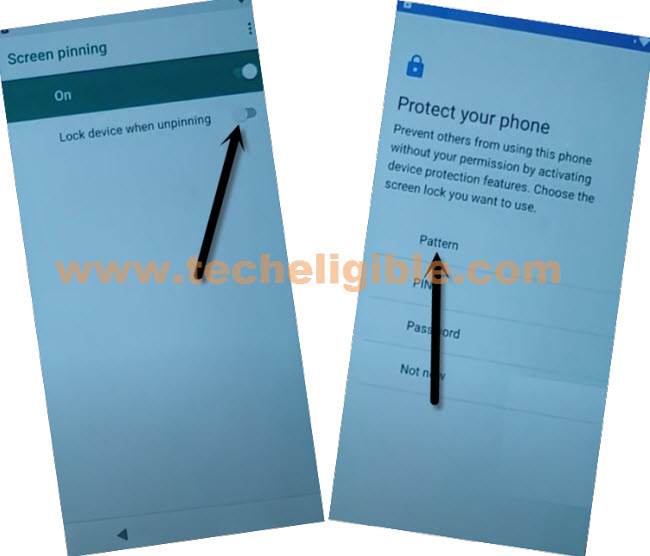
-Tap to > Screen Pinning > Turn on.

-Turn also “Lock Device When unpinning”, and then hit on “Fingerprints + Pattern”.
-You will have a pattern drawing screen, just draw your pattern, and tap on “Next”.
-Draw same pattern again and tap on “Confirm” button, congrats, you have successfully setup new pattern on this device, which will allow you to skip google verification screen while completing setup wizard.
-By tapping back arrow multiple times, get back to first (Hi there) screen, from there tap to > Start > Don’t Copy.
-Draw your already setup pattern lock there.
-Tap to > Skip > Skip Anyway from google sign in screen.
-Finish setup wizard on your own and reach device home-screen easily.
-We have to perform factory reset task from settings to Remove FRP Account UMIDIGI A7, A7 Pro.
-Go to > Settings > System > Reset Option > Erase all data (Factory Reset) > Erase all Data.
-Draw your pattern again and, tap on “Erase all Data”, the device will be restart and you need to finish setup wizard again, this is how you can easily Remove FRP Account UMIDIGI A7, A7 Pro Android 10, thanks for visiting us.