
Through this way, you will be able to bypass frp Samsung Galaxy J1 Mini, J1 Mini Prime without using any PC and paid service. If you can’t recover your old added Gmail account, so you don’t need to be worried. Because, you still have a proper way to get it back and setup new google account. How we do that all? just follow steps below from here carefully.
Note: We highly recommend you to apply this method only on your own device, if you are not owner of Galaxy J1 Mini/J1 Mini Prime, or you found this from some where, you must return this device to its real owner.
Method 1: Bypass FRP Galaxy J1 Mini & J1 Mini Prime
-Start this process by turning on Phone and Connect WiFi.
-We need to turn on talkback feature just by pressing “Home Button” 3 times same as shown in below image.
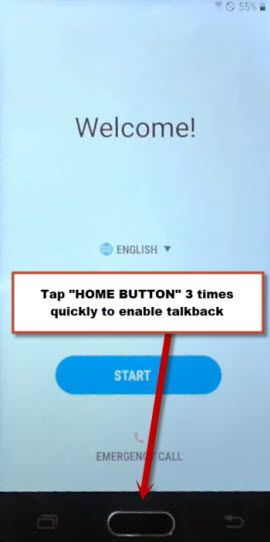
-After hitting 3 times the home button, you must see a flash message regarding turning on talkback.
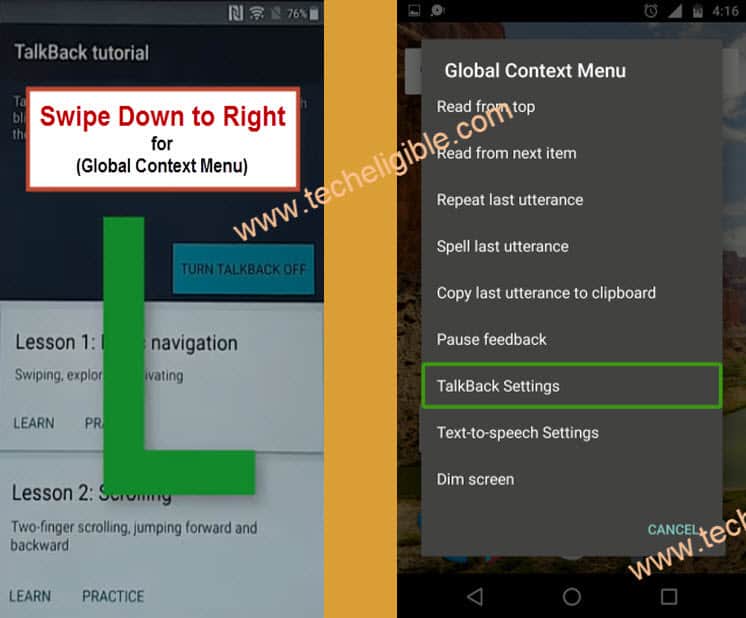
-From the (Welcome) screen, draw “L” shape just swipe down and then swipe right.
-Double tap on “Talkback Settings”.
Note: After drawing “L” letter, you must see (Global Context Menu) screen, if you don’t just keep repeating drawing “L” shape, at 3-4 attempts, you must see this screen.
-Now turn off talkback feature by pressing 3 times again “HOME BUTTON”, you will have a flash popup message of “Talkback disabled”.
-Go all the way down and hit on “Privacy Policy”.
-You will see a popup from bottom, just go to “Internet Browser”.
-After accessing to internet browser, we are going to download frp tools.
Download the Free Tools
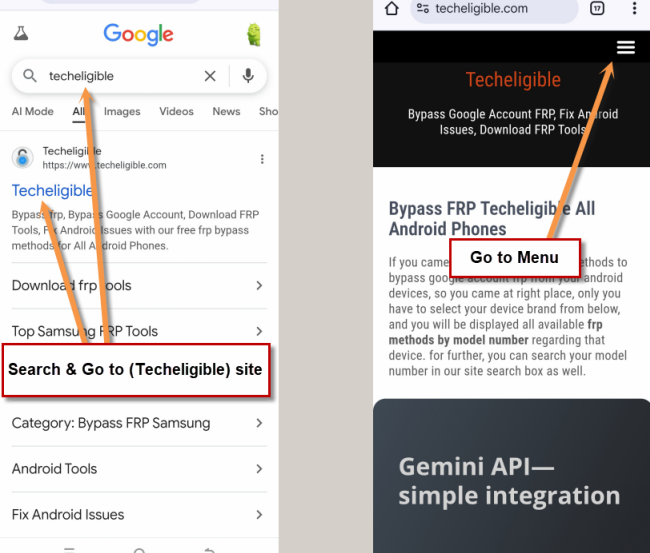
-Make search there with “Techeligible“. After that, go to techeligible site.
-Navigate to “Menu” option from top corner.
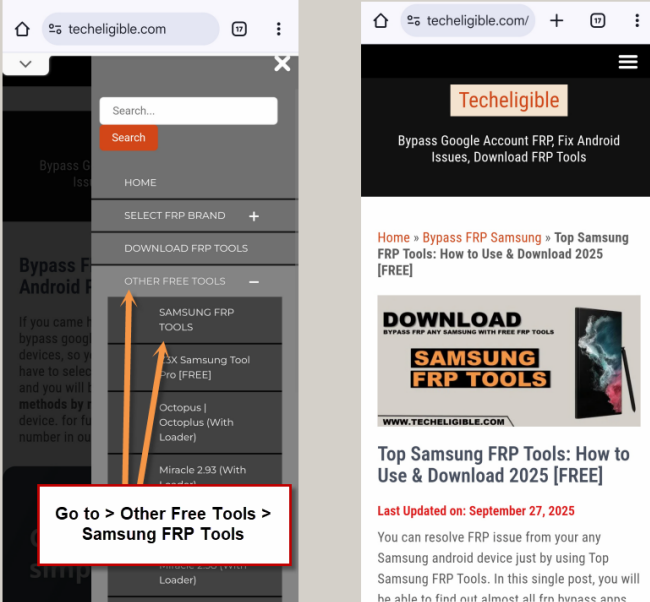
-After that, simply, hit on > Other Free Tools > Samsung FRP Tools.
-Find & Download below 2 apps.
1-Google Account Manager 5 (If your device has android 6 version, so you can download Google Account Manager 6).
2-Account Login.
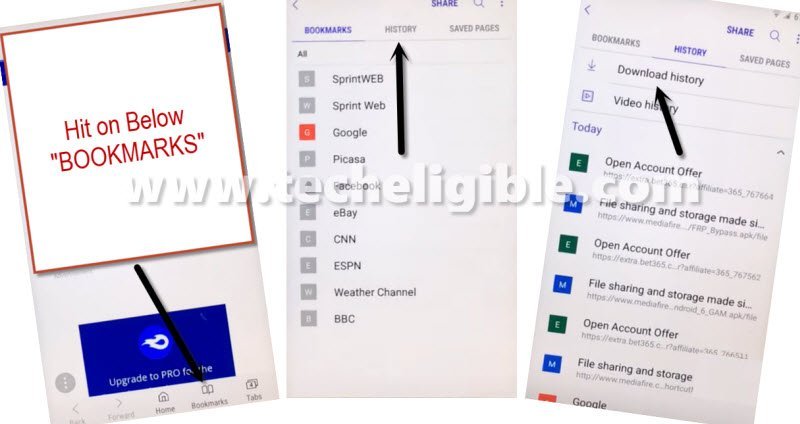
-After successfully downloading both apps, tap on “Bookmarks” from bottom bar, and then tap on “History”, and after that “Download History”.
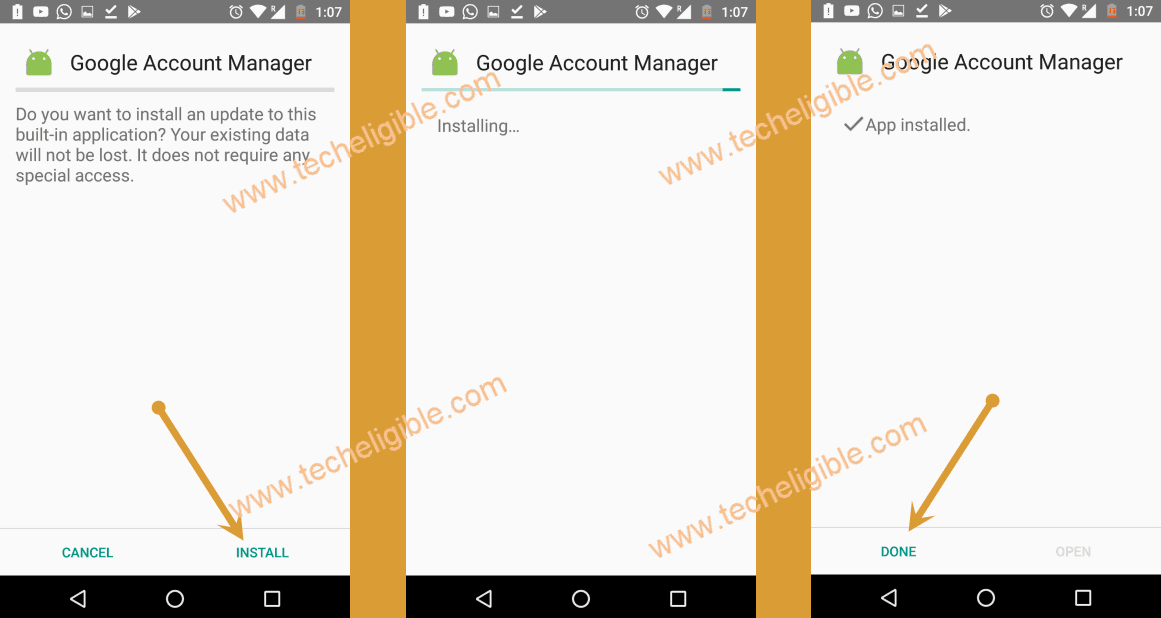
-Install app by tapping on “Google Account Manager 5”, from the popup window, just tap on “Settings”, and enable option “Unknown Sources”.
-Now tap on > Install > Done.
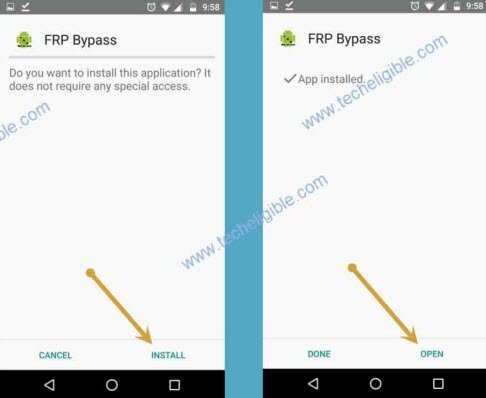
-We need to install 2nd app, just tap on “Account Login”, this will also show you a popup, from there hit on “Settings” and turn on “Unknown Sources” option.
-Tap on > Install > Open.
Sign in with Google Acc
-Tap on “3 dots” from top right corner, and then tap on “Browser Sign-in” option to access the google sign in screen.
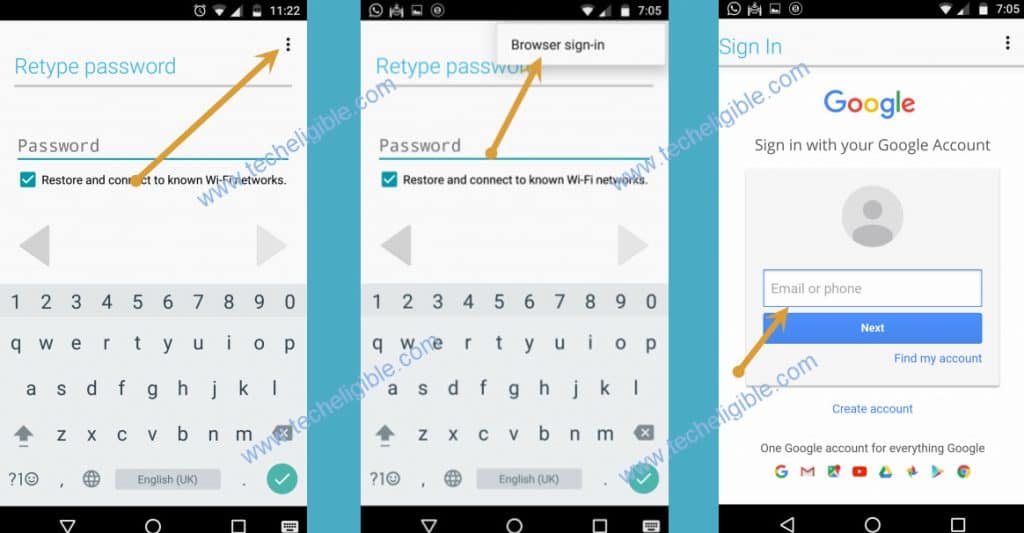
-Let’s just sign in with any valid Gmail Account to complete removed previously added google account, once you did that successfully, you are all done, now you can easily complete your Setup wizard and access to inside device homescreen without having any google verification screen.
Method 2: Bypass FRP Galaxy J1 Mini Prime 2017
-First of all we need to download Odin software and also Exynos File.
| ⇒ Exynos [DOWNLOAD] |
| ⇒ Odin 13.3.1 [DOWNLOAD] |
-After downloading, just extract “Odin” software from winrar archive.
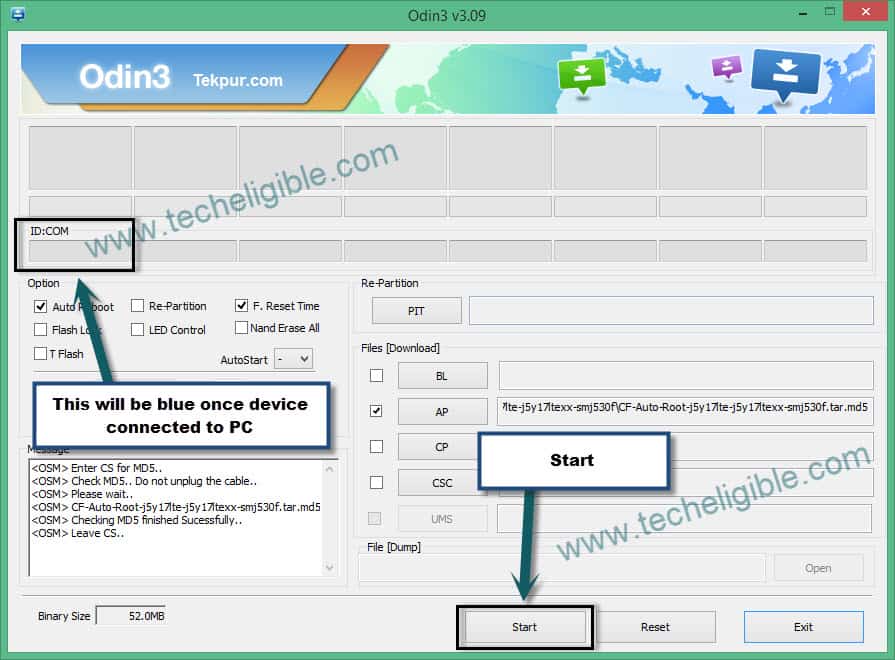
-Now open “Odin” software.
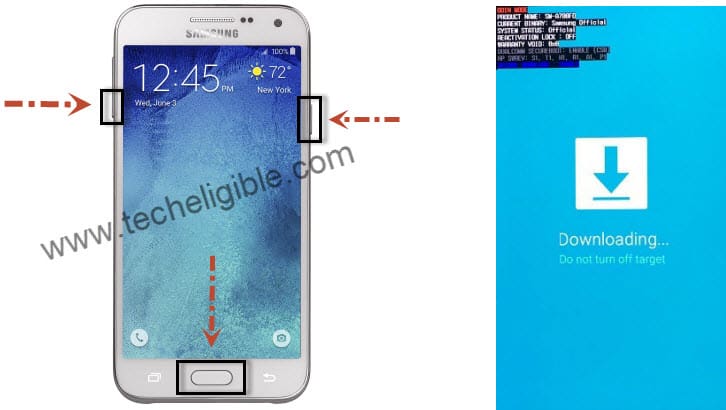
-After that put your device into “Download Mode“.
-Press & hold (Volume Down + Power + Home Buttons) together until you see “Warning!” on your screen.
-After that, press (Volume UP) key to continue.
-Now you have successfully entered into “Download Mode”.
-Connect the device to computer using Micro USB Cable.
-After successfully connected to PC, you will notice that, “ID:COM” will turn to blue in Odin tool, that means your device has successfully been detected by Odin software.
-Click on “AP” button from Odin tool, and then and give file path “Exynos.tar“.
-After that click on “Start” button.
-Now until flashing process done.
-After that, you will see “Pass!” sing on your Odin tool, that means you have successfully flashed your device.
-Perfect, now we just have disconnect our device, and then complete initial setup.
Conclusion
We enabled talkback function in method-1 just by pressing home button 3 times. After that, accessed to google chrome browser and downloaded 2 apk frp apps (Google Account Manager + Account Login). Installed both apps by going to download folder. After that, we setup another google account and completed setup wizard steps.
There is one more method available on FRP bypass Samsung J1 mini Prime, that is (Method-2). We used (Odin Flasher) tool and flashed our Samsung J1 mini prime device with (Xynos) downloaded file. In this process, you need to use PC Windows and USB Cable to connect the phone with PC.