Remove Google FRP Mobicel Neo Without a PC [Updated]
Have you performed hard reset task on your device and forgot already signed in google account? If this is the case! then you won’t be able to skip google verification screen until you get yourself verified with already synced google account. To reach your device without signing in process, follow up this method to Remove Google FRP Mobicel Neo without a PC.
Disclaimer: We highly recommend you to apply this method only on your own device, if you are not owner of this device, or you found this from some where. So you must return this device to its real owner.
Let’s Begin to Remove Google FRP Mobicel Neo:
-We have to turn on Mobicel device & Connect WiFi first by going to (WiFi page).
-After that, come back to (Hello) screen, from there, tap on “Call” icon option from bottom to get into emergency calling screen.
-From there, tap twice times “Emergency information” button.
![]()
-You have to insert any SIM card, that has some contacts number saved already, because, we will use any one random contact to go to next step.
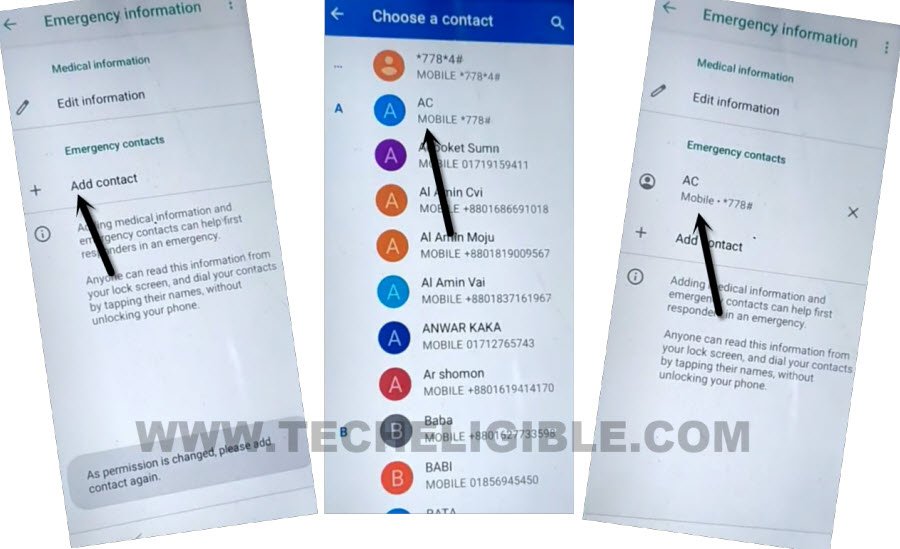
-After that, just tap to “Add Contact” option to see contact list.
-Tap at any random contact name. Tap again on “Contact name” from next screen.
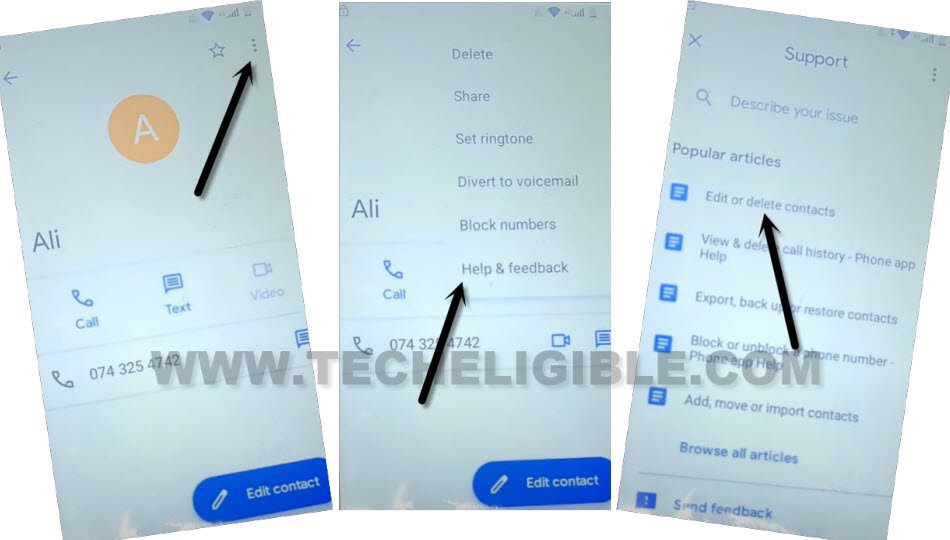
-Tap to “3 dots”, and then tap to “Help & Feedback”.
-Go to “Edit or delete contact” article from the list. You can open any article from there.
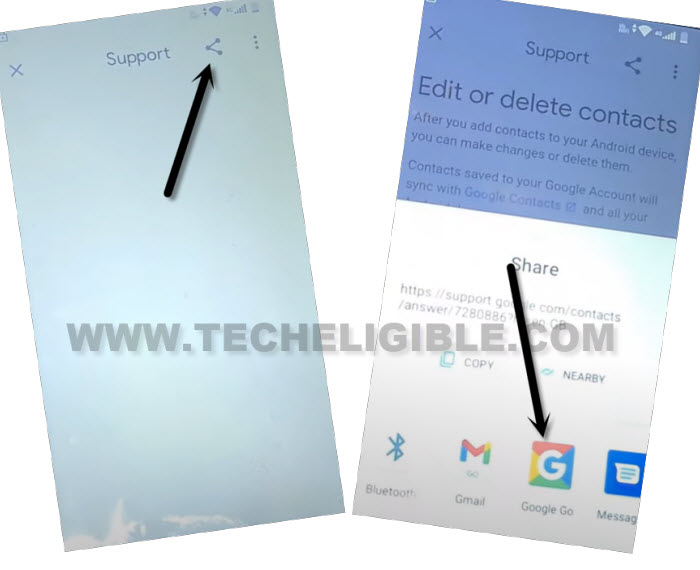
-Afterwards, tap on “Share” icon from the top of the page, and go to “Google Go”.
-Tap on “Use without a google account” from popup window.
-Tap to “Done” to launch this browser successfully.
-Hit on “Google” icon from bottom, after that, tap over “Mic icon”.
-Speak loudly there “Settings”.
-From searched result, tap on “Open Settings” gear icon to reach directly into your device main settings for easily Remove Google FRP Mobicel Neo.
Disable 2 Apps from Default App Page:
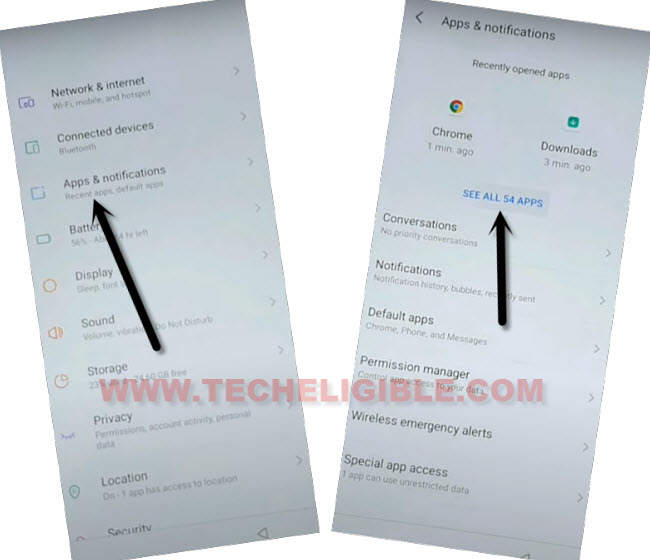
-Tap to > Apps & Notifications > See all apps.
-Afterwards, you have to get displayed hidden apps by tapping on > 3 dots > Show system.
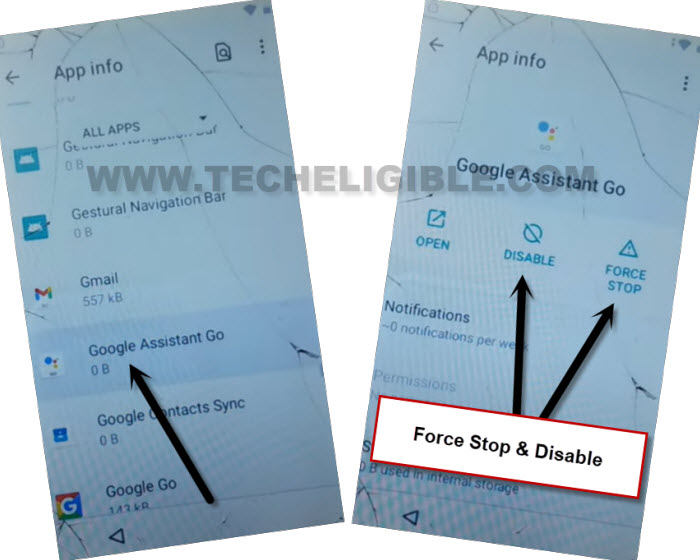
-Find and go to “Google Assistant Go” application.
-Disable & Force stop this app same as shown in below image.
-Go back to app list page by tapping on “Back arrow” from bottom.
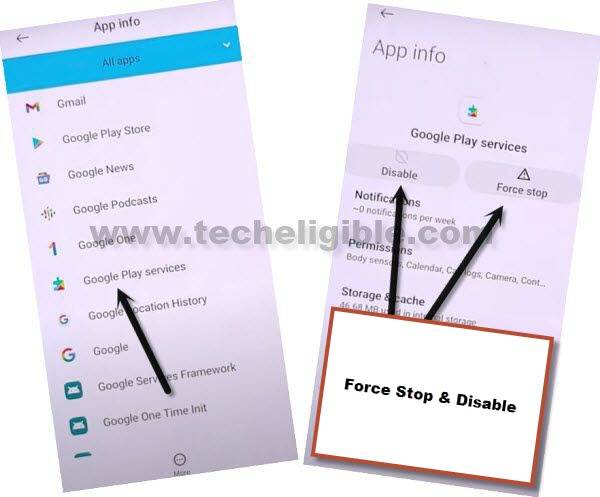
-Find and tap on “Google Play Services”.
-Do same thing with this app too, just disable & force stop this app as well.
-Let’s go back to (Hello) page by hitting back arrow several times from bottom.
-Tap on “Start”, after that wait on loading page. You will reach to (Copy Apps & Data), just tap to “Don’t Copy” option.
-After that, your device will stuck on (Checking for update) screen.
-Just go back to (Connect to WiFi) page by hitting back arrow 1-2 times. From there, hit on > Setup offline > Continue.
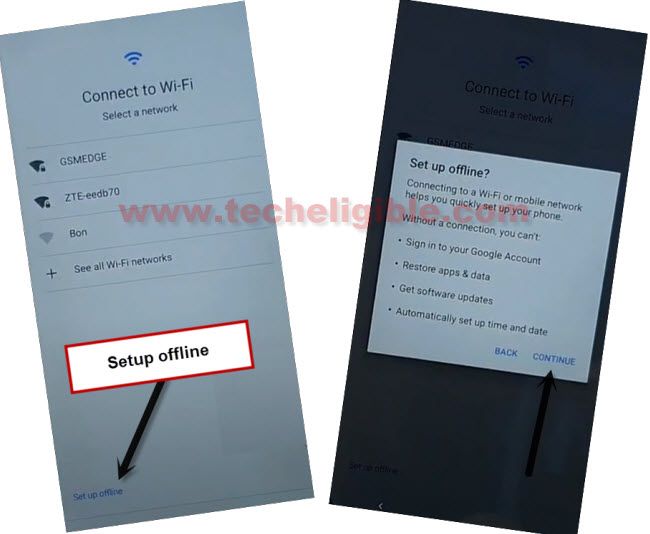
-Go back again on (Hello) page by hitting back arrow.
Enable Back Google Play Services App:
-Tap on “Call” icon option from bottom to get into emergency calling screen.
-From there, tap twice times “Emergency information” button.
![]()
-You have to insert any SIM card, that has some contacts number saved already, because, we will use any one random contact to go to next step.
-After that, just tap to “Add Contact” option to see contact list.
-Tap at any random contact name. Tap again on “Contact name” from next screen.
-Tap to > 3 dots > Share > Continue > Gmail.
-From Gmail page, just hit on > Next Arrow > Done.
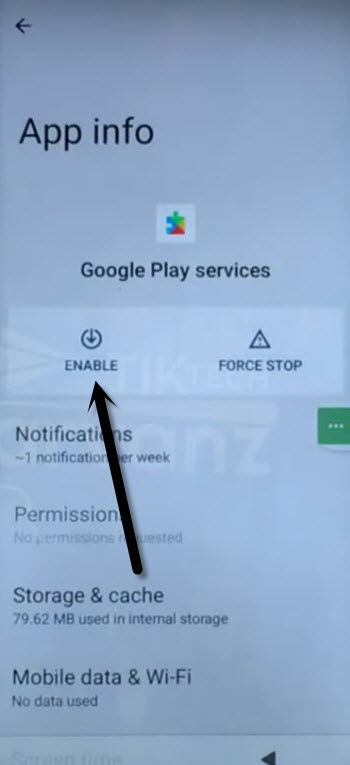
-You will be displayed a popup window asking for enabling google play services. Just tap to “Enable” option from popup window.
-Afterwards, tap to “Enable” button to enable google play services application.
-Go all the way back to (Hello) page again.
-From there, tap to “Start” button. wait on loading screen, after that, tap to “Don’t Copy” option.
-From loading page, just hit on “Back Arrow” 1-2 times, after that, you will reach back on (Connect to WiFi) page. From there, hit on > Setup offline > Continue.
-Its all done from Remove Google FRP Mobicel Neo, you can now easily complete all setup wizard steps without any help. Thanks for visitng us.
