
Have you lost access to your Umidigi Bison GT phone due to hard reset and forgetting previously synced Gmail ID? If this is the case, then, you can try our this below step by step method to fix this FRP problem. Because, your device is on FRP protection with old forgotten google account. You will have to Bypass Google Account Umidigi Bison GT in order use again your device and setup new FRP protection and updated account.
Disclaimer: We highly recommend you to apply this method only on your own device. If you are not owner of this device, or you found this from some where, you must return to its real owner.
Let’s Start to Bypass Google Account Umidigi Bison GT:
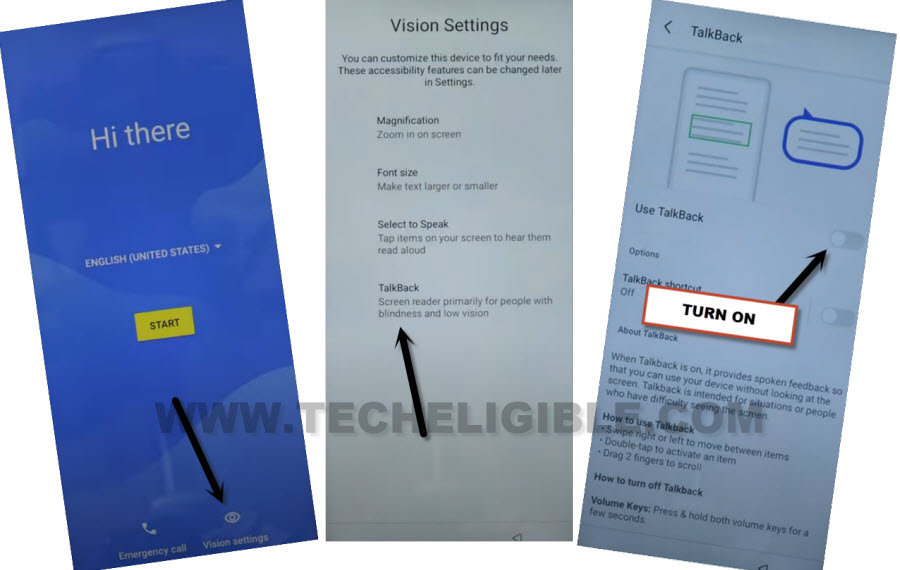
-Switch your Umidigi phone & Connect WiFi. After that, you have to access back to main (Hi there) screen.
-From here, we are gonna enable (Talkback function). Just go to > Vision Settings > Talkback.
-From next talkback page, just enable “Use Talkback” function.
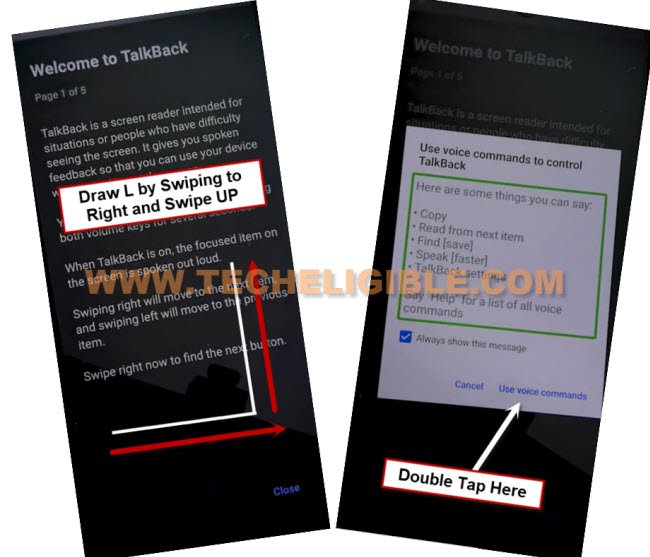
-You will be one a (Welcome to Talkback) page. Let’s swipe Right and Swipe Up. By doing this, you will have another popup window.
-From the popup screen, double tap on > While using the app > Use Voice Command.
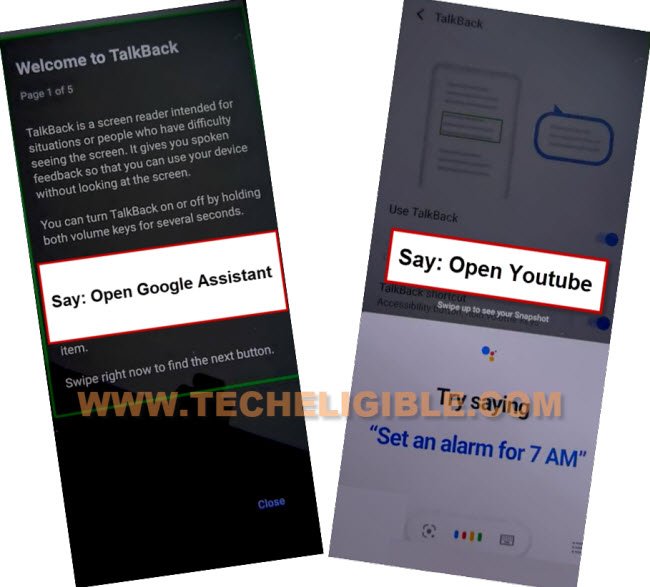
-You will see a green colored boarder on screen. After seeing this green colored lines, just speak loudly “Open Google Assistant”.
-After that, you will see another popup screen at the bottom. Just speak loudly “Open Youtube”.
-Once you access to youtube website. Just turn off talkback now by long pressing both keys (Volume UP + Down). Keep holding both keys until you see popup screen. From there double tap on “Turn on” option.
-After that, long hold again both buttons (Volume UP + Down). You will be displayed a flash message of (Talkback is turned off)
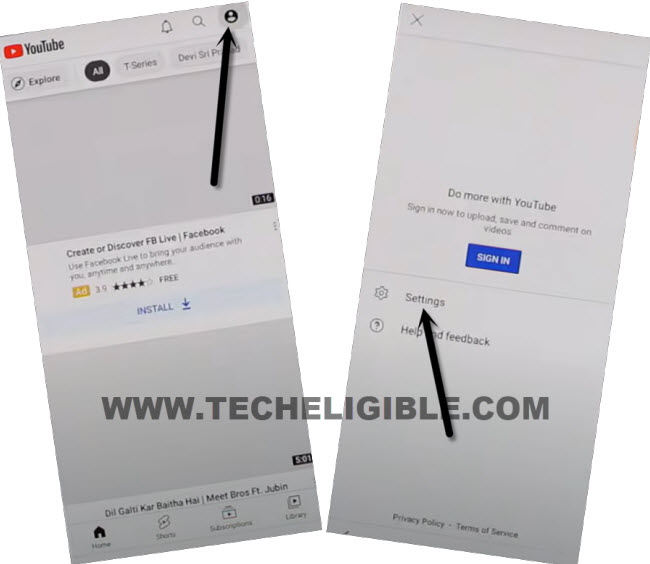
-After successfully disabling talkback function. From youtube webpage, just tap on a “Account” from top corner and tap to “Settings”.
-Reach to google chrome browser page by hitting on > About > Youtube terms of service > Accept & Continue > No Thanks.
Go to Settings Page to Turn on Accessibility:
-Type in the browser search box “Techeligible“. After that, go to same searched result as shown in below image to access official techeligible site.
-Tap to “Menu” icon from top corner and hit on “Download FRP Tools” option from there.

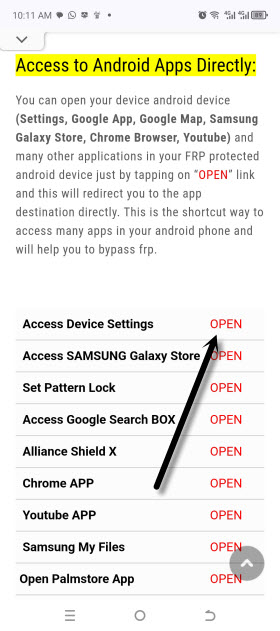
-From there, just hit on “Access Device Settings” option to access to Umidigi bison GT main settings page.
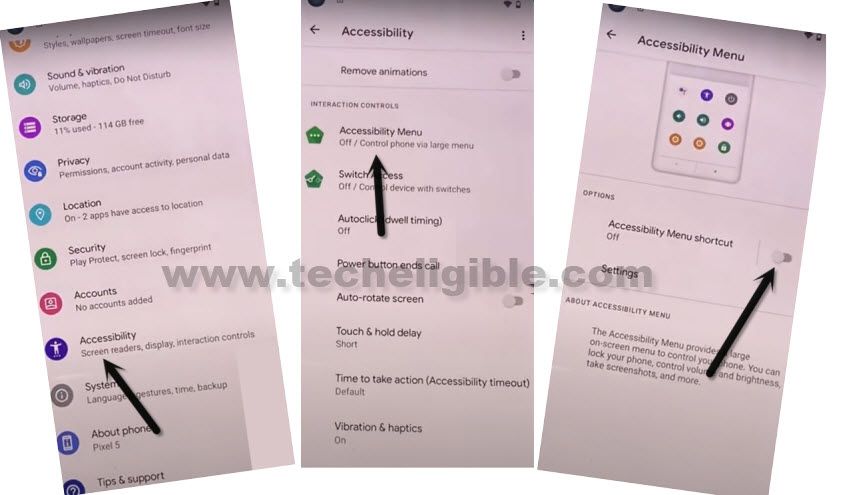
-We’re going to enable (Accessibility) function for our device by going on > Accessibility > Accessibility Menu > Accessibility Menu Shortcut.
-From popup window, tap on > Allow > Got it.
-After that, 3 dots green icon will stick on the right edge of your device screen.
Access to main App Installation Page:
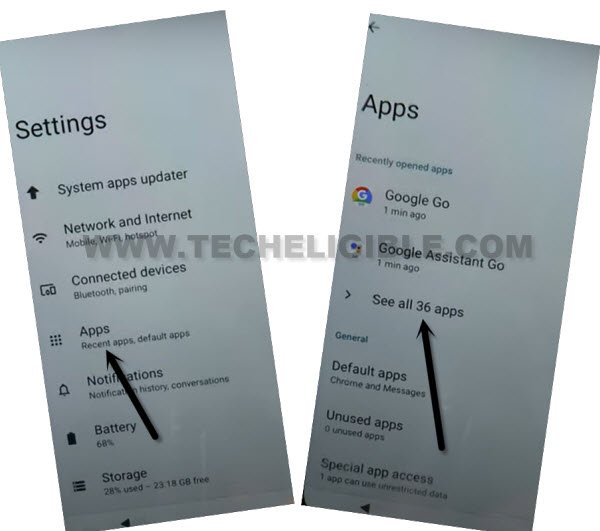
-Tap on back arrow to return on to main (Settings) screen to Bypass Google Account Umidigi Bison GT.
-Go on > Apps > See All Apps.
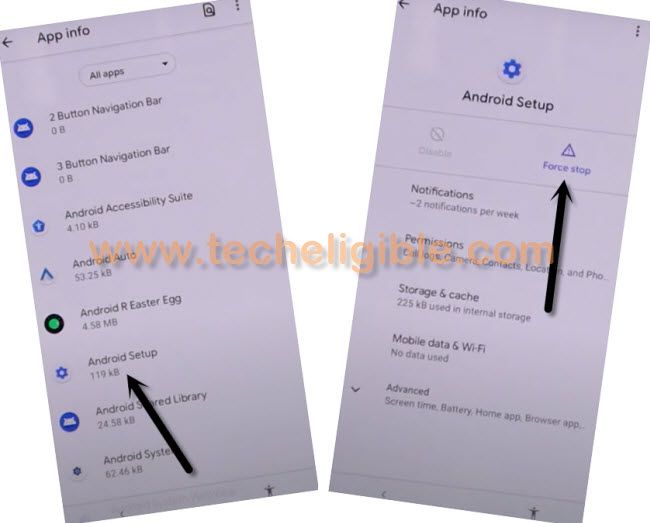
-You will have huge already installed apps there. From there, find and go to > Android Setup > Force Stop > Ok.
Note: Hit on a same (Android Setup) app which is mentioned in below image.
-Go back to app list page again.
-After that, you’ve to find and go to “Google Play Services” app.
-Let’s Disable & Force stop this too same as shown in below image.
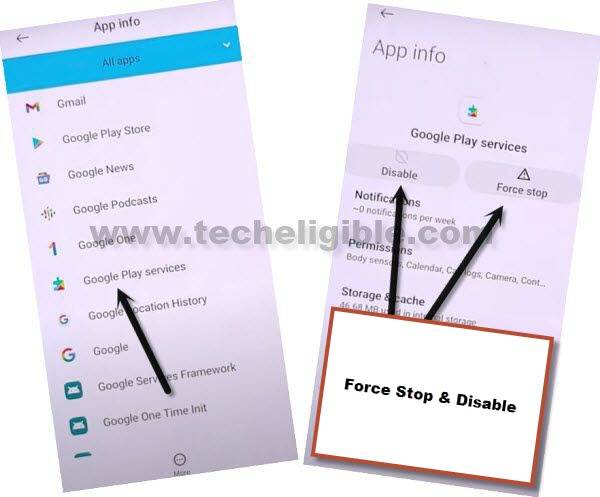
-Once the apps are disabled respectively. You have to restart your device.
Finish Setup Wizard Steps of Umidigi Bison GT:
-After restarting is completed. From first startup screen, just go to > Start > Skip.
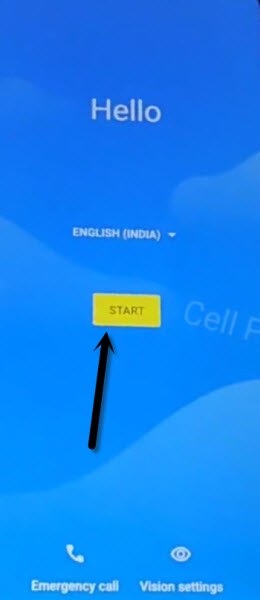
-You will see a loading page there. Just over there for 20-30 seconds. After that, hit on a “Back Arrow” icon.
-You will access to (Connect to WiFi) screen. From there, tap on a “3 dots” icon.

-You will be shown some options there in popup screen. Just go to “Assistant” and hit on a “Settings” option from bottom right corner.
-Tap to “Enable” option to enable google app again.
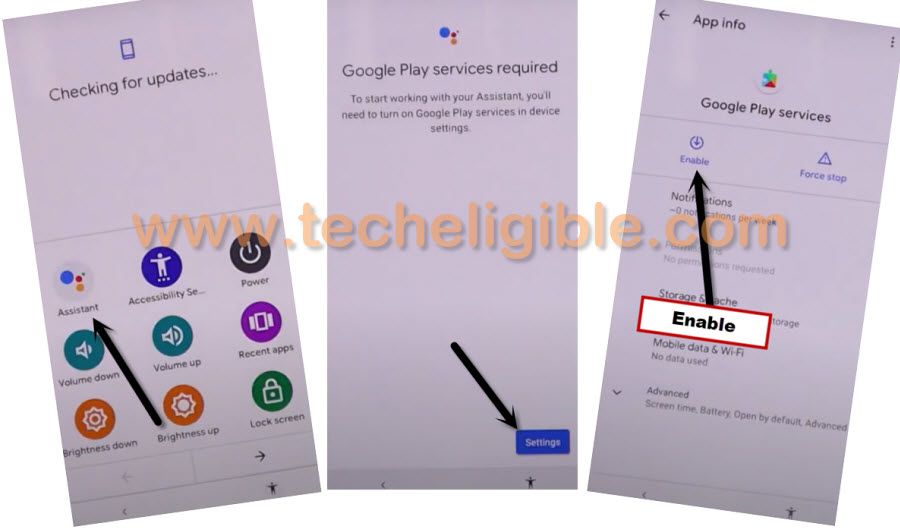
-After successfully enabling google app. Let’s go back to (Connect to WiFi) screen to Bypass Google Account Umidigi Bison GT.
-Complete setup wizard steps now by tapping on > Setup offline > Continue.
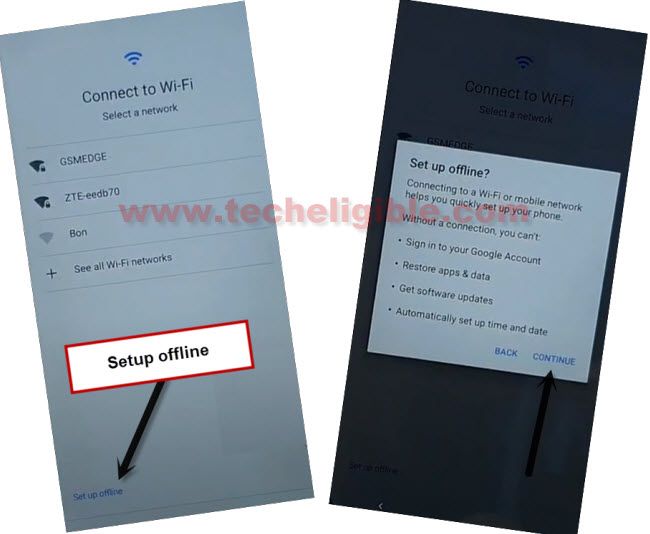
-Complete other remaining step of setup wizard steps on your own. Its all done now. Thanks for visiting us.