
Are you still stuck on google sign in screen and unable to access back to your device main home-screen after hard reset? That happens usually when someone hard reset the device without remembering already signed in google account. After that, FPR protection do not allow you go through google sign in screen without signing in with the already setup google account. To fix your this issue on your own, follow up below steps to Bypass Google Account Umidigi G1 Max.
Disclaimer: We highly recommend you to apply this method only on your own device. If you are not owner of this device, or you found this from some where, you must return to its real owner.
Let’s Start to Bypass Google Account Umidigi G1 Max:
-Turn on device and connect WiFi first. After that, get back on a (Hi there) screen.
-Enable talkback function by going to > Vision Settings > Talkback. After that, turn on “Use Talkback” option.
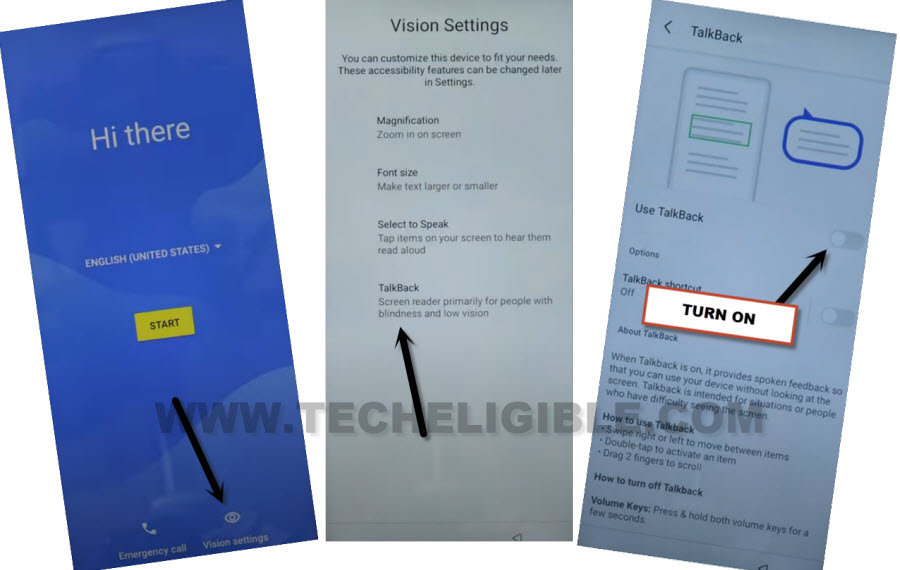
-After talkback is enabled successfully, just swipe Right and Swipe Up on screen same as shown in below image.
-You will see a popup screen. Just double hit on > While using the app > Use Voice Command.
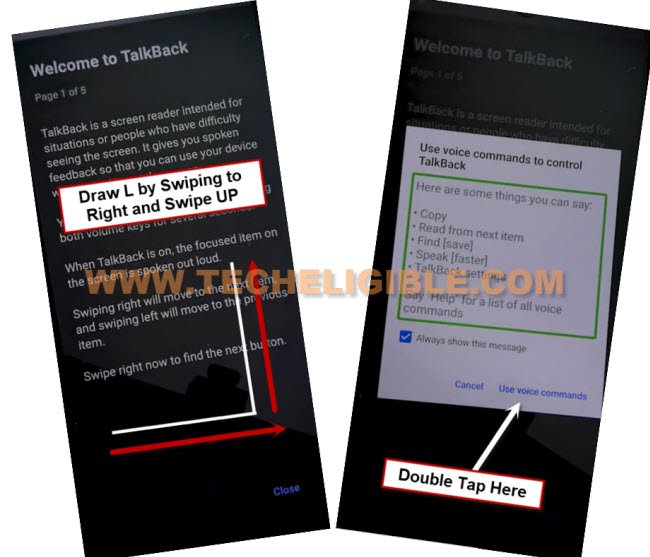
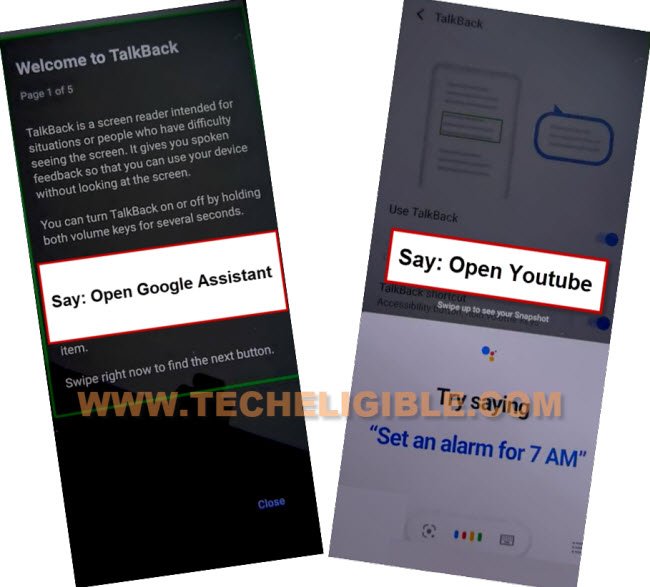
-Wait there until you have green colored boarder on screen. After seeing green boarder, just say loudly “Open Google Assistant”.
-Few seconds later, you will see another popup window. Just speak loudly “Open Youtube”.
-We don’t need talkback function anymore now. Let’s disable this by long holding both keys (Volume UP + Down). From popup screen, double tap to “Turn on” button.
-Long hold again both keys (Volume UP + Down). Your talkback function has been fully turned off.
-From youtube page, tap to > Human icon > Settings.
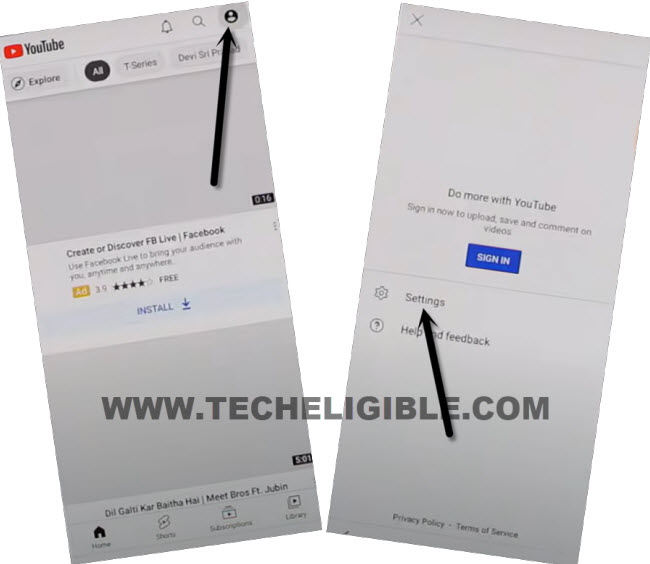
-After that, from next screen, tap on > About > Youtube terms of services.
Enable Accessibility Function from Settings:
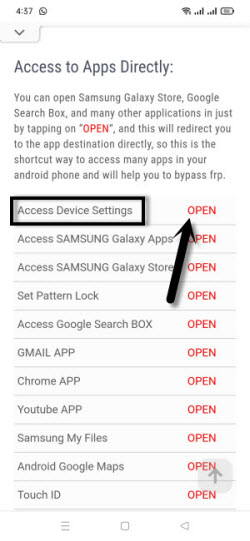
-Access to techeligible website. After that, go to official frp tools page from there by hitting on “Menu icon” from top corner.
-Tap to “Download FRP Tools” text from sidebar menu.

-Hit on a “Access Device Settings” option to reach directly in your device main settings page.
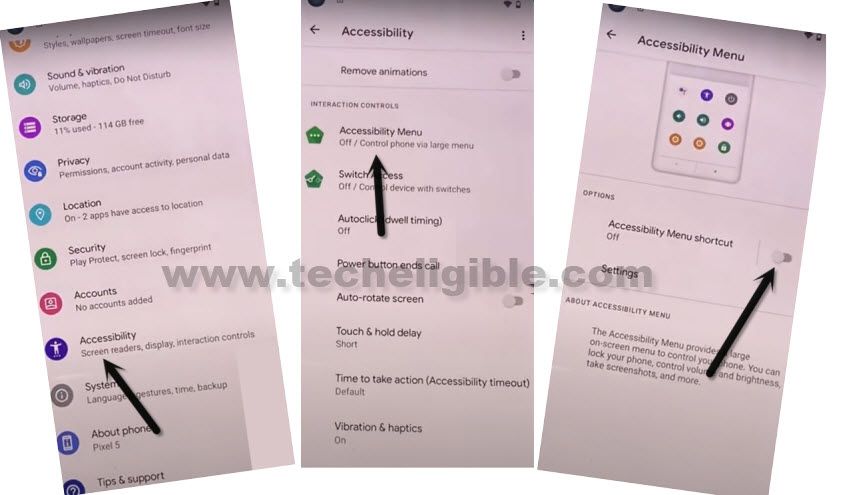
-Tap to > Accessibility > Accessibility Menu. Turn on “Accessibility Menu Shortcut” from the screen.
-From popup window, just go to > Allow > Got it.
-After enabling accessibility function, you will start having “3 dots” icon on right edge of your device screen.
-We’re gonna disable some apps from app list screen.
Go to (Apps) from Settings:
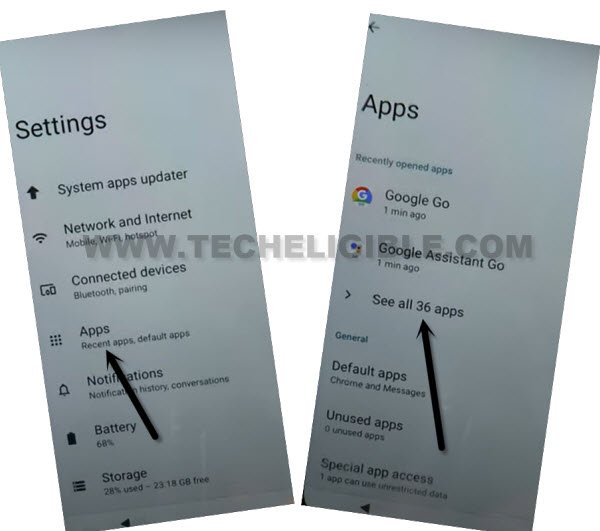
-Return on main settings page. After that, tap on “Apps”.
-Hit on “See All Apps” option to reach to all installed apps screen.
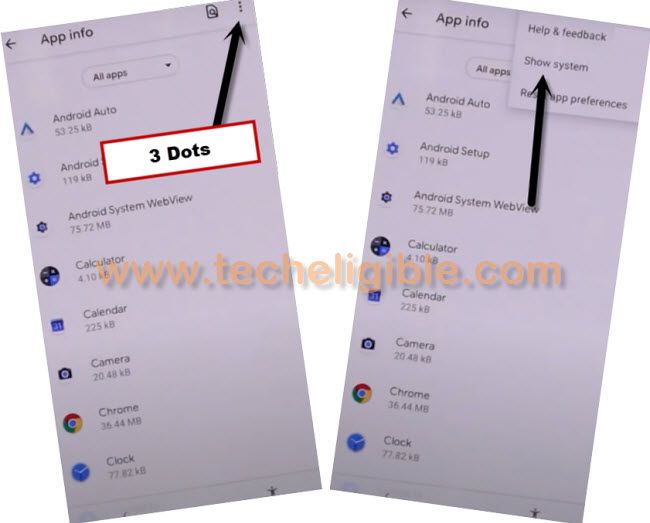
-Get displayed all hidden apps now by tapping at “3 dots” icon and tap on “Show system”.
-Let’s force and disable mentioned apps one by one.
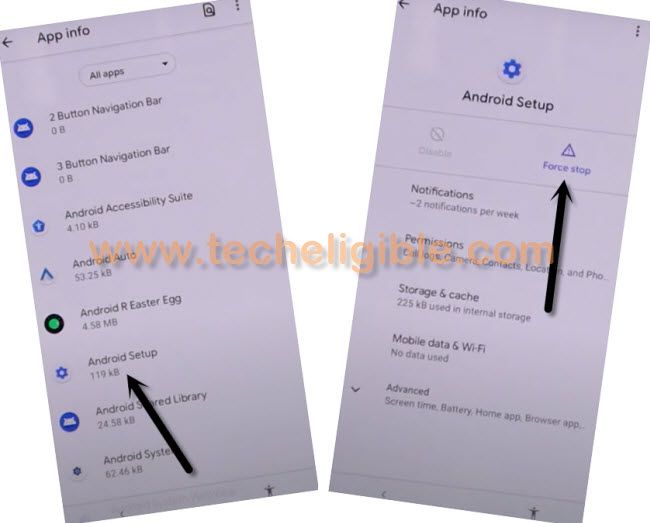
-Firstly, from app list page, find and go to “Android Setup” app same as shown in below image.
-From there, tap to > Force Stop > Ok.
-We’ve to disable google play services app now. This is the main app. After disabling this app, we can easily Bypass Google Account Umidigi G1 Max.
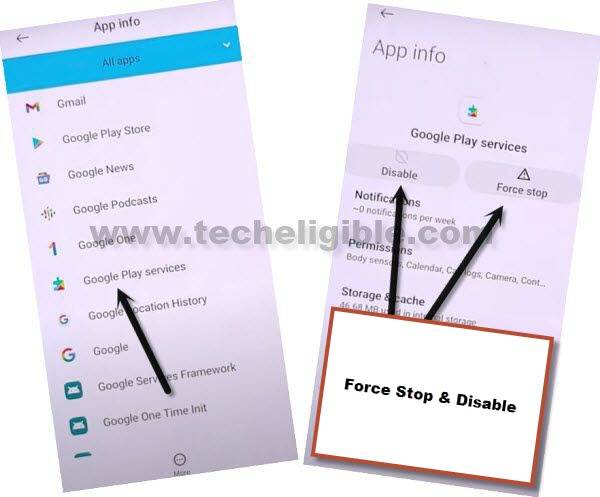
-Go back to main “App list” screen. From there, find and tap on “Google Play Services”.
-Afterwards, tap on > Disable > Disable app.
-Tap also on > Force Stop > Ok. After that, this app will be fully disabled. and you can login back with your google account.
-You can restart your device now.
Complete Startup Steps:
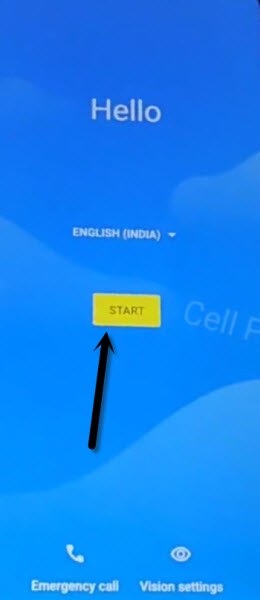
-From first start up page. Go to > Start > Skip.
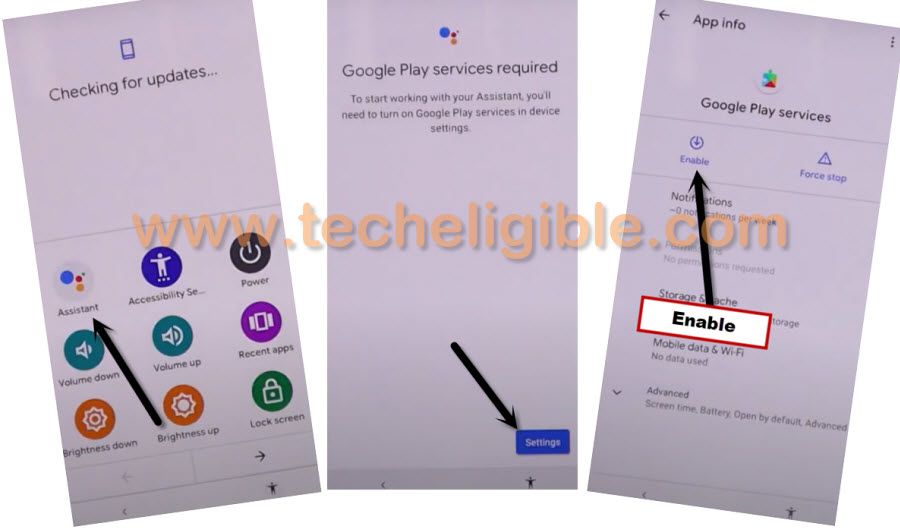
-Wait for at least 30 sec on a loading page. Tap on “Back Arrow” icon to go back.
-After that, you will be taken back to (Connect to WiFi) screen. From this page, just go to “3 dots” icon.

-Hit on an > Assistant > Settings > Enable.
-We have enabled back google play services app successfully. We can now easily complete setup wizard steps.
-Go back on (Connect to WiFi) screen.
-From WiFi screen, tap to > Setup offline > Continue.
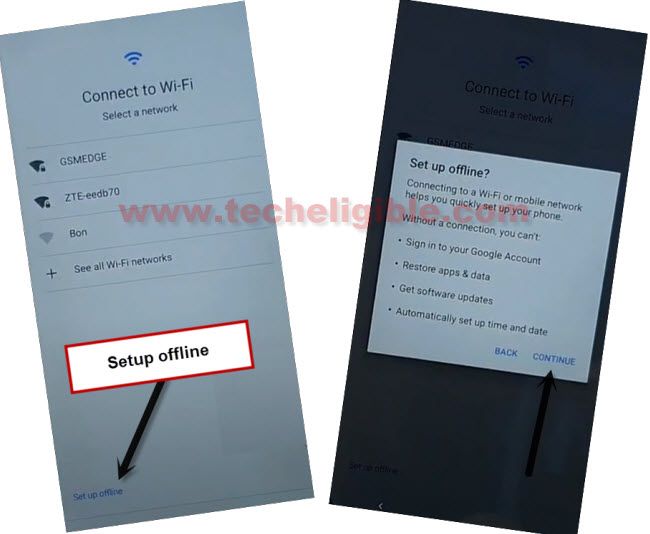
-Its all done now from bypassing frp account on Umidigi G1 Max. You can finish up remaining steps on your own.