Unable to access back to your device main home-screen after factory reset? If you’ve lost your google account, that was signed-in on Samsung F13. Them, your device is on FRP protection. You need a way to fix this accessing issue through the method of Bypass FRP Samsung Galaxy F13. Here 2 guidelines available on (Android 13/12) version Samsung devices. Check out both one by one.
Disclaimer: We highly recommend you to apply this method only on your own device. If you are not owner of Galaxy F13, or you found this from some where, you must return to its real owner. This FRP bypass process is just for educational purpose.
| 1st FRP Method: Samsung Galaxy F13 [By Samfw Tool Android 13/12] |
| 2nd FRP Method : Samsung Galaxy F13 [By XShare App Android 12] |
1st Method: Bypass FRP Samsung Galaxy F13 By Samfw Tool (Android 13/12 By PC)
Using Samfw tool, we achieve our FRP bypass goal on Samsung F13. Firstly download (Samfw) free software on your PC, after that, connect your Samsung F13 device with PC and install proper Samsung USB driver. This allow your F13 to be detected by the Samfw software. Click on (Remove FRP) button to bypass frp. You can follow these all in steps by step guideline from here.
-Firstly, download free tool in PC or laptop from below link.
⇒ SamFw tool V3.31 in PC [DOWNLOAD].
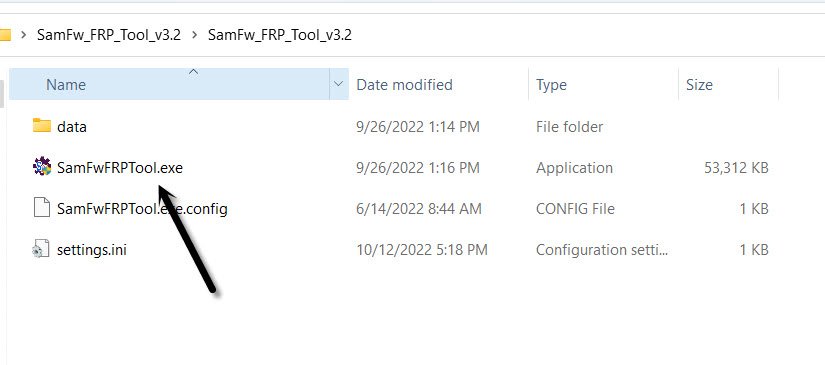
-Afterwards, connect the FRP protected Samsung F13 with PC.
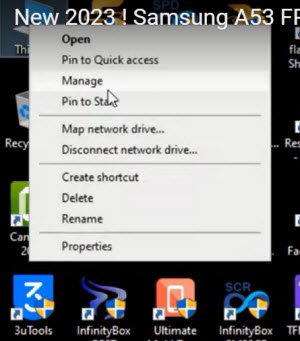
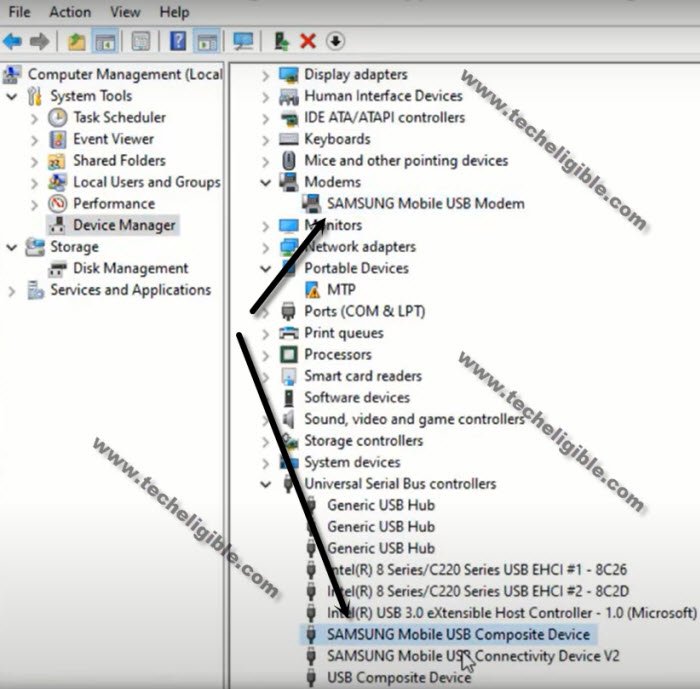
-Do make sure, whether Samsung F13 device has been connected successfully or not, to do this, right click on (This PC / My Computer), and click to “Manage”.
-Go to “Device Manager”.
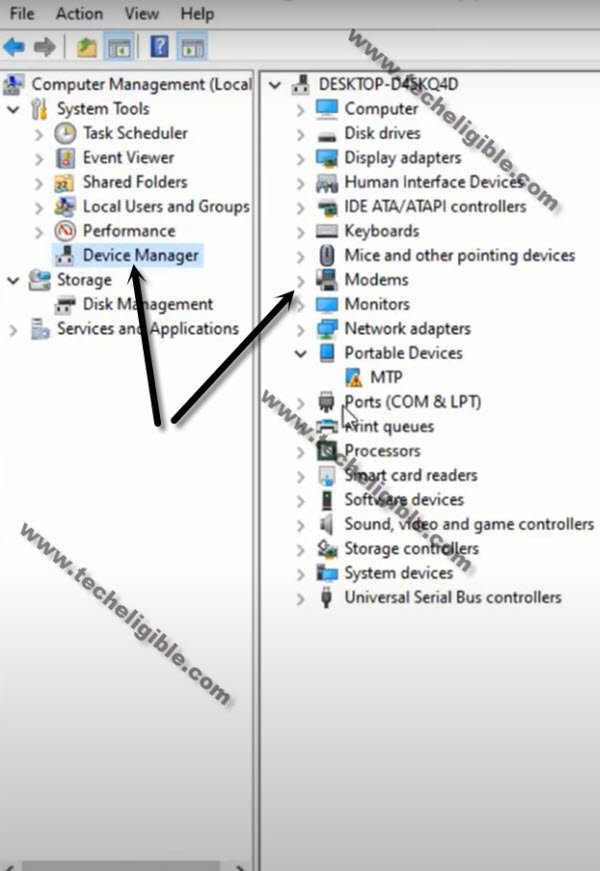
-There you will be able to see your Samsung F13 connected detail same as shown in below image.
Note: If you see there any (Exclamation Sign) on your Samsung USB modem hardware, that means your computer is required to install proper Samsung USB drivers, well, while opening (SamFw) tool, you must receive a popup message of installing Samsung USB driver, so you can install those drivers from there easily, you can also Download Samsung drivers here.
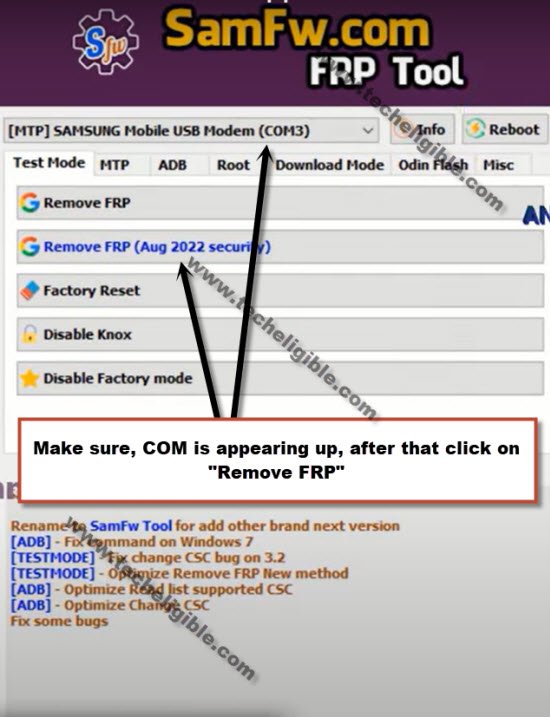
Click the Button (Remove FRP):
-Once the F13 is detected successfully, just go to (SamFw) pc software,, and click on “Remove FRP (Aug 2022 security)” button.
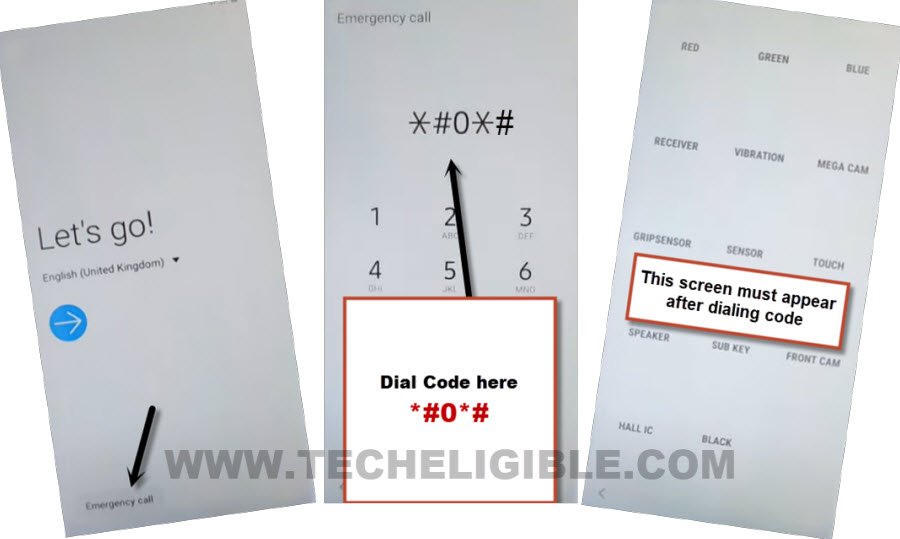
-You will receive a popup in Samfw tool, saying dial code in your Samsung F13, but do not hit on “OK” button.
-Dial this code “*#0*#” from Samsung F13 by tapping on (Emergency Call) option.
-After that, you will see there a (Blank) boxes screen.
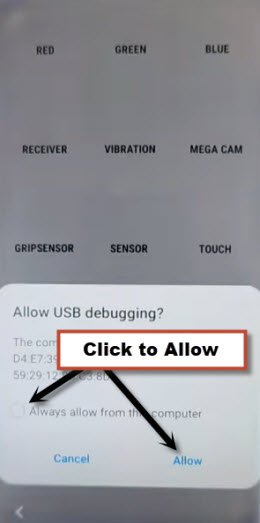
-Go back to your PC screen, and click on “OK” from enable test mode popup, after that you will receive another popup in your Samsung galaxy device screen saying (Allow USB Debugging?).
-Select option “Always allow from this computer”, and after that, tap to “Allow”.
Note: If you face any trouble, reconnect Galaxy F13 and try again.
-Within few seconds or few minutes, you will receive popup in your PC screen saying (FRP Remove Successfully), just hit on “Yes” button or you will see “OK” in green color in your software box.
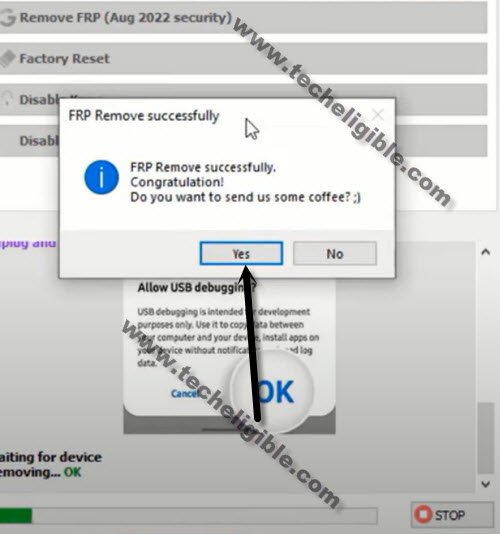
-The device may auto restart, or you just swipe up the screen, wait over there, new popup will appear, just select (Samsung Setup Wizard), and select “Always” to Bypass Google Account on Samsung F13.
-Tap on “Always” from Samsung Setup wizard screen, after that, you will see a blinking black screen, just press “Power button” once to turn off screen only, after that press again the (Power Button) to wake up the screen, and swipe up screen this time, just wait over there for few minutes. and you will get into your device homescreen successfully, thanks for visiting us.
2nd Method: Bypass FRP Samsung Galaxy F13 By Enabnling Talkback [Android 12]
-If you can’t access to your Samsung Galaxy F13 main home-screen. Then, go back to first (Welcome) screen.
-From there, long hold both keys (Volume UP + Down). You will be shown a popup screen, just tap to “Use” option.
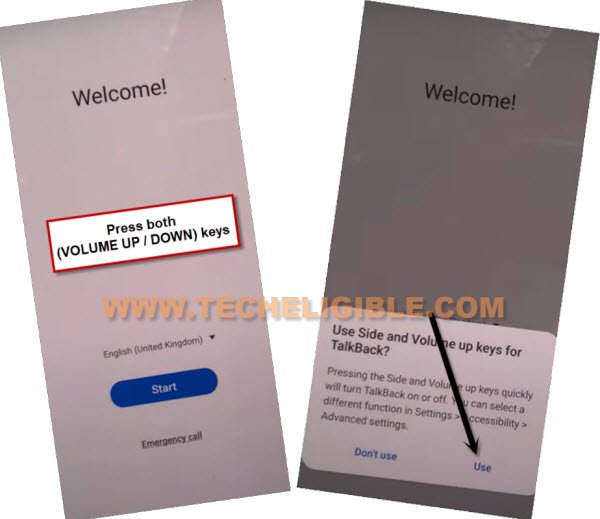
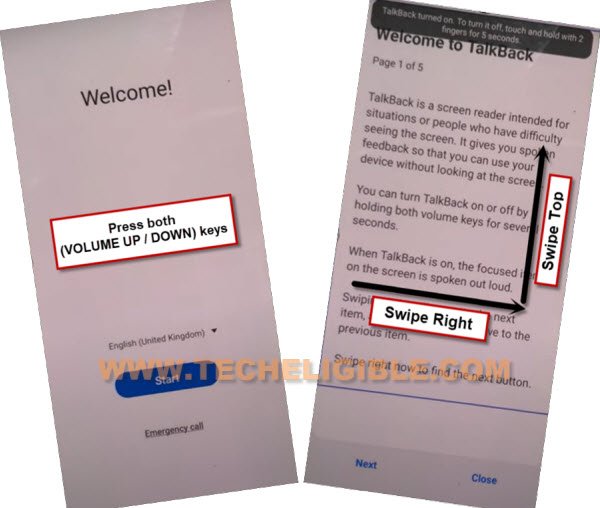
-Let’s long hold again both buttons (Volume UP + Down). After that, the talkback function will be enabled completely.
-After the talkback function is enabled complete, just back on first (swipe right and swipe up on the screen.
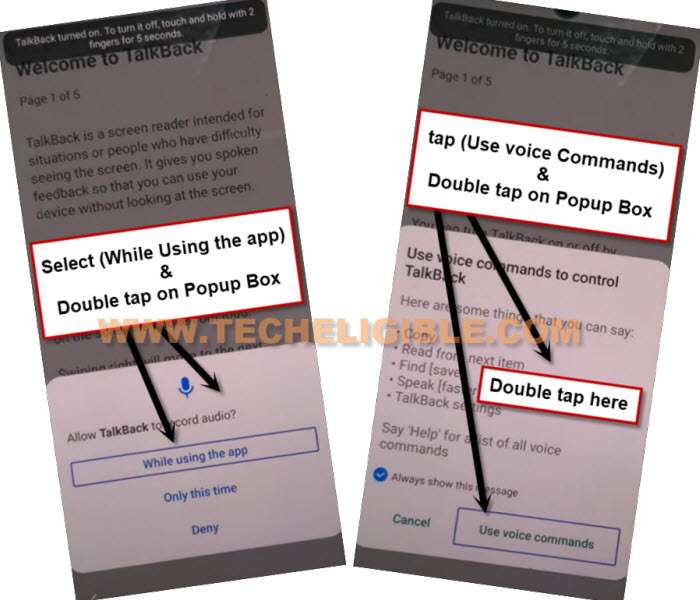
-You will see a popup window, just go to > While using the app > Use voice command.
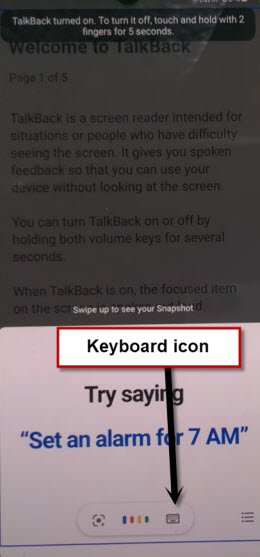
-Wait over the next screen. As soon as, you see a green colored lines on screen, just speak loudly “Open Google Assistant”.
-Go to “Keyboard” icon.
 `
`
-We are gonna turn off talkback function. Do same thing again by long holding both buttons (Volume UP/DOWN). After that, you will be shown a popup window.
-Let’s long hold again both buttons (Volume UP/DOWN). After that, the talkback feature will be turned off.
-We have to reach to official youtube site. Search there “Youtube” and go to “Youtube” searched result.
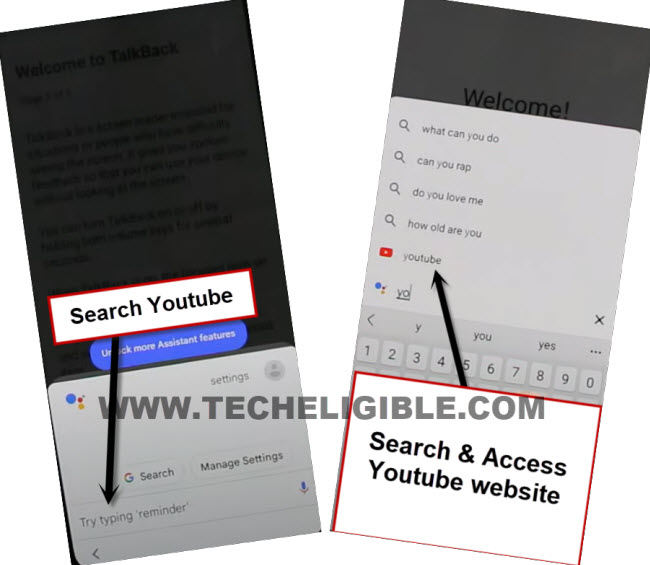
-Congrats on accessing to youtube website. Hit over the “Human icon” from top corner and go to “Settings”.
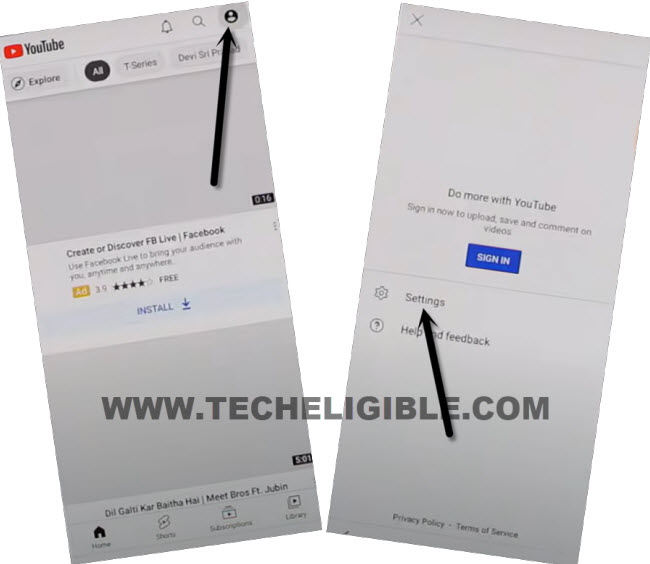
-Tap to > About > Youtube terms of services.
-From chrome popup screen, go to >Accept & Continue > No Thanks.
Download FRP APK Applications on Samsung F13:
-Search in google chrome browser “Techeligible” and visit techeligible official site. Go to “Menu” option from top corner.
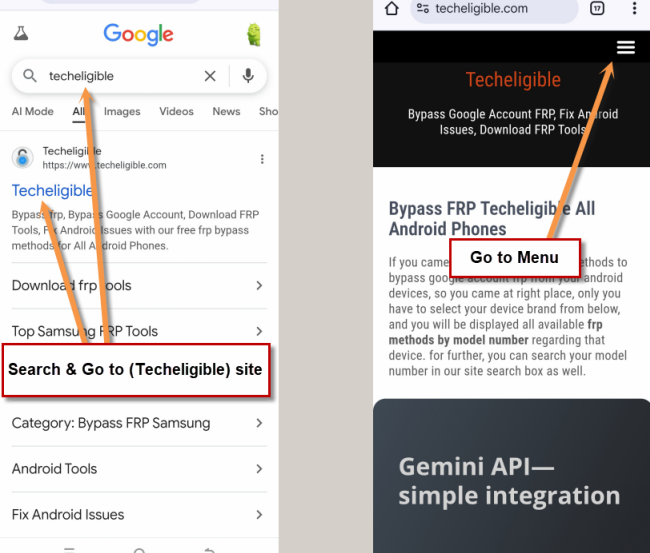
-Tap on > Other Free Tools > Samsung FRP Tools.
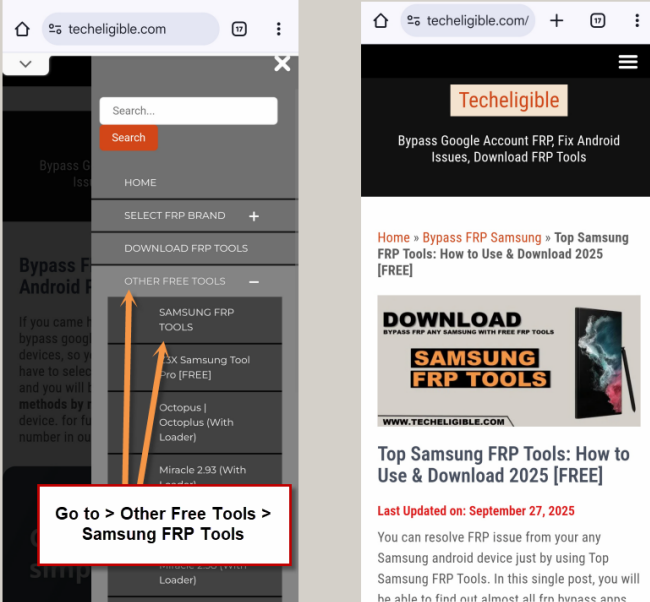
-Download from there below applications.
1/ Package Disabler Pro.
2/ Notification Bar.
-From FRP Tools page, just tap on “Open Galaxy Store” option. This will redirect you on galaxy store app.
-Let’s check mark “Get news and special offer” option and tap on “Continue” option.
-You may not face update option on latest security device. From there, just tap to “Continue” option.
| Note: If you see update screen, then, tap on “Update” option, this will start downloading updates. As soon as downloading is completed and installation process starts, just quickly tap to “Back Arrow” icon from bottom. This is how, you can use back your galaxy store app without stuck on update process. |
-After accessing to Galaxy Store, just tap to “Continue” option. After that, go to “Skip” from top corner.
-From popup window, tap to > While using the app > Done.
-Hit on a “Search” icon from top corner of the galaxy store app. Search and install “Files Shortcut” application.
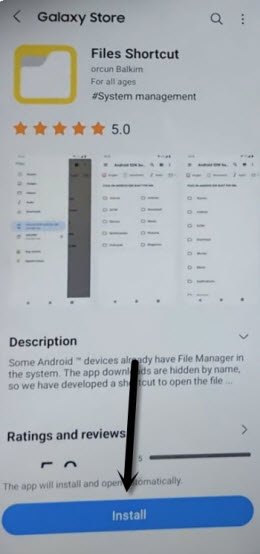
-After installing process is done.
-Let’s search and install also “Xshare” application for FRP Bypass.

-Once the installing process is done, just tap to “Open” button from there.

-Hit on “Agree and continue”.
-You may have a popup window, just tap on “While using the app” option. After that, tap to “Close” option from status saver popup screen.
-Tap to “Grant Permission” button from xshare app page. But, this will not go away.

-Tap to “Receive” button from xhsare app screen to Bypass FRP Samsung Galaxy F13.
-You will be displayed a popup window of (Allow) options. You have to allow all options 4 times one by one to start frp bypass process.

-Tap 4 times on first “Allow” option from popup window.
-Tap 4 times on 2nd “Allow” option form popup window.
-Do same thing with 3rd and 4th (Allow) option.
-Once its all done, just tap to “Cross” icon from popup window to close this.
-Go back to (Galaxy Store) app. From there, search and open “Files Shortcut” application.
-After hitting on “Open” option, you will be taken to the file manager screen of your Samsung F13 device. From there, go to “Download” folder to see you recently downloaded applications.
Install Notification Bar App on Samsung Galaxy F13:
-From there, we are gonna install (Notification bar) application to bypass google account. Let’s tap to “Notification bar” application.
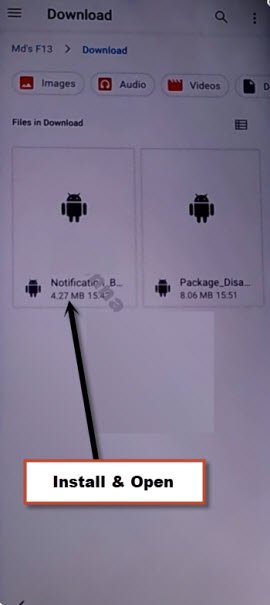
-If you see a google chrome popup window, just tap to “Settings” and turn on “Allow form this sources” option.
-Go back to download folder again. From there, install and open “Notification bar” app in your Samsung Galaxy device.
-Let’s tap to> Accessibility > Installed apps.
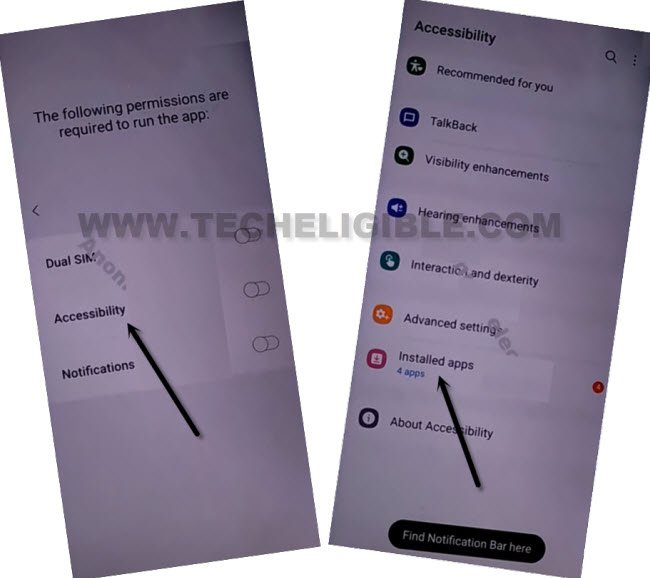
-We are gonna turn on notification bar ap, just tap on “Notification bar” and then, turn on option from top same as shown in below image to bypass frp.
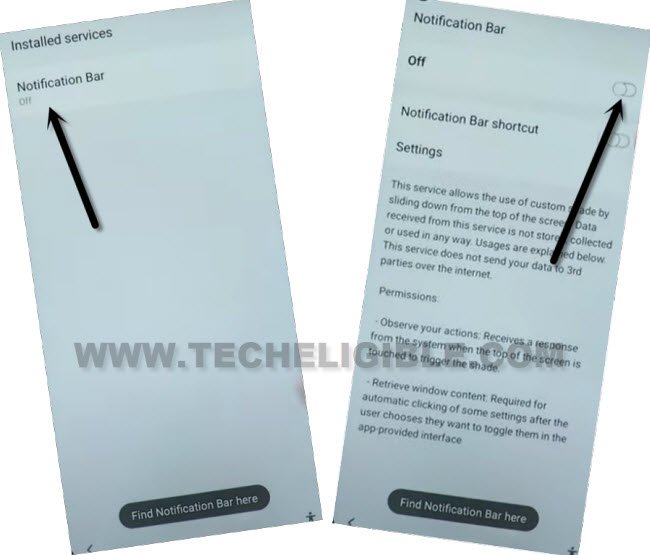
-Tap to “Allow” from popup window.
-Let’s access to main Samsung F13 settings page using notification bar app. Just slide down from top to bring up top notification bar. After that, tap to “Settings” gear icon from top corner to access to your Samsung Galaxy main settings page.

-Scroll down and go to > Privacy > Permission Manager > Files and Media.
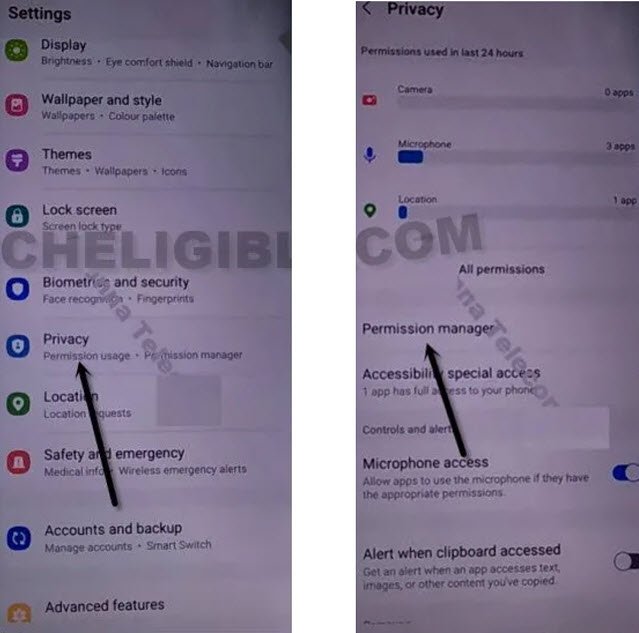
-Let’s get displayed all hidden apps by hitting on a “3 dots” icon from top corner and tap on “Show system”.
-We are gonna allow permission to (Xshare) app. To do this, just go all the way down from app list and tap on “Xshare” app.
-Check mark the option of “Allow management of all files”. After that, tap on “Allow” from popup window.

-Get bac to “Galaxy Store” app page by tapping on “Back arrow” icon from bottom left corner.
-From there, search and open (Xshare) application. This time, you will be able to use this app successfully, because , we have allowed permission to this app successfully to bypass frp.

-Let’s go to “Send” option and tap on “Grant Permission” butt from there. This time, this will work for you and will display all recently installed and used applications on screen.
-Tap over the “Back Arrow” from top corner. After that, tap on “Receive” option.
-Tap 4 times on first “Allow” from popup window.

-After that, tap 4 times on 2nd “Allow” option from popup screen.
-Let’s get back to main (Galaxy Store) application by tapping on “Back Arrow” icon from bottom. Do this carefully.
Open File Shortcut App from Galaxy Store on Galaxy F13:
-After accessing to galaxy store. From there, search and open “Files Shortcut” application.
-Install another frp bypass app from there by going to “Download” folder.
-We’re going to install 2nd downloaded app (Package disabler pro).
-Tap to > Package disabler pro > Continue > Install > Open > Allow.
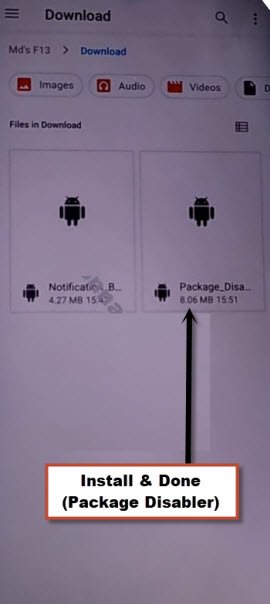
-Your Samsung F13 screen will start blinking after opening package disabler pro app. But, don’t worry, we can resolve this issue easily just through giving permission to this app as well.
-Bring up the top notification bar by swiping down from top and go to “Settings”.
-Go to > Privacy > Permission Manager > Files and Media.
-Tap over the “3 dots” icon from top and go to “Show system”.
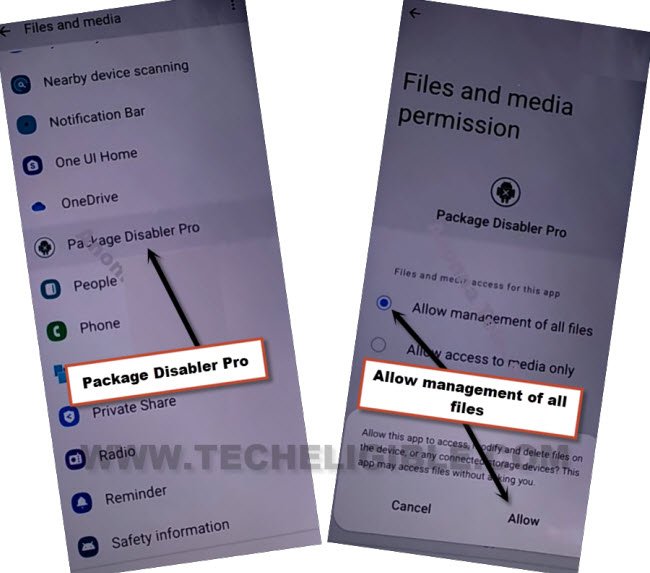
-We have to do same thing to allow (Package disabler pro) same as we did with (Xshare) app.
-From app list page, go to “Package disabler pro” app and turn on “Allow management of all files”. Tap over the “Allow” from popup window on Samsung F13 to remove frp.
-We have to disconnect WiFi, just bring up top notification bar by sliding down from top and Tap on “WiFi” icon to turn off WiFi connection.
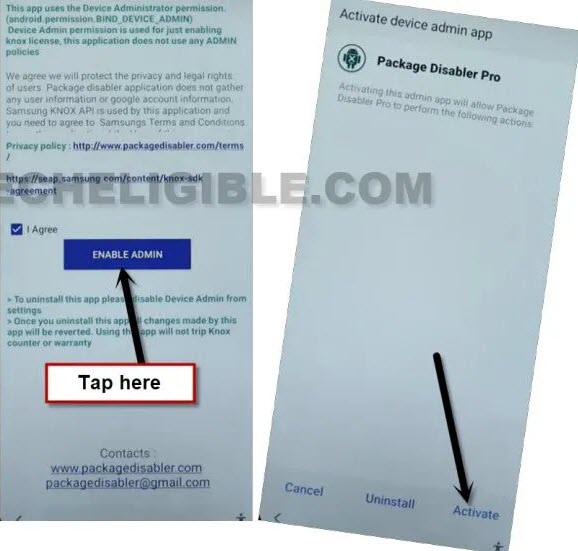
-Tap 3-4 times on back arrow very cautiously until you get (Enable Admin) option same as shown in below screen shot. From there, check mark “i agree” option. After that, tap to “Enable Admin” option.
-For Bypass FRP Samsung Galaxy F13, you are have hit on a “Activate” button from bottom right corner of the screen.
-Finally, you will access to (Knox License Activate) page. From this page, we have to connect back to WiFi to our device.
-Slide down from top to get top bar menu, and turn on “WiFi” option.
-Once the WiFi logo appears at the top, just tap on “AGREE” option.

Let’s Finish Up Samsung Setup Wizard to Bypass FRP:
-After that, wait on next screen, after few seconds or a minute, the package disabler pro application will be fully launched.
-Let’s tap on “Search” icon from top bar menu. Search there “Setup”. Tap to “Android Setup” from searched result same as shown in below screen shot.
-Check mark “Disable” option and hit on a “Clear Data” option.

-Search again “Setup”. This time, go to ” “Samsung Setup Wizard” from searched result.
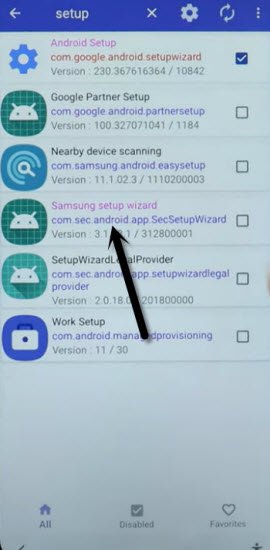
-Tap to “Clear Data” option from there. After that, your device time will start appearing up on top bar menu. That means, the FRP has been bypassed successfully.
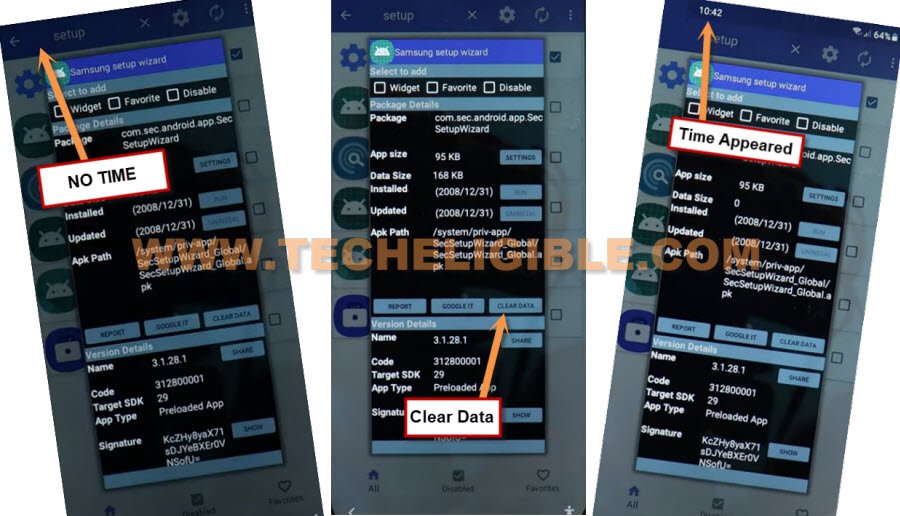
-Tap once on the “Back Arrow” icon from bottom.
-Tap again one time on “Back Arrow” icon from bottom. This time, you will have a popup window same as shown in below image.
-From this popup screen, tap on “Samsung Setup Wizard” and hit on a “Just once” option.

-After that, you will be redirected to the (Get Recommended apps) screen. From that page. just go to > Next > Skip > Finish.
-This is how you can reach back to your FRP locked Samsung Galaxy F13 device without using any paid service.
Read More: