
Did you ever reset your Blackview Wave 6C and after that, while finishing up setup wizard steps, you face a google verification screen asking you to login back with previously logged in google credential. And, you don’t remember that google account? To resolve and regain access to your device, you can follow the steps here for Blackview Wave 6C FRP Bypass without using any paid service.
Disclaimer: We highly recommend you to apply this method only on your own device. If you are not owner of this device, or you found this from some where, you must return to its real owner. This FRP bypass process is just for educational purpose.
Follow up Steps here for Blackview Wave 6C FRP Bypass:
-Do make sure, the SIM card is already inserted in your device.
-Turn on your blackview device and connect WiFi. After that, get back on (Hi there) screen.
-You have to use your device sound panel to go to next more steps. Press “Volume UP”‘ button. From side sound panel, hit on “3 dots” icon.
-After that, tap again on “3 dots” icon from another sound menu (See below image).

-From sound and vibration page, you’ve to go to “Do not Disturb” option.
-After that, hit over the “Schedules” option.

-Let’s setup new schedule here by going to > Add more > Events.
-Enter any name in popup window and tap to “Add” button.

-From new schedule page, just go to > Do not disturb behavior > Create Custom Settings for this schedule.

-Let’s hit over the “Calls” option from top.
-After that, tap to “Starred Contacts”.
-Go to “Add Starred Contacts”.

-You will be shown your sim contact list there. Tap on any contact name.
-From next page, go to “Call” icon.
-Dial this code on screen to access to engineermode page. Dial this code there *#*#9646633#*#*
| Note: If the above code do not redirect you on (EngineerMode) screen. Then, try to dial this code *#*#83781#*#* |

-Swipe the screen to left side to access to (DEBUG&LOG) page.
-Scroll down and turn on “USB Debugging” option.

Use Zeroknox Software to Bypass FRP:
-First of all, you have to download (Zeroknox Tool) in your PC.
| ⇒ ZeroKnox 1.6 Software [DOWNLOAD] |
-Once the downloading process is done. Let’s use this tool on our device to bypass frp account with one click.
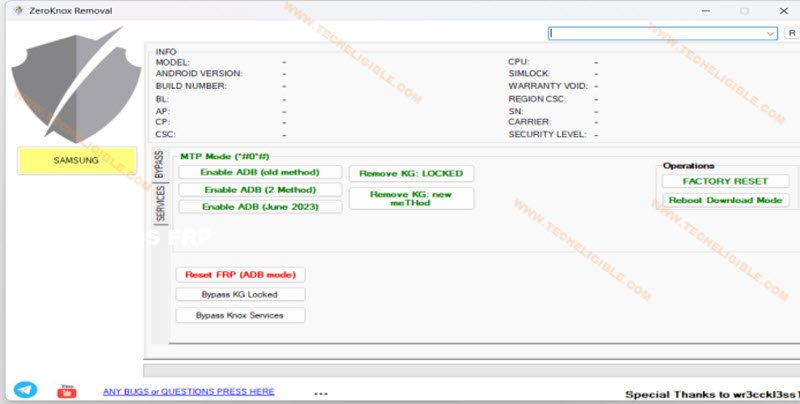
-Turn off your any active @ntivirus from PC and extract the downloaded (Zeroknox) tool from winrar archive. After that, go to that folder and double click over the “Zeroknox Removal.exe” to run.
-Afterwards, you’ve to connect your Blackview Wave 6C device with PC to start frp bypass process.
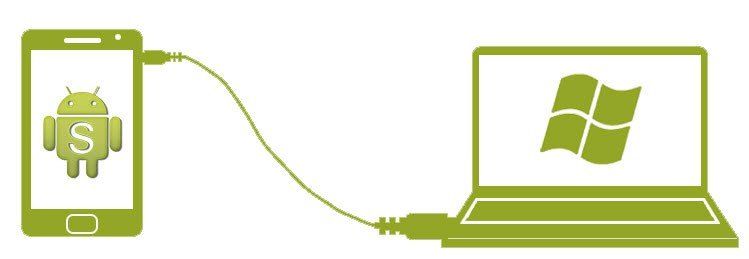
-Once the device is detected by the tool and PC, you will receive a popup window on your device screen, just choose “File Transfer” option from there.
-Let’s go to Zeroknox tool screen and click on “Reset FRP (ADB)” option.
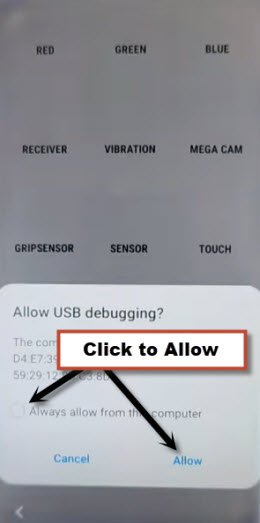
-Few seconds later, you will get another popup notification on Blackview device screen of (Allow USB Debugging). You just have to check mark (Always allow from this computer) and tap to “Allow” option.
-Few moments later, the frp removal process will be completed and you are all done from Blackview Wave 6C FRP Bypass. You will get a (Done) message on zeroknox tool screen.

-Disconnect the device from PC any your blackview device will auto start.