
Do not panic at this moment if you are encountering the FRP lock problem on your device after performing a hard reset from the recovery mode display. This situation can occasionally occur for individuals who have forgotten the details of their logged-in Google account along with the recovery alternatives. In such a scenario, you may feel remorseful and desire to regain access to your device. You can find instructions here to Bypass FRP Sharp Aquos Zero 2 (Android 11) without using computer and paid tool.
Disclaimer: Attempting this frp removal method on a phone that is not yours, is not allowed. This post is only for the device owner or follow up with the consent of the owner. This is an educational guide.
Bypass FRP Sharp Aquos Zero 2 (With Easy Steps)
-Start this way by turning on the Aquos device and access to WiFi screen. From there, connect WiFi to this phone first.
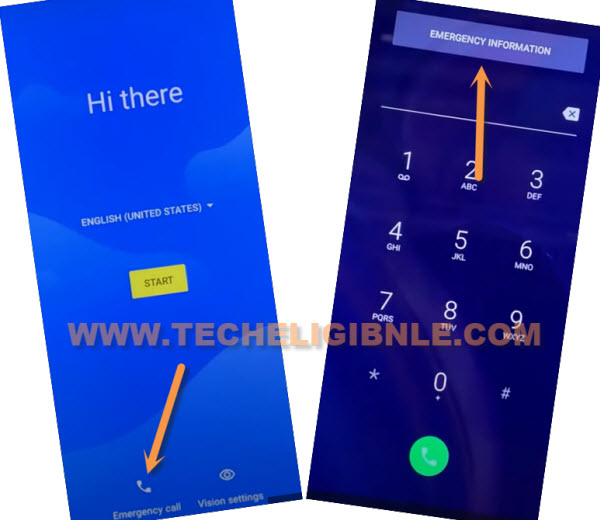
-Keep tapping the back arrow option till you reach back on the (Hi there) screen. Then, open up the emergency page by tapping over the “Emergency Call” option.
-Double tap on the “Emergency information” button.
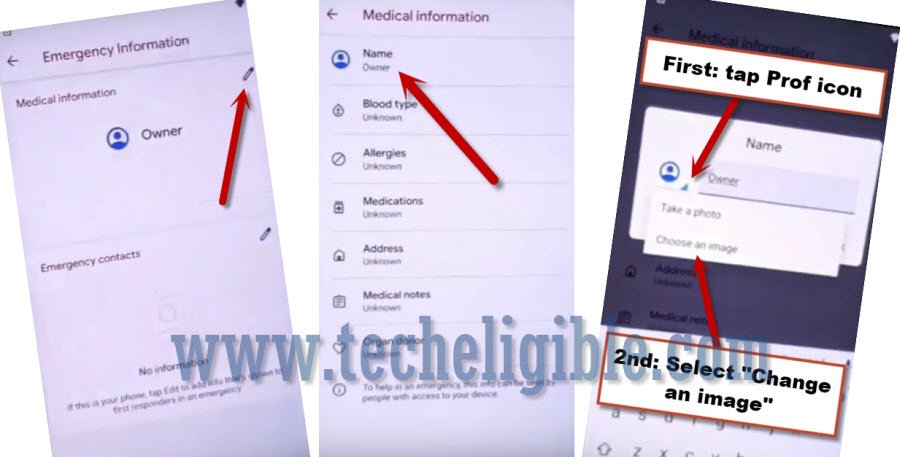
-Let’s hit on the “Edit” icon from upper corner and then, tap “Name” option.
-From new popup screen, tap the “Arrow” icon and go to “Choose an image”.
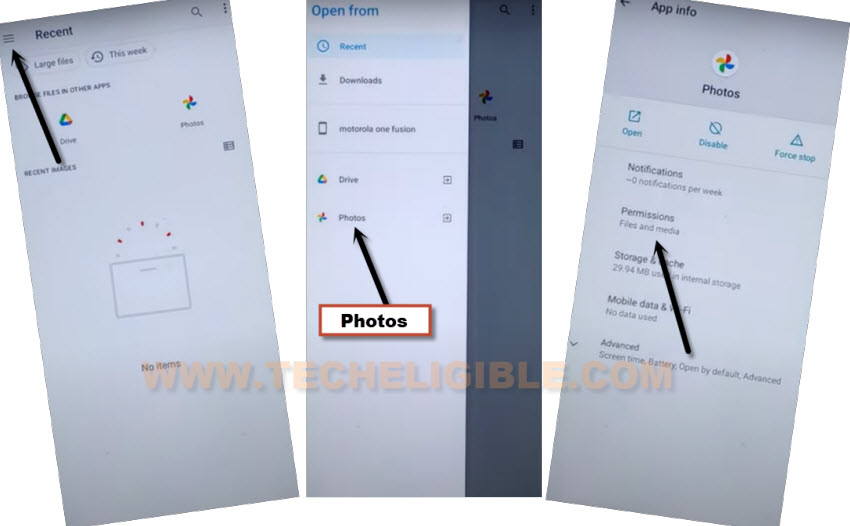
Long hold on (Photos) icon
-Open up the menu by tapping on “Menu” icon and then, long hold on the “Photos” icon.
-Next, tap over the “Permissions”.
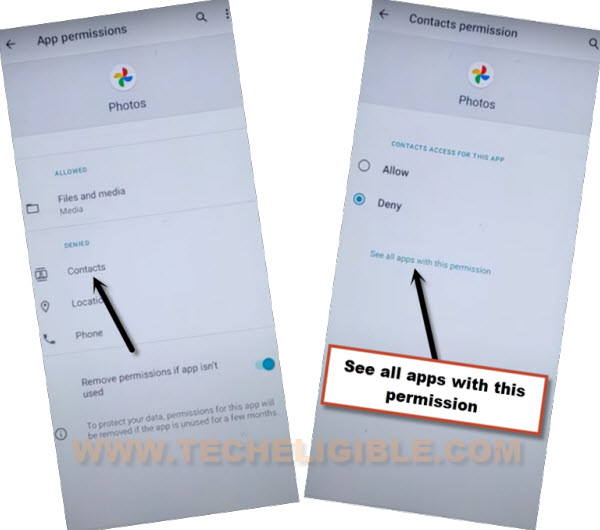
-You have to go to > Contacts > See All apps with this permissions.
Access on Settings for Disabling Apps
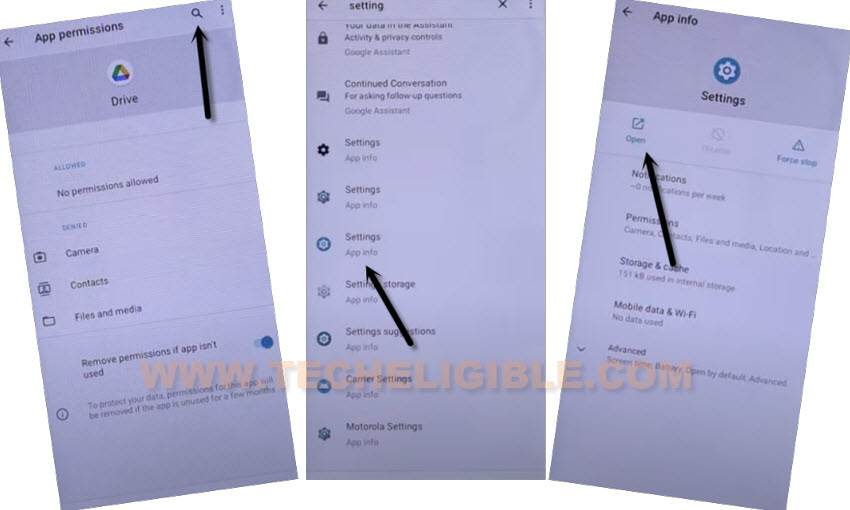
-Open the search bar by hitting on “Search” icon from top corner.
-Type in the search bar “Settings” and find and tap to “Settings app info” icon.
-Next, you have to hit on “Open” icon to reach directly on the primary settings page of this device.
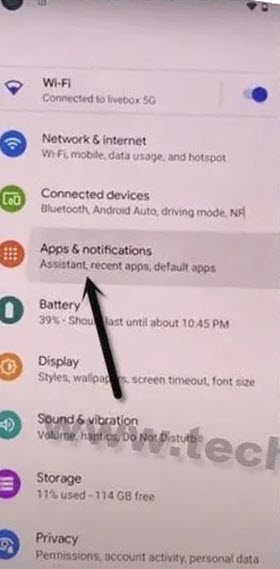
-Afterwards, we need get into the app list page by tapping on the > Apps & Notification > App info.
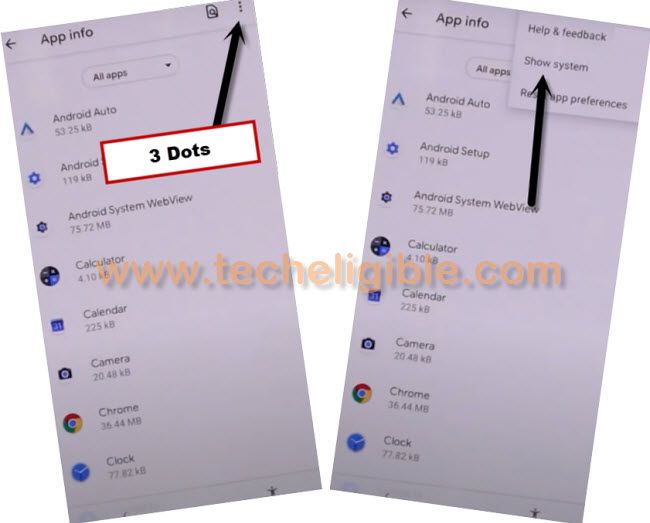
-Get all the hidden apps displayed by going to “3 dots” icon. Then, choose option “Show system”.
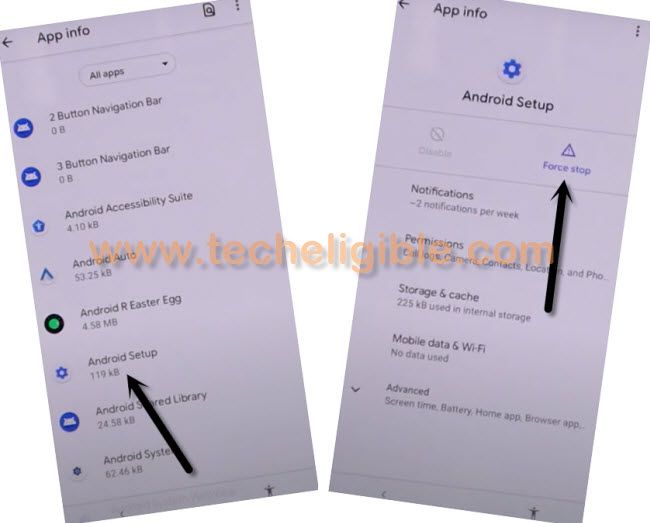
-Let’s get to the “Android Setup” app same as shown in the below image.
-After that, tap to “Force Stop” option. And then, hit on “Ok” from the popup screen.
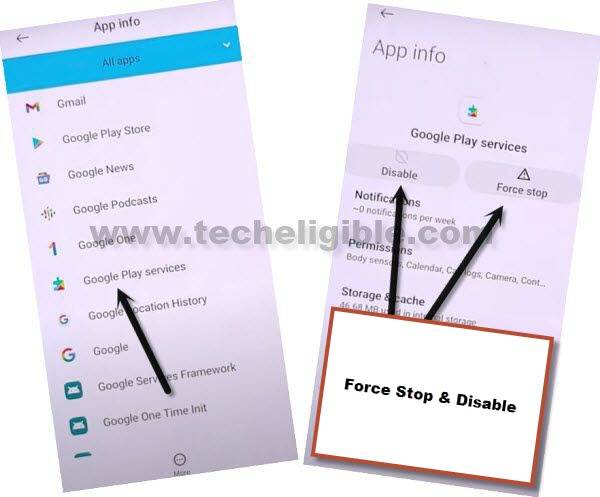
-Go back on the (App list) page. From there, find and tap on another application “Google Play Services”.
-Simply, go to Disable > Disable App.
-After that, tap also on the > Force Stop > Ok.
Go to WiFi Screen to Verify (Setup Offline) Option
-After force stop and disabling both apps correctly, we need to go back on the first (Hi there) startup page again.
-For this, hit few times on back arrow option from bottom until you access back on the (Hi there) page. After that, go to > Start > Skip.
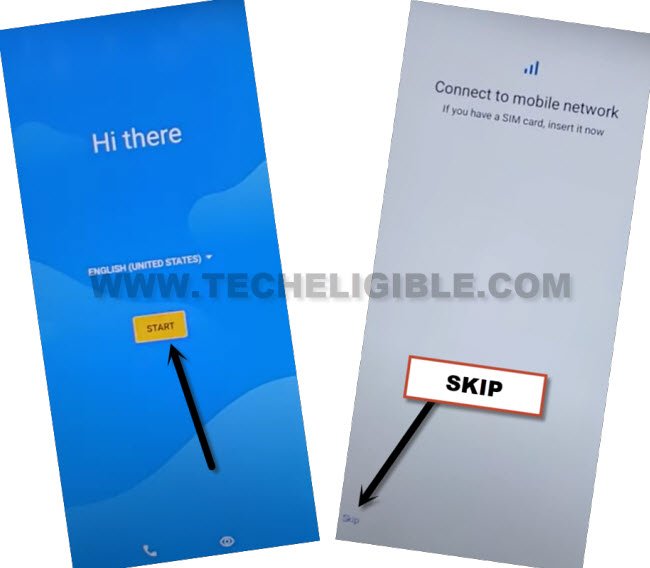
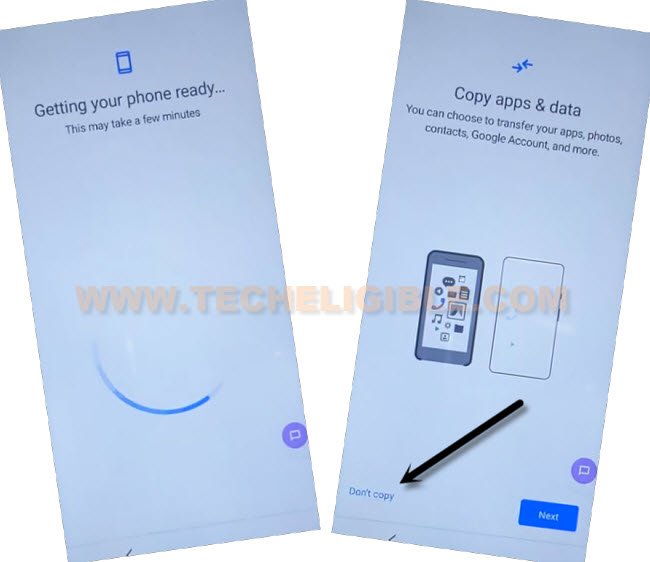
-Wait over the loading page to be done completely, then, tap to “Don’t Copy” option.
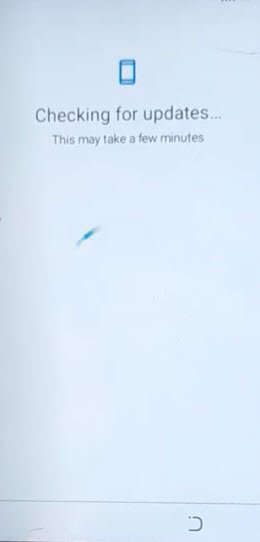
-You will notice that, the phone will stuck on the (Checking for update…) page. From there, tap on “Back Arrow” icon.
-You will reach back on the (Copy Apps & Date) page, from here, tap again on “Back Arrow” icon from bottom and finally, the (Connect to WiFi) page will appear up. There, you will have a (Setup offline) option, but don’t tap on this option right now.
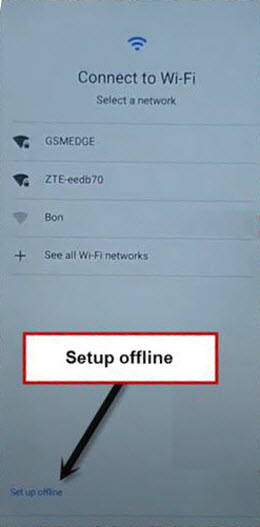
Go back on Settings using Mic option
-Before we proceed, firstly, we will turn on the (Google Play Services) app again by going into the phone primary settings. For this, go to > See All WiFi Network > Add New Network.
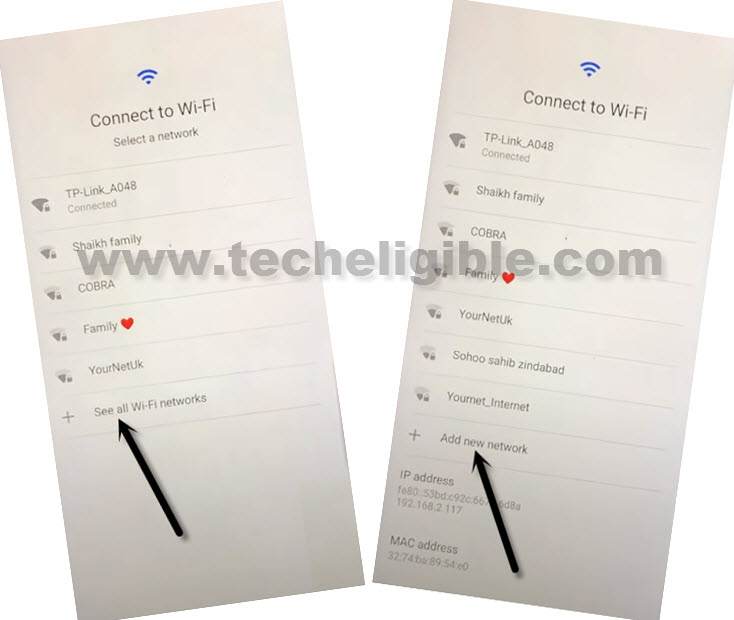
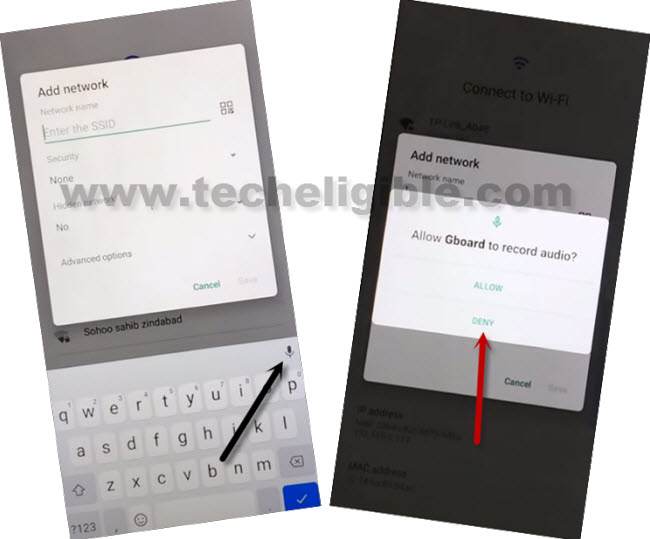
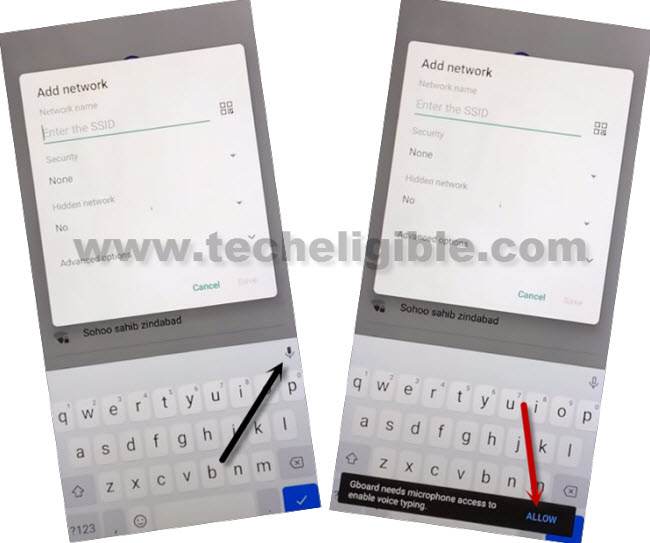
-As soon as the (Add network) popup will appear up, the device keyboard will also popup on your screen. From there, tap to > Mic icon > Deny.
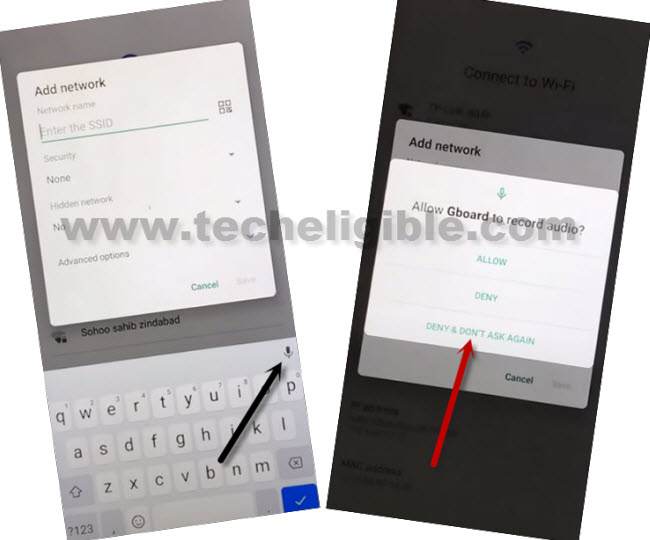
-We have to tap again on the > Mic icon > Deny & Don’t Ask Again.
-Once more, tap again on the “Mic” icon. This time, you will be notified in flash popup message, from there, tap on “View” option quickly to lead to (Gboard) screen.
-Let’s quickly tap on the “Permission” option.
-Open up the search bar by hitting on “Search” icon from the top.
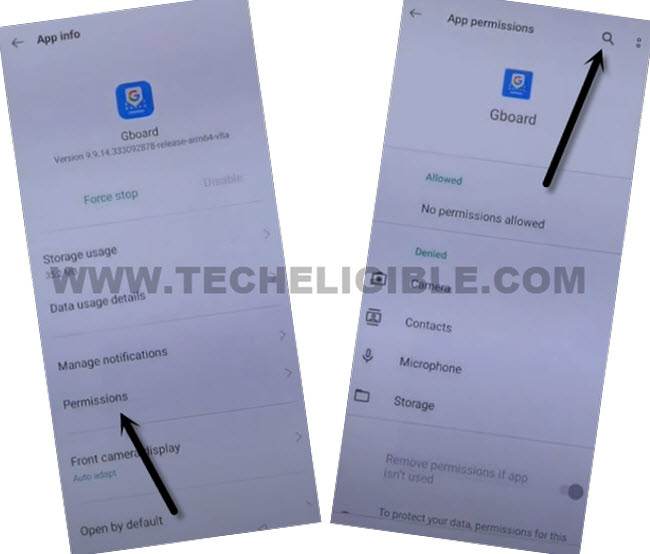
-Let’s search and go to “Settings app info”
-Tap on the “Open” option to launch the Sharp Aquos phone settings page.
Enable the Google Play Services Again
-Let’s hit again on > Apps & Notification > App info.
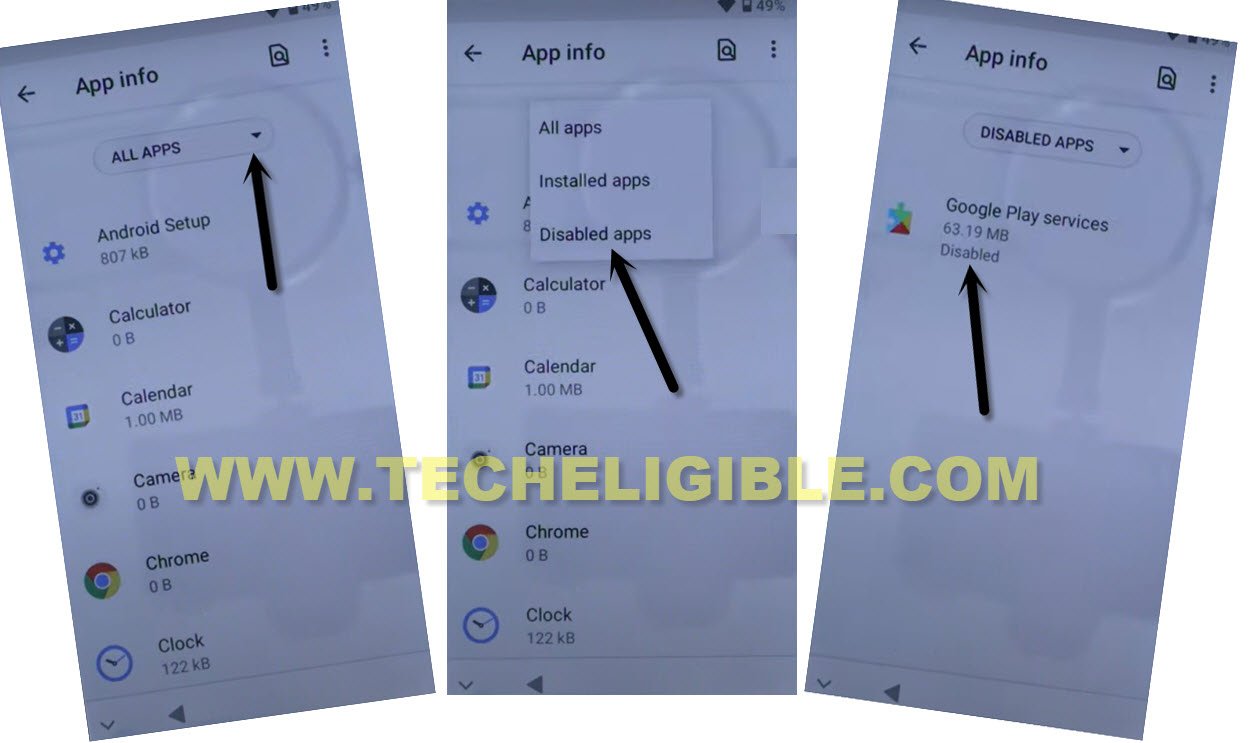
-Tap on the > All Apps > Disabled Apps.
-Go to “Google Play Services” app.
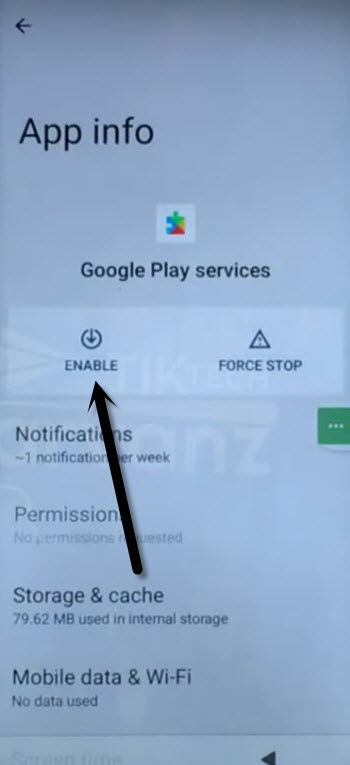
-Tap to “Enable” button to enable this app again. So that, we do not stuck again on the (Checking for update) screen.
Complete Setup Wizard Steps using (Setup Offline) Option
-Finally, go all the way back to (Connect to WiFi) screen by tapping few times on back arrow option. From there, tap to > Setup offline > Continue.
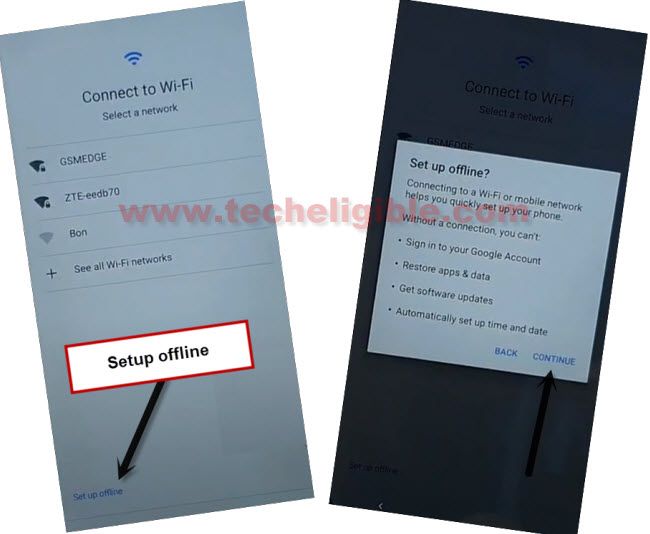
-After that, you will successfully access on the next page named (Google Services). From there, tap on > More > More > Accept.

-Finish All the remaining steps on your own. After you setup the phone completely and reach over the main home-screen. From there, we have to do one more steps, that is to completely reset the phone from settings to delete all logged in forgotten Gmail account. So that, after restarting the phone, you may not face the (Google Sign-in) screen again.
Enable OEM Unlocking & Reset the Phone
-Go to > Settings > About Phone.
-Tap 7 times on the “Build Number” and there, you will see the message of (You are now a developer).
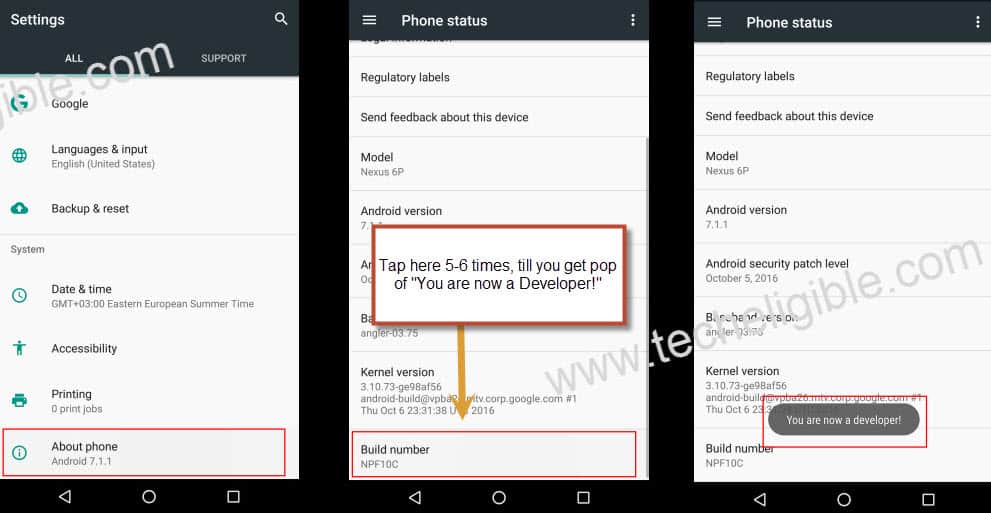
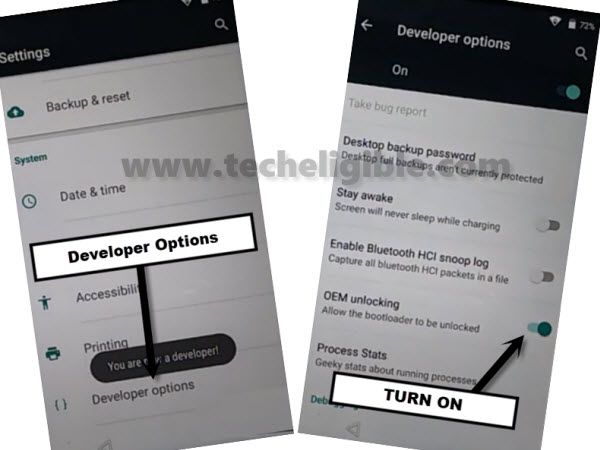
-Go back to main (Settings) screen. After that, tap to > System > Advanced > Developer Option.
-Turn on the “OEM Unlocking” from there.
-Tap once on the “Back Arrow” icon to get back on (System) screen.
-Go to “Reset Option”.
Note: This action will reset all data & Settings of your phone.
-Tap 3 times on “Erase all data” option to start doing a complete reset your device.
The Bottom Line
Used the emergency option to access on the settings page of the phone. From there, we just disabled (Google Play Services & Android Setup) application. After that, got back to the (WiFi page) to get the (Setup offline) option appeared up there. Then, we enabled back to (Google Play Services) app again and successfully reached to the main home-screen using the (Setup Offline) option from WiFi page. Once its done smoothly, then, we further enabled the (OEM unlocking) option and reset the phone from settings.