
Experiencing challenges navigating the Google sign-in interface immediately after executing a hard reset on your mobile device? In this situation, you would likely be required to log in using the same Google account that was previously configured. If you do not have recollection of your forgotten account, you can opt for a different method to regain access to your phone, which involves Bypass FRP Itel AC13.
Disclaimer: We highly recommend you to apply this method only on your own device, if you are not owner of this device, or you found this from some where, you must return to its real owner.
Bypass FRP Itel AC13 By Setup PIN Code
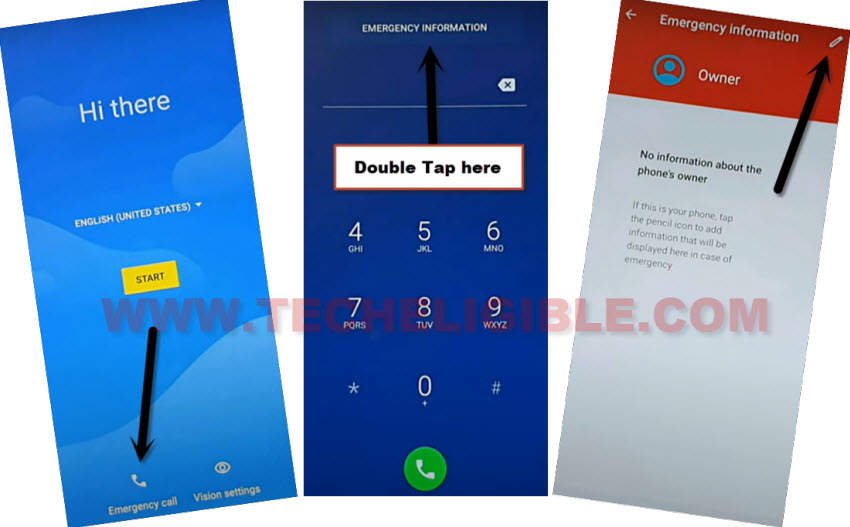
-To get back your phone, connect WiFi first. Then, go back over the first (Hi there) screen.
-From there, simply, hit over the “Emergency Call” option. Then, you need to tap twice time on the “Emergency information” button.
-From very next screen, tap to “Edit” option from upper corner.
-When you get popup window, just choose “Continue”.
-Then, tap on any contact name from the list.
-Tap again on your same contact name from next page.
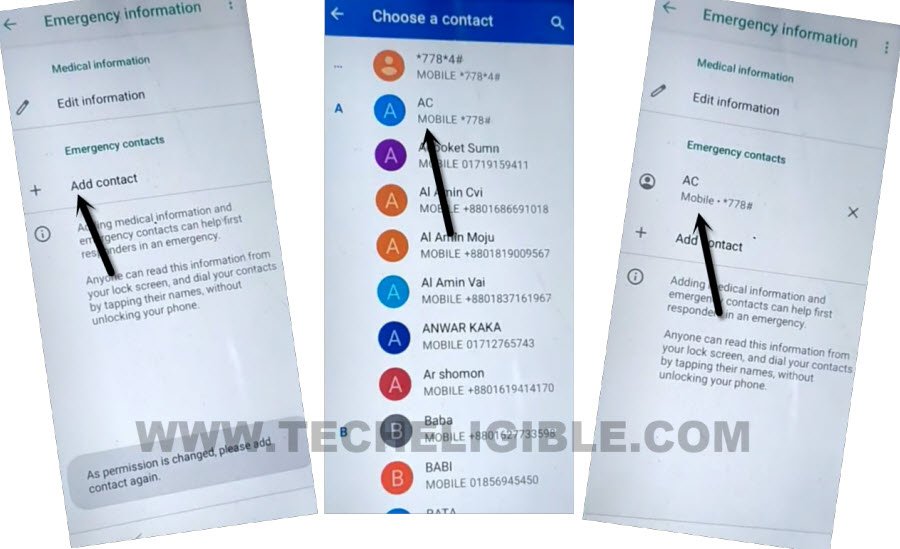
Access to App list Page
-Hit on the “Message icon” which is right next over the contact name.
-Afterwards, you will be taken on the message application page. From there, go to > 3 dots > Help & feedback.

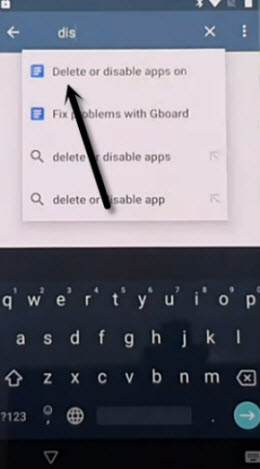
-We have regain access over the app list, for this, just type letter “d” in top search bar. From the result, tap to “Delete or disable apps on android”.
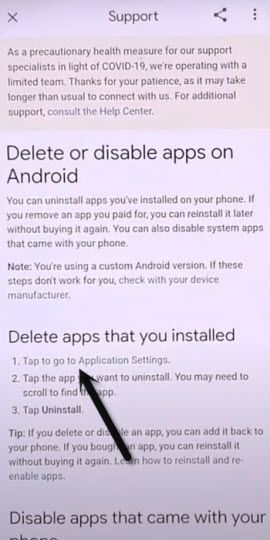
-On the next support page, go on the link “tap to go to application settings”.
Launch Settings & Setup PIN
-From next app list page, scroll down, find and hit on > Settings > Open. This will take you on the main settings interface of your phone. From there, we will be able to setup another PIN lock protection.

-Let’s hit over the “Security” option. Then, tap at on the “Screen Pinning” from very bottom of the page.
-Enable option from top corner.
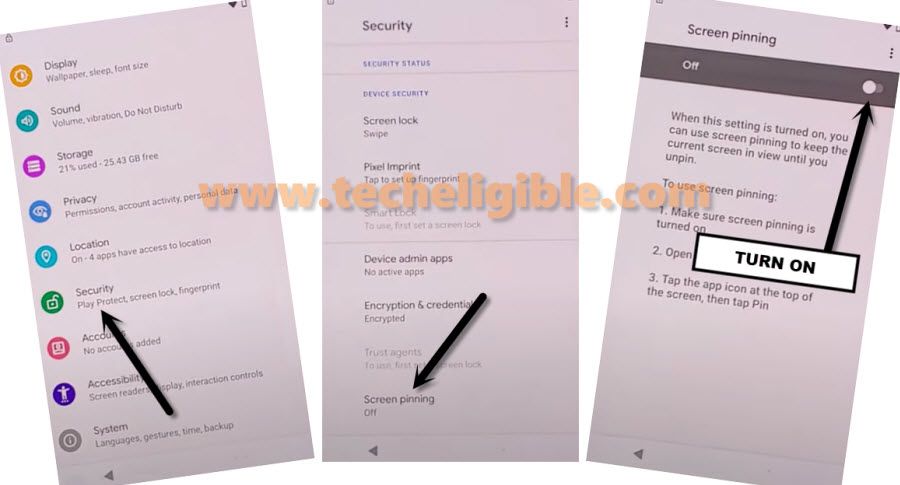
-Enable another option “Lock Device When unpinning”. This will allow you to create new security lock protection.

-Choose the option “PIN”.
-From next page, setup your any 4 digits PIN lock code on this phone.

-After tapping on the “Confirm” option from the PIN lock setup page, the next page will be displayed of (Touch the sensor). That means, your phone has successfully accepted your PIN.
-Skip this screen.

Skip Google Sign in After Verification
-Time to finish the setup process. Go back on “Hi there” page through hitting on (Back Arrow) option several times.
-From there, tap at the “Start” button. If you see any loading page, just wait over there until its done. From next page, hit on “Don’t Copy” option.

-You will see a PIN verification screen. Let’s input your recently created PIN code. And, tap to “Next” option.
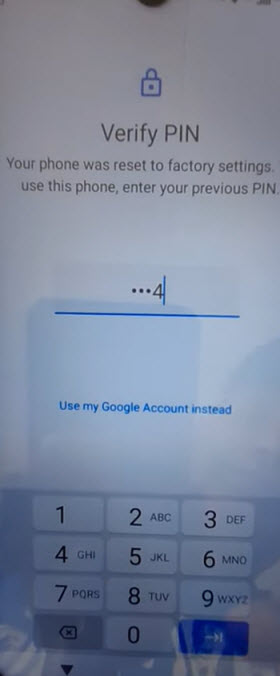
-You can easily skip the google verification page. Because, the verification has already been completed through PIN code. Just, skip this page.
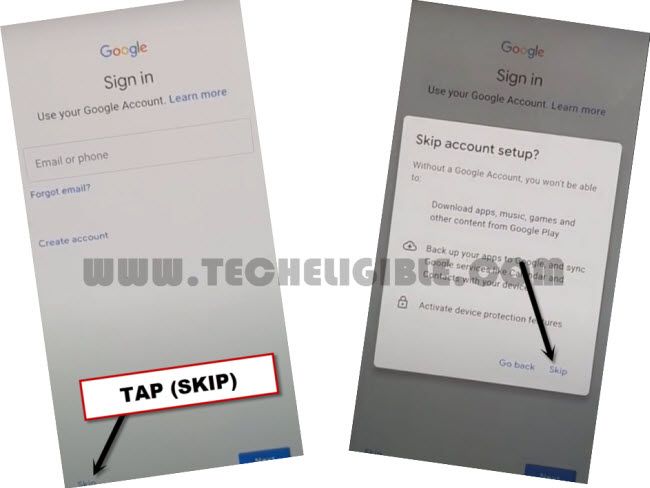
-After that, from the (Google Services) page. Tap on the > More > More > Accept.
-Complete rest the remaining steps on your own.

Conclusion
We followed up simple method here to get back this phone. We just access to the primary settings page of this phone through (Emergency Calling) feature. Afterwards, opened up the option of (Security). Setup PIN lock code. Then, got back on the startup page again. From there, we just got our self verified using the (PIN) code. Finally, we skipped the google sign in page and completed setup wizard steps.