
Fix up your device accessing issue after forgetting logged in google ID without getting help of any paid tool. This method can be applied to Bypass FRP Samsung Galaxy J8. There are 3 frp bypass guides available on same topic, you can switch to 2nd guide in case of first one is not working properly on your phone due to android version variation.
Disclaimer: We strongly advise you to use this approach exclusively on your own device; if you do not own it or you found it somewhere, you should give it back to the original owner. This procedure is merely meant to teach the device user how to handle their own FRP-locked Samsung Galaxy J8.
You can choose your best FRP bypass method from below according to your device compatibility. There total 3 frp methods mentioned on this single post to assist you how to get back your device with updated google account.
Method 1: Bypass FRP Samsung Galaxy J8 [By Samsung Keyboard]
In this below method, we will use Samsung keyboard & Sim card contacts to access frp tools page and download from there (Apex Launcher) application. This is a free app and can be used very often to get approach directly to the main home-screen of FRP protected device to. View the detailed instructions below.
-Connect WiFi first before starting frp method.
-Go to (Verify Your Account) screen, and tap on “Email or phone” field to bring keyboard.
-Tap “settings” gear icon, and then tap “Swipe touch and feedback”, and then select “Touch Feedback”.
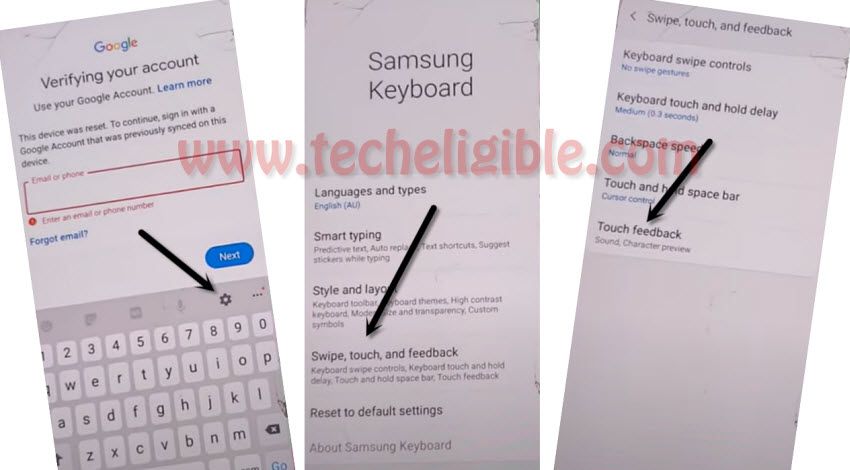
-Now hit on “Sound and vibration”.
-Tap on “Ringtone”, and then tap on “SIM 1”.
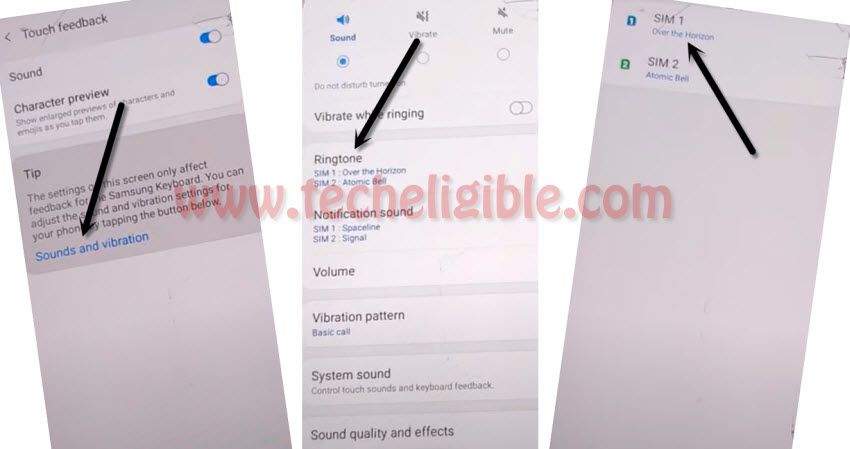
-Tap “+” plus icon from top right corner and there you will see a popup window bottom of the screen.
Note: If you do not see popup window, that means this method won’t for you, just try 2nd method.
-From the popup window, just tap on “Deny”.
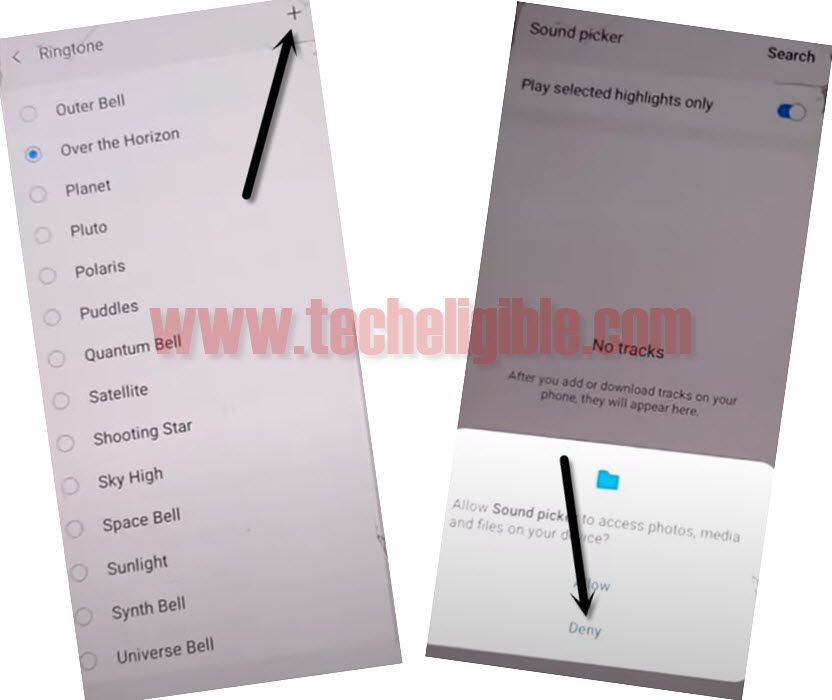
-Again hit on > SIM 1 > + > Deny & Don’t ask again.
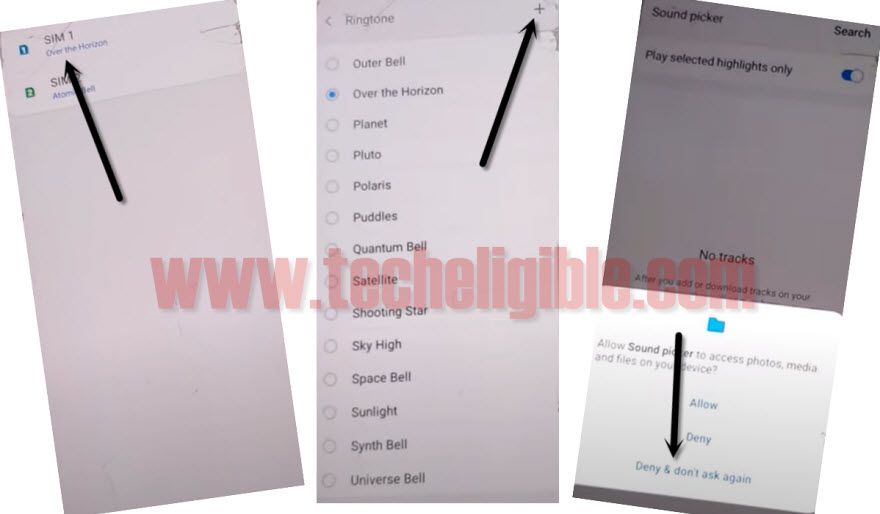
-One more time tap on > SIM 1 > + > Settings.
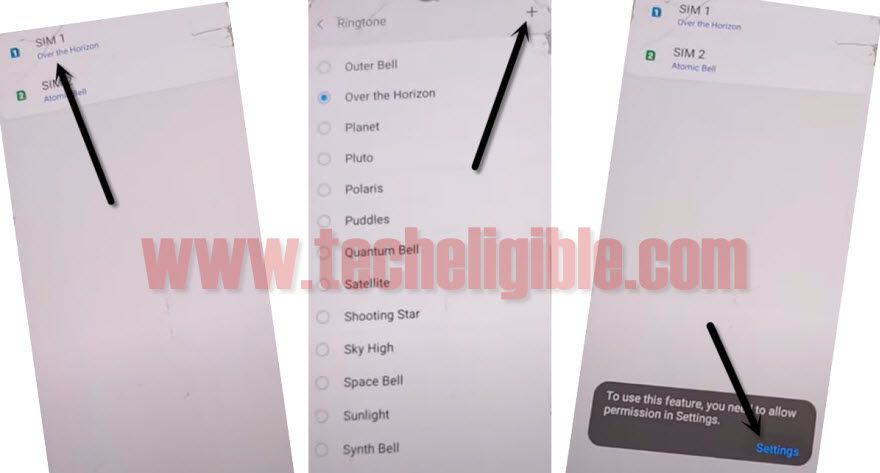
-Go down and tap on “Permissions”, and then tap on “search icon” from top right corner, and then type there “Chr” and wait until you get “Chrome” option.
-Now tap on “Chrome app info“, and then hit on “Open” from bottom left corner.
-After that, go to > Accept & Continue > Next > No Thanks.
Get the FRP Unlocking Apps
We have to download frp bypass applications on our android device.
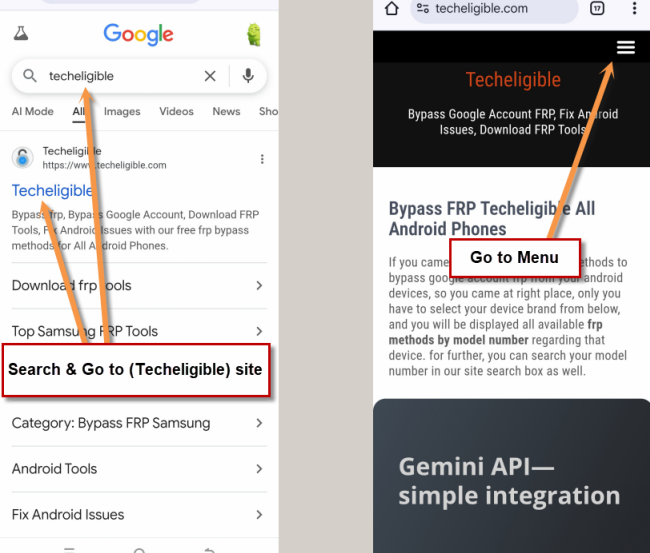
-Search in chrome browser “Techeligible“. Visit same searched result as mentioned in below screen shot.
-Tap to “Menu” option from upright corner of the site.
-Simply, go to “Other Free Tools” option from there. After that, tap to “Samsung FRP Tools”.
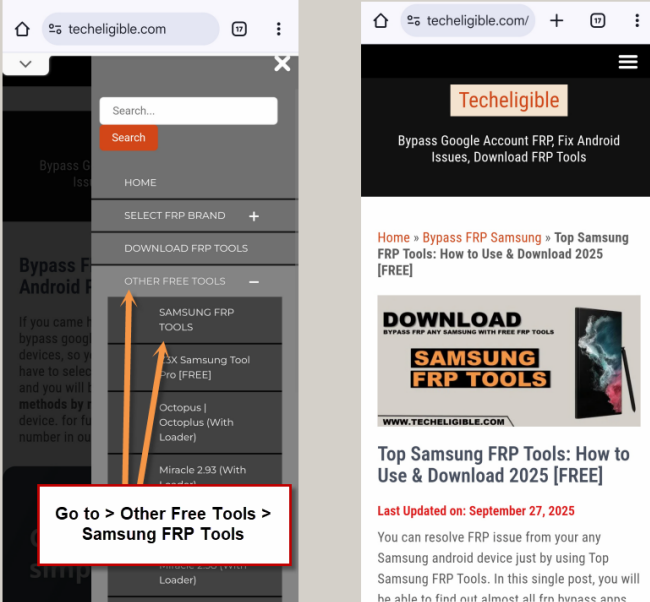
-Scroll down, download from there below 2 apps.
1/ Apex Launcher
2/ Google Play Services
-Once downloading finish, go to top of the page, and tap “3 dots” from top right corner and then tap on “Downloads” to see your downloaded app.
-Tap on “Apex Launcher“, and then you will be shown a chrome popup window, just tap on “Settings” and after that enable option “Allow from this source”.
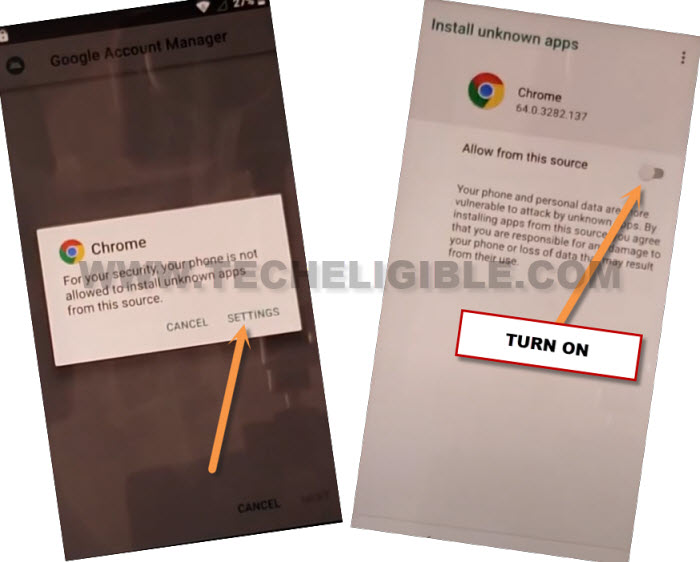
-Tap on “install”, and then tap on “Open”, and finally tap on “Continue”.
-Now go to your device MENU, and tap on “Chrome icon” from there, and then tap on “3 dots” from top right corner of the chrome browser, and select “Downloads” to access download folder.
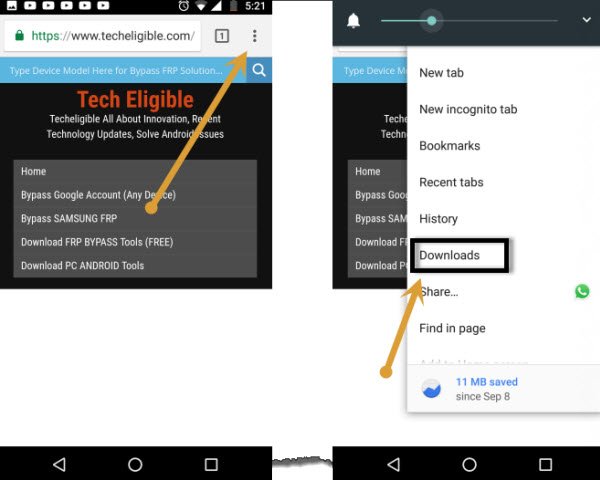
-Tap on “Google Play Service”, and then tap on “Install”, after that tap on “Done”.
-Now go back to your phone by tapping on “Back Arrow”.
-We are going to deactivate find my device option from our phone settings, lets do that.
-Go to your phone > Settings > Biometrics & Security > Other Security Settings > Device Admin apps > Find My Device > Deactivate.
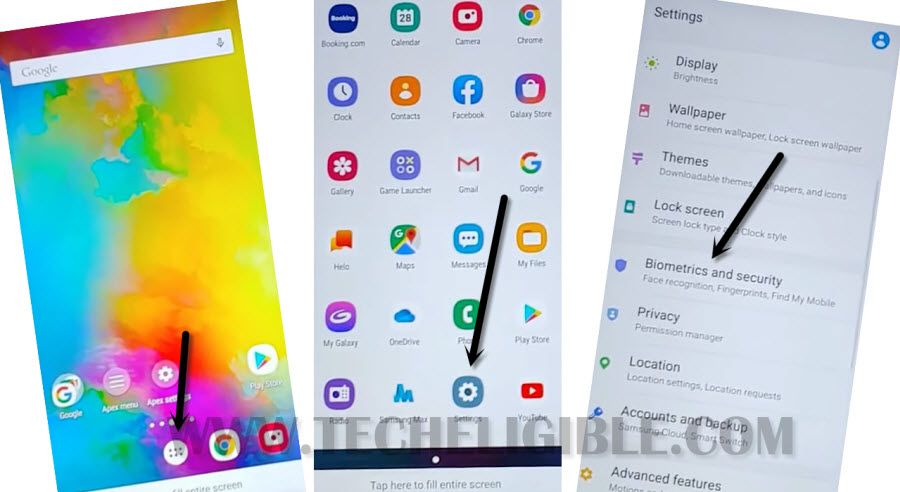
-Now go back to “Settings” again.
-From there, go to > Apps > Google play Services, and then tap on “Disable” from bottom left corner, and then tap on “Disable apps” from popup window.
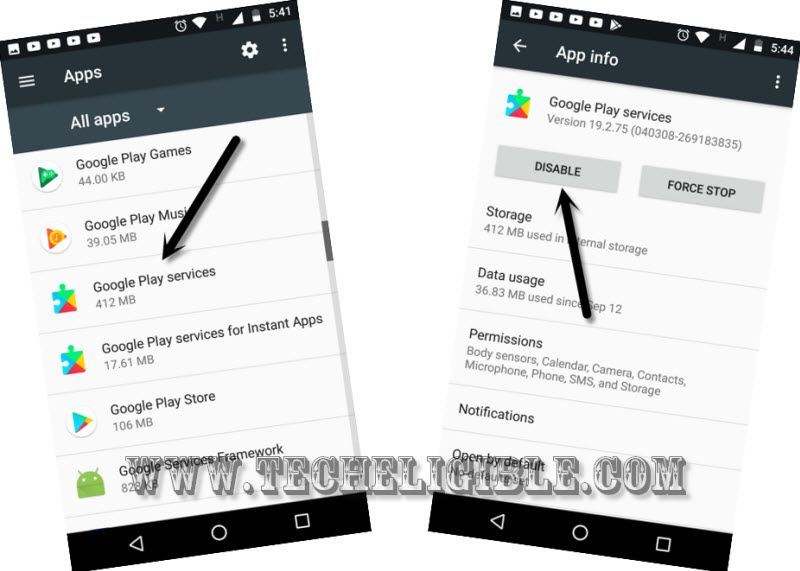
-Now we can easily add new Gmail account.
Let’s Add New Google Account
-Go back to “Settings” again.
-From there, go to > Accounts & Backup > Account > Add Account > Google.
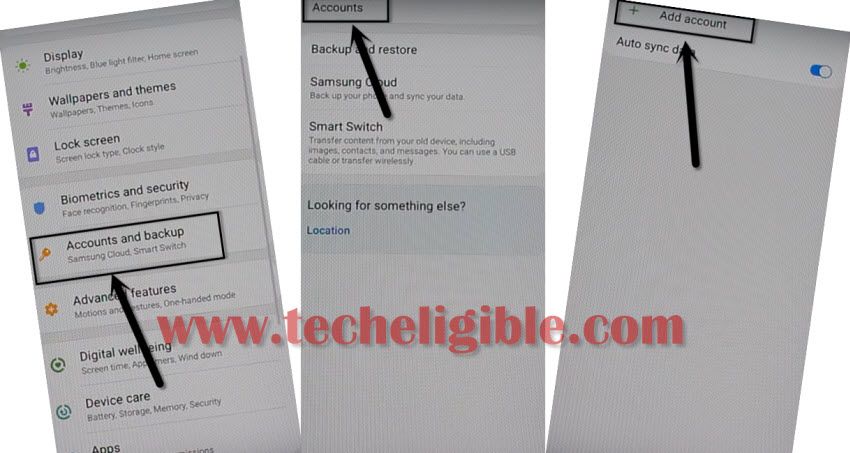
Note: You may see google play services error popup window, just ignore it and tap on “OK”.
-Now you will have “Just a sec…” screen, so you have to wait there until you see a google sign in screen.
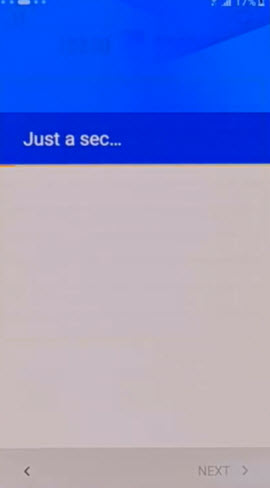
-From the google sing in screen, you can now easily add your new Gmail account.
-After signing in successfully, now we are going enable (Google Play Service & Find My Device).
-Go back to > Settings > Apps.
-Now tap on “All” from top right corner, and then select “Disabled”.
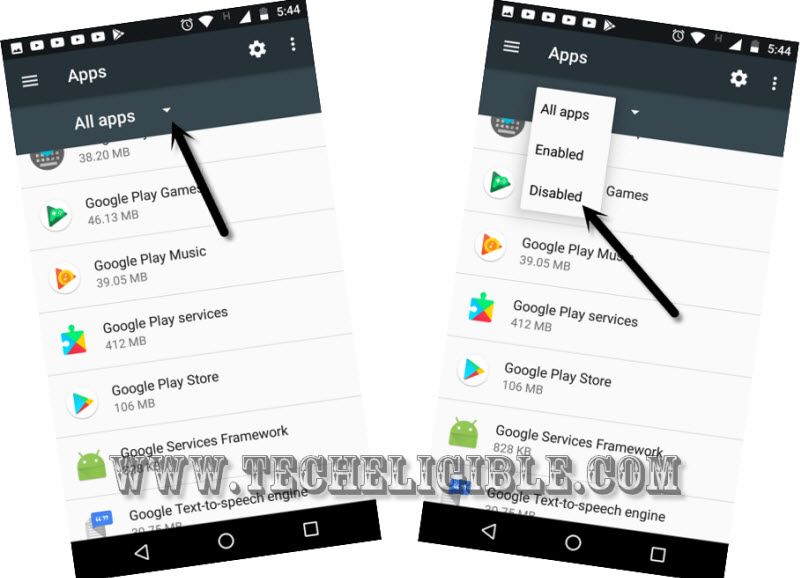
-Tap on > Google Play Service > Enable.
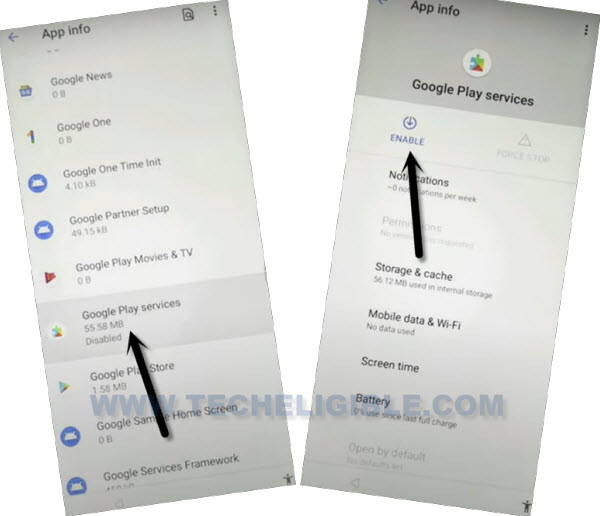
-After enabling that, lets activate find my device as well.
-Go back to “Settings”, and then go to > Biometrics & Security > Other Security Settings > Device Admin apps.
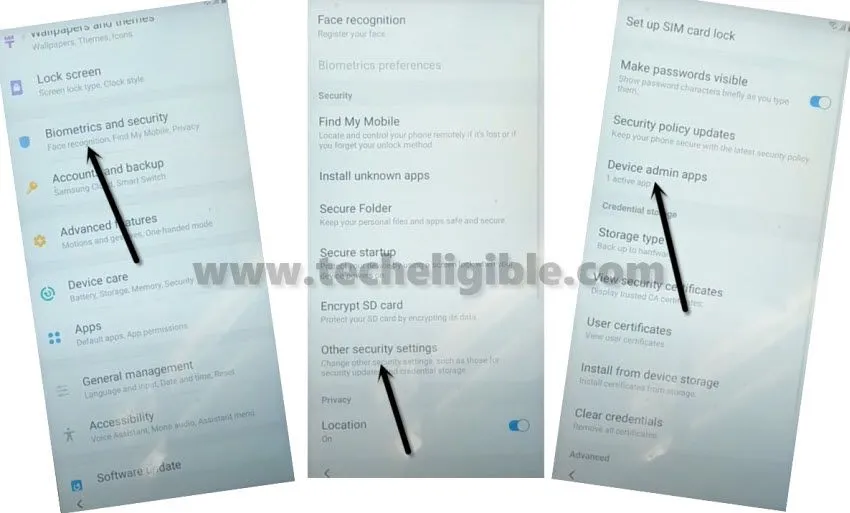
-From there, go to > Find My Device > Activate.
-Restart Phone and Complete setup wizard, because you are all done from here.
Method 2: Bypass FRP Samsung Galaxy J8 [Via PIN Locked SIM]
We will have to apply 2nd method, in this method you are required a “Pin Locked SIM” card, the pin can easily be set with any other phone, and that is very simple and easy, if you want your phone back, just do it now.
-If you do not see any popup box, then means we have to apply other method on this phone to bypass frp.
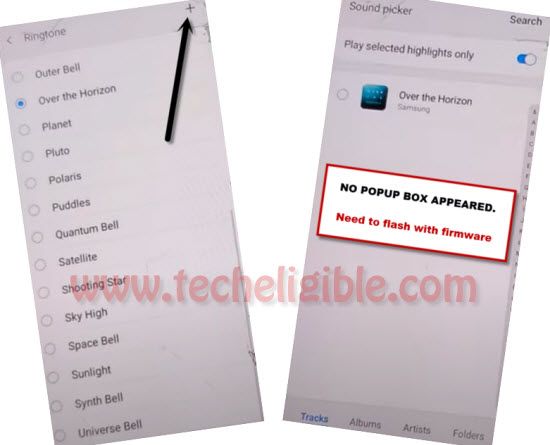
-Now tap on “Search” option from top right corner.
-Remove sim tray, and put your Pin Locked SIM Card to unlock FRP on Samsung J8.
-Keep your sim tray on stand by position, means do not insert sim tray completely, because we have to tap on “Microphone icon” before inserting sim tray, so just keep your SIM tray in popup position.
-Follow below 2 steps very carefully.
-Tap 7-9 times very quickly on “Microphone icon” from top right corner.
-After that, very quickly insert SIM Tray.
Note: You have to insert sim tray very quickly right after hitting very fast 7-9 times on “Microphone icon”.
-You will be asked to enter sim pin lock code, just enter your correct pin lock code, and tap on “OK”.
-Now quickly drag “Time and Date” to the right side, and tap on “Lock icon” quickly.
Remember: While dragging the time and date option to right side, do not lift up your finger, keep touching on TIME and Date, and using other finger tap on “Lock icon”.
-After that you will have top bar menu, just quickly tap 5-6 times on “Settings gear icon”.
-From there, tap on “Devices”.
-If you do not see “Devices” option there, then we can go with Bluetooth icon, for that you should follow Bluetooth steps here.
-After that, tap “3 dots”, and then tap “Settings”.
-Tap on “About Media and Device”, and then tap on “Exclamation sign” from top right corner.
-Tap on “Permission”, and then tap on “Search icon” from top right corner to bypass frp.
Note: If you do not see “Search icon”, then you can get that easily by tapping on “Storage”, and from there tap on “Search icon”.
-Type in search bar “Pin Windows”, and then tap on Pin Windows from searched result.
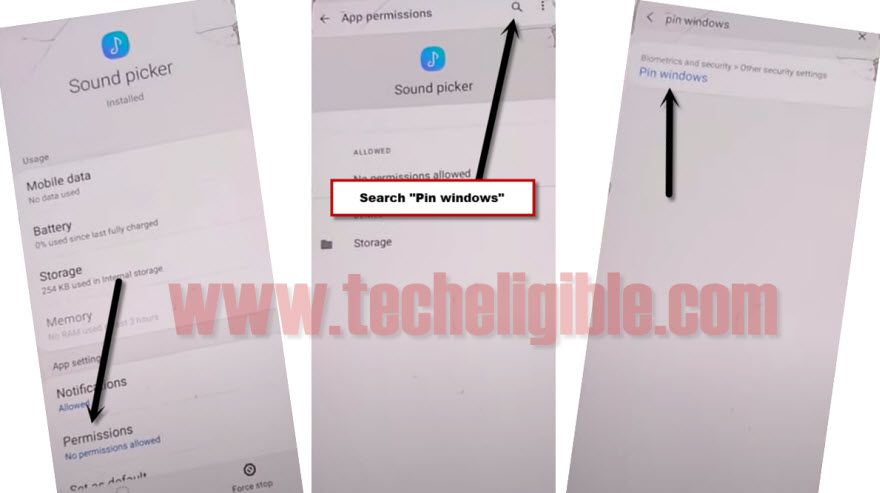
–Now we are going to enable pin windows to setup pin lock.
Enable Pin Windows & Setup PIN
-First, enable “Pin Windows”, and then tap on “Pin Windows”.
-Turn on option “Use screen lock type to unpin”.
-Tap on “PIN”.
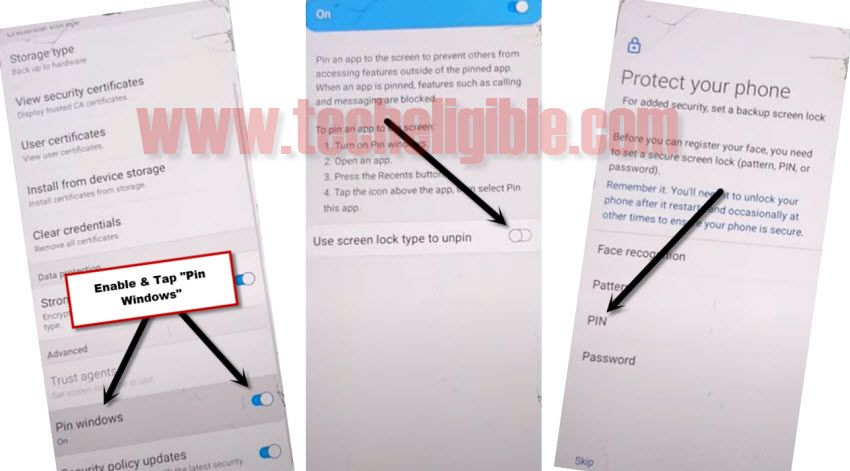
-Setup your 4 digit pin code “1234”, and then tap on “OK”.
-Once you successfully setup pin, now we will have to get back to very first “Lets Go” screen by tapping on back arrow multiple times, you may have to tap back arrow for 10-15 times.
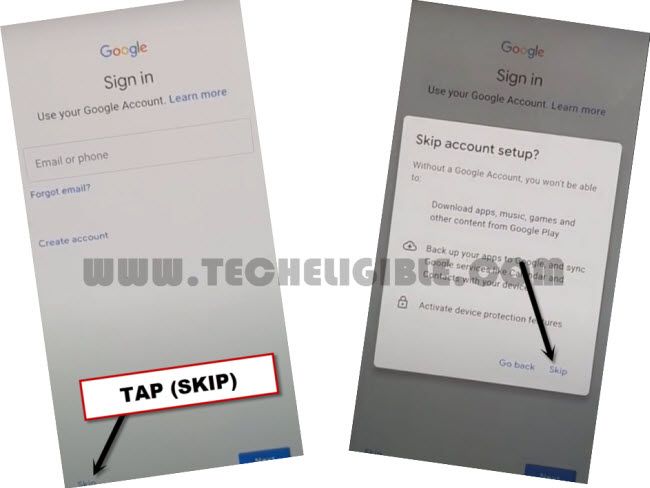
-Once you get back to very first “Let’s Go” screen, now we can easily bypass verify your account screen by hitting on “Skip” option.
-While completing the initial setup, you will be asked to enter code, just give there your already setup 4 digits code “1234”.
-From the verify your account screen, just tap on “SKIP”.
Method 3: Bypass FRP Samsung J8 [Via Bluetooth Pods]
If you are not seeing “Devices” option in top bar menu, then still you can Bypass frp through Bluetooth options.
-Tap on “Bluetooth icon” first time, but nothing will happen.
-Tap again on “Bluetooth icon”.
-Now tap on “Bluetooth icon”.
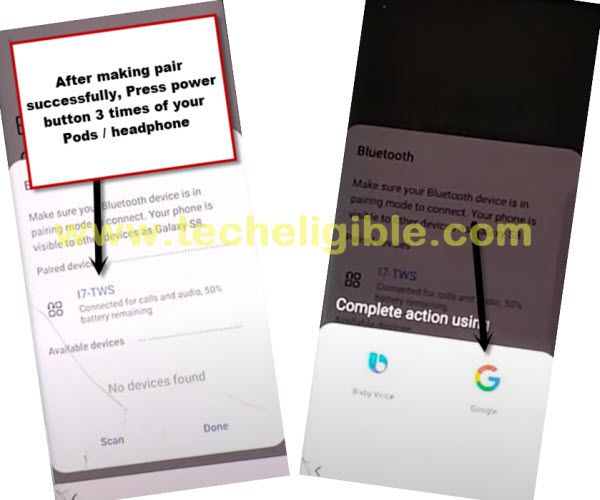
-Use your any newer generation (Bluetooth Pods / Bluetooth headphones) for making pair with.
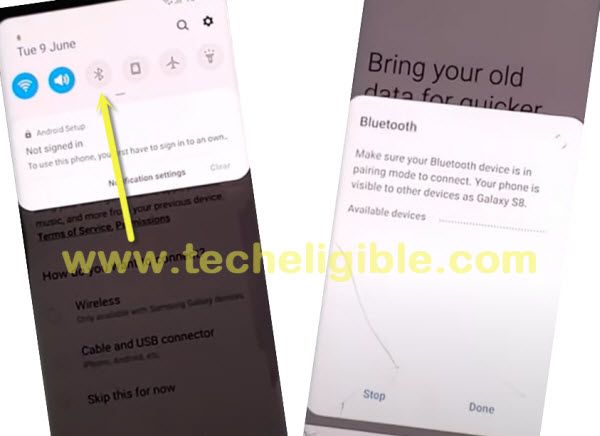
Open the Google App By Bluetooth Device
-After making pair successfully, just press your Bluetooth pods/headphone power button 3 times quickly.
-By doing this, new popup window will appear, and then tap on “Google” icon from there.
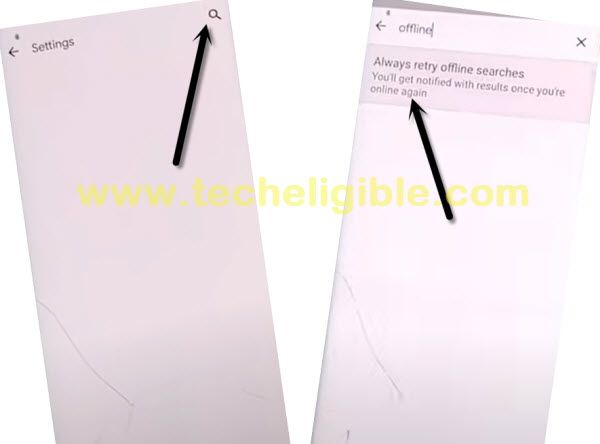
-From there, just go to > Notification > in-app notification settings.
-Tap on “search icon” from top right corner, and search there “Offline”.
-Tap on “Always retry offline searches”.
-Go down and tap on “Manage pending searches”, and hit on “No Thanks” from bottom popup window.
Go on the Security Settings Page
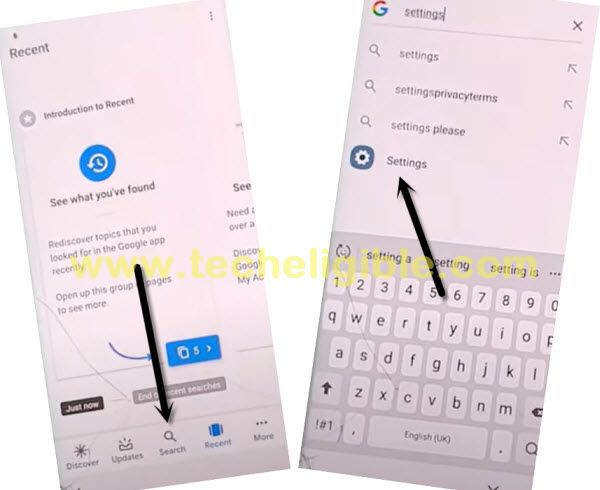
-Now tap on “search” from bottom bar.
-search “Settings”, and tap on “Setting gear icon” from searched result.
-Now we are going to setup 4 digits pin lock code in our phone.
-From the settings, just go to > Biometrics and Security > Other Security Settings.

-Let’s hit over the > Pin Windows > Turn it ON.
-Next all steps have already been described in 2nd methods, so you can continue your methods just by Clicking Here.
Conclusion
In the 1st guide, we used the (Samsung keyboard), we just hit on over the (Settings) icon, after that, accessed to the (Touch keyboard) option. Form there, we just chose the SIM 1 option and then launched the chrome browser. After that, we just disabled some apps and added new account.
From the 2nd method, we simply inserted the PIN locked sim card and opened up the settings. After that, enabled pin windows and setup PIN lock protection, which allowed us to setup the phone without signing with google account.
3rd Method: In this method, we just used the Bluetooth air pods or headphone and paired with Samsung J8 device. After that, accessed at the settings page. Then, we did same things, just enabled PIN windows and created security lock protection.