
Remove Google FRP Umidigi Power 5 Android 11 Without PC
Are you unable recover your lost Gmail account that was currently signed-in in your Umidigi hard reset device. Your device is on FRP protection, that’s the reason, you are unable complete setup wizard steps. Follow this method to Remove Google FRP Umidigi Power 5 (Android 11). We will use (Mic icon) option from device keyboard to access settings and disable few apps from there.
Warning: This method is only for a real device owner, who has lost his/her Gmail account after hard reset. If you are unknown to this phone & trying to gain access, you will be jailed once the device is traced. This is a serious crime & Sin. You must return this phone to its real owner.
Let’s Start to Remove Google FRP Umidigi Power 5:
-Let’s start process by switching on your Umidigi phone and Connect WIFI.
-Do make sure, your device don’t have any SIM card inserted. If it is? just remove your SIM card before starting this process.
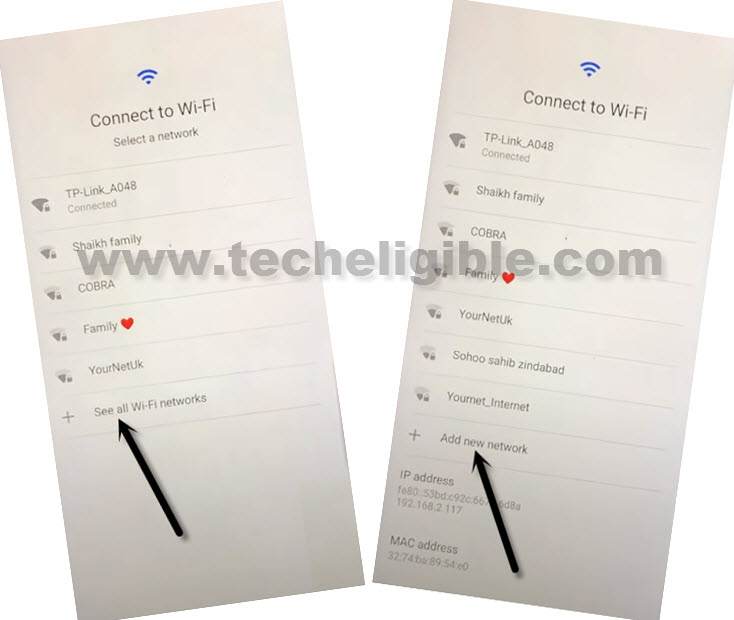
-Go to (Connect to WiFi) screen and tap over > See all WiFi network > Add new network.
-Hit on “Mic” icon from top corner of the keyboard. After that, tap on “Deny”.
![]()
-You have to do same thing again, just hit again on “Mic” icon. After that, tap on “Deny & don’t ask again”.
![]()
-In the 3rd attempt, we will be able to reach our device settings page easily. Let’s hit again on “Mic” icon. After that, tap to “View”.
![]()
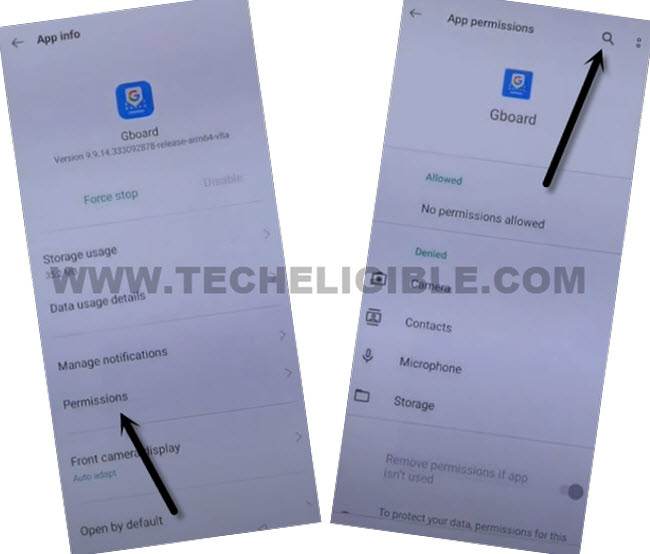
-You will be on a (Gboard) screen. Just tap to > Permissions > Search icon.
-From top search box. Just type there “Settings”.
-You will see (Settings) relevant searched result, from there, just tap to “Settings app info” app, that has (Gear icon). See below image. After that, tap over “Open” option from next screen.
| Note: If you don’t get proper (Settings app info) searched result, just tap again on “Search” bar, and there, you will have a recent searched “Settings” displayed, just tap over that again. This time, you will be able to get same searched result as shown in below screen shot. |

Lets Disable & Force Stop Umidigi Apps:
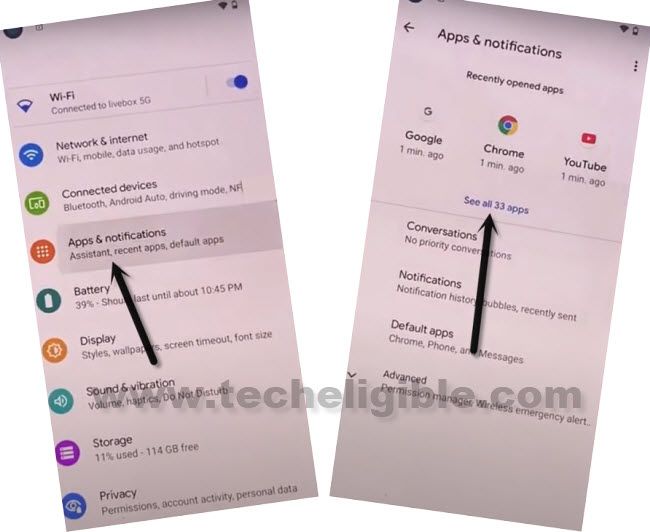
-You have accessed inside the device main settings page. From there, just tap to > Apps & Notifications > See / View all apps.
-Let’s get displayed hidden apps by hitting on “3 dots” from upright corner.
-Tap to “Show system”.
![]()
-Firstly, find and hit on “Android Setup” gear icon.
-You have to force stop this app just by tapping at > Force Stop > Ok.
![]()
-Tap over “Back Arrow” icon from bottom to go back to (App info) page.
-Find another “Android Setup” app that has (Clock icon). See below image.
-You have to force stop & disable this application to Remove Google FRP Umidigi Power 5.
![]()
-Let’s go back again to (App info) page.
-This is the most important app, we will enable back this app later on while completing setup wizard.
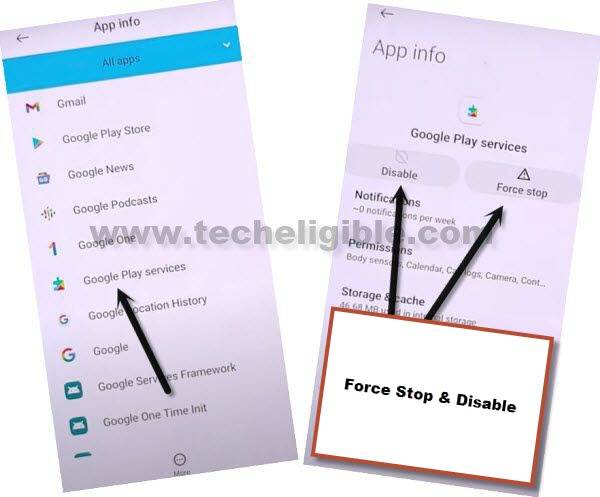
-Find and tap to “Google Play Services” app.
-Tap to “Force Stop”, and hit on “Ok”.
-After that, tap to > Disable > Disable this app.
-Go all the way back to (Connect to WiFi) screen by hitting on “Back Arrow” icon cautiously.
-Tap to > Setup Offline > Continue.

-Wait for 30 sec at least on loading screen. To get this loading scree done, we are required to enable again (Google Play Services) app.
-Let’s repeat steps to access back to (App info) page.
-Go back to (Connect to WiFi) page, from there, tap to > See all WiFi network > Add new network.
Repeat Some Steps to Reach back on Settings Page:
-From keyboard, just hit on > Mic icon > Deny.
![]()
-You have to do same thing again, just hit again on “Mic” icon. After that, tap on “Deny & don’t ask again”.
![]()
-In the 3rd attempt, we will be able to reach our device settings page easily. Let’s hit again on “Mic” icon. After that, tap to “View”.
![]()
-You will be on a (Gboard) screen. Just tap to > Permissions > Search icon.
-From top search box. Just type there “Settings”.
-You will see (Settings) relevant searched result, from there, just tap to “Settings app info” app, that has (Gear icon). See below image. After that, tap over “Open” option from next screen.
| Note: If you don’t get proper (Settings app info) searched result, just tap again on “Search” bar, and there, you will have a recent searched “Settings” displayed, just tap over that again. This time, you will be able to get same searched result as shown in below screen shot. |
Lets Enable Back Google App:
-You have accessed inside the device main settings page. From there, just tap to > Apps & Notifications > See / View all apps.
-Let’s get displayed hidden apps by hitting on “3 dots” from upright corner.
-Tap to “Show system”.
![]()
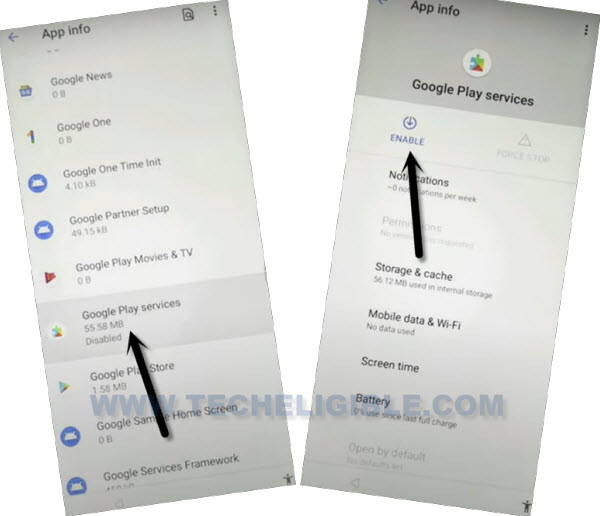
-You have to find and tap on “Google Play Services” application from app list page.
-After that, tap to “Enable” to enable this app again.
-Let’s get back to (WiFi page) again by hitting back arrow several times. After that, tap to > > Setup offline > Continue.
-You can now easily finish up setup wizard steps without stuck on loading page anymore. You are all done from Remove Google FRP Umidigi Power 5 without using any paid services. Thanks for visiting us.