
Remove FRP ZTE Blade A31 Plus Android 11 Without PC
Are you still stuck on a google verification screen, and can’t bypass this screen just because of forgetting Gmail Account, you can still Remove FRP ZTE Blade A31 Plus (Android 11) without using computer or any other frp removal tool, we will disable (Google Play Services) app, and after that you will be able to setup latest account and use this device freely.
Note: This method is just for device owner and for educational Purpose only.
Let’s Start to Remove FRP ZTE Blade A31 Plus:
–Connect WiFi, and then go back to (WiFi Setup) screen.
-After connecting WiFi, go back to first (Hi there) screen, from there tap on > Start > Skip > Don’t Copy.
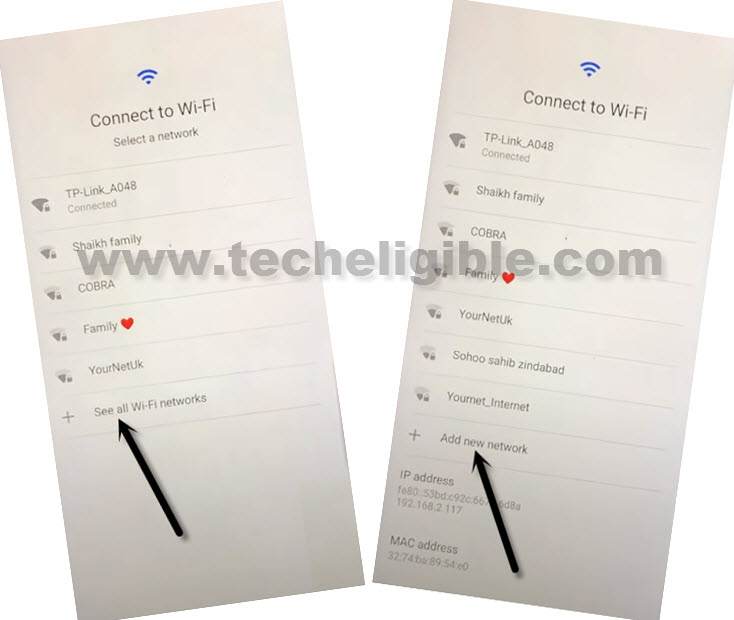
-Tap on back arrow 2-3 times until you reach back to (Connect to WiFi) screen.
–Tap to > See All WiFi Network > Add New Network.
–Tap to > Mic icon > Deny.
![]()
–Tap to > Mic icon > Deny & Don’t Ask Again.
![]()
–Tap to > Mic icon > Allow.
![]()
–Go to “Permission”, and hit over “Search icon” from top corner.
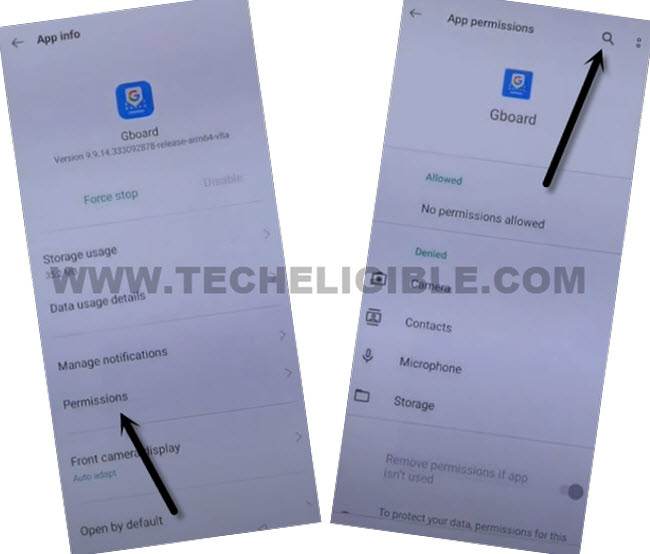
-Type in top search box “Setting”, and go to “Settings” icon, and then tap on “Open”.
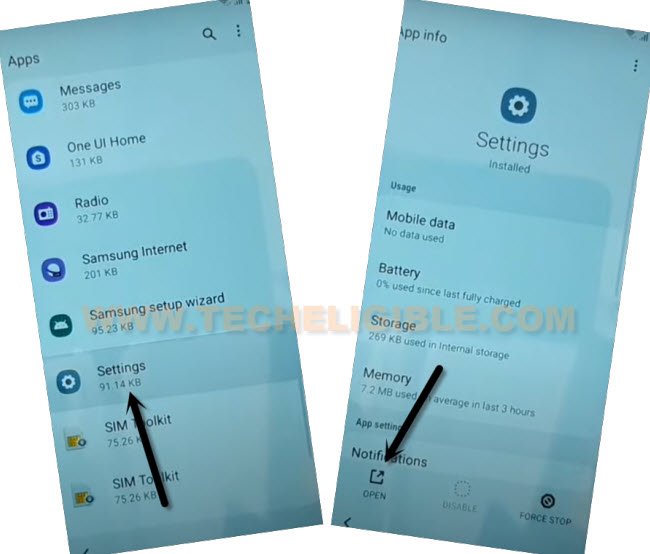
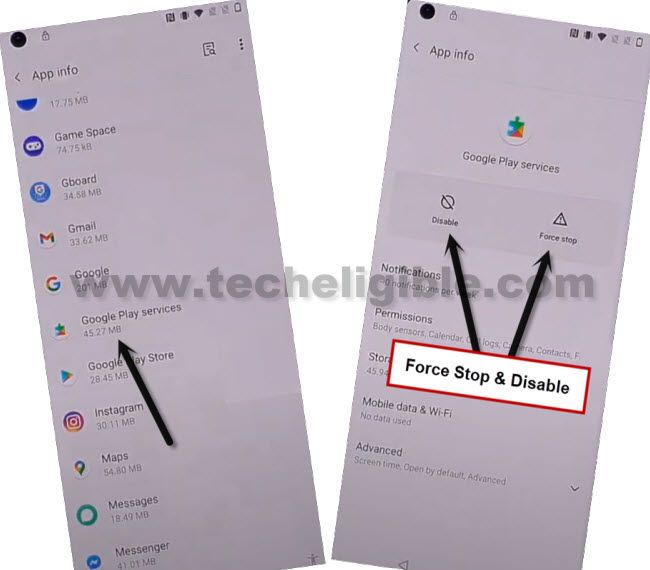
-Go to > Apps & notifications and then tap to “App info”.
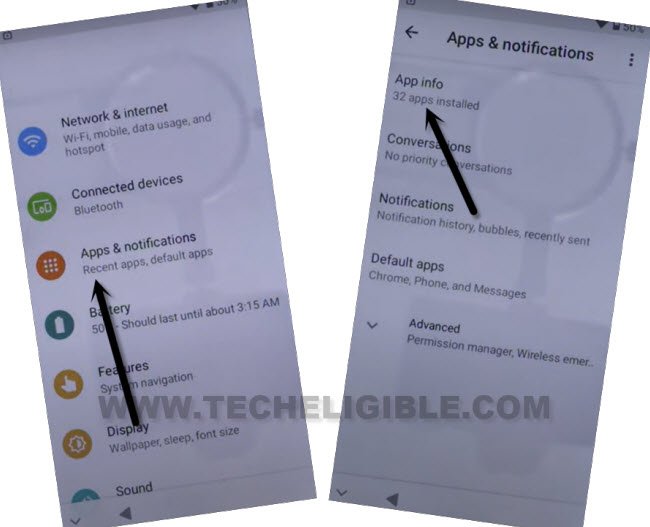
-Disable and force stop “Google Play Services” same as shown in below image.
-Let’s restart device, and after that you will see (Just a sec…) screen, wait over there.
-If SIM card is not inserted, you will get a screen of (Connect to Mobile network), just tap to > Skip.
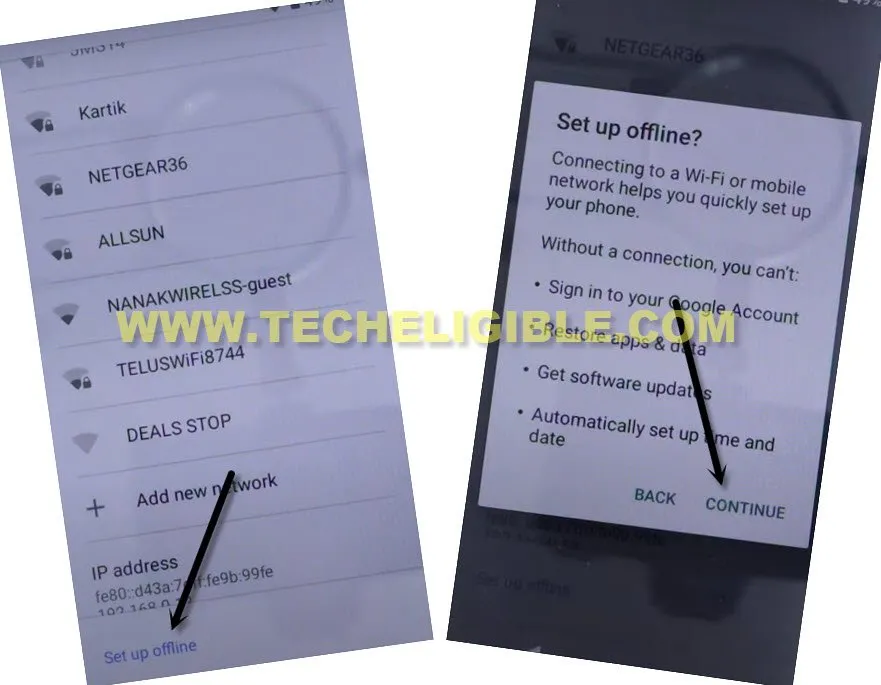
-Now hit on “Back Arrow”, and there you will have a (Connect to WiFi) screen, and you must have there a (Setup Offline) option as well.
-Just hit on > Setup Offline > Continue.

-But, this screen will stuck on (Just a sec…) screen, this will not complete until you enable back (Google Play Services), to do this, we have repeat all above steps again to reach back to (Google Play Services) app.
-To do that all, by tapping on back arrow several times, just get back to first (Hi there) screen, and repeat all steps again.
Repeat All Steps to Enable Google Play Services:
-Go to > Start > Skip > Don’t Copy.
-Tap on back arrow 2-3 times until you reach back to (Connect to WiFi) screen.
–Tap to > See All WiFi Network > Add New Network.
–Tap to > Mic icon > Deny.
![]()
–Tap to > Mic icon > Deny & Don’t Ask Again.
![]()
–Tap to > Mic icon > Allow.
![]()
–Go to “Permission”, and hit over “Search icon” from top corner.
-Type in top search box “Setting”, and go to “Settings” icon, and then tap on “Open”.
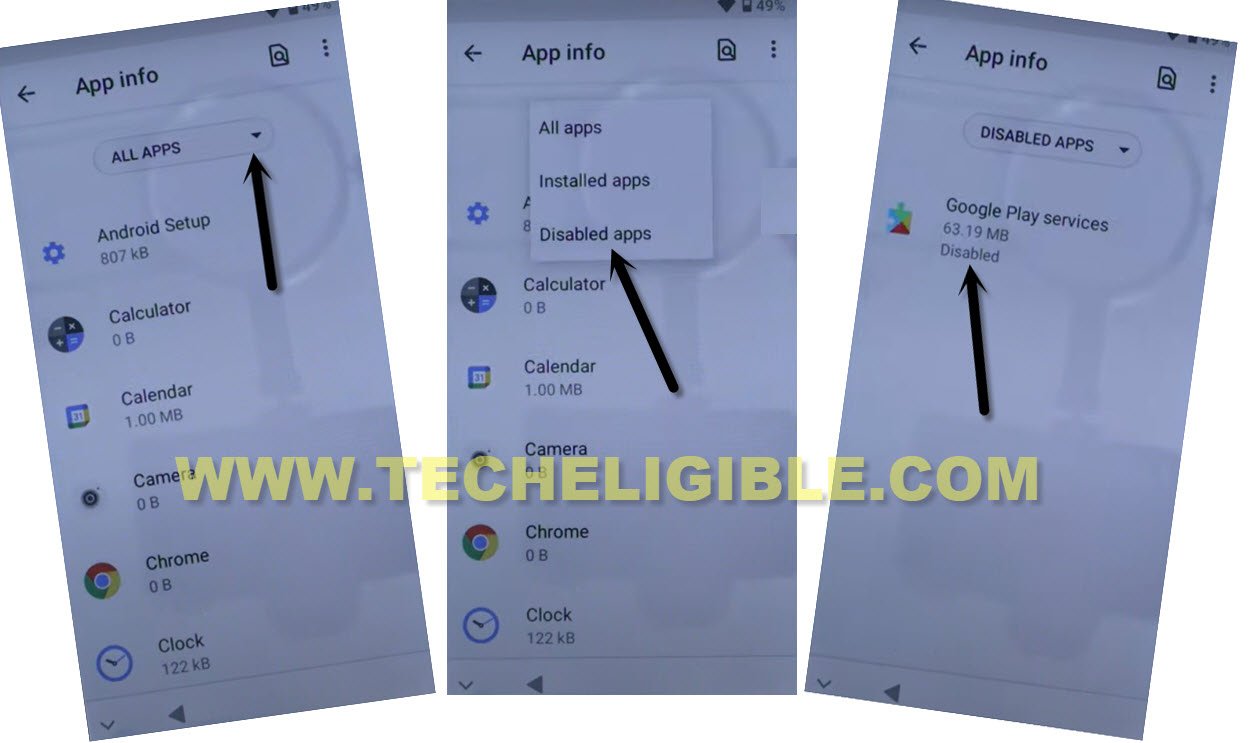
-Go to > Apps & notifications and then tap to “App info”.
-Now tap to “Down Arrow” from all apps, and hit on “Disabled”, you will be shown “Google Play Services”, just tap on that app.
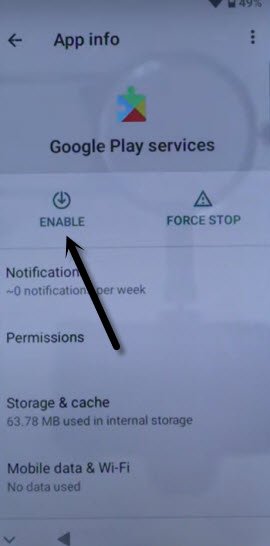
-Tap to “Enable” button.
-Go back to (Connect to Network) screen by tapping on back arrow multiple times, and then tap to > Setup Offline > Continue.
-Now wait on just a sec… screen, after that tap to > More > More > Accept, after that, hit on > Skip > Skip Anyway.
-Tap to > More > Agree > All Set.
-Congrats, you have reached inside your ZTE Blade A31 Plus device homescreen, lets perform a factory rest task.
-Go to > Settings > System > Reset Options > Erase all data.
-Tap to 2-3 times on (Erase all data), the device will auto restart, and you are all done from Remove FRP ZTE Blade A31 Plus, lets just finish your setup wizard again, thanks for visiting us.
Read More: