
Get back your Fujitsu device even after hard reset and forgetting already signed in google account. We can fix this issue just by disabling google play services. But, to disable this app, you will have to access to device main settings screen just by using (Japanese Keyboard) from this phone. Follow steps from below.
Disclaimer: We are creating this post to educate people about how to get back their lost device due to forgetting Google account. This method is only for device owner and for educational purpose only.
Let’s Start to Remove FRP Fujitsu Arrows NX9 5G:
-Firstly, switch on your device & Connect WiFi.
-Let’s hit on a “Add new network” option from same WiFi page.
-From there, tap on a “Keyboard” icon from bottom corner. From popup window, choose “Japanese” language.

-Let’s go to “MENU” option from keyboard screen. After that, long tap on a “Panda icon”.
-Go to “Search phonebook”.

-Let’s go to > Docomo Phonebook > Open.

-From next page, just go to > Accept & Go on > Ok > Ok.
-Tap also on these options > Allow > Agree > Next > Next > Next.
-From “Easy & Safe Access” page. Tap to “Back Arrow” icon from bottom.
-You have to create new contact just by tapping on a “+” icon.
-After that, go to “Device” option.
-Enter any name in “Contact name” field tab. After that, enter also any number in “Phone” field tab.
-Tap to “Save” option from top corner. Your new contact has been created successfully.
-From next contact details page, just go to “Message” icon.
-Tap to > Next > Next > Allow.
-Tap once on the “Back Arrow” icon from message screen.

-From bottom of corner, just tap on a “Mypage” option.
-Let’s access to source licenses page by going to > About Message > Open source licenses.
-You will have a link list there, just tap to first blue link same as in below image.

-After that, long press at any text and tap on “Share” option to Remove FRP Fujitsu Arrows NX9 5G.
-From popup screen, tap to to “Nes Suits” application.
-To launch this app, tap to “Get Started” option as well.

-Tap on a “Back Arrow” from top left corner same as shown below.
-Tap at any random post from news suits app.

-After opening up a post, you must have a “Share” option at bottom corner. Just tap to that “Share” icon.
-From popup window, tap to “Share to other apps” option.

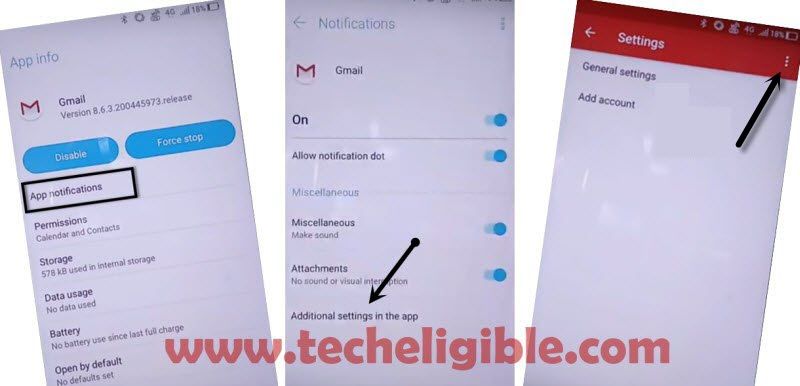
-Open up Gmail app by long hold on “Gmail” application.
-Let’s tap over a > Notifications > Additional Settings in the app.
-Go to > 3 dots menu > Help & Feedback.
-Tap on a search bar. After that, tap once on “Keyboard” icon from bottom. Select “Gboard” option from popup screen. Your device keyboard language will be changed to English.
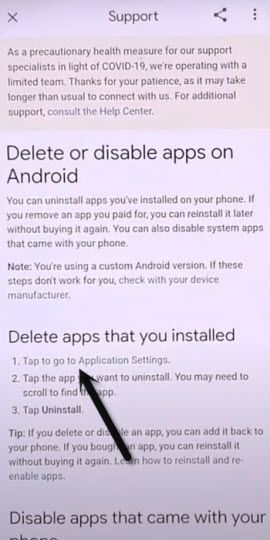
-Type in search bar “Delete or disable apps on android” and tap to “Search” icon from bottom keyboard to start searching.
-You will be displayed all relevant searched result, from there, tap to “Delete apps on your android device…..” article.

-Hit on a link “Tap to go to application Settings” from support page to Remove FRP Fujitsu Arrows NX9 5G.
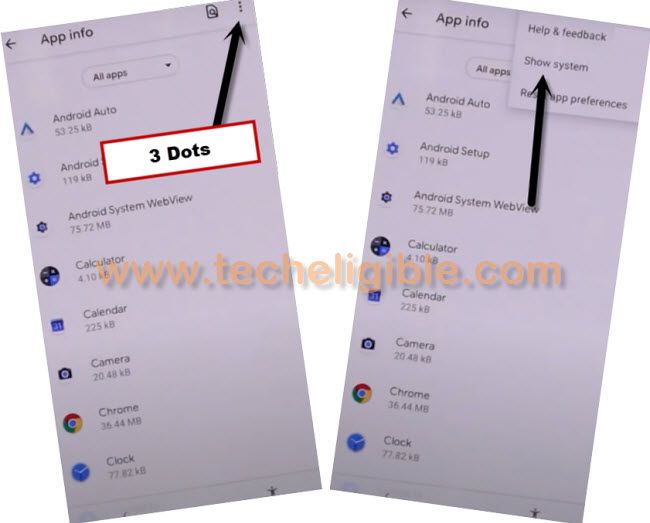
Let’s Disable Google Play Services:
-Firstly, tap over a “3 dots” icon from top corner. After that, tap to “Show system”.
-Let’s force stop android setup app by going to > Android Setup > Force Stop > Ok.
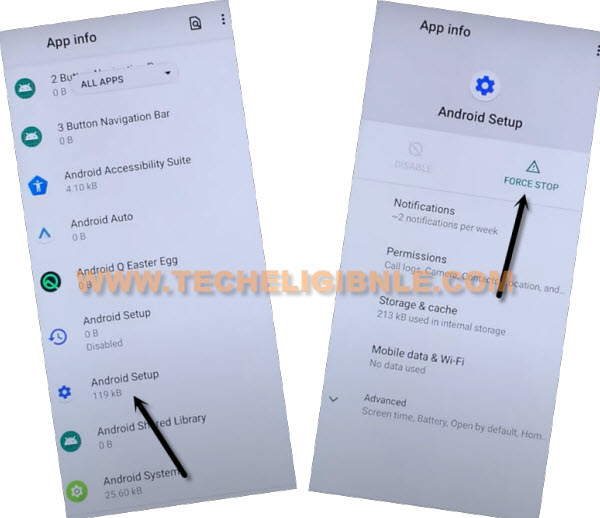
-Hit on a back arrow icon from bottom to get back on a app list screen.
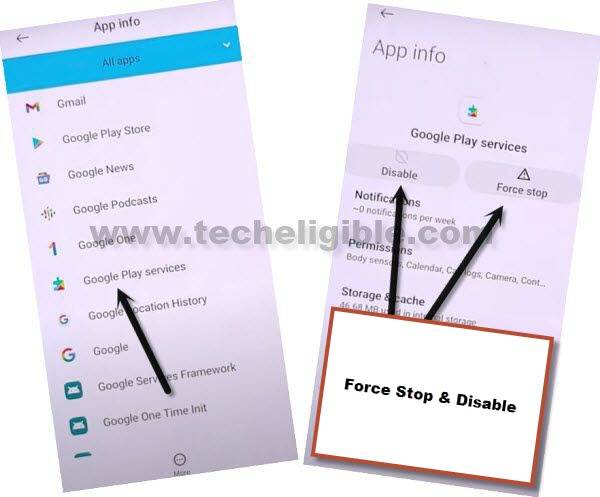
-From there, find and tap on “Google Play Services” app.
-Disable & Force Stop this app as well.
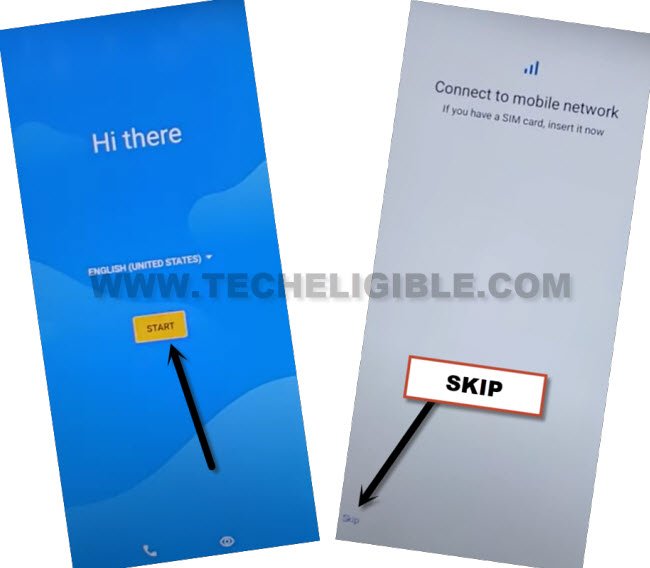
-Keep tapping on back arrow icon until you reach back on a first (Hi there) screen.
-After that, tap over a > Start > Skip > Don’t Copy.
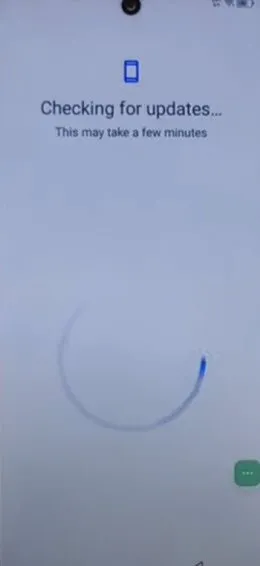
-After that, your device will stuck on a (Checking for update…) page. To get this done, we have to enable back google play services application.
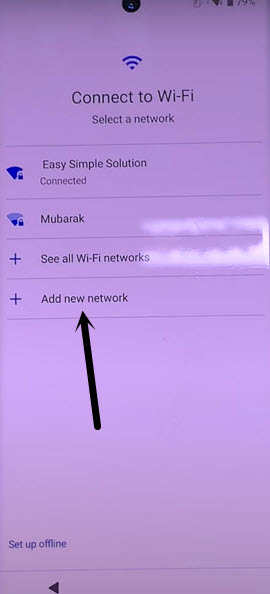
-Go back on a (Connect to WiFi) screen by hitting on a back arrow icon. From there, hit on a “Add new network”.
Let’s Enable Back Google Play Services:
-Let’s hit on a “Add new network” option from same WiFi page.
-From there, tap on a “Keyboard” icon from bottom corner. From popup window, choose “Japanese” language.
-Let’s go to “MENU” option from keyboard screen. After that, long tap on a “Panda icon”.
-Go to “Search phonebook”.
-Let’s go to > Docomo Phonebook > Open.
-From contact detail page, just hit on a > Message > Back Arrow icon to Remove FRP Fujitsu Arrows NX9 5G.
-Let’s access to source licenses page by going to > About Message > Open source licenses.
-You will have a link list there, just tap to first blue link same as in below image.
-You have to long tap at any text and go to > Share > Gmail.

-From Gmail application page, tap to “Skip” option.
-From popup window, tap to “Skip”. After that, you will taken inside google play services screen.
-From there, tap to “Enable” option.

-You can easily finish up your device setup wizard steps by going back to (Connect to WiFi) screen. From there, tap to > Setup Offline > Continue.
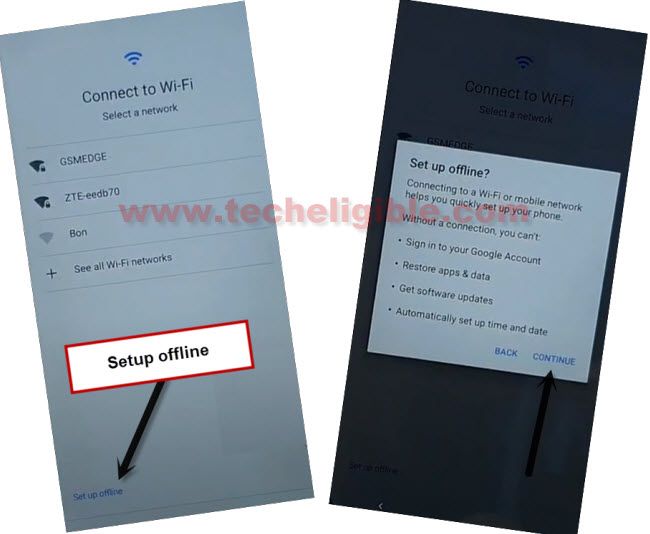
-You can easily complete your all remaining setup wizard steps on your own.
-After accessing inside your device main home-screen. Don’t forget to reset your device from settings.
Enable OEM & Developer:
-Let’s factory reset device from settings page.
-Open up your device menu and tap to “Settings” icon to reach your device main settings page.
-Go to “About Phone”. Let’s tap 7 times on “Build Number” option.
-After that, go back to “Main Settings” page. From there, go to > System > Developer Options.
-Enable “OEM Unlocking” option.
-After that, tap once on the back arrow icon from bottom to go back to (SYSTEM) page. From there, tap to > Reset Options > Erase all data > Erase all data > Erase all data.
-Your device will auto restart and you can finish up setup wizard steps easily.