Remove FRP Samsung J3 Eclipse Android 8
Remove FRP Samsung J3 Eclipse Android 8.1 without PC and Talkback method, because in this latest android version device, the talkback is not working at all, so we are going through latest frp way to Remove frp, for accomplishing this process, you are required a PIN locked SIM and a strong WiFi connection.
You can add and remove frp protection easily from your own device if you know your device previously synced Gmail Account, but if you have forgotten your Gmail ID and also you have performed a Hard Reset process on your phone, then you will not be able to access in your phone until you follow this below frp method to Remove FRP Samsung J3 Eclipse.
Warning: Do not try this frp method on a stolen phone, this is serious crime, if you are trying to bypass frp on a stolen phone, you may also be jailed.
Tools Required for J3 Eclipse:
♦ Wifi Connection.
♦ SIM Card (PIN Locked), you can setup PIN in your SIM using other device.
♦ J3 Eclipse Android 8.1 (FRP Locked Device).
How to Remove FRP Samsung J3 Eclipse:
-In your J3 Eclipse phone, connect WiFi first.
-Remove Battery & insert (PIN Locked SIM).
-Turn on device.
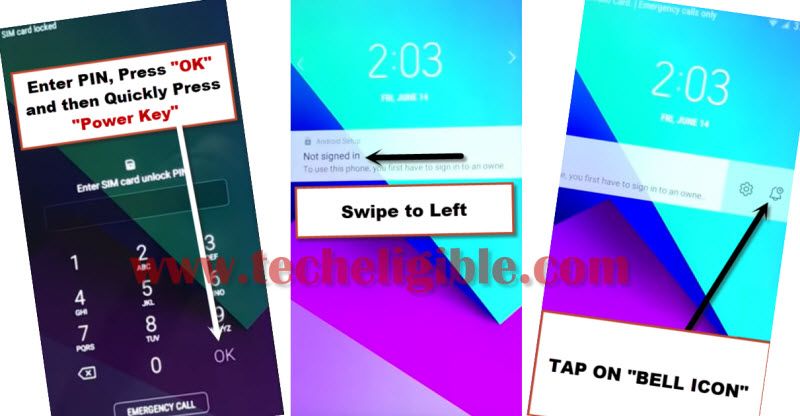
-Enter correct 4 digits PIN.
-Tap on “OK” & Quickly Press (Power Button) to turn off screen only.
Note: You have to quickly press button right after hitting on “OK”.
-Press (Power Button) again to wake up phone screen.
-Swipe (Not Signed in) to the left side & tap on “Bell icon”.
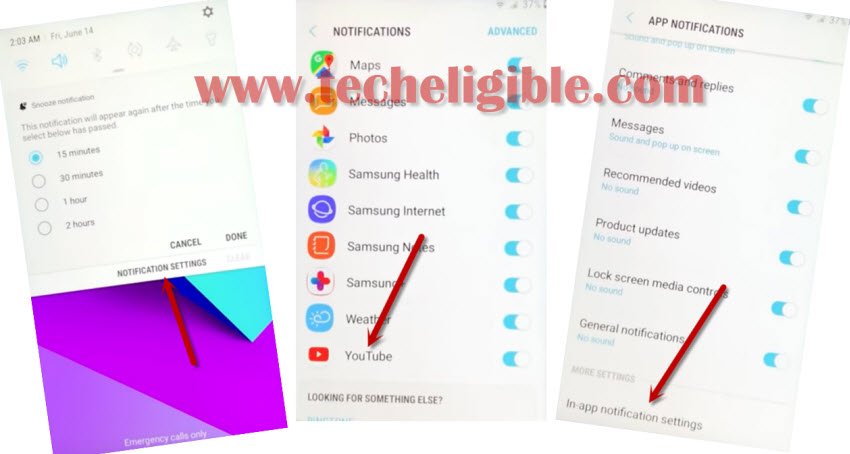
-Notification Settings > Youtube > in-app notifications Settings.
– About > History and Privacy > Youtube Terms of Service.

-From (Welcome to Chrome) homepage, tap to > Accept & Continue > Next > No Thanks.
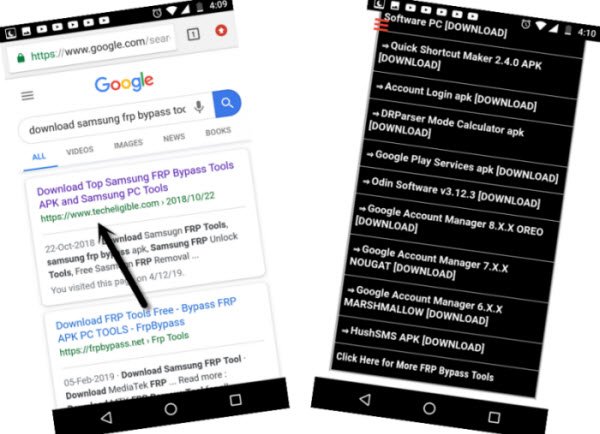
-Type chrome search area “Download Samsung frp tools techeligible“.
-Visit our website 1st searched result. (Follow below image).
Download FRP Tools:
-Download 2 frp tools to Remove FRP Samsung J3 Eclipse.
1st Tool: Google Account Manger 8.
2nd Tool: Quick Shortcut Maker.
-Wait until downloading process done & Go to top of the page, and tap to “3 dots” from top right corner, and then tap on “Downloads” to get into download folder, where you will see both downloaded frp tools.
Install Apps:
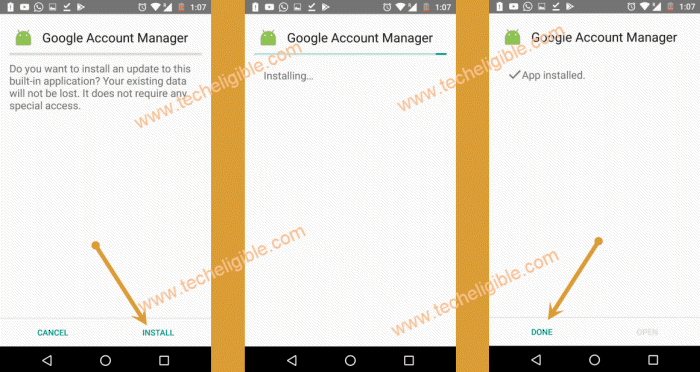
-Tap on “Google Account Manger 8”.
-From new popup box, tap to > Settings > Allow from this source.
-Go back.
-Tap to > Install > Done.
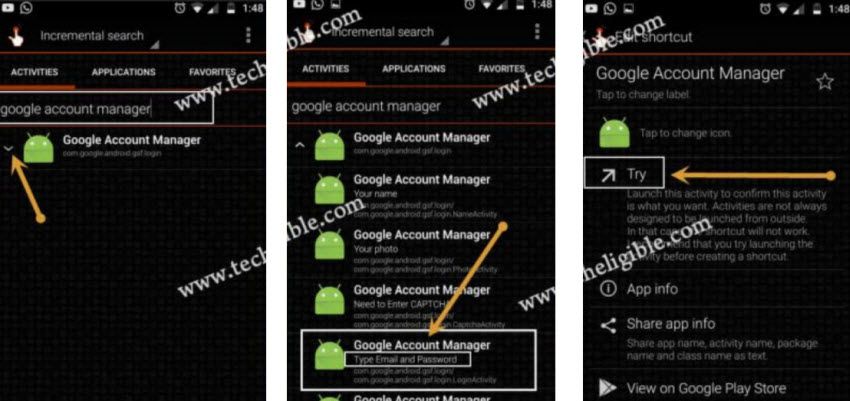
-Install 2nd app by tapping at > Quick Shortcut Maker > Install > Open.
-Type “Google Account Manager” in search box.
-From the list of (Google Account Manager), select only one that appears with (Type email and Password), see below image.
-Tap to “TRY”.
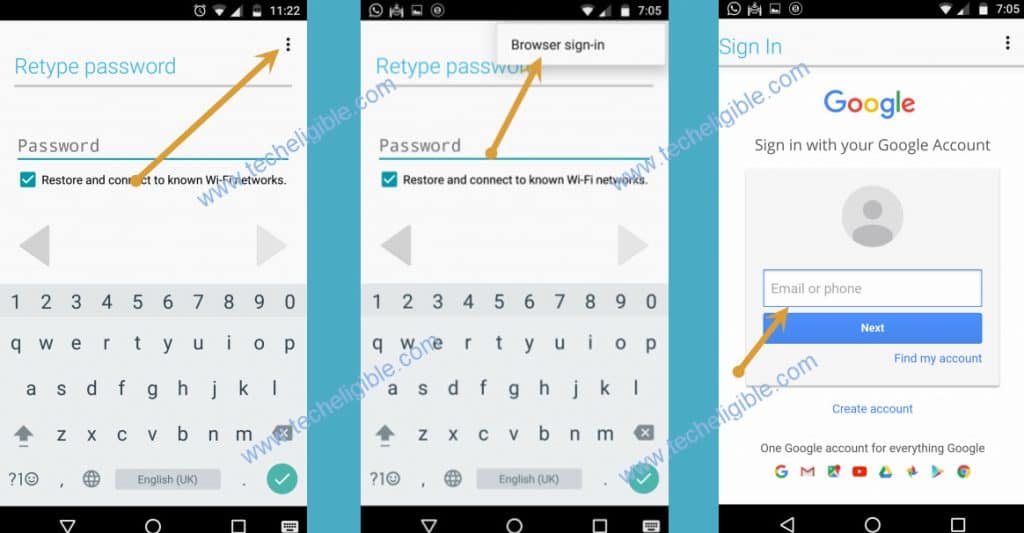
-Hit > 3 dots > Browser Sign-in.
-Sign in with your any new Gmail Account to Remove FRP Samsung J3 Eclipse.
How to Add FRP Protection (FRP) in Galaxy J3 Eclipse:
This can easily be done by going into your device settings, if you bought brand new device, then you will have to add your own gmail account, and that account will be use for frp protection, no one can access your device Galaxy J3 Eclipse until he/she enter your gmail account.
-To add Gmail account, just go to > Settings > Accounts & Backup > Add Account > Google.
-Sign in there with your Gmail Account.
Remove FRP Protection in Galaxy J3 Eclipse Before Selling Phone:
-If you wanna sale your device to someone, in this case, you should remove your Gmail account, otherwise later on your device will be frp locked, and new owner of that device Galaxy J3 Eclipse won’t be able to have access in that phone, so put someone in trouble, better to remove Gmail account.
-For removing Gmail account, just go to > Settings > Accounts & Backup > Account > Select your Gmail Account > Remove Account.
Read More:
⇒ Bypass frp J3 Prime (Android 7)