
Bypass Google FRP Moto G50 Android 12 With Easy Way
If you are still struggling with this device, and unable to Bypass Google FRP Moto G50 (Android 12), we will show you this easy method, how you can easily get back this device with your new google account signed in, for sure, once you hard reset device, and forget your signed in google account, this device will be useless until you setup forgotten account, but in this case, you can follow this method to get back your Moto G50.
Warning: This method is only for device owner and for educational purpose only.
Let’s Start to Bypass Google FRP Moto G50:
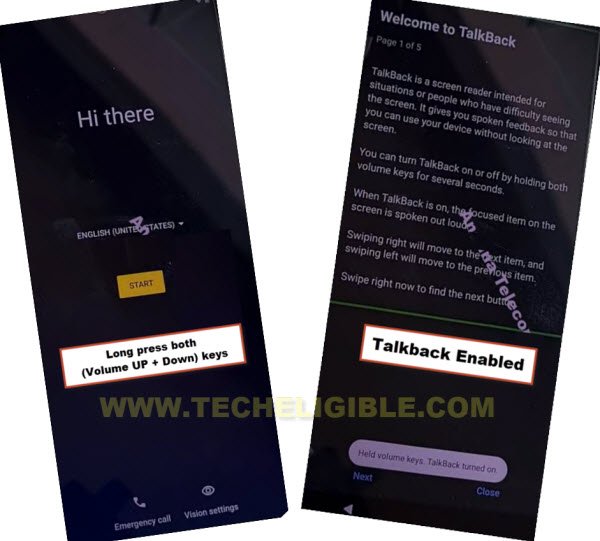
Step 1: Connect WiFi, and turn on talkback just by long press both (Volume UP + Down) buttons, and double hit on “Turn on” from popup.
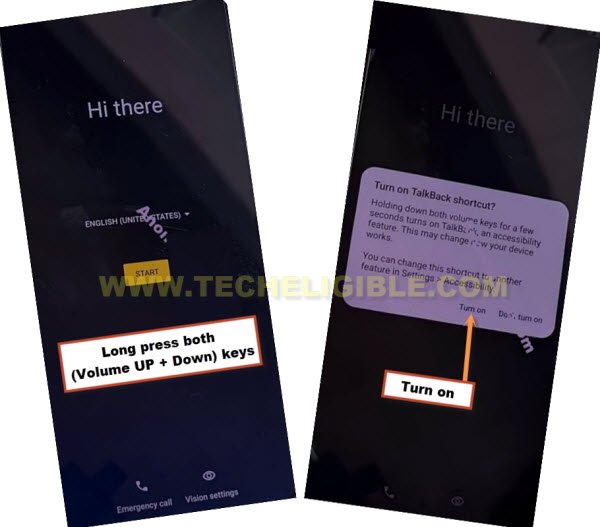
Step 2: We are gonna long press again both (Volume UP + Down) keys at once, there you will have a (Welcome to Talkback) screen.
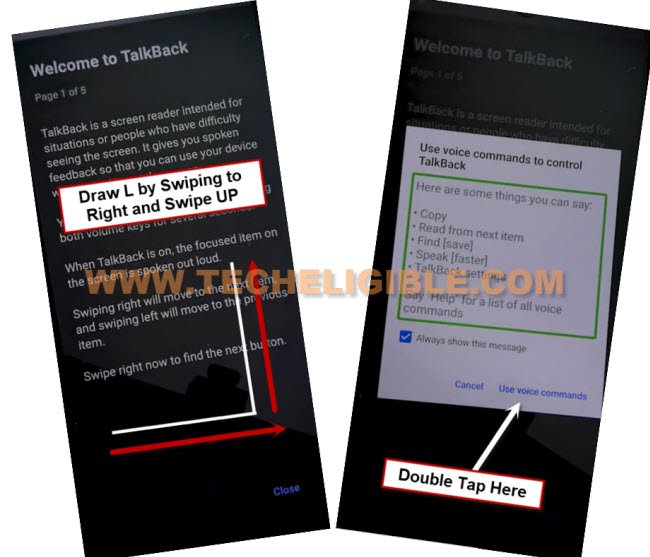
Step 3: Lets make a reverse “L” letter on screen by swipe right and then Swipe up.
Step 4: Double tap > While using the app > Use Voice Command.
Step 5: You must see a green boarder around the screen corner, once you see this, speak loudly “Open Google Assistant”, this will show you new (Try Saying) popup window.
Step 6: Another new popup will appear up on screen, just double tap over “Keyboard” icon same as shown in below image.
![]()
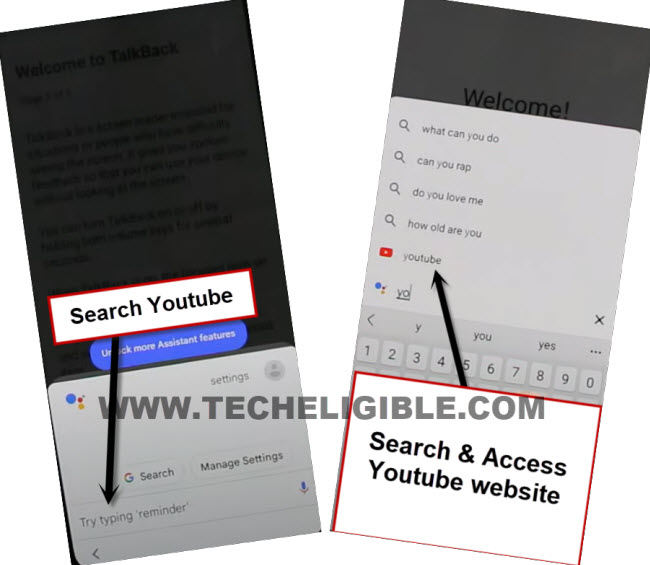
Step 7: Turn off talkback by long press both (Volume UP + Down) keys simultaneously, after that, search there “Open Youtube”, and tap to “Youtube” icon from searched result to be redirected inside youtube app directly.
Step 8: After reaching inside Youtube official website, just tap “Profile icon” from top corner, and go to “Settings”.
![]()
Step 9: Go to > About > Youtube terms of service > Accept & Continue > Next > No Thanks.
Turn on Accessibility Menu:
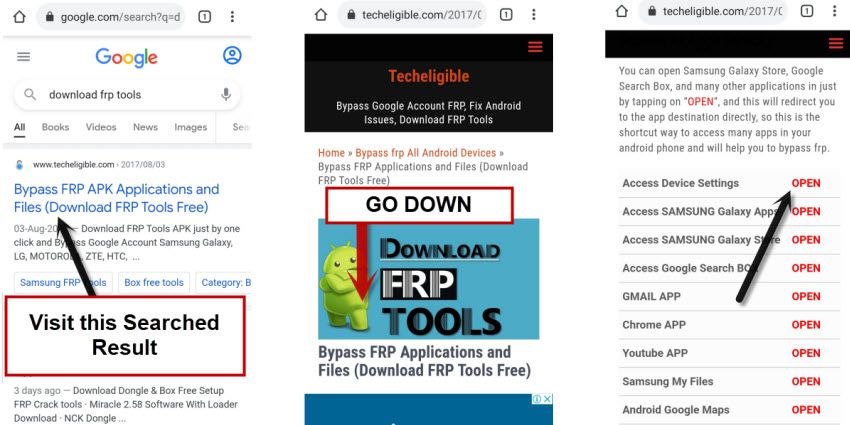
Step 10: Once you reach inside browser, search there “Download FFRP Tools“, and visit our website searched result.
Step 11: Go down and tap to “Access Device Settings” option same as shown in below image.
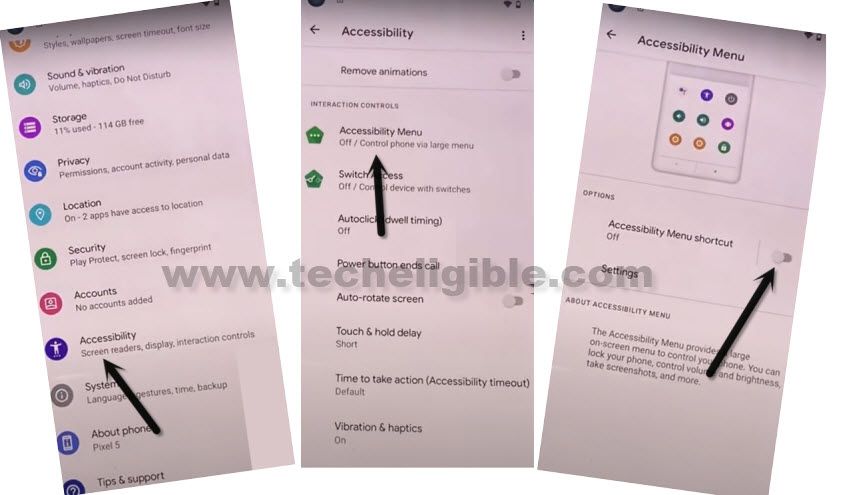
Step 12: Now we have to turn on shortcut menu just by going inside > Accessibility > Accessibility Menu > Turn on.
Step 13: Once you enable this, (3 dots) will just start popping up at bottom right corner.
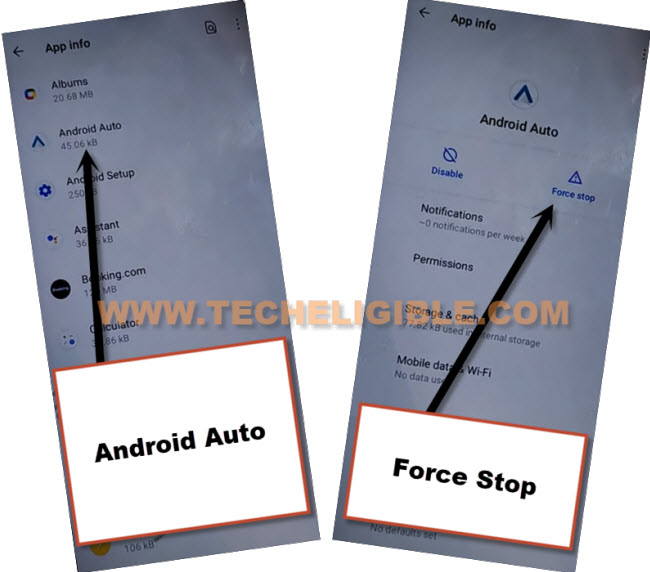
Step 14: Go back to (Settings), from there tap to > Apps > All Apps, now go to “3 dots” from top corner and hit on “Show Systems”, there you will have app list.
![]()
Force Stop and Turn off Google Apps:
Step 15: From app list, find and tap to > Android Auto > Force Stop > OK.
Step 16: Tap to another settings gear icon “Android Setup” same as shown in below image, so just tap to > Force Stop > OK.
![]()
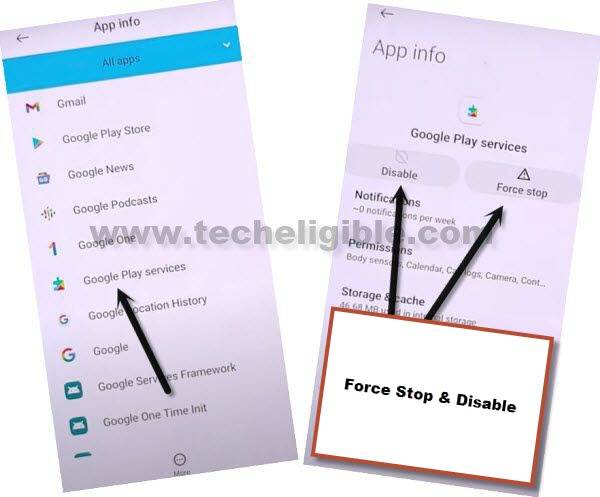
Step 17: We have to disable one main application, after that you will be able to easily finish setup wizard without signing with any google account, find and tap to > Google Play Services > Force Stop > OK, now hit on > Disable > Disable App.
Step 18: From first (Hello) screen, tap to > Start > Skip > Accept & Continue > Don’t Copy.
Quickly Follow 3 Main Steps:
Step 19: On checking for update screen, we will see there (3 dots) icon at bottom right corner, don’t hit on right now, we are just showing you 3 dots icon.
![]()
Step 20: We have to tap these 3 options very quickly as much as possible, so quickly hit on > 3 dots icon > Assistant > Settings, (Follow below image).
Note: You may fail at first few attempts, just keep repeating until you hit all 3 options successfully, and reach to (Google Play Services).
Step 21: Now tap to “Enable” button from google play services to Bypass Google FRP Moto G50.
![]()
Final Step: Congrats, you are all done from Bypass FRP Account (Android 12), you can now easily finish initial setup wizard, and don’t forget to sign in with new google account after reaching inside device homescreen, so that, you may not see FRP lock again after restarting this device.
Read More: