Bypass FRP All Infinix Android 14 Without PC [2025 Method]
This method covers all infinix android 14 devices for bypassing frp account completely. If you are the one of them and put your device on FRP because of forgetting Gmail account. So, you can follow up guideline from here to Bypass FRP All Infinix Android 14 with the help of enabling (Accessibility Menu Shortcut) function.
Remember: Do not try this frp method on a stolen phone. This is a serious crime, if you are trying to bypass frp on a stolen phone. You may also be jailed, because this process is for device owner and for educational purpose only. Just to assist device owner, how they can recover back their phone and setup new account.
Let’s Start to Bypass FRP All Infinix Android 14:
-Start up this process by turning on infinix device & Connect WiFi to have proper internet connection.
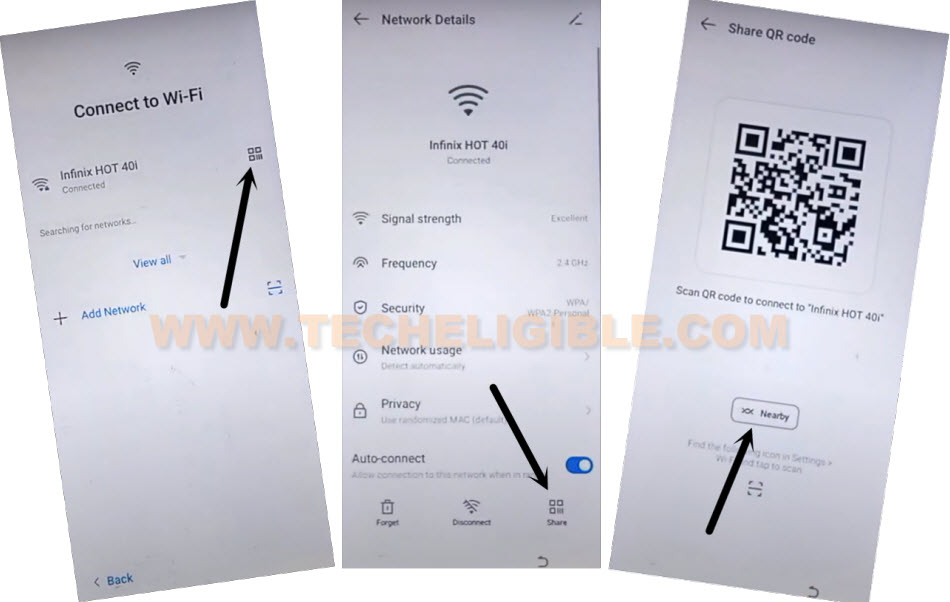
-Go back to (Connect to WiFi) page. From there, tap on your connected WiFi name and tap to “Share” option from network details page.
-Afterwards, go to “Nearby”.
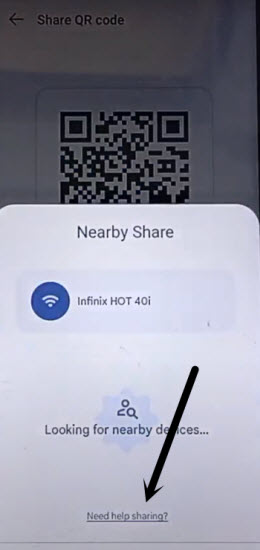
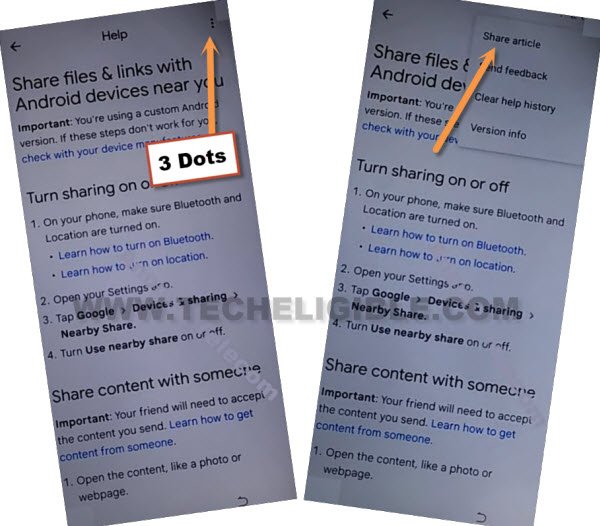
-From next page, you have to hit on a link named “Need help sharing?”.
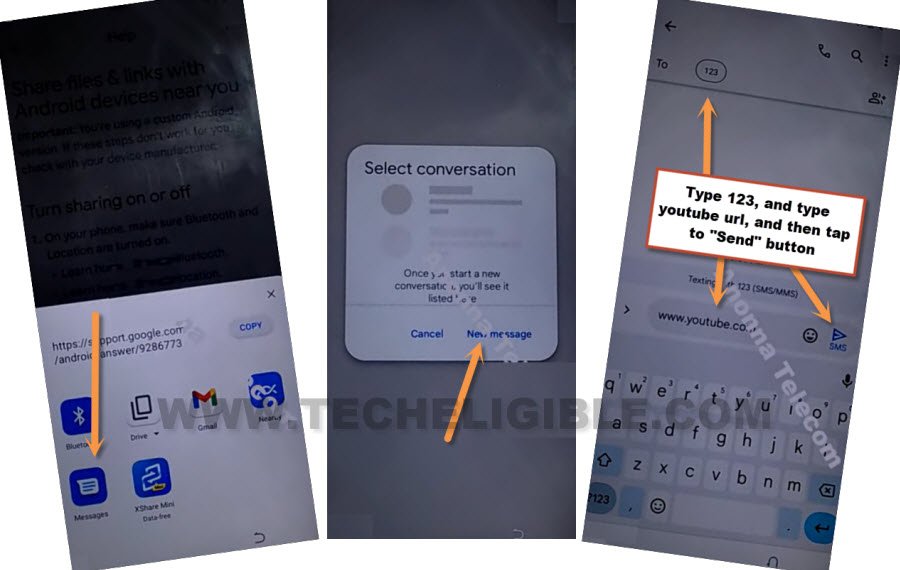
-Let’s bring up some sharing apps by tapping on “3 dots” icon from top corner. Afterwards, tap to “Share Article”.
| Note: Do make sure, your device has SIM card inserted. |
-Type any random number in (To) field tab.
-Type a link “www.youtube.com” and send this youtube link to that number as a text message.
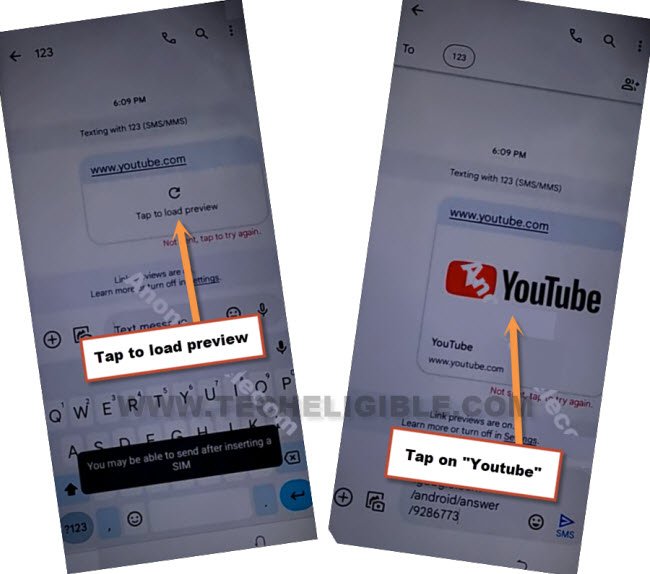
-Tap on your link from message box to access youtube url directly.
-If the url converts to a youtube image, just tap on that youtube image.
-Go to “Account” from bottom corner of the youtube page. After that, tap over a “Settings” gear icon.
-Tap to > About > Youtube terms of services > Use without an account > No Thanks.
Turn On Accessibility Shortcut:
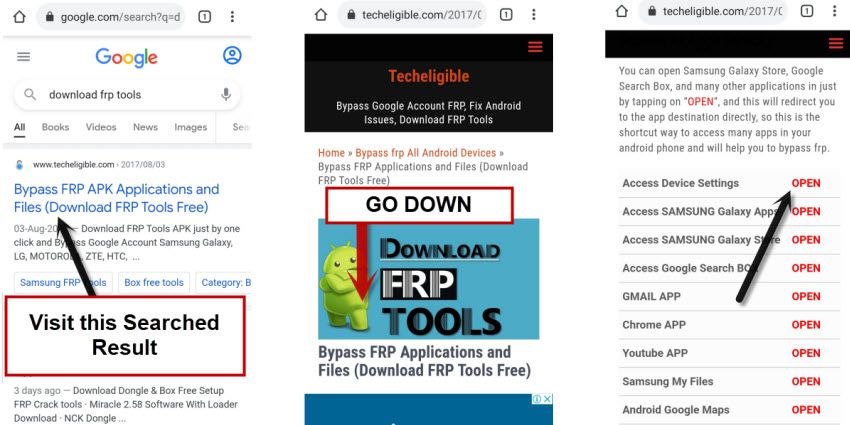
-Firstly, we will manage to access our device settings page. For that, search in browser with “Download frp tools” text.
-Afterwards, just visit same searched result as shown in below screen shot. You will be able to access techeligible frp tools page.
-Go to “Access Device Settings” from there.
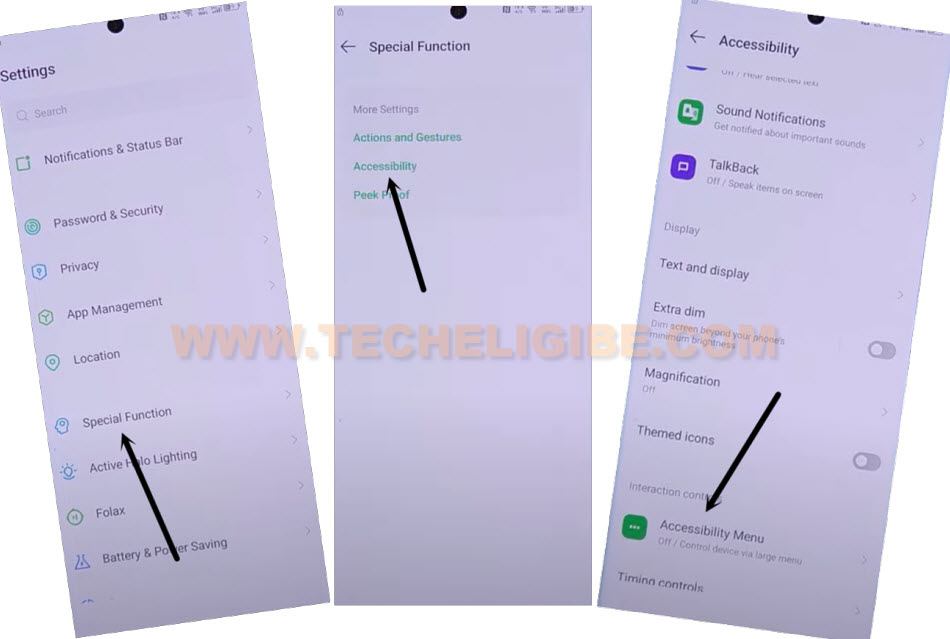
-Let’s turn on (Accessibility Menu Shortcut) by tapping on > Special Function > Accessibility > Accessibility MENU.
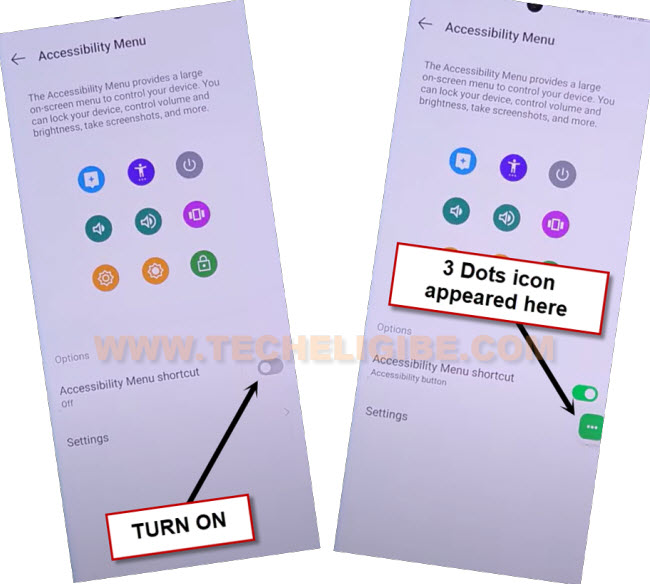
-After that, just switch on “Accessibility Menu Shortcut” function to have 3 dots icon on the right of your device screen.
-Tap over a > Allow > Got it.
-After enabling this function, you will have (3 dots) icon.
Go back to Settings & Disable Apps:
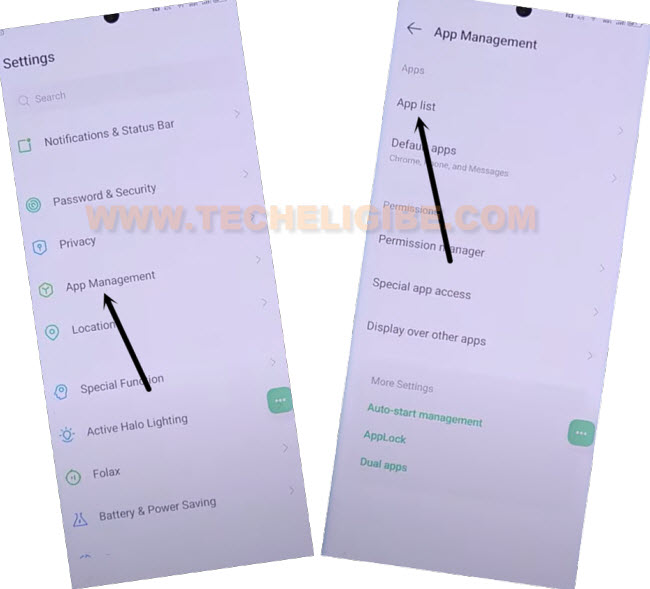
-Let’s get back on main (Settings) screen by hitting back arrow icon from bottom.
-Go to “App Management” option. After that, tap on “App list”.
-You will be redirected to the app list page, from there, tap to “3 dots” icon from upright corner. After that, tap on “Show system”.
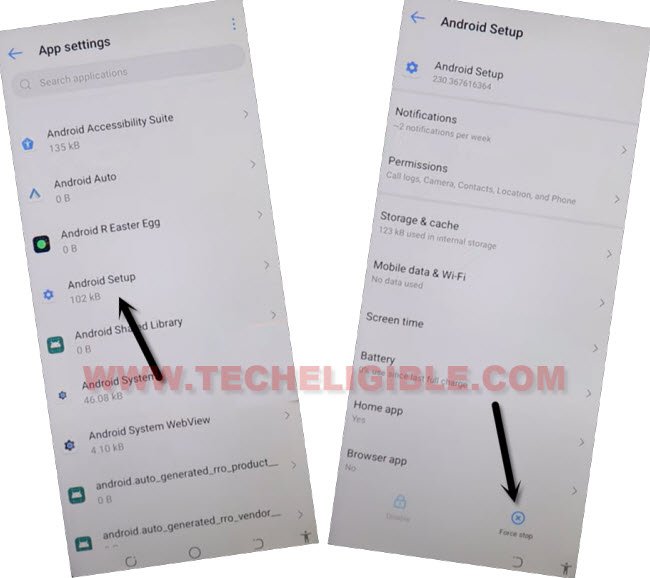
-Force stop (Android Setup) app first. Find and tap on > Android Setup > Force Stop > Ok.
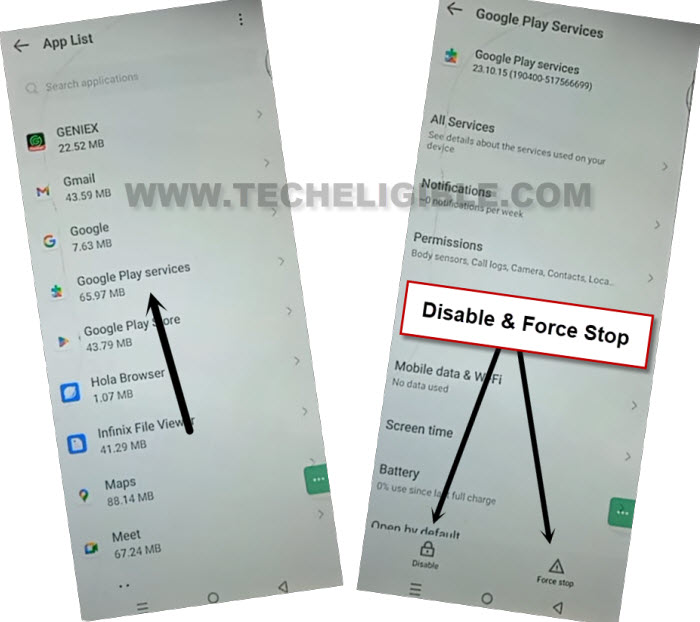
-Go back to app list page again. Find and tap on another app named “Google Play Services”.
-Disable & Force Stop this app as well (See below image).
Restart Device & Complete Setup Wizard:
-Long press “Power button” and tap to “Restart” option.
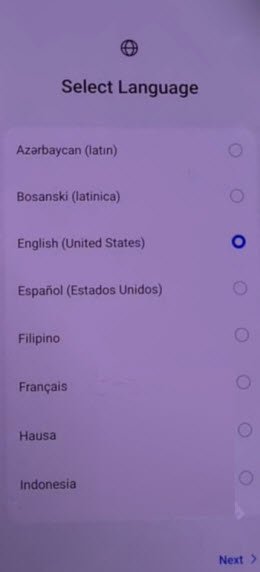
-After that, you will have your first startup page (Select Language).
-From there, tap to > Next > Next > Next.
-Wait on loading screen, after that, tap on “Don’t Copy” option.
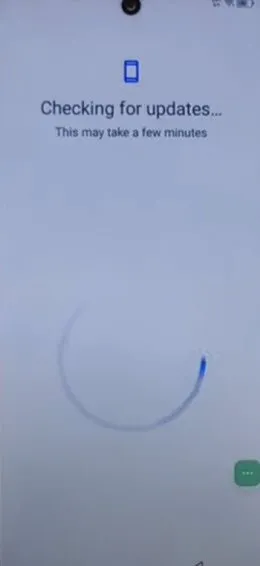
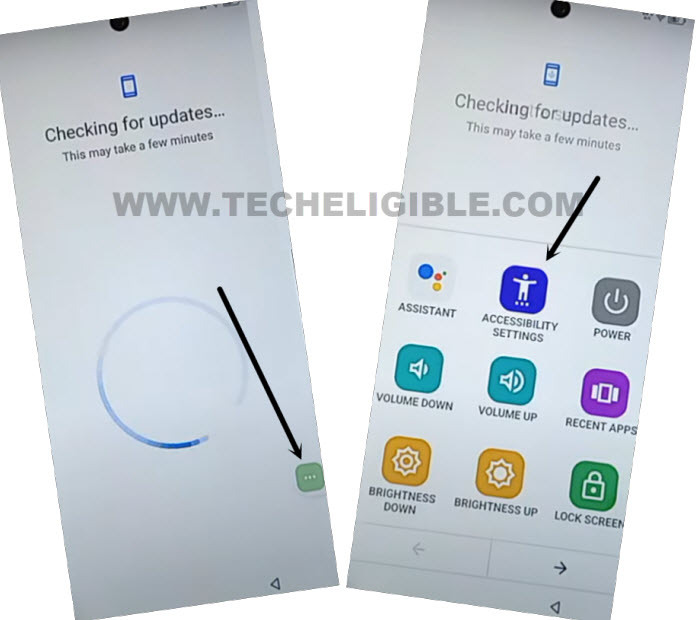
-You will see (Checking for update…). This screen will not go away and complete until we enable back google play services. After that, we will be able to complete setup wizard without facing google sign in screen.
Enable Google App Using Assistant Option:
-We have to use here (3 dots) icon to enable google app.
-Tap to “3 dots” from right edge of the screen. After that, tap on “Accessibility Settings” option.
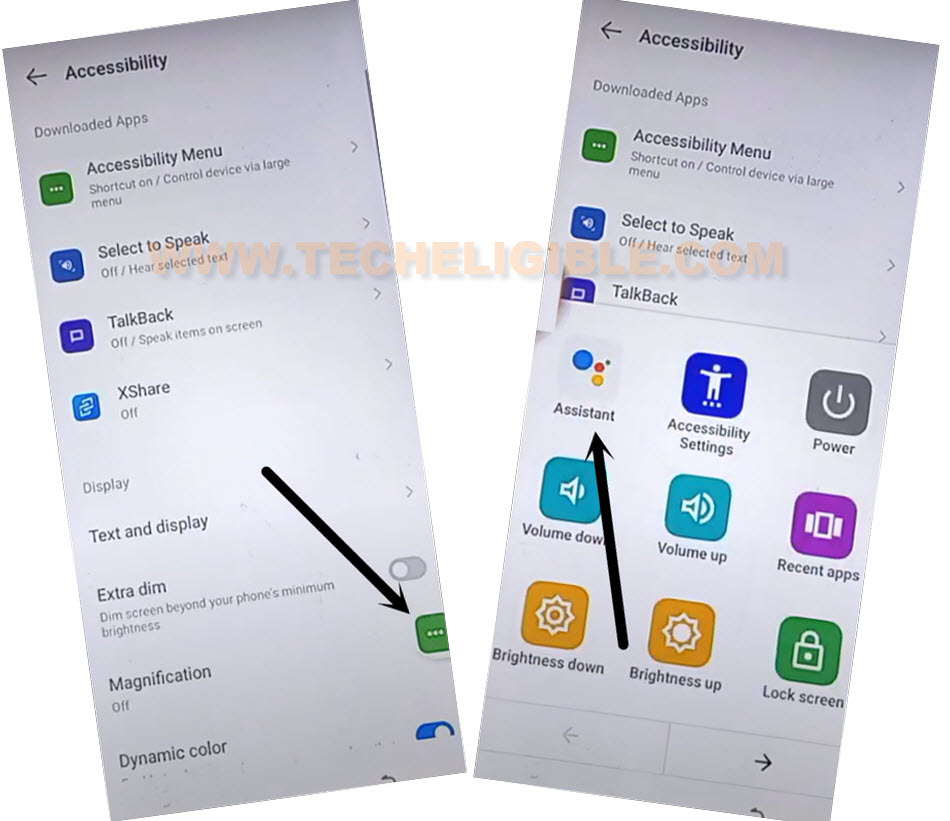
-You will be redirected inside (Accessibility) page.
-From there, tap again on > 3 dots > Assistant.
-You will have a (Google Play Services Required) screen, from there, hit on > Settings > Enable (google app).
Note: If you failed hitting on (Settings) option. Don’t worry, try again for 2-3 times. You will succeed.
-Once the app is fully enabled, you can happily finish up your device setup wizard steps and reach to main home-screen without signing in with forgotten Gmail ID.
-Let’s reach back to (Checking for update…) screen. This time, this loading screen will complete and take you to the (Google services) screen.
-Tap to > More > More > Accept.
-Remaining setup wizard steps can be completed easily, its all done from Bypass FRP All Infinix Android 14 without using any paid services. Don’t forget to setup new pattern lock and Gmail account for turning on new FRP protection.

