
Lost your already-signed-in Google account details and are stuck on the Google verification screen? This indicates that you have locked yourself and are protected by FRP as the owner. However, you still have the chance to Remove FRP Account Sony Xperia 1 III/Xperia 1 (Android 13 & Android 10 versions) by creating new pattern lock on this device. You can do this all without paying for any services.
With the help of 2 frp removal guidelines, you can access back to your device easily. Follow the guideline from below. Choose any 1 method according to your Sony Xperia 1/1V android version.
Let’s Begin to Remove FRP Account Sony Xperia 1 III:
-To obtain the complete tutorial, switch on the device and establish a suitable WiFi connection on a Sony Xperia.
-Return to the Welcome screen. Put the SIM card into your phone.
-You must tap the “Emergency information” option in order to dial any emergency number (112). You can dial any emergency number.
-If you get the “exclamation error” symbol from the calling screen. Just, disconnect the call.
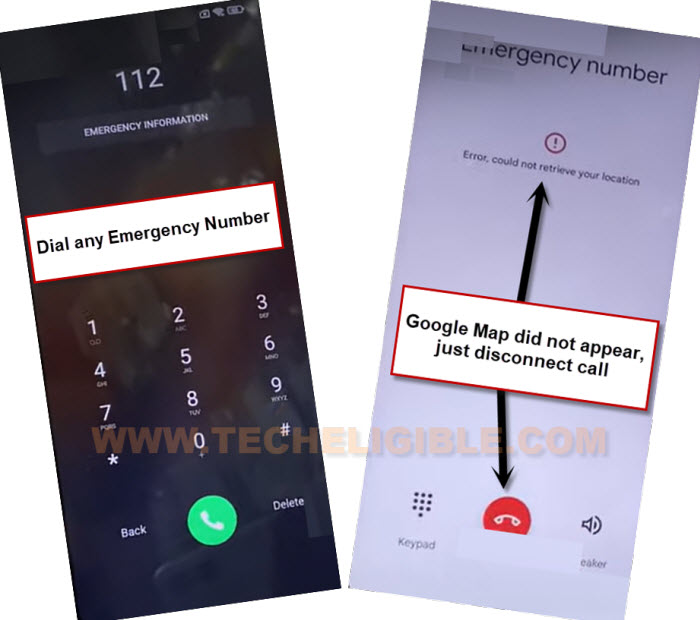
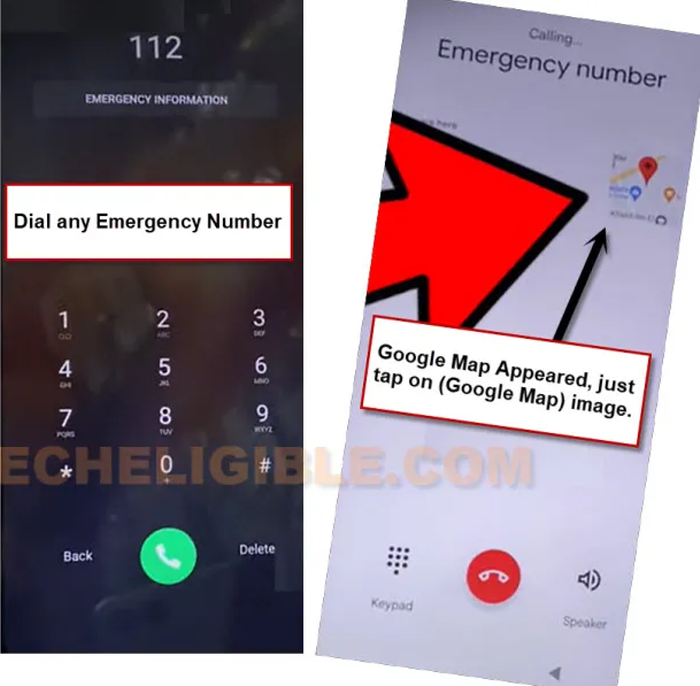
-Let’s call again on emergency number, and keep trying again and again by connecting and disconnecting call until you see (Google Map) preview on screen same as shown in below image. This may take 5-10 attempts to see google map on screen.
-Quickly tap on “Google Map” image.
-After reaching to google map page, just go to “Skip” option. You are successfully inside google map now. Let’s disconnect your connected call by ejecting your sim card from the device.
-Simply select “Skip” after you have arrived at the Google Maps page. You have now successfully entered a Google Map.
-Remove your SIM card from the smartphone in order to end the call you are now on.

-Look up “Restaurant” on a map. Next, click the “Call” button from the restaurant search results.

-You will access to the dialing screen. Let’s insert the SIM card again in your device.

-From there, hit over the “3 dots” option. Then, hit over the “Add wait”.
-After that, tap on a “Send a message”.

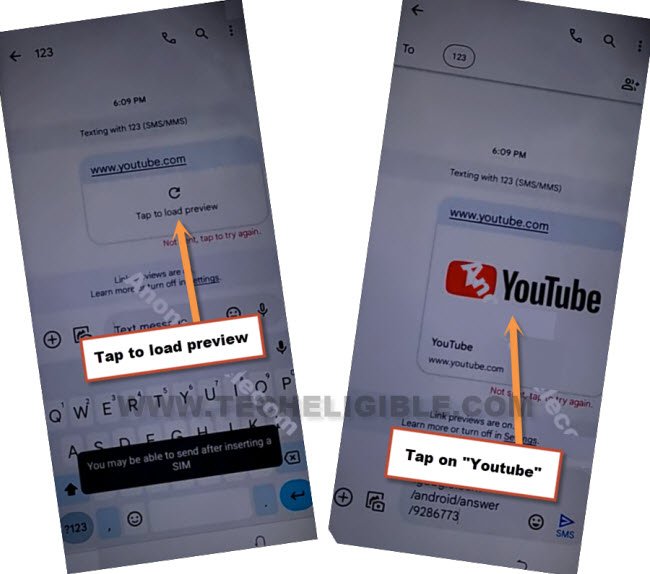
-Type & Send www.youtube.com url as text message. After that url is sent, just tap on a “Tap to load preview” option.
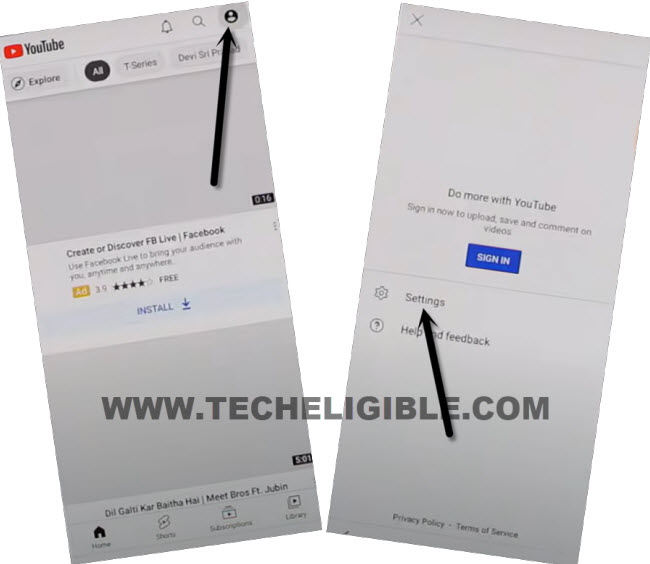
-Hit on a “Human” circle icon in the upper corner. After that, you must go to “Settings” option.
-Go to > History and Privacy > Youtube terms of service.
-Once the Chrome browser has been accessed, simply press Accept & Continue > No Thanks.
Add New Pattern Lock on Sony Xperia 1 III:
-Search (Techeligible) and then, go to techeligible official searched result from there to Remove FRP Account Sony Xperia 1 III.
-After that, hit on “Menu” option and go to “Download FRP Tools“.

-As illustrated in the leading image below, we can quickly access the pattern lock setup screen by tapping on the “Set Pattern Lock” option on the FRP tools page.

-We have to setup new pattern lock here. But, this requires an effort and some quick repetition steps. Let’s quickly tap to “Pattern”. Draw any desire pattern and tap to “Next”. Draw again same pattern and tap to “Confirm”.
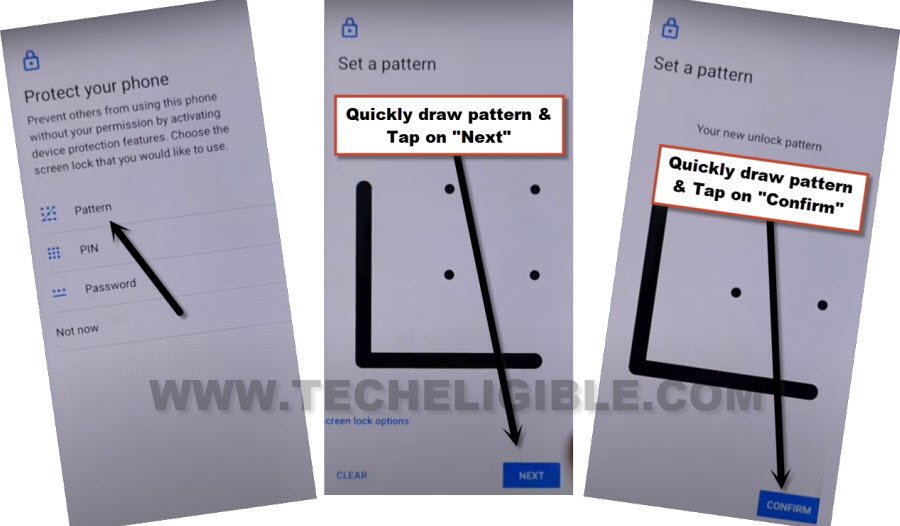
-If you return back to (FRP Tools page) or see a popup window or blank white page. That means, the pattern is not setup yet. you need to repeat steps again. After 5-10 attempts, you will succeed in setup new pattern lock and will see next page of (Keep your device unlocked while its on you).
Repeat Very Fast: Tap again on “Pattern”. Setup your desire pattern quickly by following below image.
-Finally, after some attempts, you will have this page (Keep your device unlocked while its on you). That means, the pattern has been acknowledged by the device to Remove FRP Account Sony Xperia 1 III.
-Go to “Skip” option from there.
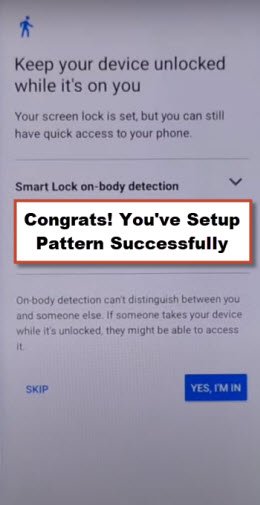
-We must hit the back arrow icon to return to the first setup page. Tap > Get Started > Accept from there.
-Your device will stuck on a loading screen. Wait for 30 sec, after that, remove sim card.
-Restart the device.

-Once the device is fully switched on, from first startup page, just go to e > Get Started > Accept. You will have a loading screen again, just wait again there until you reach to (Connect to Mobile Network) screen.
-Simply, tap to “Skip” option from next page.
-Go to > Accept > Don’t Copy.
-Verify your device ownership by drawing recently setup pattern lock there.
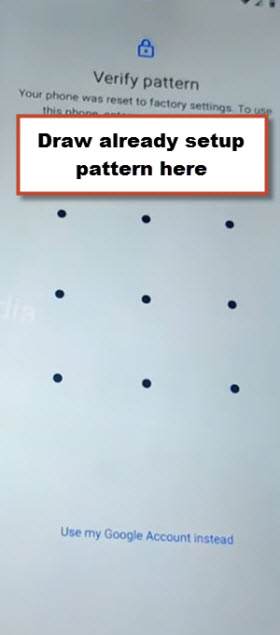
-From google verification page. Hit on a > Skip > Skip.
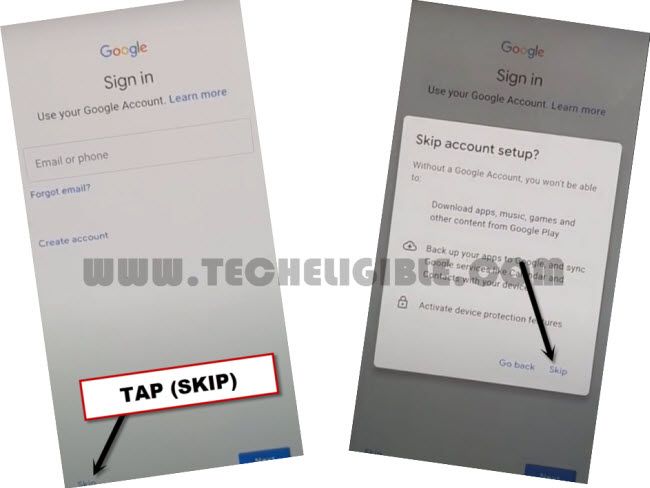
-Everything is finished now. You will not run into any problems completing the following tasks by yourself.