
No idea how to navigate the Google verification screen, and receiving incorrect email ID and password error messages on that screen? This indicates that your phone is protected by FRP lock. You encounter this circumstance only if you have forgotten the Gmail account previously signed in after conducting a factory reset. To resolve this, follow the procedure to Bypass FRP Tecno Spark 40/40C.
Please remember: Do not carry out this FRP method on a device that has been acquired through illegal means. Attempting to eliminate FRP from a stolen gadget is a serious crime. You could face jail time, as this process is meant exclusively for the legitimate owner of the device for educational purposes. It aims to assist the rightful owner in regaining access to their device and creating a new account.
Let’s Proceed with Bypass FRP Tecno Spark 40/40C:
-Before continuing this process, you need to prepare a SIM card with 4 digits PIN lock code.
| Note: If you don’t aware of how to setup the PIN on SIM, simply, insert the SIM card on other phone and go to phone settings. From there, you can setup code directly. Google it for better understanding or check here easy steps. |
-First and foremost, connect your phone to a WiFi network.
-Once that is complete, return to the initial (Select Language) screen.
Insert & Remove SIM
-Insert the previously prepared SIM card that has its PIN locked, which will lead you to a (Enter SIM PIN…) page.
-Let’s eject the SIM tray to take out the SIM.
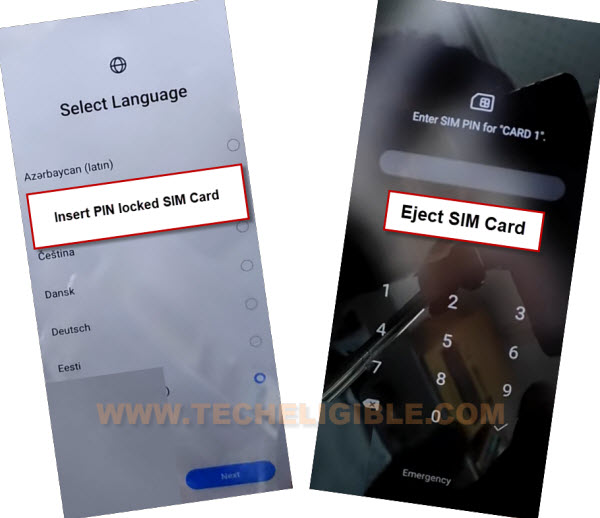
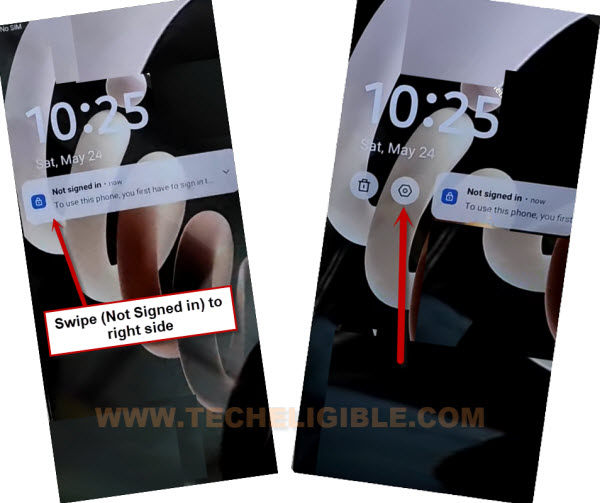
-Then, press the (Power) button once, and the (Not Signed-in) notification will show on the phone display.
-Swipe the not signed in notification to the right side and select the “Settings” option.
Note: If this method does not succeed, swipe it to the left side and then tap once again on the “Settings” option.
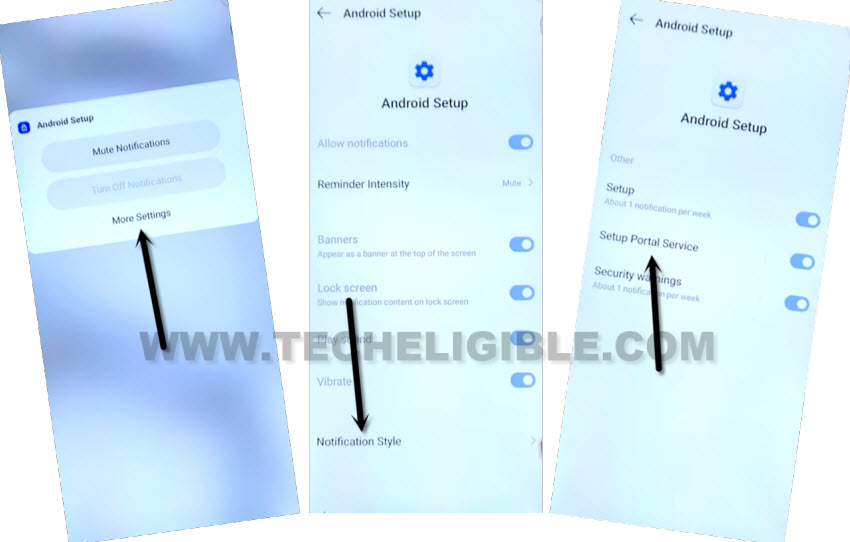
-We will select the “More Settings” option now.
-Next, tap on “Notification Style,” and subsequently navigate to “Setup Portal Service” on the following Android setup screen.
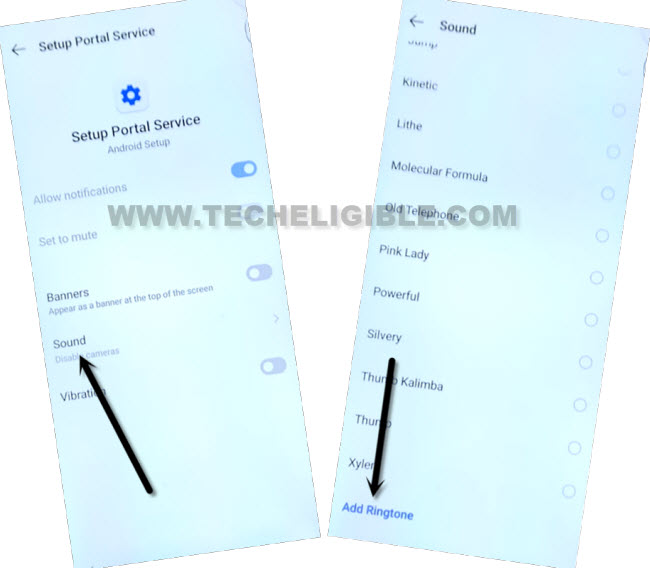
-Press the “Sound” option. On the next page, locate and select “Add Ringtone.”
-After reaching the (Recent) screen, open the sidebar menu and long press on “Drive.”
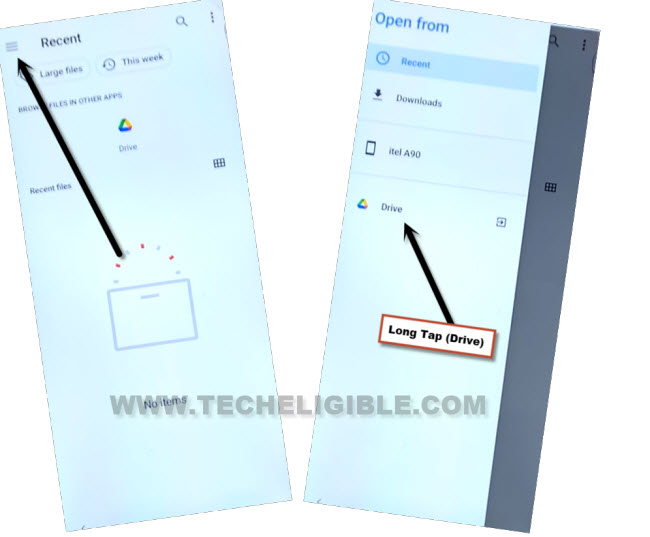
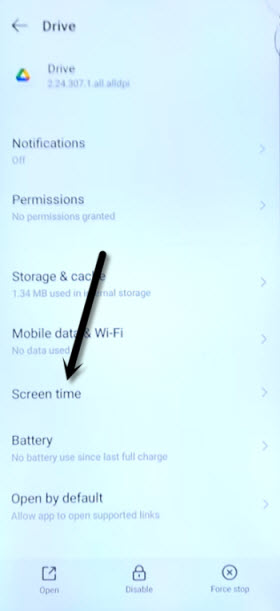
-Proceed to “Screen Time.”
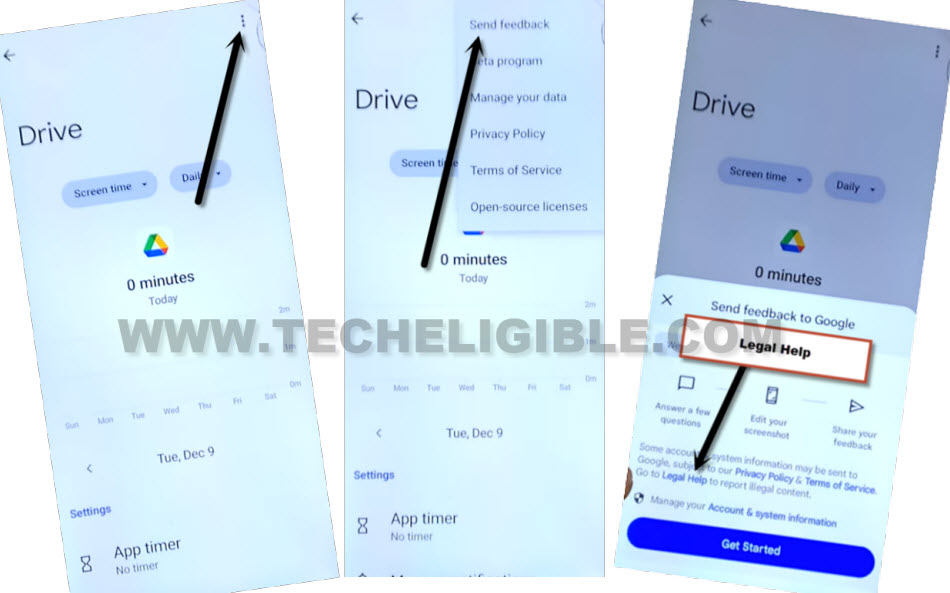
-We need to access the (Legal help) page; simply tap on > 3 dots > Send feedback > Legal help. (Refer to the image below).
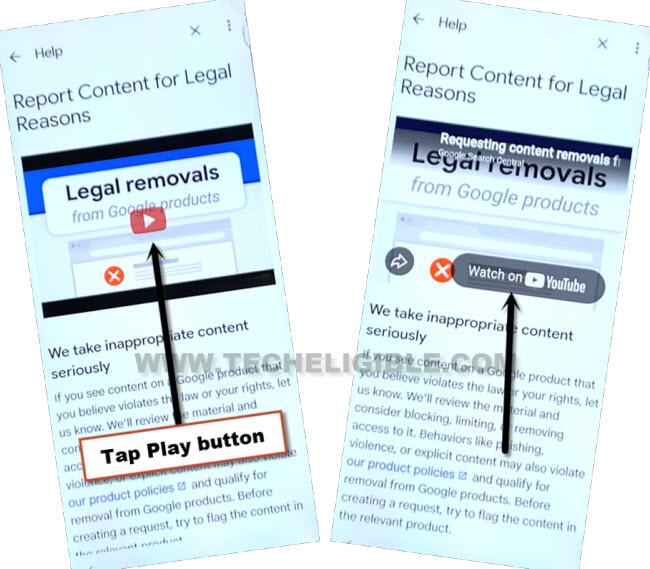
Reach at Youtube Site to Launch the Chrome Browser
-Press the (Play button) on YouTube; after a brief wait, a “Watch on YouTube” option will appear, just click on that.
-A popup window will emerge on youtube site, select “Allow.”
-Next, you will be redirected to the YouTube website; from there, drag down the youtube video.
-After that, go to “Profile” option from top corner and hit on “Settings”.
-Tap over the “Try experimental new features”.

-Afterwards, hit on the “3 dots” kebab menu from top corner and go to “Terms and privacy policy”.

-You will have a access on the (Make Chrome your own) browser page. From there, choose options > use without an account > no thanks.

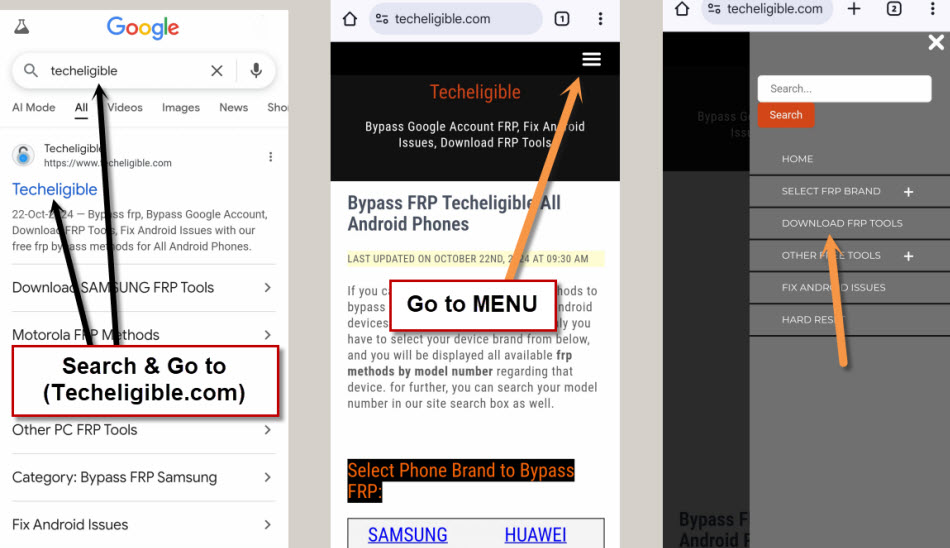
-After being accessed to the Google Chrome browser screen. Type “Techeligible” in the search bar and visit the official site.
-Hit on the “Menu” icon from top corner to open the (Sidebar Menu) and select “Download FRP Tools”.
Turn on the ADB Mode
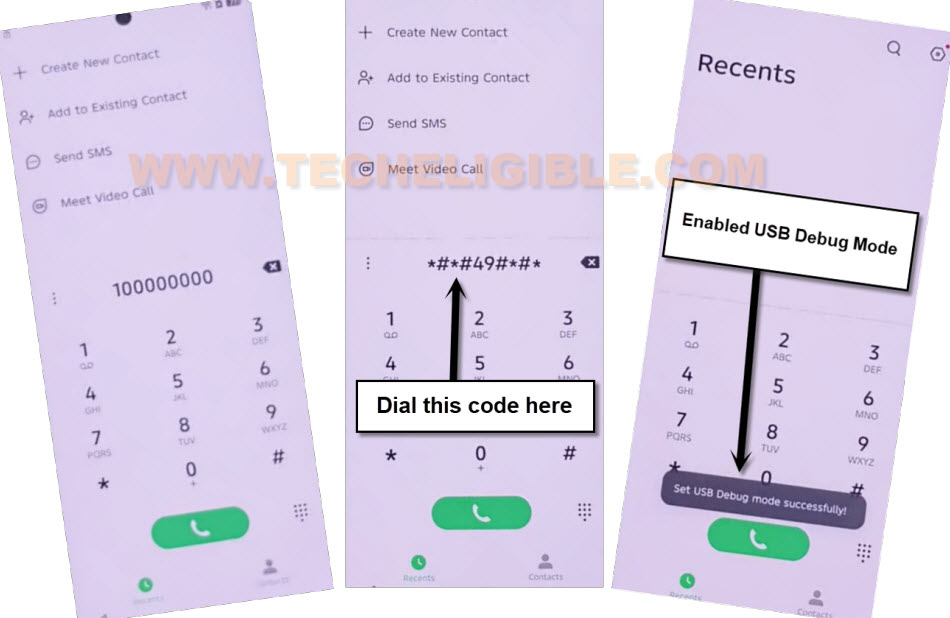
-We have to launch the dialer screen on our phone just by hitting on “Open Dialer Code“.

-Make Connection of your device to the PC using the appropriate USB cable.
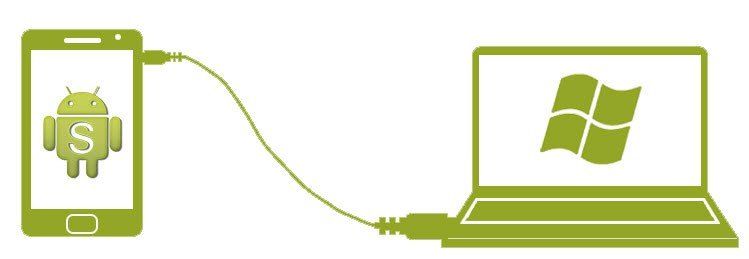
-Once the PC detects the device, enable ADB mode by dialing the code *#*#49#*#*.
Note: If the PC does not recognize your device, you need to install the correct Meditake and ADB drivers on your PC for (Tecno Spark 40/40C). Search online or consult another post on how to set up drivers on PC using the free Chimera installer.
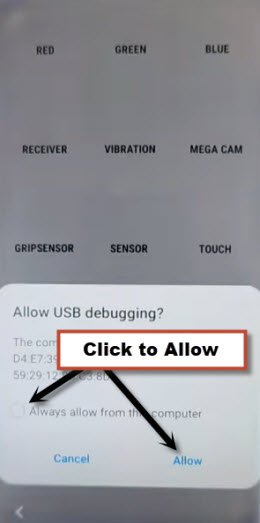
-From the pop-up window for (Allow USB Debugging mode), simply check the box and click on “Allow”.
Install & Launch Samfw Tool on PC
-Firstly, we have to arrange the PC tool, for that, download the tool from below on PC.
Note: Temporarily disable any active antivirus software.
| ⇒ Samfw Tool V5.4 [DOWNLOAD]
|
-Downloading is completed, install and open the (Samfw Tool) on your computer.
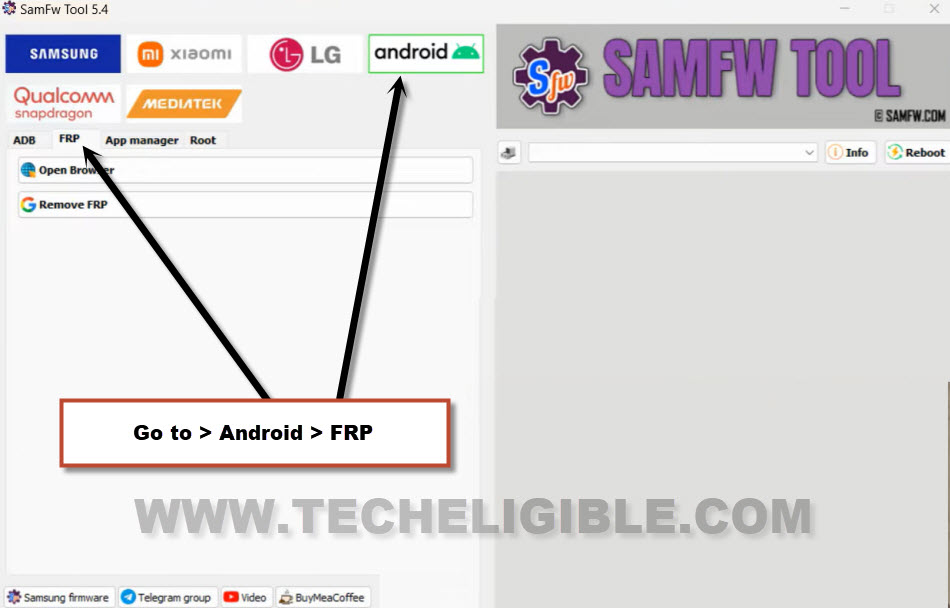
-From Samfw tool screen, select > Android > FRP.
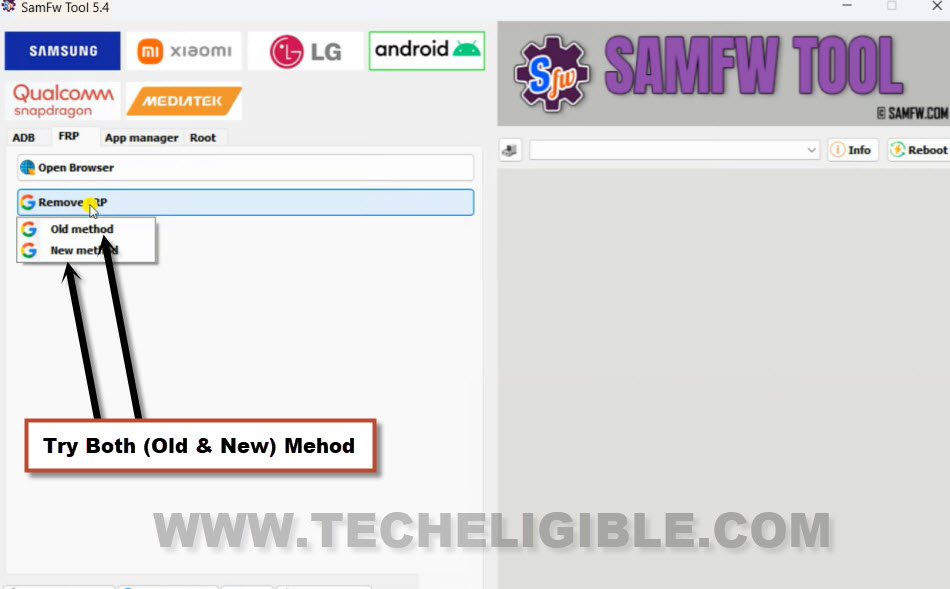
-We simply have to click the “Remove FRP” option and select the “Old Method”.
Note: If the old method fails to bypass the FRP lock, try again by clicking 2-3 times on (Old Method). If it still doesn’t work, then opt for the (New Method).
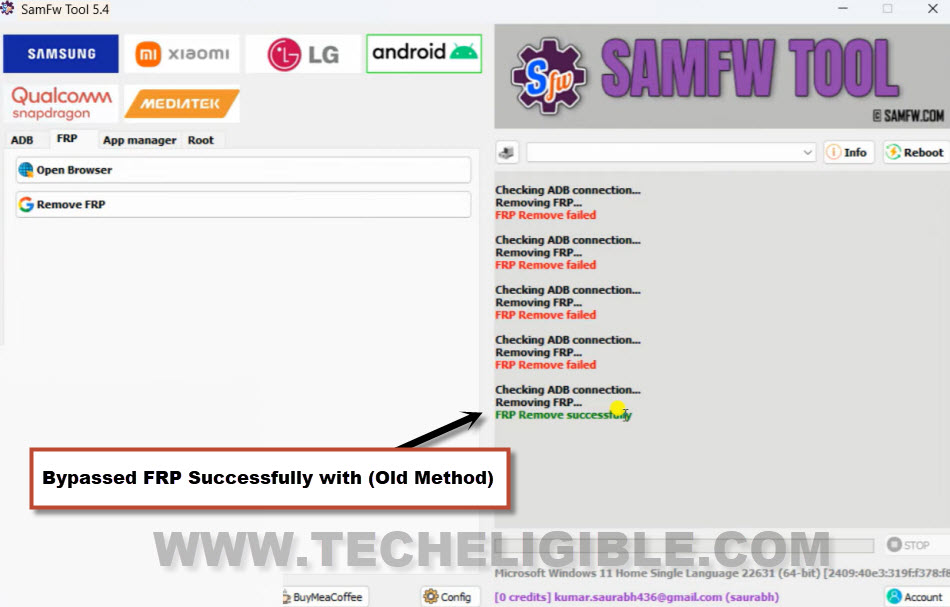
-You will have a notification of (FRP Remove Successfully…) on Samfw tool screen. After that, the phone will reboot and you can now complete setup wizard steps without encountering the google verification screen.
The Conclusion:
We adhered to a straightforward solution, connected to WiFi, and activated the (Accessibility Shortcut) feature. Subsequently, we launched the Chrome browser and accessed the dialer on the device. We entered the code to enable USB debugging mode. Then, connected to the PC and utilized the (Samfw) tool to eliminate the FRP account.