Micromax Q402+ Bypass FRP Lock and Google Account Verification (New Method)
Are you getting screen of “Verify Your Account”, and unable to bypass it? that means you have frp lock and you can’t access your device until you bypass it, if you have Micromax Q402+, and other Micromax device, so you can try our best method for Micromax Q402+ Bypass FRP Lock, we will unlock frp just by enabling talkback feature, once we enable talkback, we can easily access to chrome browser and will be able to download frp bypass applications for Micromax Q402+ Bypass FRP & Google Account Verification.
Warning: This method is only for Device Owner.
Let’s Start Micromax Q402+ Bypass FRP Method:
-Turn on Micromax Q402+ & Connect Wi-Fi network.
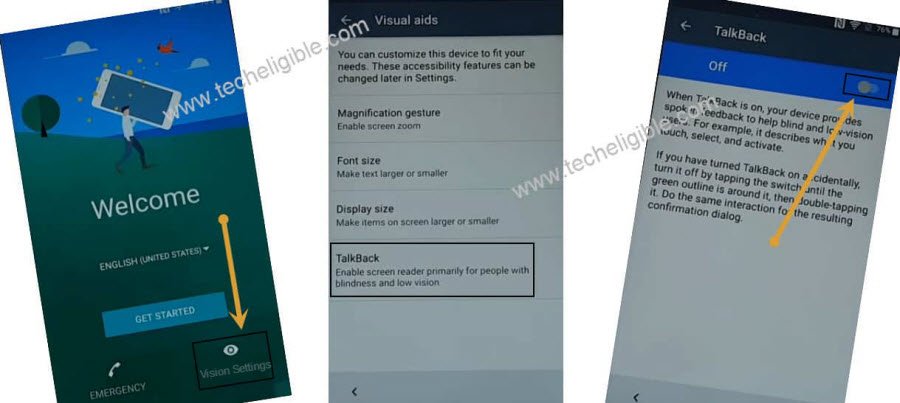
-After Wi-Fi connected successfully, go back to first “Welcome Screen” just by tapping on “Back Key” multiple times.
-Tap on > Vision Settings > Talkback > Turn on talkback from there.
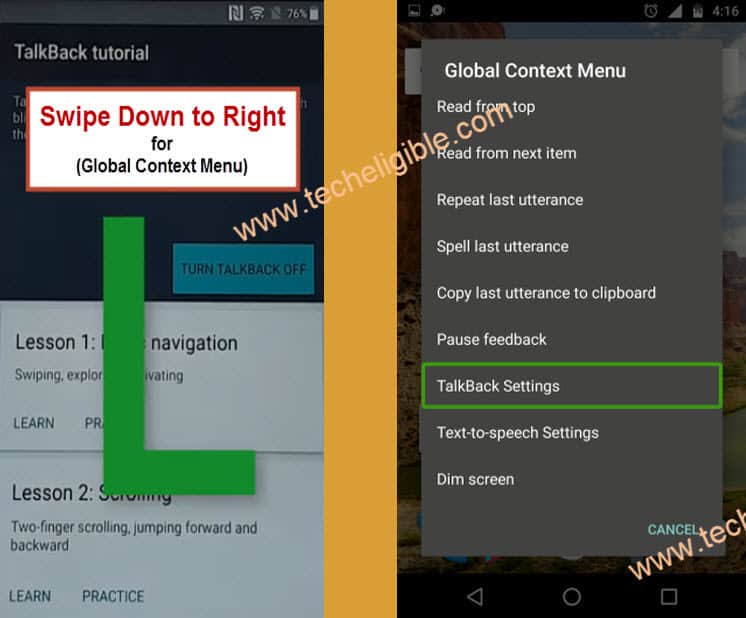
-Draw “L” on your screen using your finger.
Note: To draw “L”, first you have to swipe from up to bottom, and then swipe to right. (See Below image).
-Now you will have “Global Context Menu” screen.
-Double tap on “Talkback Settings” from there.
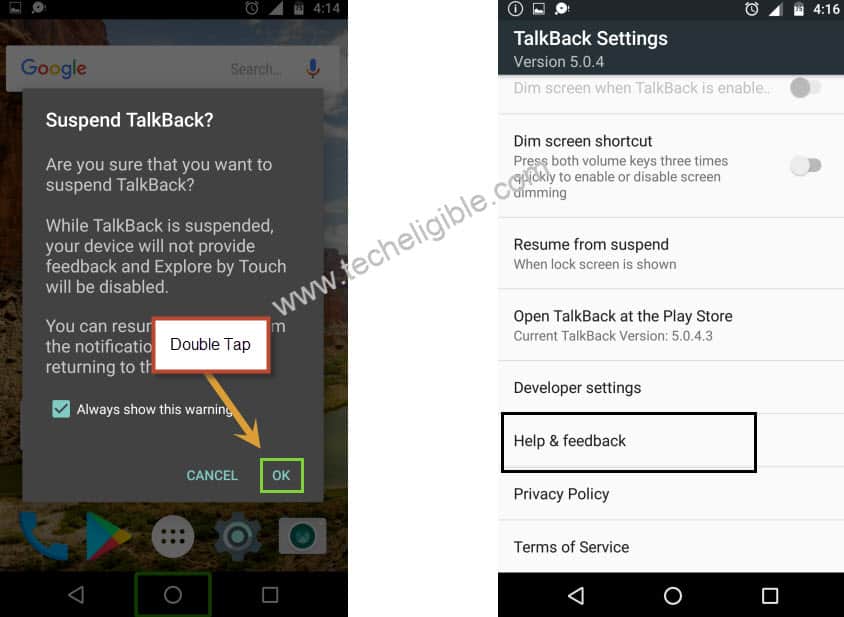
-Once you access to “Talkback Settings”, just long press both (Volume UP + Volume Down) keys together.
-After that you will get popup screen of “Suspend Talkback”, simply double tap on “OK”.
-Go down & Double tap on “Help & Feedback”.
-Select “Get Started with voice access”.
-Tap on “Youtube Play icon” to play youtube video.
-After that tap on “Clock icon” or Youtube title to go to Youtub official website.
![]()
-You will get “Update” screen, just tap on “Not Now”.
-Congrats, now we have successfully accessed to youtube website for Micromax Q402+ Bypass FRP
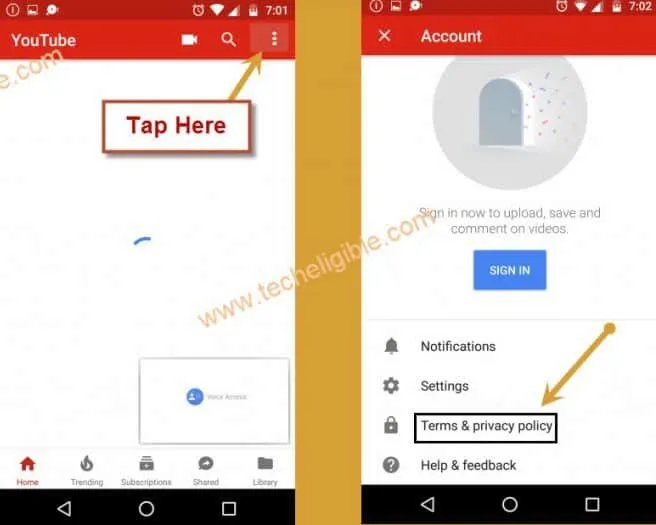
-Drag down “Youtube Video”, and you will have “Profile icon” or “3 dots” at top right corner, just tap on that.
-After that, select “Terms & Privacy Policy”.
-You will be redirected to the “Chrome Browser”.
Download FRP Tools for Micromax Q402+ Bypass FRP:
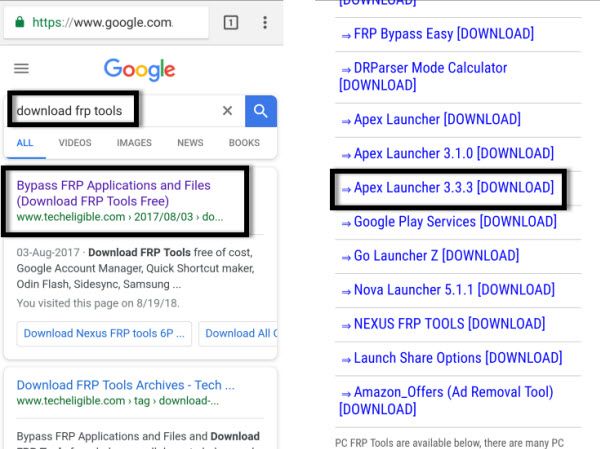
-Type in search box “Download FRP Tools“.
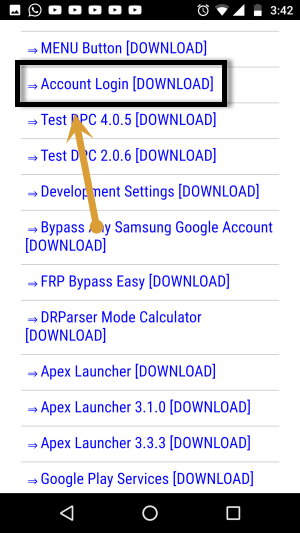
-Go to very first search result same as shown in below image.
-Go down & download “Apex Launcher 3.3.3“.
-Wait until downloading finish.
-You will surely have a “MENU Button” on bottom bar, just tap on that, and then select “Downloads” option to see your downloaded apex launcher app.

Note: If you don’t see any menu button on bottom bar, then you will get popup window on downloading finish, just tap on “Open” from that popup window to access to apex launcher app.
-Now from download folder, tap on “Apex Launcher” app to install it.
-You will see popup window, just tap on “Settings”.
-Go down, and enable “Unknown Sources” option from there.
-Tap on “Back Key”, and then tap on “Install”.
-Wait until installation finish, after that tap on “OPEN” to launch APEX LAUNCHER app.
-Excellent, now you have successfully reached to “HOME SCREEN”, but still we have some steps remaining for Micromax Q402+ Bypass FRP.

Disable Some Applications:
-To successfully bypass frp, we have to disable some applications from our Micromax Device.
-Go to “MENU”, and tap on “Settings” icon from there.
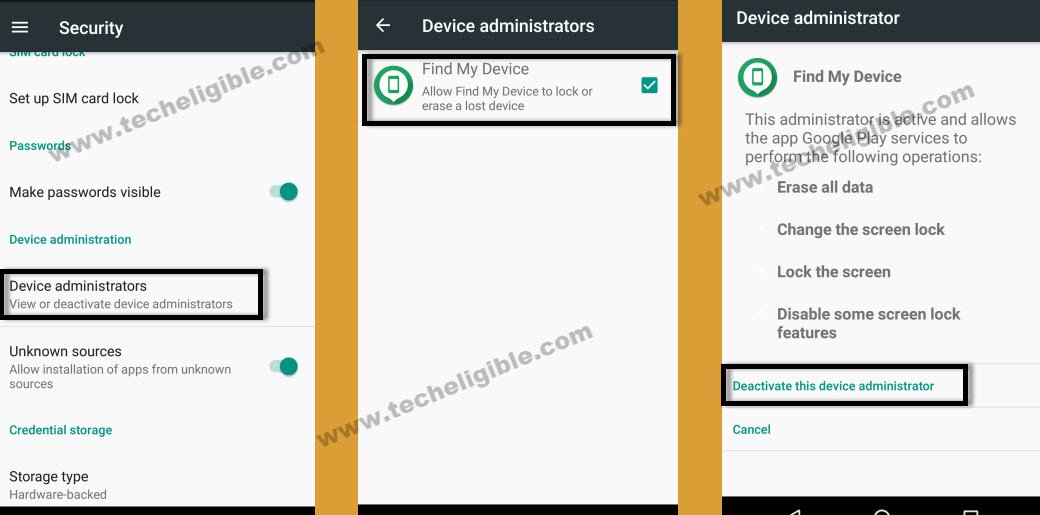
-Go down, and tap on “Security”.
-Now tap on “Device Administrators”.
-After that tap on “Find My Device”.
-At last, tap on “Deactivate this device administrator”
-Go back to “Settings” by tapping on back key.
-From “Settings”, go to “APP”.
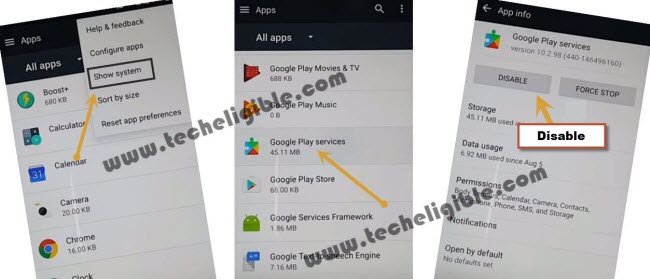
-Tap on “3 dots” from top right corner & select “show system”.
-From “Apps”, go to “Google Play Services”, after that tap on “Disable” button, and then from popup window, again tap on “Disable” option.
-Perfect, now we have successfully disabled “Device Administrator + Google Play Services”.
-Open “Chrome” browser.
-Type in search bar “Download FRP Tools“.
-Go to first search result from there.
-After that, go down & download “Account Login” app.
-Wait until downloading finish.
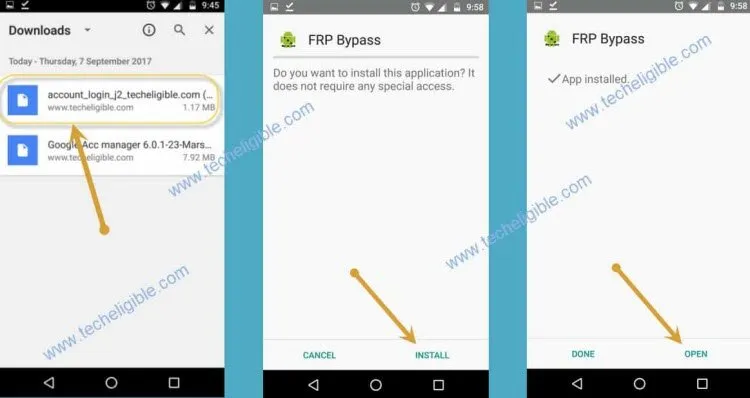
-Tap on “3 dots” from top right corner of the chrome browser, and then select “Downloads”.
-There you will be able to see “Account Login” app.
-Tap on “Account Login” app, and then install it.
-Once installation finish, tap on “OPEN”.
-Perfect, now we have installed account login app successfully, now we can add our new gmail account for Micromax Q402+ Bypass FRP and Google Account Verification.
-Go back to “Settings”.
-Go to Settings > Accounts > Add Account > Google > +Add Account.
-Now it will take some time to load browser sign in page.
-After that, you can add your any valid gmail account in your Micromax device to Bypass Google Account Verification.
-Once you successfully add your google account, just go back to “Settings”.
-From “Settings”, go to “Apps”.
-Now enable back “Google Play Services” app.
-After that, restart your device, now you will not face any frp lock issue on your Micromax Q402+.
Thanks for visiting us.