Method 1: This Method will help you to Bypass Google Account Moto E Android 10 without PC, change your device language, and through that you will get reach to the chrome browser, from there access to your Moto E Settings, and then turn on screen pinning option to bypass frp easily, this method has been applied on Motorola Moto E XT2052-1.
Method 2: In method-2, you can don’t need change your device language anymore. You just have to turn on your device and connect WiFi. After that, from first startup page. There is an (Emergency calling) option. You have access and enable (Accessibility function). After that, you can access back to your device main home-screen.
Note: This method is only for Device Owner, stay away if you do not own this phone.
| Method 1: Remove FRP Moto E (2020) [By Changing Device Language] |
| Method 2: Remove FRP Moto E (2020) [By Accessibility Function] |
Method 1: Bypass Google Account Moto E [Language Change]
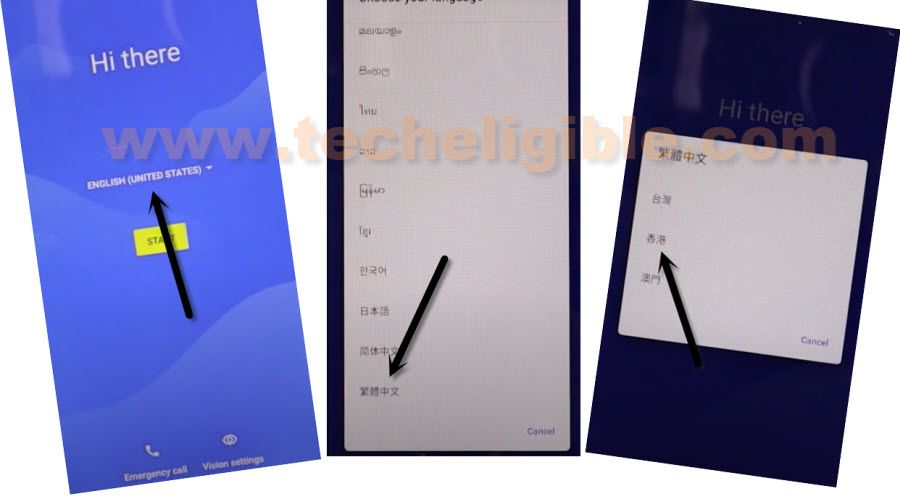
-Go back to 1st (Hi there) screen, tap on “Language changing” option, and go all the way down, select same language as shown in below mage, from popup window, tap on “2nd option”.
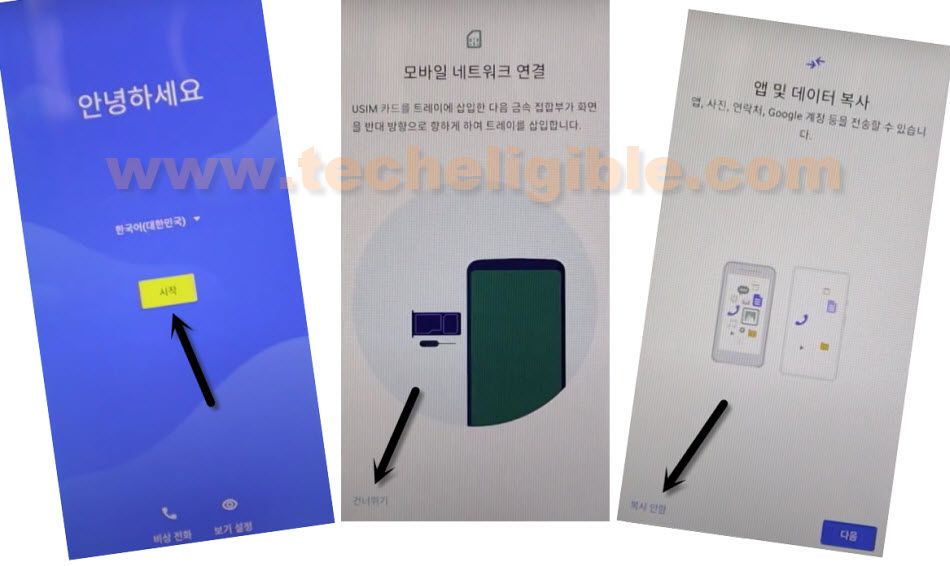
-Tap on “Yellow option”, select “bottom left option”, and then again tap on “Bottom left option”.
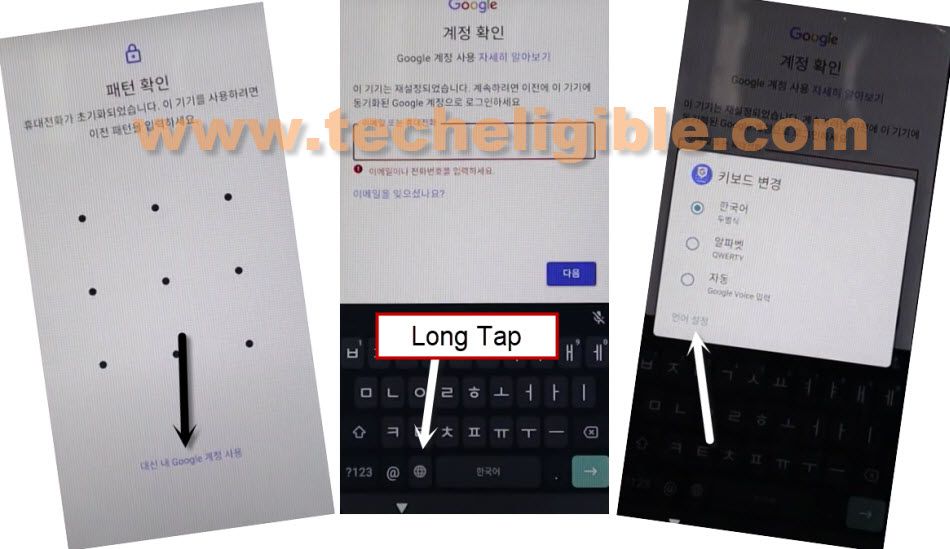
-Tap on “Centered Option”, and then bring keyboard by tapping on “bottom right” option, long tap at “World icon”, from popup window, tap on bottom left option”.
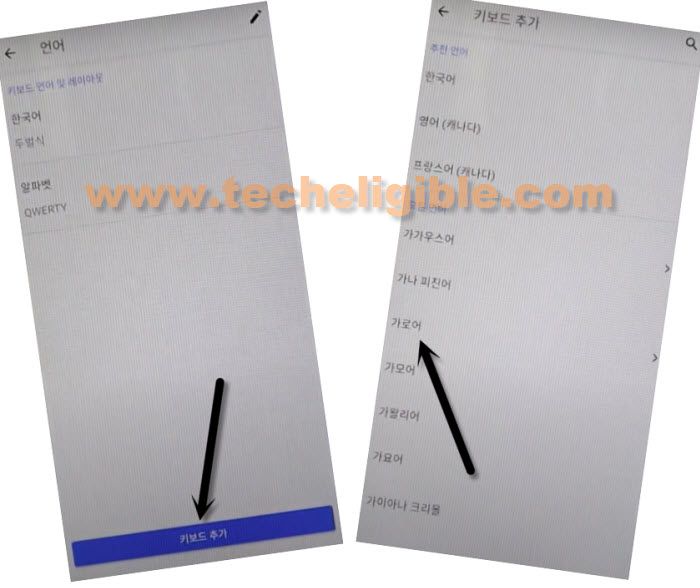
-By following below image, tap on > Blue option > 2nd arrow option.
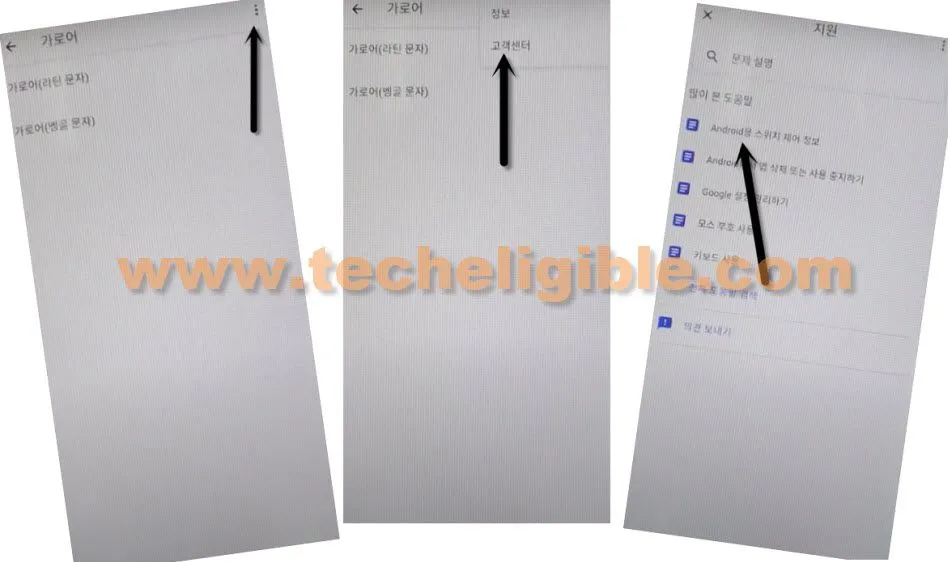
-Tap on “3 dots”, and then tap on “2nd option”, after that tap on “android …..” option from the list same as shown in below image.
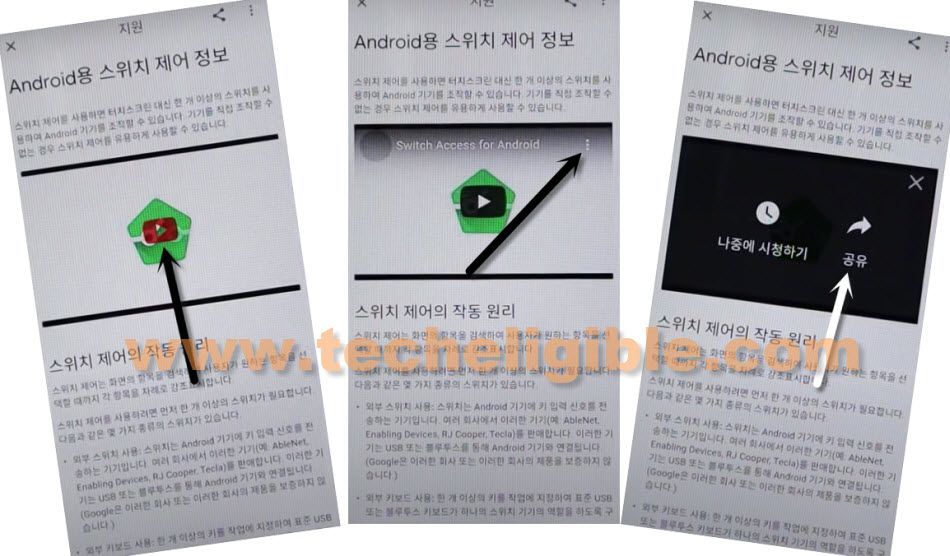
-Tap on “video play icon”, and wait few seconds, after that tap on “3 dots” from the top right corner, and then tap on “Share Arrow”.
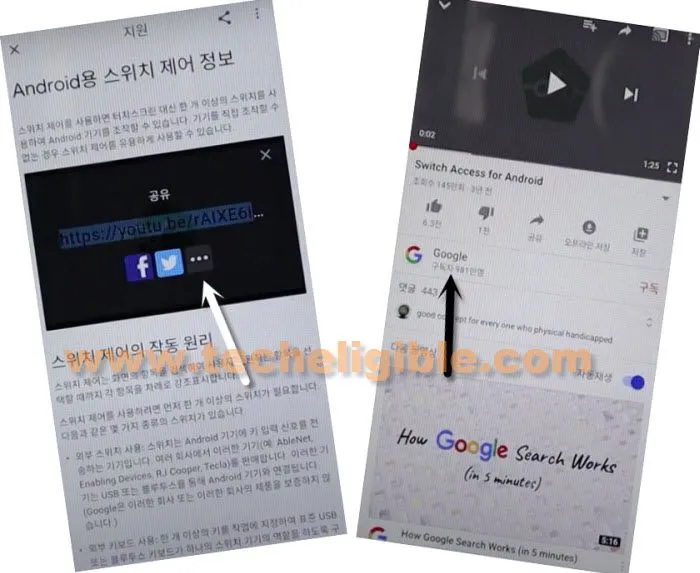
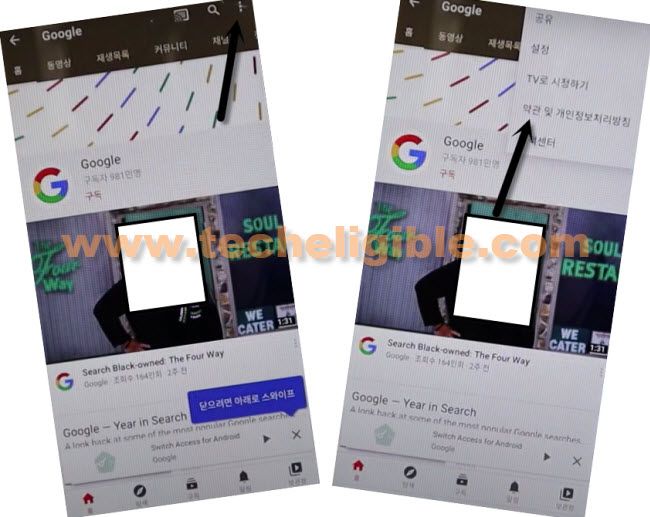
-Tap to > 3 dots > Google.
-Hit on > 3 dots > 4th option.
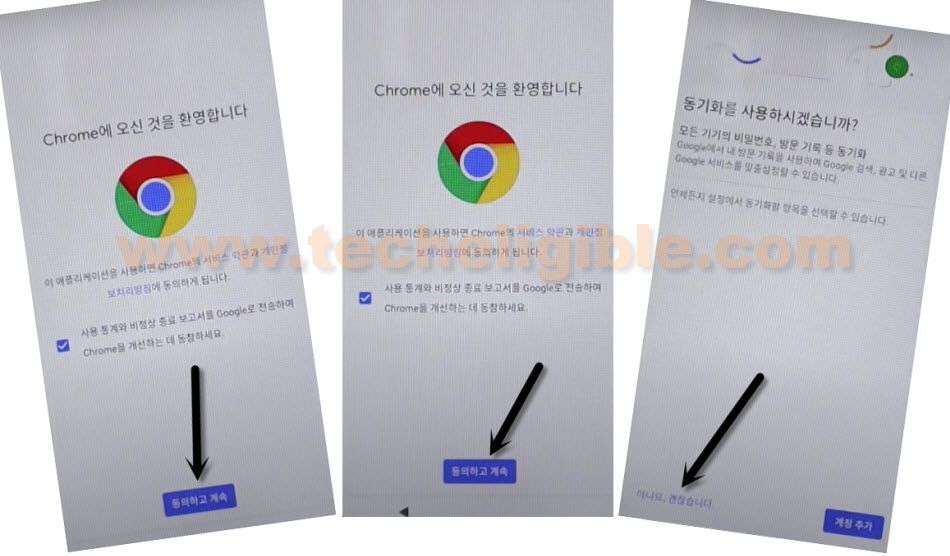
-From the chrome window, tap on > Blue Option > Bottom left option > Bottom left option.
Download FRP Bypass App:
-Lets download frp tools to bypass google account moto e.
-Make a search in search bar of the browser with “Techeligible“. Go to 1st searched result same as shown in below screen shot.
-From techeligible site, just hit on a > Menu > Download FRP Tools.

-Download from there “Apex Launcher” any version.
-Once the downloading finish, tap on (Blue hyperlink) from the bottom popup message, which will appears only after downloading complete.
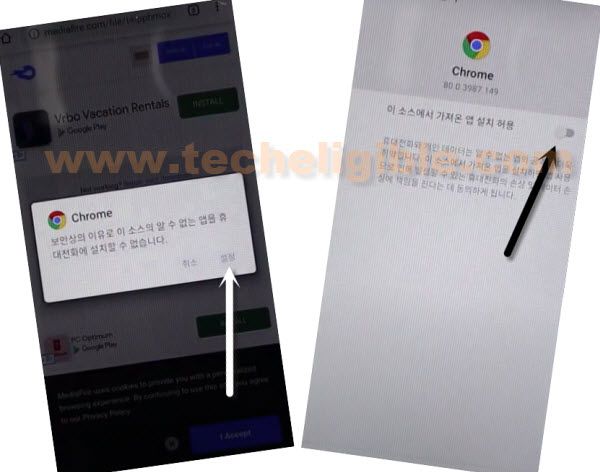
-Install and Open “Apex Launcher” app.
Note: Choose only right option, to for next and installing apps.
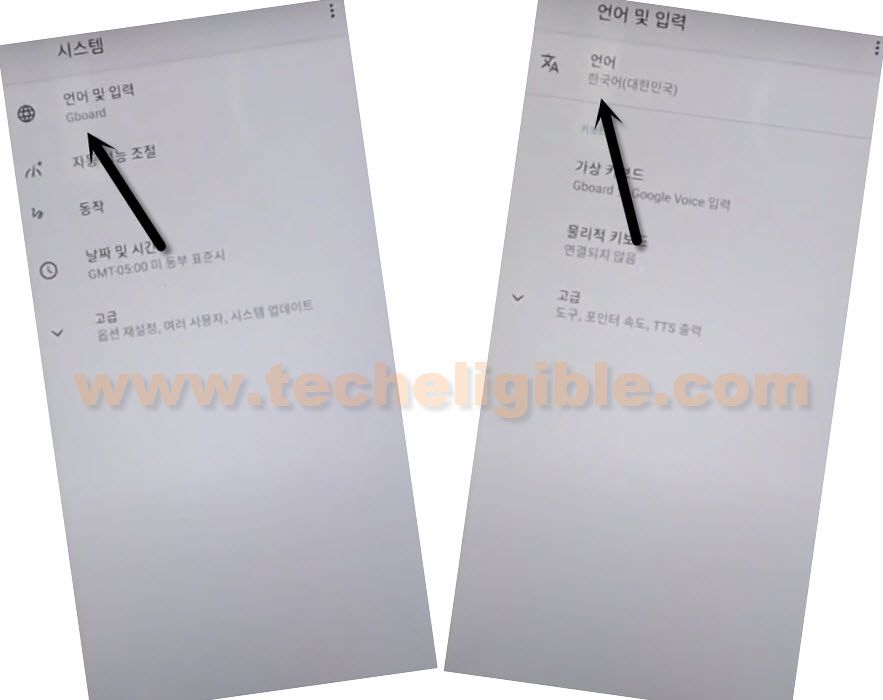
-After accessing inside Moto E, just tap on “Settings”, and go all the way down, after that tap on 2nd last “Exclamation sing” option, which will allow us to change our phone language to English, so that we could easily bypass google account moto e.
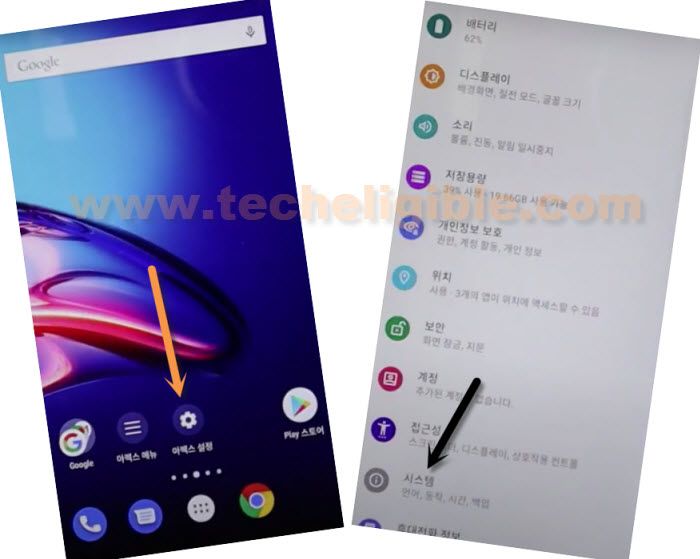
-Tap on > World icon > 1st option.
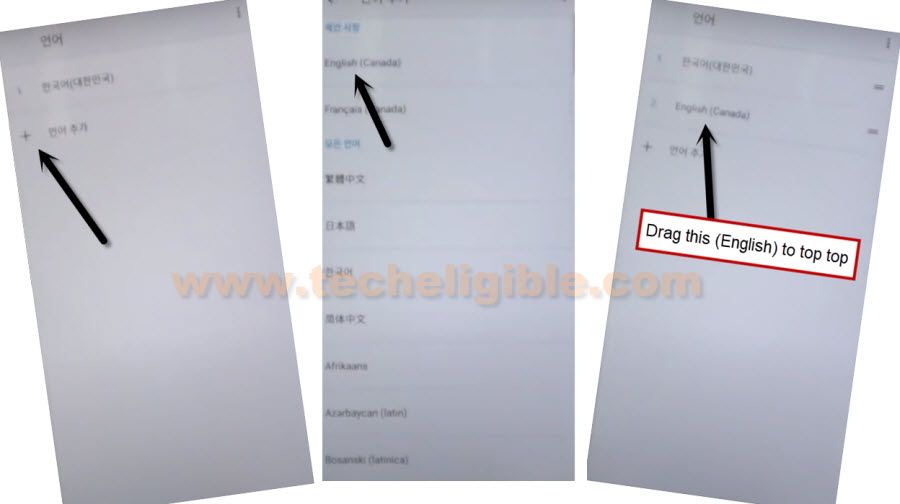
-Tap on “+” option, and then tap on “English (Canada)”, and then bring “English (Canada)” at top of the list.
-Now your device language will be changed to English.
-Enable screen pinning option to bypass google account moto E.
Let’s Enable Screen Pinning:
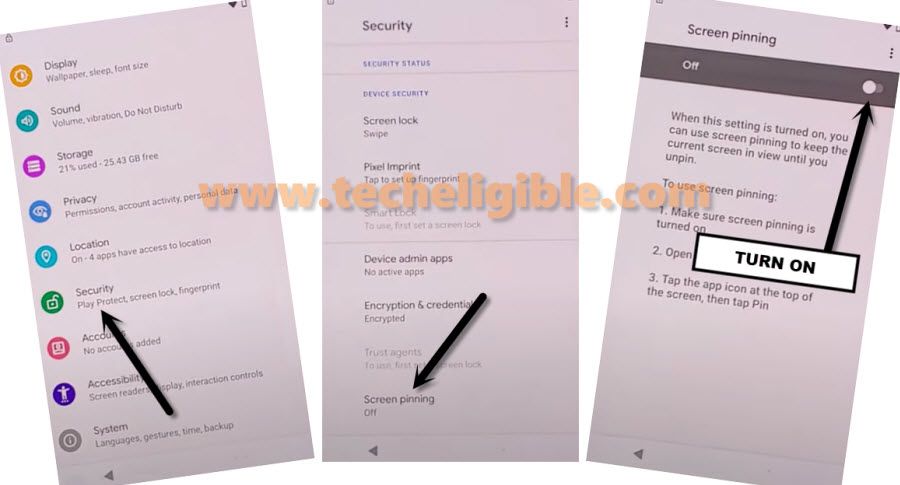
-Go back to “Settings”.
-From there tap on > Security > Screen Pinning > Turn on.
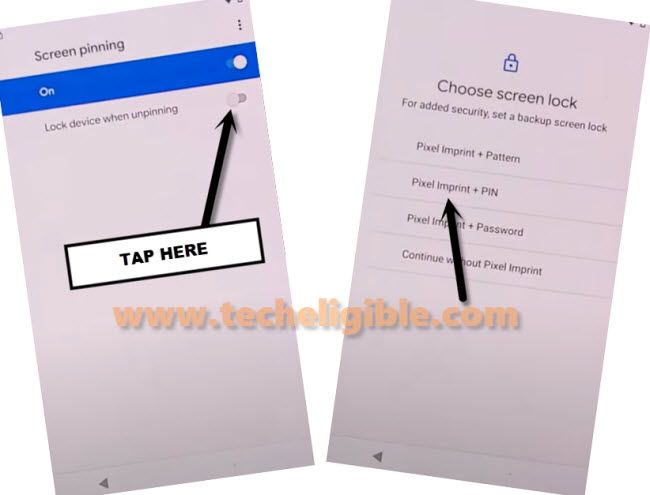
-Turn on also “Lock device when unpinning”, and then, select “Fingerprint + PIN”.
-Set you your New Pin there, and also setup your New Fingerprints there to bypass google account moto e.
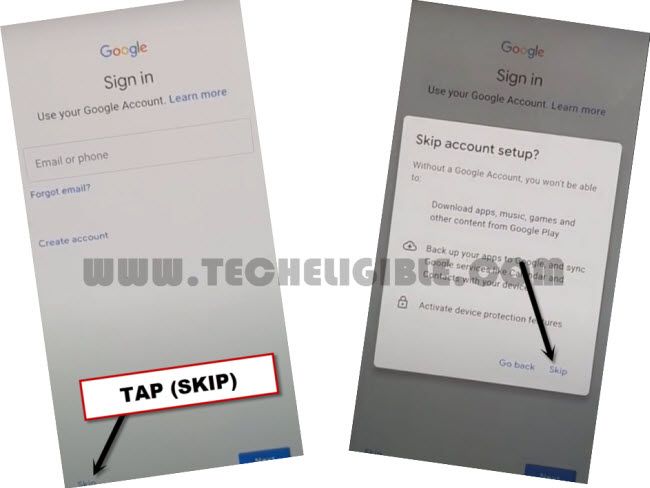
-Restart Motorola Moto E phone, and then finish setup wizard, while completing the setup wizard, if you are asked for the PIN, you can give same PIN, which you have setup early, and from (Verify your Google Account), you can skip this screen by tapping on “SKIP” from the bottom left option.
Method 2: Bypass Google Account Moto E (2020) [By Emergency info]
-Startup process by switching on your MOTO E 2020 device.
-Connect WiFi from WiFi screen.
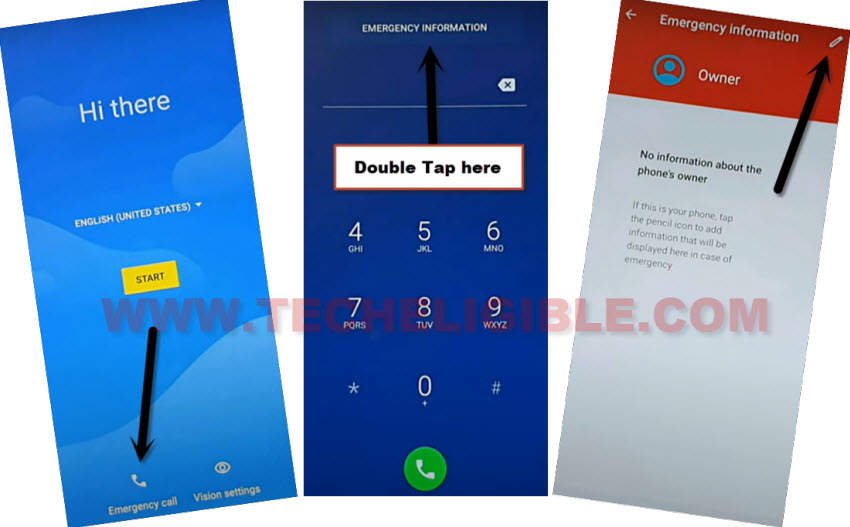
-Go back on (Hi there) homepage. Hit over the “Emergency Call” option. After that, tap two times on top center button “Emergency information”.
-Go to “Edit” button from top right corner as mentioned in below image.
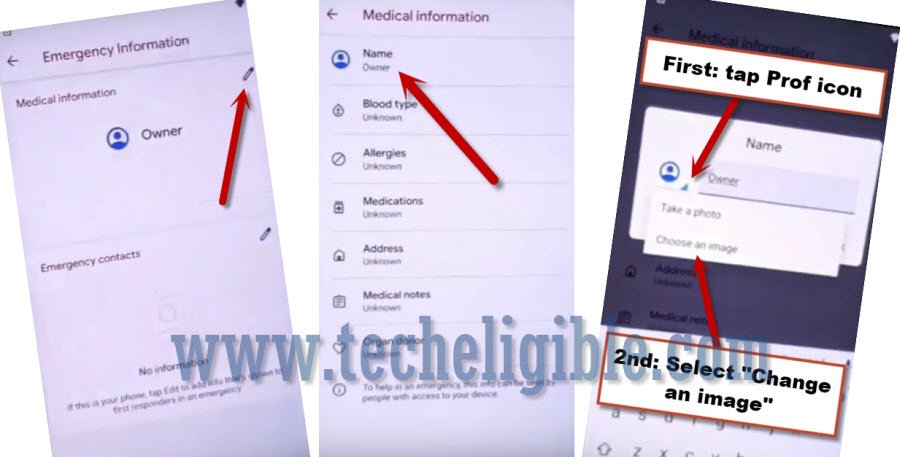
-Tap on “Name” to get one more popup window. From there, tap to “Small down arrow” icon from circle image same as shown in below image.
-After tapping at the down arrow icon, you will be shown 2 more options, just tap on “Choose an image”.
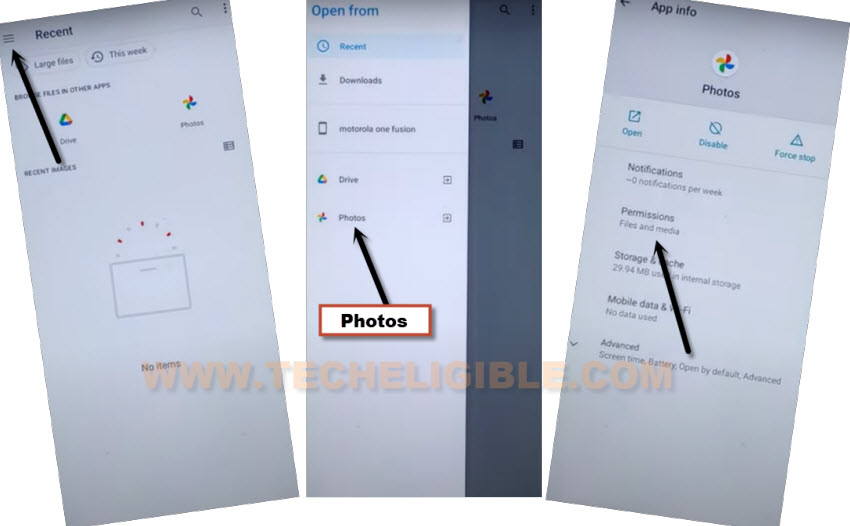
-Tap to “3 parallel lines” icon from top left corner and long tap to “Photos” option to reach to (App info) screen.
-Tap over “Permissions”.
-Go to “Search” icon from top corner.
-Type “Setti” and tap to “Settings” from hint result same as shown in below image.
-Go all the way down, there, you will have a (Settings app info) option.
Note: If you don’t see same as options as shown in below image, then, search again by typing with “Settin” and tap to “Settings” again from hint result. This time, you will see same options as shown in below image.

-After tapping on “Settings” just tap also “Open” to reach your device main settings page. From there, we will be able to Bypass Google Account Moto E.

Let’s Disable Few Apps from App List Page:
-After accessing to settings page, just go to > Apps & Notifications > See all apps.
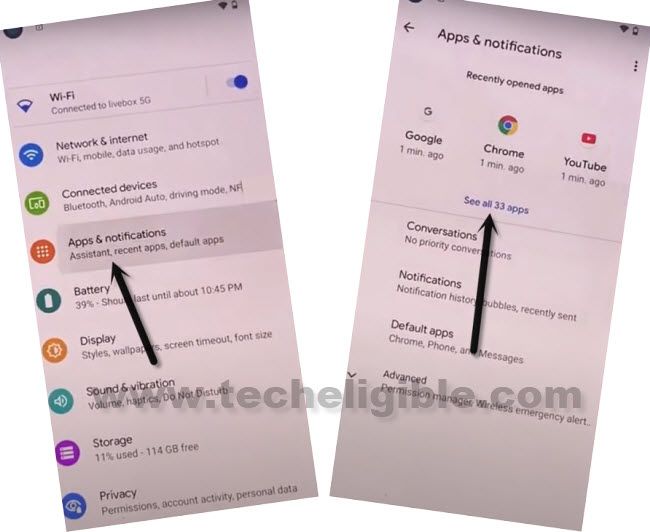
-You’re now inside your all pre installed app list page. From there, find and tap on “Android Setup”.
-Tap also on “Force Stop” option and tap to “Ok”.
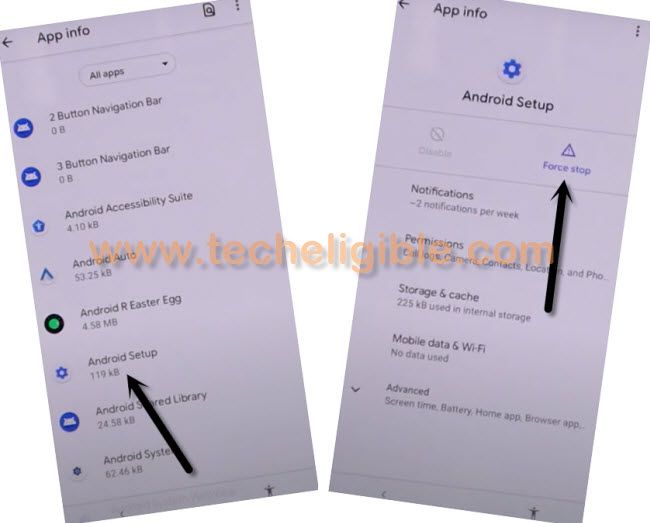
-Tap on a “Back Arrow” icon from bottom to go back on app list screen again.
-Let’s find and hit on a “Google Play Store” application.
-You have to tap on an option > Disable > Disable this app.
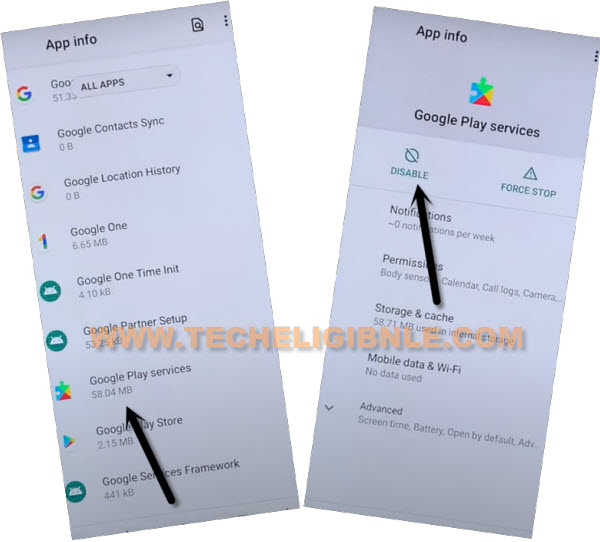
-Return to main settings screen to Bypass Google Account Moto E.
-Let’s turn on (Accessibility) function from there by tapping on “Accessibility” option.
-Scroll down little bit from next page and tap to “Accessibility Menu”.
-Turn on button from “Accessibility Menu Shortcut”. From popup screen, tap to > Allow > Got it.
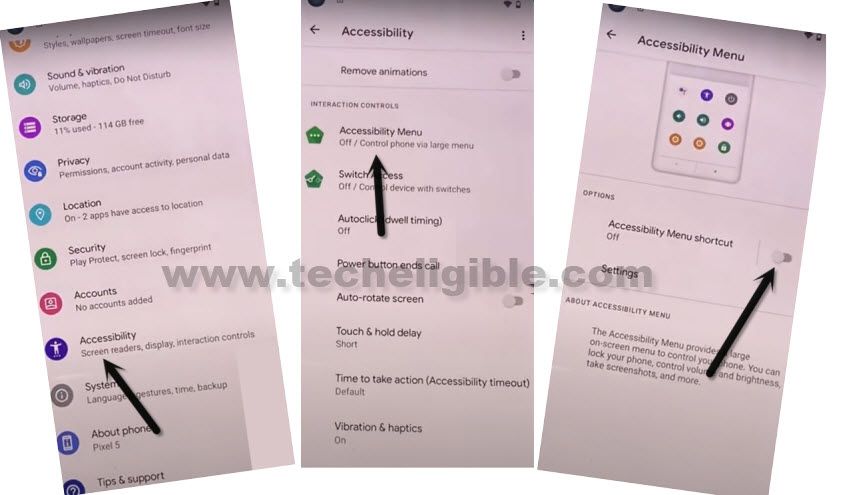
-We’ve successfully enabled accessibility function. To confirm, whether the function is enable or not, you can swipe up with your two fingers together from bottom of the screen, this will show you (Accessibility function) window.
-Return to main (Hi there) screen by tapping on back arrow icon several times.
-Let’s swipe up using two fingers together from bottom to get accessibility functions.
-Tap on “Assistant” option from there.

-After that, you will be asked to turn on (Google Play Services) first. From there, tap to “Settings” and hit on “Enable” option to enable this app again, so that, we could easily complete setup wizard steps without stuck on google verification screen anymore.

-Return on to (Hi there) screen again and tap to > Start > Skip.
-Within few seconds, you will be redirected to the (Copy apps & data) screen. From there, tap to “Back Arrow” icon.
-You will reach to (Connect to WiFi) screen. From bottom corner, hit on > Skip > Continue > More > More > Accept.
-You will face a (Set screen lock) page. If you don’t wanna setup your screen lock, you can skip that screen as well by tapping on > Skip > Skip > Accept & Continue.
-Turn on of option of (Subscribe for email) and tap to > More > Next > Get Started.
-Tap few more times on “Next” option. After that, you will reach to main home-screen successfully.