
Bypass FRP Walton Primo NF5 Android 10 New Method [NO PC]
If you are still having a FRP lock screen on your device, then follow this free method to Bypass FRP Walton Primo NF5 Android 10, you don’t need any expert help or paid tool for this method, we will show you some easy steps, how you can easily reach to device settings and setup your new security lock to bypass and skip google verification screen.
Warning: This process is just for device owner and for educational purpose only.
Let’s Start to Bypass FRP Walton Primo NF5:
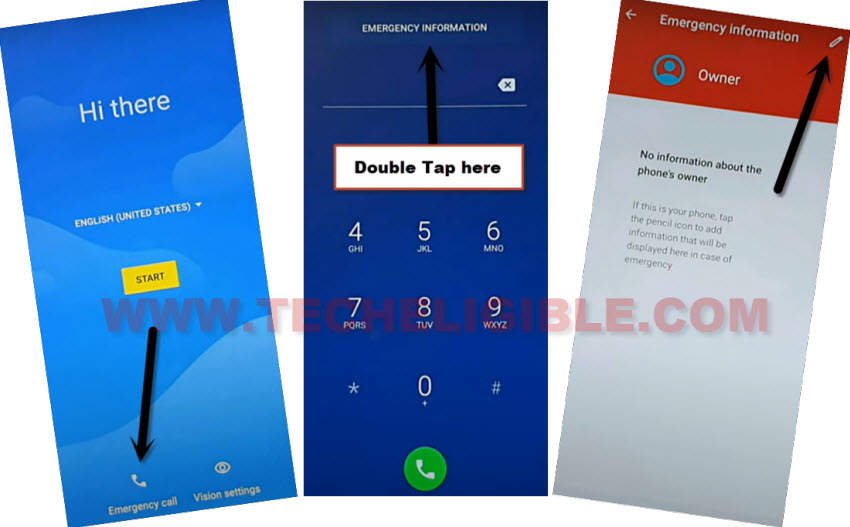
-Connect WiFi, and go back (Hi there) homepage, tap “Emergency Call”, and double tap on “Emergency Information”, and then tap “Pencil icon” from top corner.
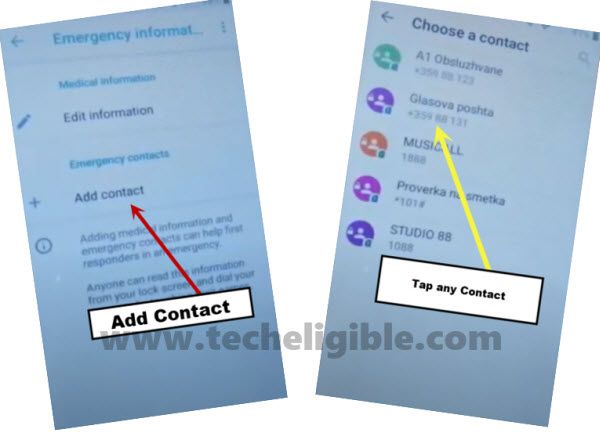
-Hit on “Add Contact” option, if you see there blank contact list, that means you did not insert SIM card, just remove sim tray and insert any SIM card which has some contacts saved, after that the contact list will be displayed same as shown in below image.
Note: After inserting SIM card, tap to back arrow once, and then tap again on “ADD Contact”, and there you will have your contact list.
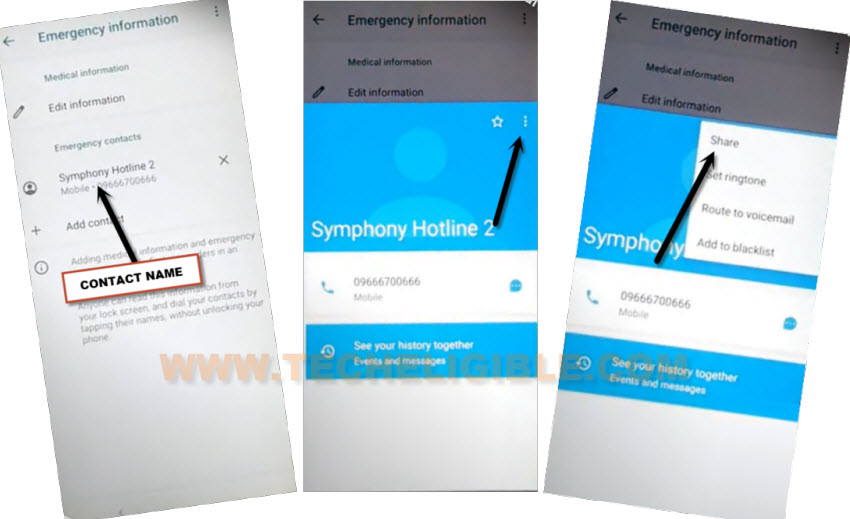
-Tap again on > Contact Name > 3 Dots > Share.
-Long tap on “Message” icon, and tap “App info”.![]()
-Hit on > Advanced > SMS App.

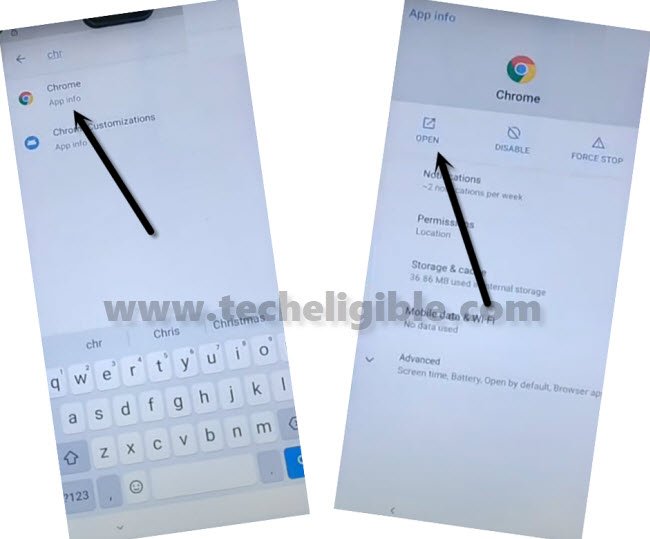
-Tap on “Search icon” from top right corner, now search and open “Chrome” browser to Bypass FRP Walton Primo NF5.
-Tap to > Accept & Continue > No Thanks.
-Search and access to our website frp tools page.
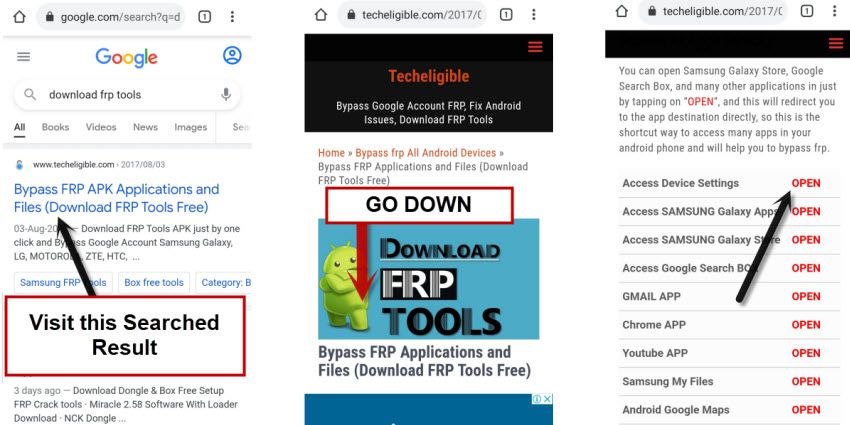
-Search in browser with “Download FRP Tools“, and visit our website searched result same as shown in below image.
-Scroll down little bit, and tap to “Access device settings“.
Create New PIN:
-After reaching inside the device settings, just scroll down, and tap to > Security > Advanced.
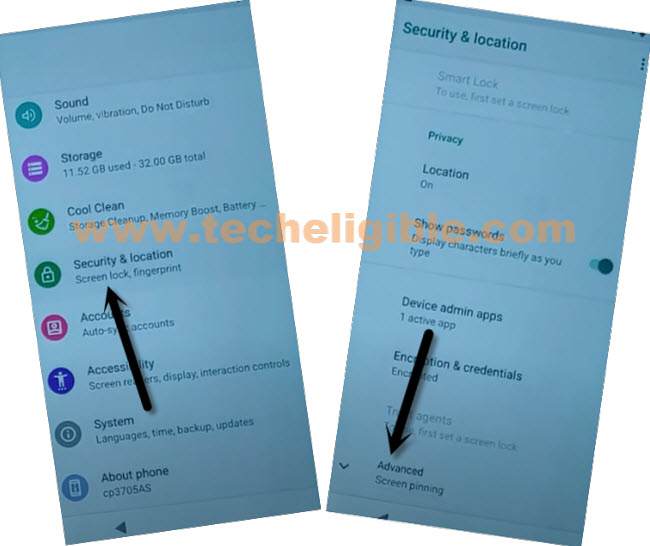
-Hit on “Screen Pinning”, and then turn on option from top right corner.
![]()
-Turn on also “Lock device when unpinning”, and then tap on “Fingerprints + PIN”, lets setup new PIN lock code to bypass frp completely.
-After creating 4 digits PIN code, just press “Power key” once to turn off the screen only, and then press again “Power key” to wake up the screen, now you will have a lock screen, that means the 4 digits PIN lock has been set successfully.
-Go all the way back to “Hi there” screen, tap to > Start > Don’t Copy > Give your new PIN code there.
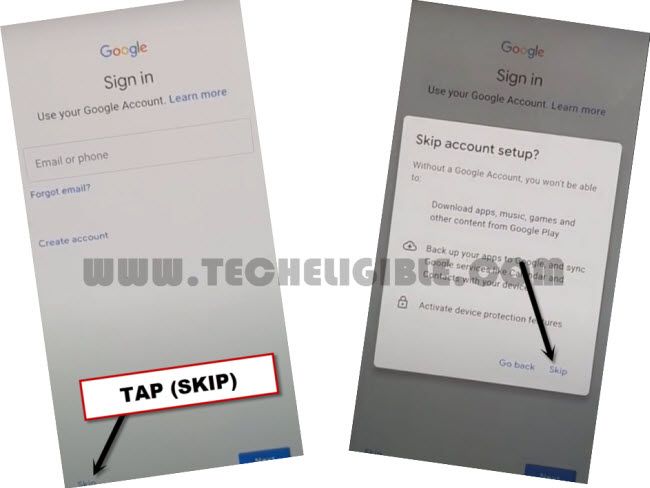
-From (Google Sign in) screen, just tap on > Skip > Skip.
-Finish all remaining steps on your own, and after that you will reach to your device homescreen, thanks for visiting us.