
Remove FRP Account Sony Xperia XA2 (Android 8,9) Without PC
This process is only for owner to Remove FRP Account Sony Xperia XA2 (Android 8, 9) without using any paid software and PC, this is a complete free method to reach inside device menu and setup new account without signing in with old account, there is not any harm or risk, if you follow steps from here on a Sony FRP protected device.
Warning: Do not try this frp method on a stolen phone, this is a serious crime, if you are trying to bypass frp on a stolen phone, you may also be jailed, this process is for device owner and for educational purpose only.
Let’s Begin to Remove FRP Account Sony Xperia XA2:
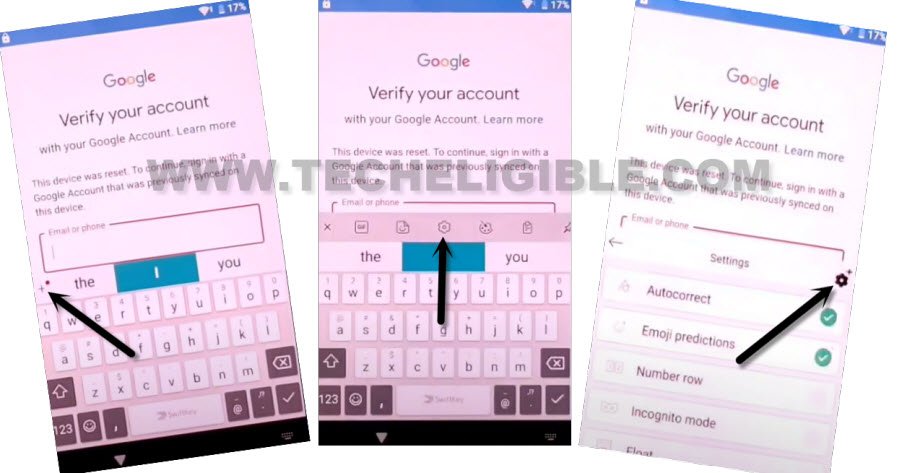
-Start this process by connecting WiFi first, after that go to the screen of “Verify your Google Account”. hit on “Email or Phone” field tab to get keyboard.
-Tap over > + > Settings icon > Settings icon.
Note: If you are failed to get (Gmail icon), don’t worry, just follow another way from here, once you get into (App list) rest steps can be followed up from here again.
-Tap on “Share” icon same shown in below image.
-After that, long hold on “Gmail” icon, and then tap to “App info” from popup.
![]()
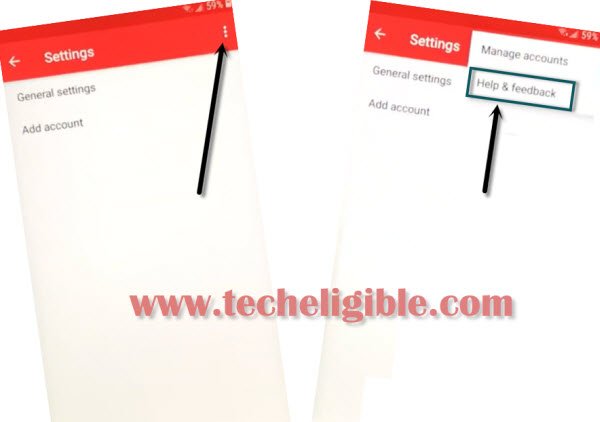
–Tap to > Notification > Advanced > Additional Settings in the App.
–Hit on > 3 Dots > Help & Feedback.
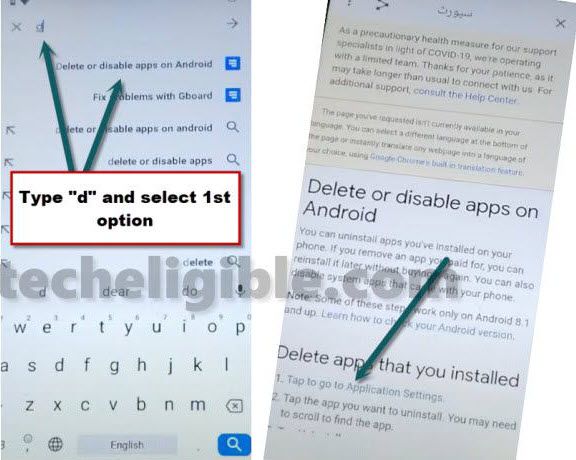
-You will have there a search box, just Search there “d”‘, and then tap to searched result (Delete or disable app on android).
–Now hit over blue link, so tap to “Tap to go to application Settings”.
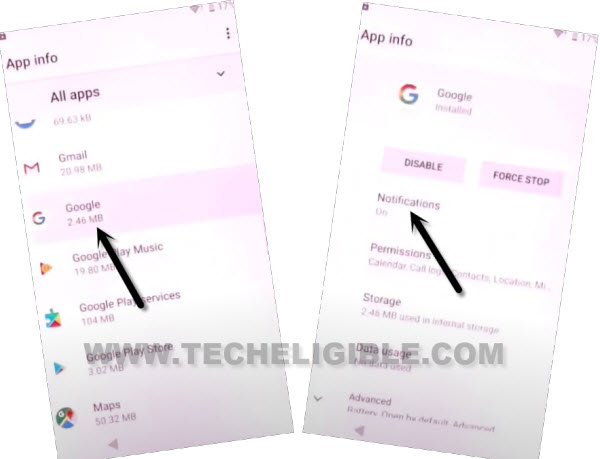
-From app list, scroll down, find and tap over > Google > Notification.
-Go to > Advanced > Additional Settings in the app.
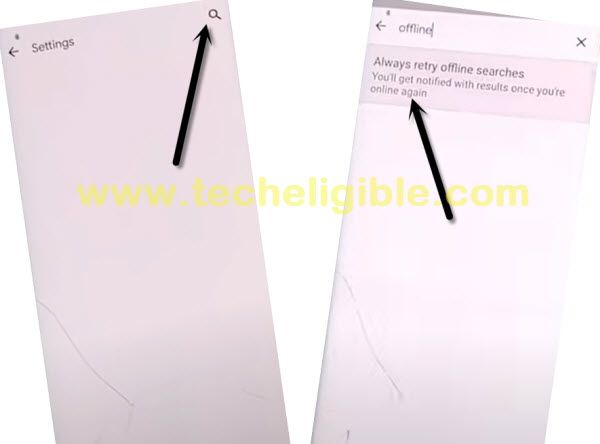
-Tap to “Search icon” from top right corner, and search there “Offline”, now go to “Always Retry offline searches”.
-Scroll down and tap to “Manage Pending Searches”, after that, tap on “No Thanks”.
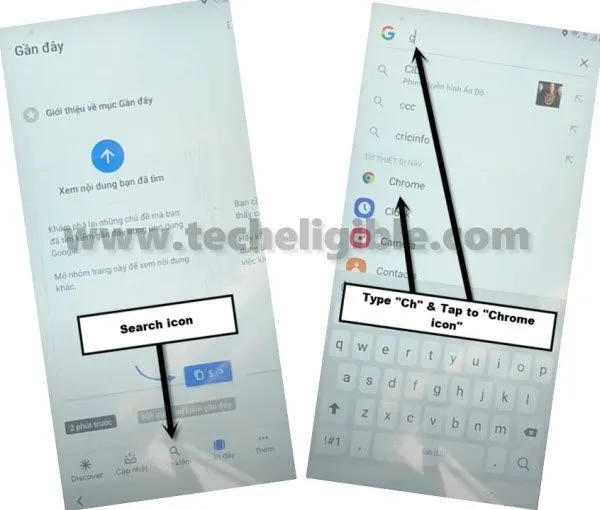
-Lets open chrome browser by tapping on “Search” icon from bottom, and search there “Ch”, after that tap to “Chrome” icon.
Let’s Start to Download FRP Tools:
-We’ve to download 2 main apps, through these apps, you will be able to Remove FRP Account Sony Xperia XA2.
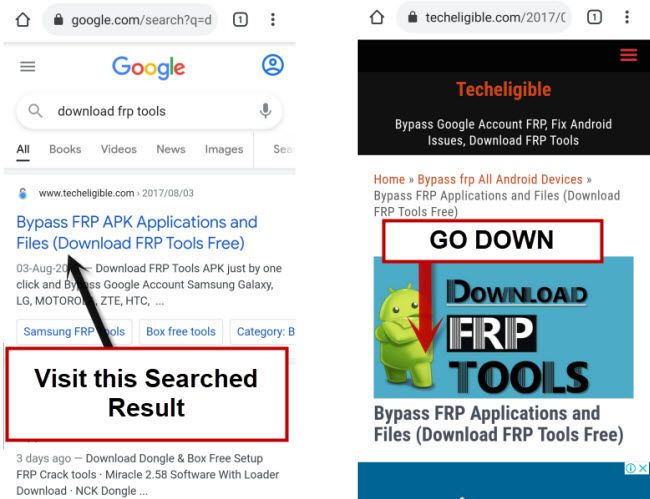
-Search in browser “Download frp tools“, and visit our website searched result.
-Go down and download 2 below apps.
1st: Google Account Manager 6.
2nd: Account Login.
-Once downloading apps done, just go to top of the page, now tap to > 3 dots > Downloads.
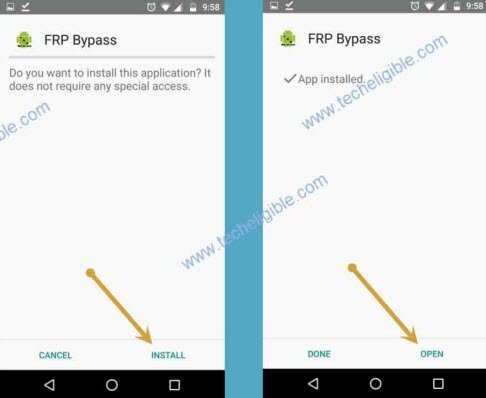
-Tap on “Google Account Manager 6” app to install, but you will see “Chrome Popup” window, tap to “Settings”, and turn on option “Allow from this sources”.
-Go back, now tap to > Next > Next > Install > Done, we have successfully installed (Google Account Manager), lets go for second app installation.
Note: If you are facing an error while installing (Google Account Manager 6) app, so you can try with other version app, such as (Google Acc Manager 7,8 or 9)
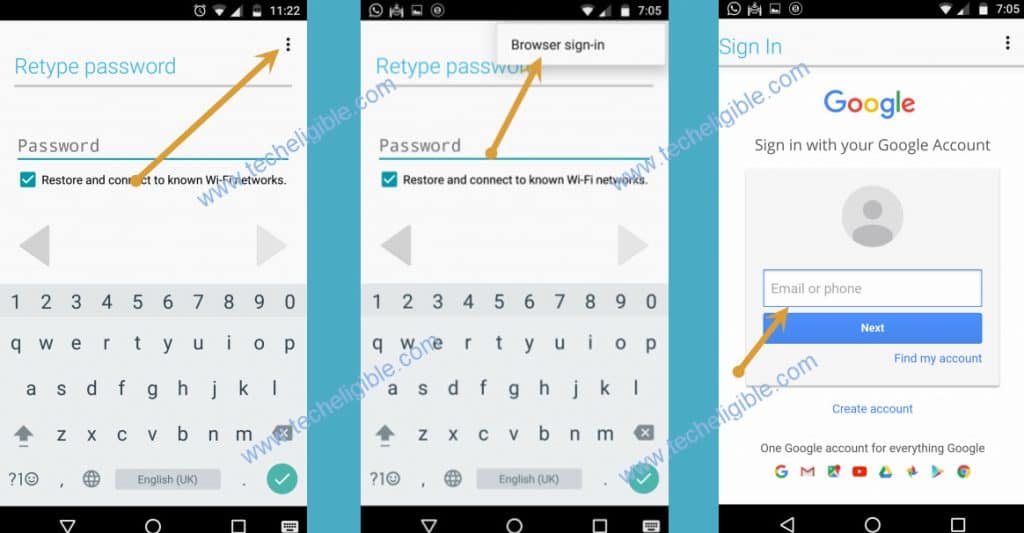
-Tap to > Account Login > Install > Open.
-Tap to > 3 dots > Browser Sign-in > Sign in with your new Google ID.
-You are all finish from Remove FRP Account Sony Xperia XA2 , now just go back on first screen of your device by tapping on back arrow multiple times, after that finish your setup wizard.
Read More: