Bypass Google Account Sony Xperia Z5 Premium [Android 7]
Another best way to easily Bypass Google Account Sony Xperia Z5 Premium on Android 7.x.x device without using any PC and any paid frp tools, though this way, you can also bypass frp other Xperia Z series android 7 devices, to apply this method, you just require a proper wifi connection in your device, and then you can add new Google Account in your Xperia phone.
Warning: This Article is only for educational purpose, try this frp method only to bypass frp your Own Phone.
Why Do You Face FRP Lock ?
If you have performed hard reset to your phone, or you bought old/used device from mobile market without checking already signed in google account, and you don’t even know what Gmail account is added in this device, then you won’t be able to bypass “Google Verification” screen until you sign in with previously synced Gmail ID, so in this condition, you will have to Bypass Google Account Sony Xperia Z5 Premium.
There is no doubt, that this (FRP) feature is for our Sony Xperia device security, and this feature prevent our device from data leaking and from accessing to personal data, but in some cases we forget our own Gmail account, so in this case we will go for the method of Sony Xperia FRP Bypass. Follow steps from below.
Bypass Google Account Sony Xperia Z5 Premium:
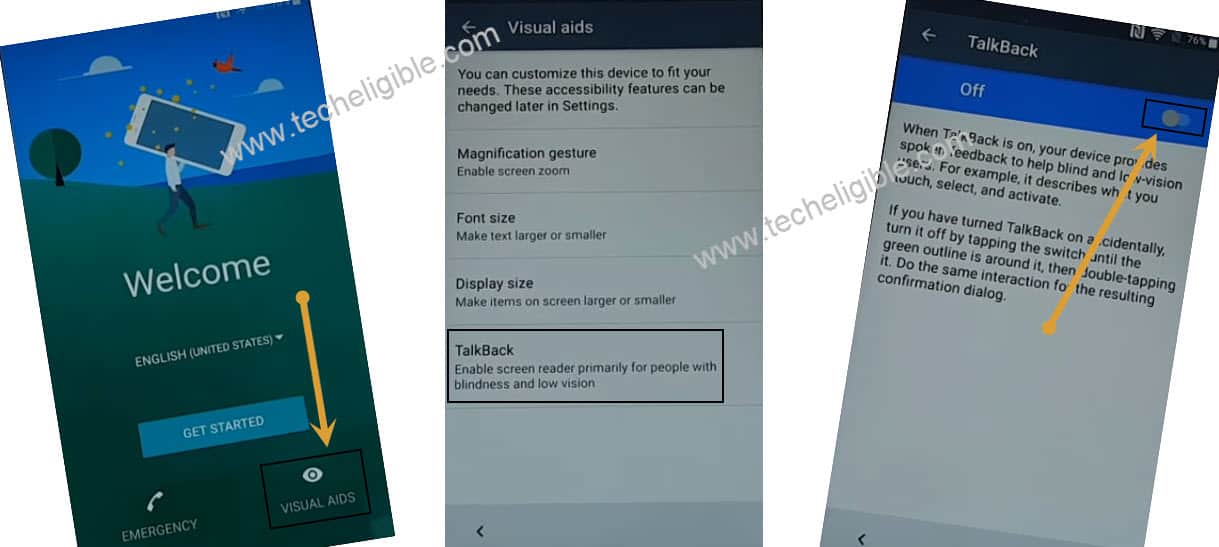
1.Firstly, turn on frp locked device, connect WiFi, Go back to (WELCOME) homepage, go to > Visual Aids > Talkback.
2.Turn on “Talkback” by hitting on button from top right corner.
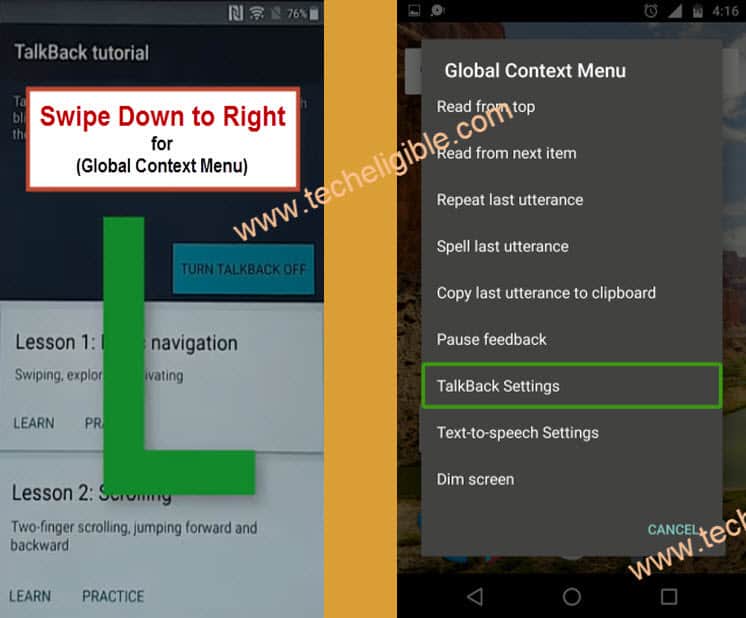
3. Draw a letter “L”, and double tap to “Talkback Settings”.
4. Swipe up using with 2 fingers, and double hit on “Explore by touch”, and then hit on “OK”.
5. Now go to “Help & Feedback” option.
6. Hit on “Use Morse Code”, and hit on “Play icon” from the Youtube video, and then hit on “Video Title” to access Youtube website.
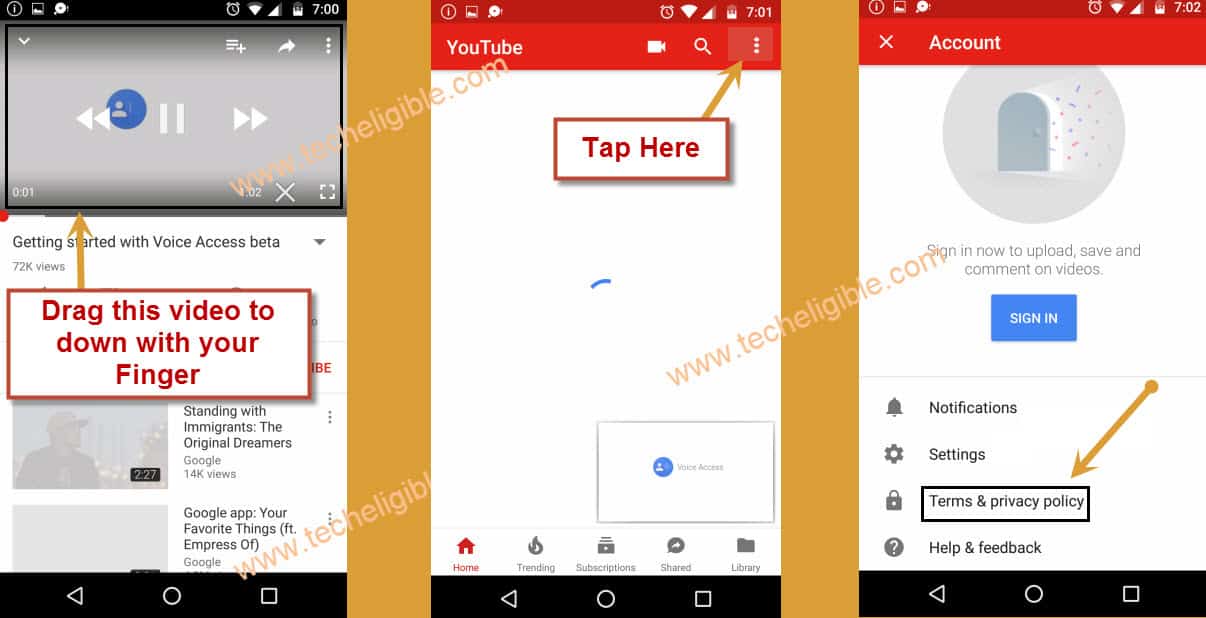
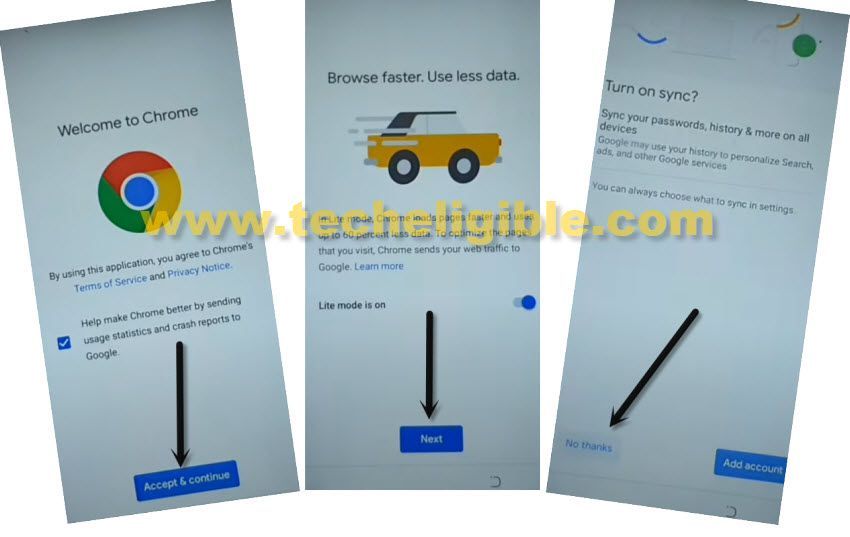
7.Hit on “Not Now”.
8. Drag down the youtube video & tap on “3 dots or profile icon” from top right corner, and then hit on “Terms & Privacy Policy”.
9. Hit on “Accept & Continue > Next > No Thanks”.
Download Sony Xperai Z5 FRP Tools:
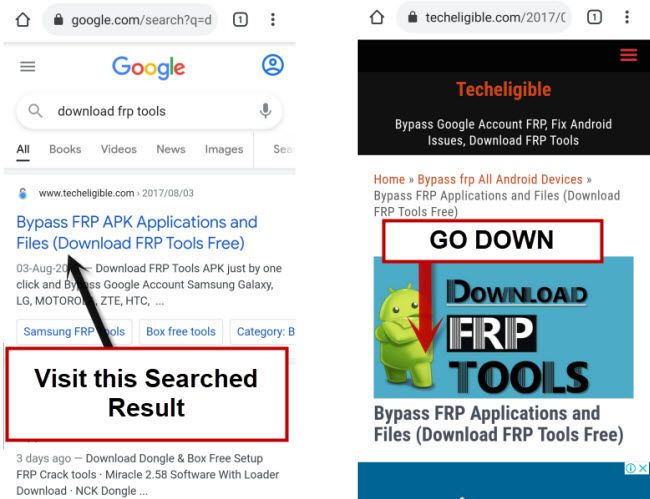
10. Search “Download FRP Tools“, and access to our website page by following below image.
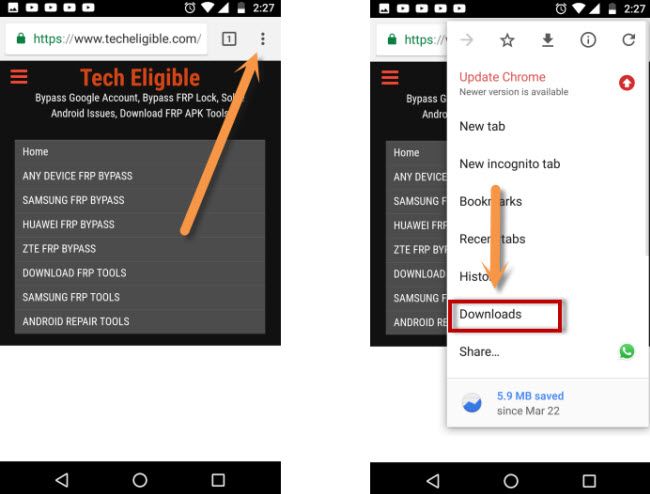
11. Download below 2 apps in your Sony Xperia device & wait till downloading process done.
1st. Quick Shortcut Maker 2.4.0.
2nd. Google Play Services.
12. Go top of the page, and then hit on > 3 dots > Downloads.
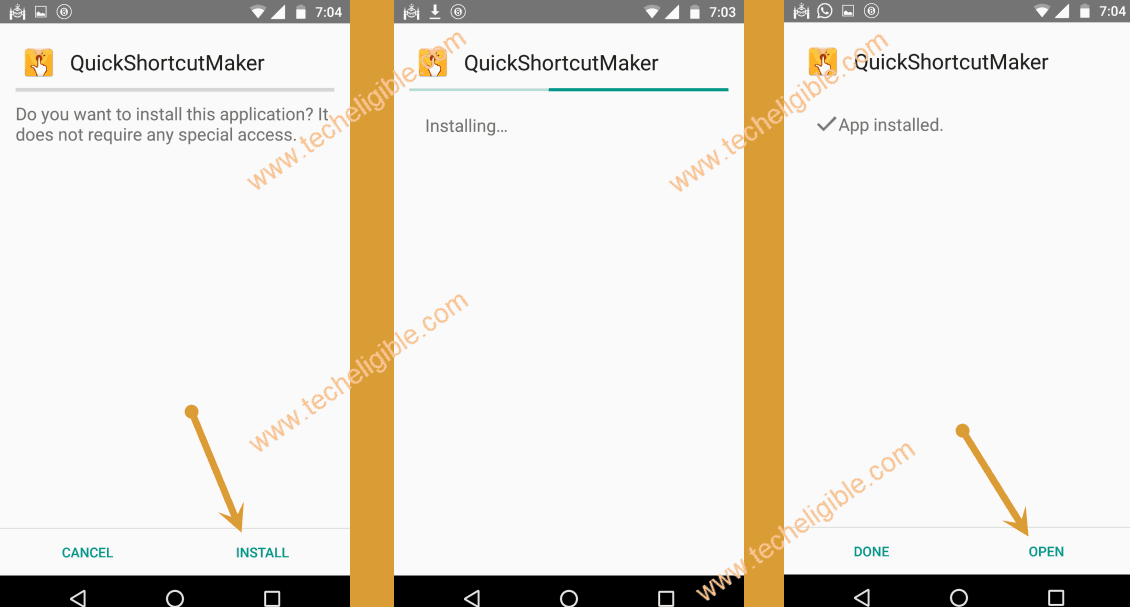
13. Install & open “Quick Shortcut Maker” app.
Note: You may see popup box, just go to > Settings > and enable “Unknown Sources” option from there, now go back and install and open quick shortcut maker application to Bypass Google Account Sony Xperia Z5 Premium.
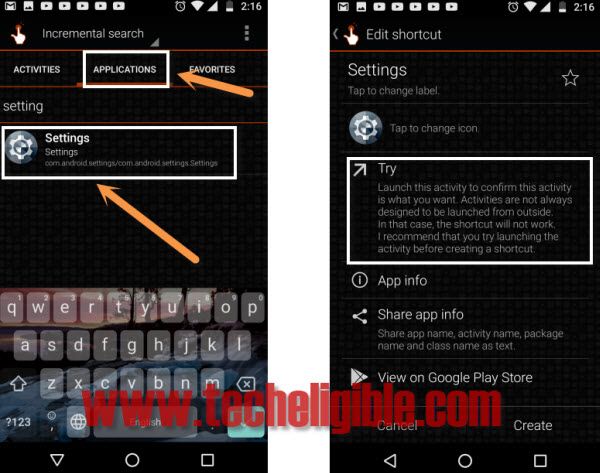
14. Go to > Applications > Settings > Try.
Disable Apps to Bypass Google Account:
15. Go to > Lock Screen & Security > Device Administrator > Android Device Manager > Deactivate this device administrator.
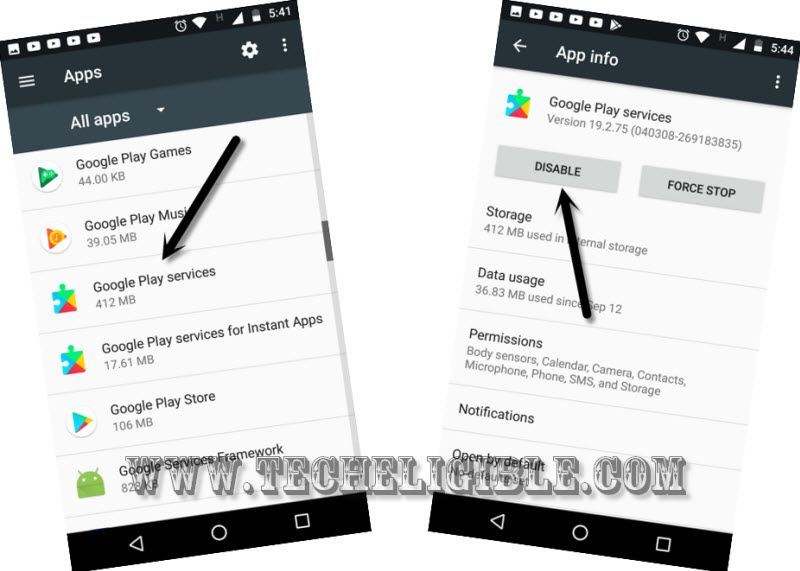
16. Go back to > Settings > Apps > Google Play Services > Disable > Disable App”.
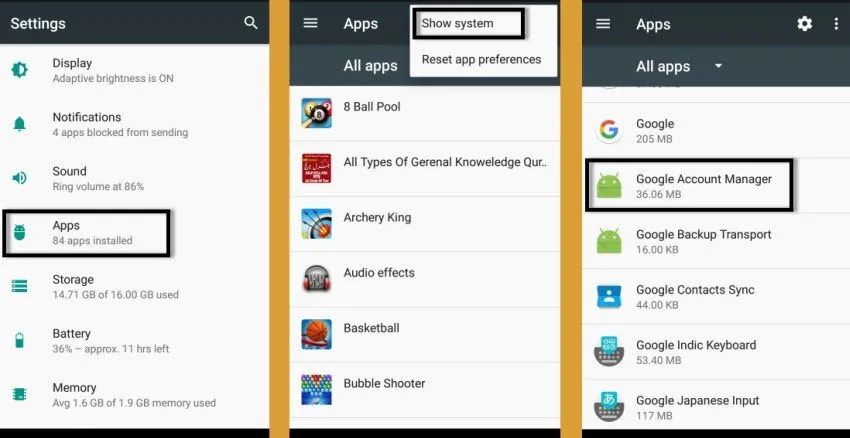
17. Get back to (App List), tap to “3 dots”, and select “Show System”.
18. Go to > Google Account Manager > Disable > Disable App”.
19. Go back to app list again, and tap to > Google Services Framework > Disable > Disable App.
Install Final App & Add New Google ID:
20. Access back to “Download Folder” by tapping on back arrow carefully.
21. Tap on > Google Play Services > Install > Done.
22. Install & open again > Quick Shortcut Maker > Install > Open.
23. Go to device settings again by tapping on > Applications > Settings > TRY.
24. Go to > Accounts & Sync > Add Account > Google, now login there with any Gmail Account to successfully Bypass Google Account Sony Xperia Z5 Premium.
Enable Applications:
25. From “Settings”, just go to “Lock Screen & Security > Device Administrators > Android Device Manager > Activate this device administrator.
26. Lets enable other disabled apps as well, for that, just get back to > Settings > Apps > All Apps > Disabled.
27. Tap on “Google Play Services“, and then tap on “ENABLE”.
28. After that, tap on “3 dots” from top right corner & select “Show systems”.
![]()
29. Enable both apps as well (Google Account Manger & Google Services Framework).
30. Restart Sony Xperia Z5 device, and finish initial setup wizard.
Read More: