
You have no way to complete the verification process right after performing hard reset on Bundy Tablet? The reason behind this, you are not using the same Gmail account to login with, that was setup earlier the hard reset. FRP lock protection start protecting phone from an unknown person access. After all tries, if you’re still on same situation and unable to remember your login account. Then, you can follow up our safe steps to Bypass FRP Bundy BT7 tablet.
Note: This guide has been applied successfully on (Bundy BT7), its our assumption, that, you can also apply this same guide on similar models on Bundy BT7+ / Bundy BT7 Pro tablets.
Disclaimer: We strongly advise you to use this approach only on your own device; if you do not own this device or obtained it from somewhere else, you must return it to its rightful owner. This method is intended solely for instructional purposes.
How to Bypass FRP Bundy BT7 Tablet (Without PC Guide)
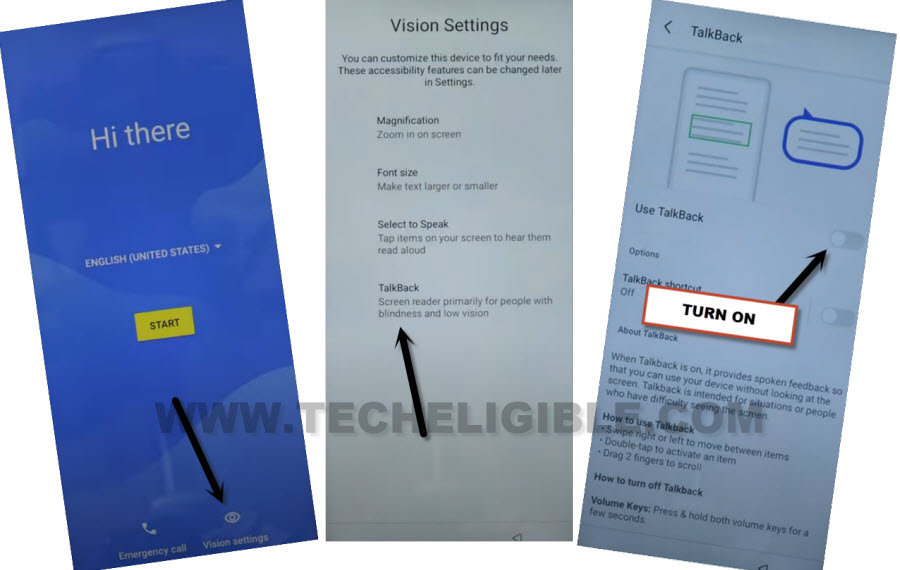
-Continue this process by turning on the phone and connect WiFi. Once its done, get back on the first (Hi there) startup screen.
-Wherefrom, we will tap on > Vision Settings > Talkback. Then, turn on the “Use Talkback” option.
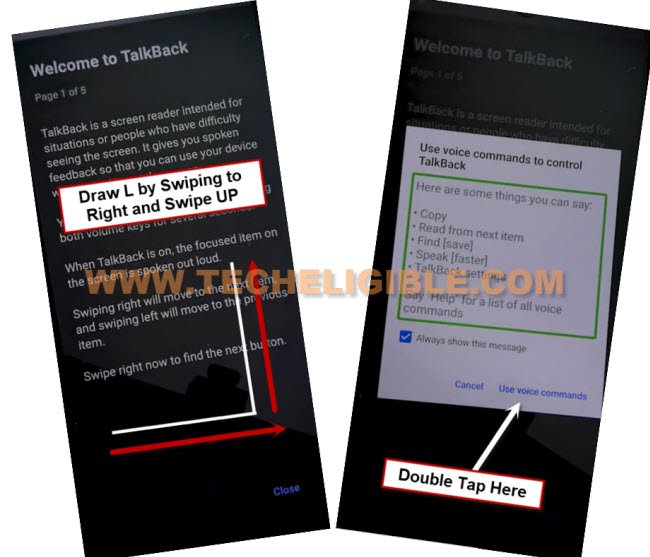
-Let’s make reverse (L) shape on the phone display by swipe right and swipe up.
-Within few seconds, you will get the popup notification, just double hit on options > While using the app > Use Voice Command.
-As soon as, you see the (Green boarder) on screen, Speak loudly “Open Google Assistant”.
Enable Use Talkback & Accessibility From Settings
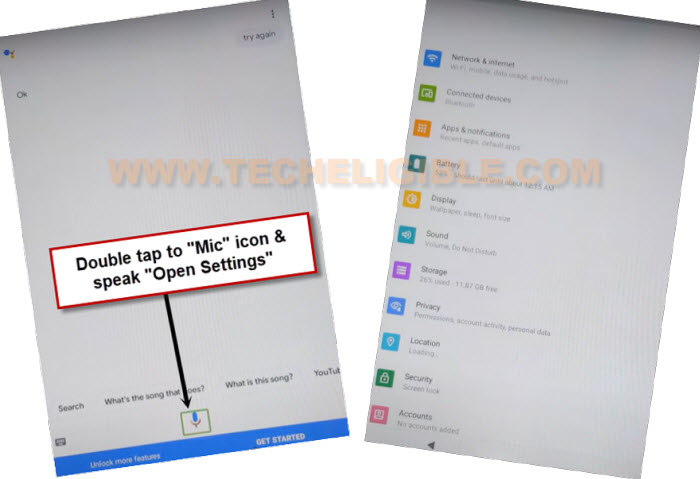
-We will access on the (Google Assistant) page, tap to “Mic” icon from there and say loudly “Open Settings”. This will launch the primary settings of the tablet.
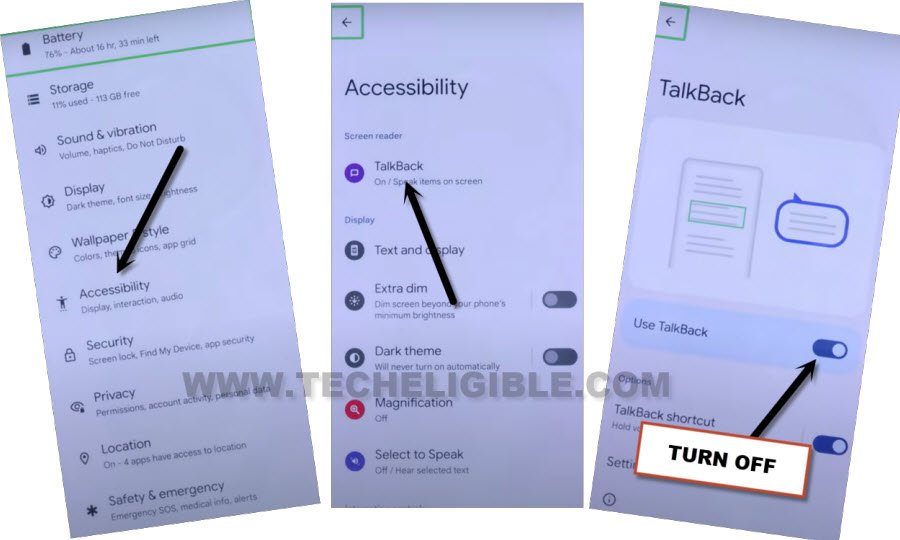
-Once you reach over the (Settings) page, just scroll down using two fingers together and tap on “Accessibility”.
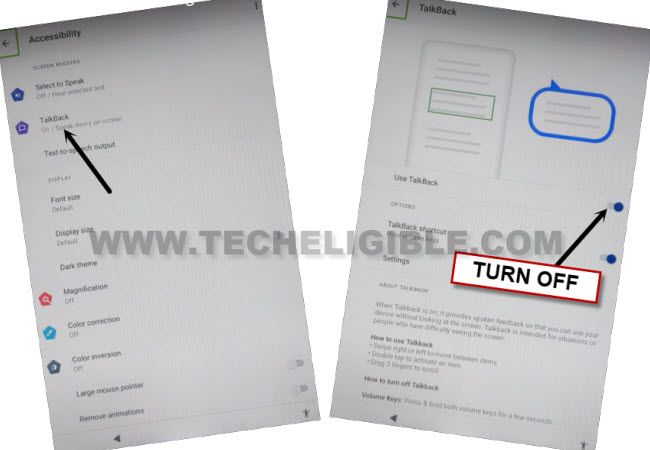
-Then, double hit on “Talkback” and then, turn off the “Use talkback” option by double tapping on it.
-Go back over the main settings page by tapping twice on the back arrow icon from bottom.
-We need to switch on the (Accessibility functionality) by tapping on the > Accessibility > Accessibility Menu > Turn on (Accessibility menu shortcut).
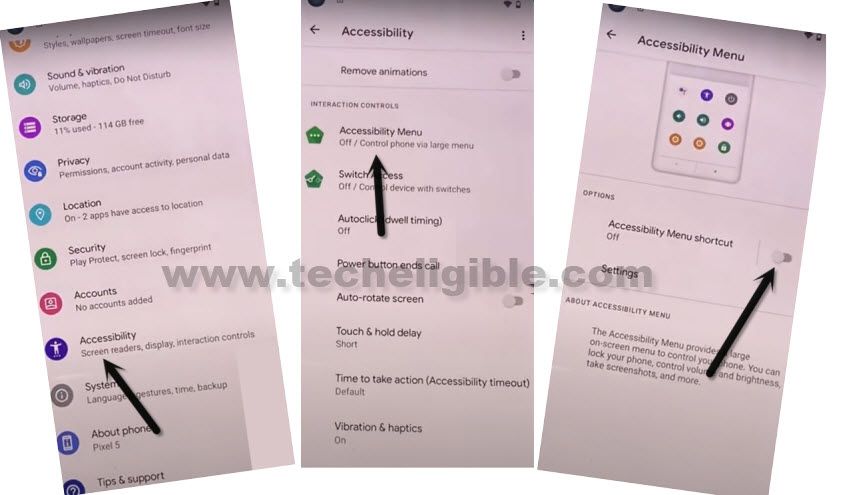
-After turning on this accessibility function, you will start facing the (Menu icon) on bottom right corner of the screen.
Disable Apps from App List Page
-Simply, get back to primary settings page of the tablet again. Wherefrom, we will go to > Apps & Notifications > See All Apps.
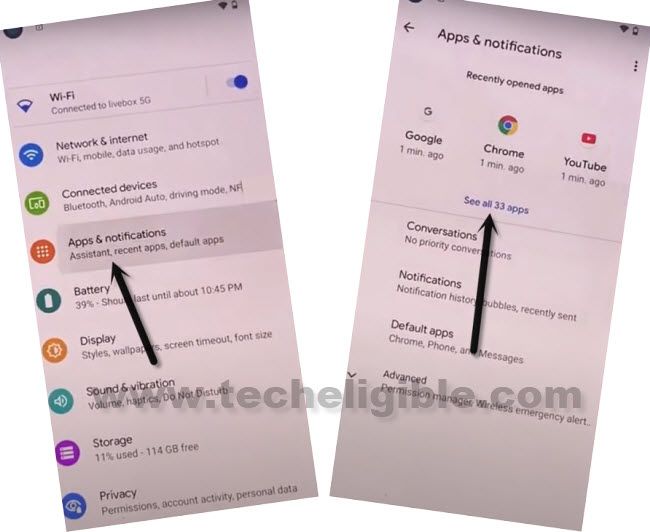
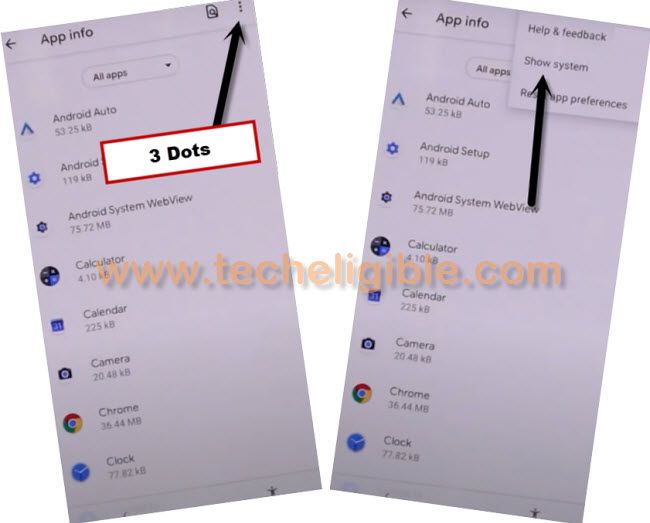
-We are gonna make show all hidden apps by tapping on “3 dots menu option” from top corner. After that, choose “Show system” option.
-From app list page, find and hit over the “Android Setup” option. Then, tap to > Force Stop > Ok.
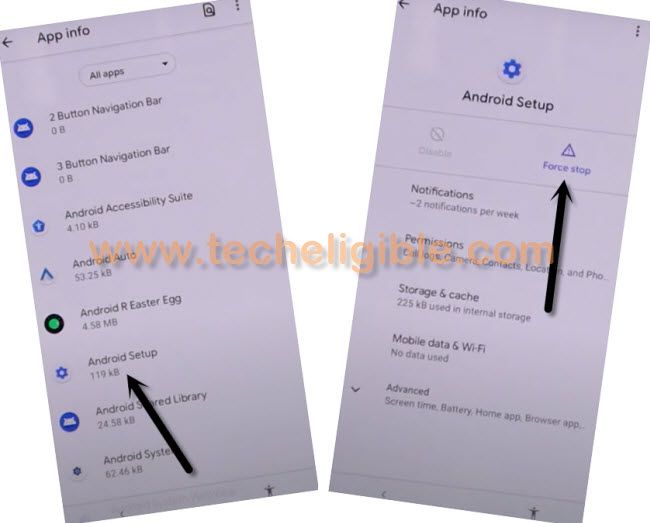
-Get back to app list page again by tapping on back arrow icon.
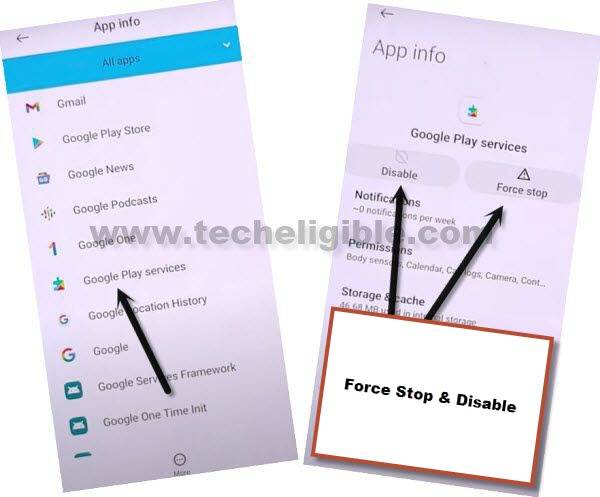
-From there,, find and go to “Google Play Services” app. After that, tap on > Force Stop > Ok.
-Then, tap also on the > Disable > Disable app.
Open the (Braille Keyboard) option:
-Let’s go all the way back over the (Hi there) startup screen again by tapping several times on back arrow option.
-Now, we have to get the talkback braille keyboard option by tapping on > Vision Settings > Talkback > Turn on “Use talkback”.
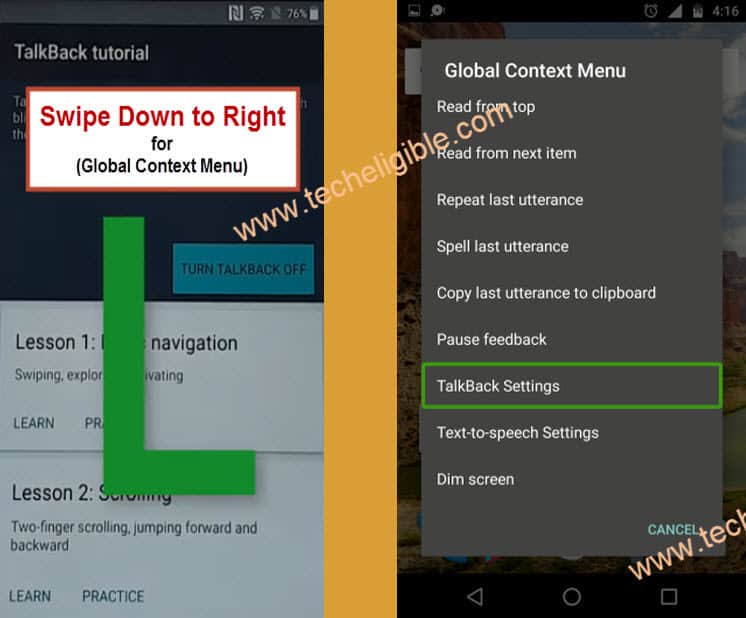
-Simply, make the (L) shape on screen through swipe down and swipe right. Then, double hit on “Talback Settings”.
-Choose options through double tap > Braille Keyboard > Set up braille Keyboard.
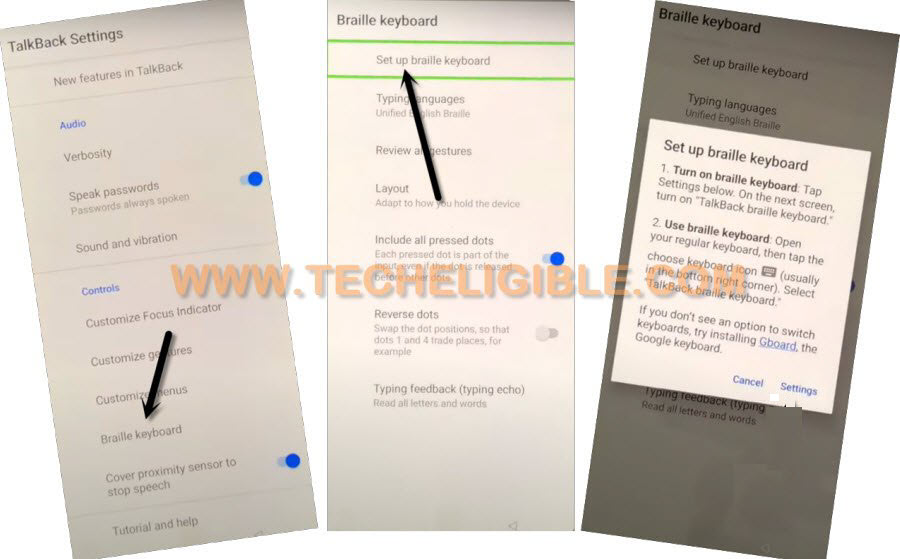
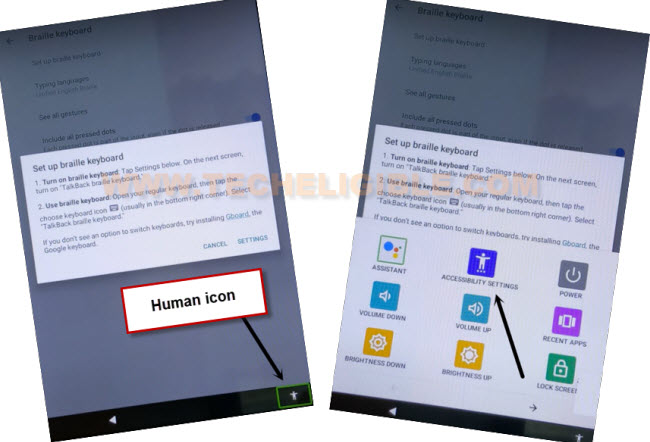
-Afterwards, a popup window will be displayed to you, we simply have to “Human icon” from bottom right corner.
-Double hit over the “Accessibility Settings” option.
-We can easily turn off the talkback function now, for that, go to “Talkback” option and turn off the (Use talkback) function. Then a popup screen will appear up, just double hit on “Stop”.
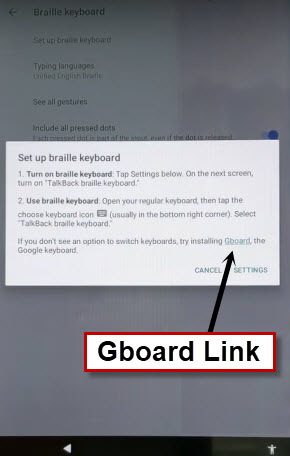
-Tap twice on back arrow icon until you reach on the (set up braille keyboard) popup screen same as shown in below image, from there, tap to link “Gboard”.
Access back to Settings & Enable Google Play App
-We are on a (Google Play) app page screen, just go to > 3 dots > Settings.

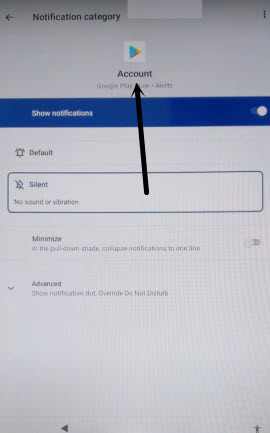
-Afterwards, hit over the > General > Notifications > Account.
-Tap on the “Account” option.
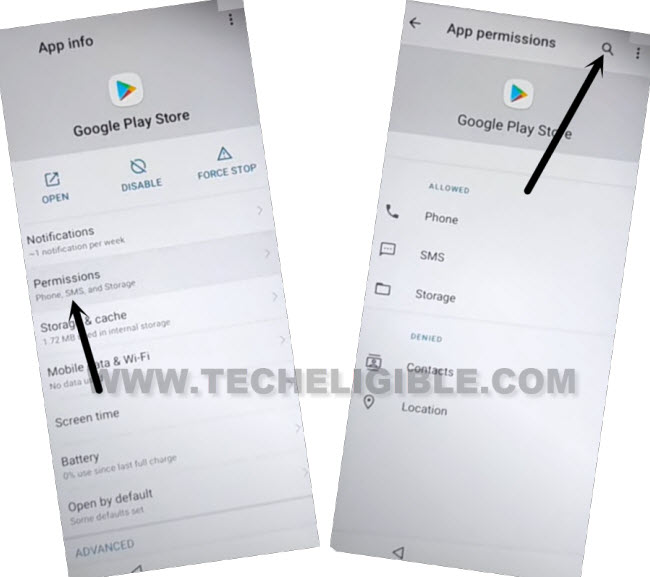
-From the next google play store (app info) page, go on the “Permissions”.
-Then, open up the search option by hitting on “Search icon” from top corner.
-Search there “Sett” and tap on the “Settings” option from searched result.
-Reach again on the settings page by tapping on “Settings” gear icon. Hit on “Open”.
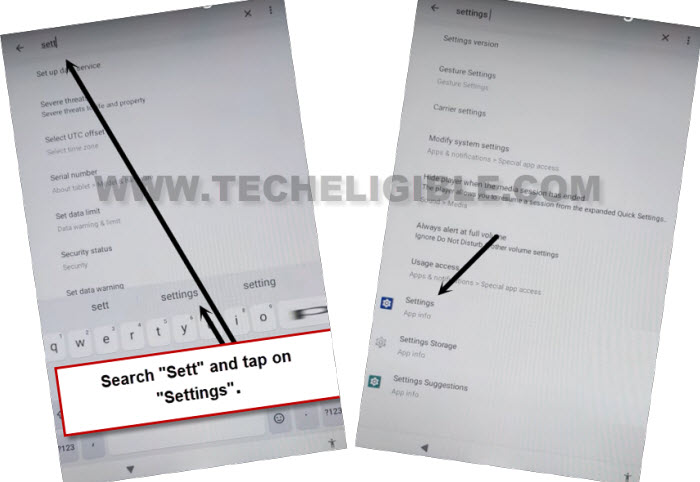
-From the (Settings) screen, we need to access the app list page again, for this, go to > Apps & Notifications > See all apps.
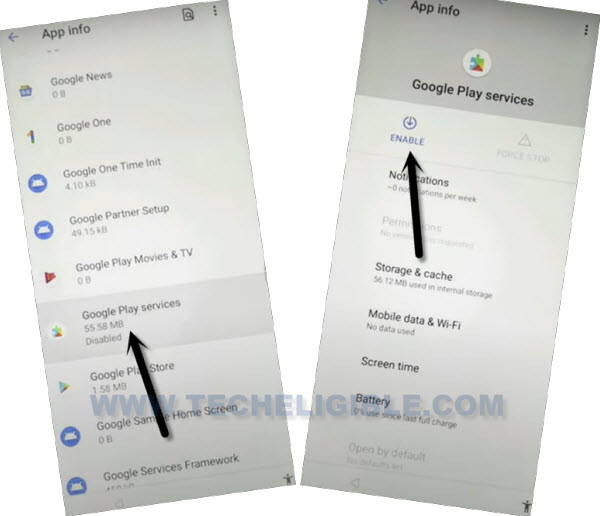
-Then, hit over the > Google Play Services > Enable.
Complete Startup Steps
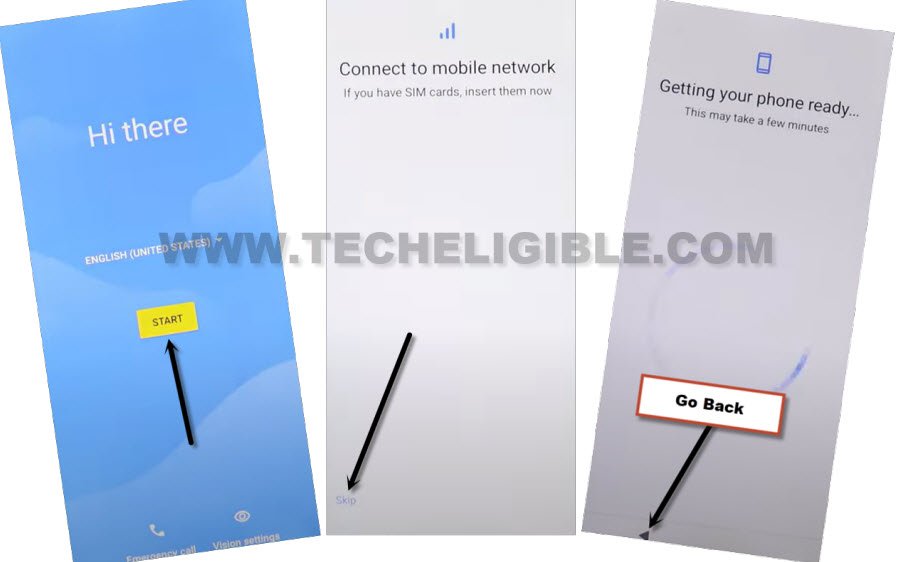
-Access back to (Hi there) page by tapping back arrow icon multiple times. Then, tap to “Start” button from there.
-From the next loading page (Getting your phone ready), simply, tap to “Back Arrow” icon.
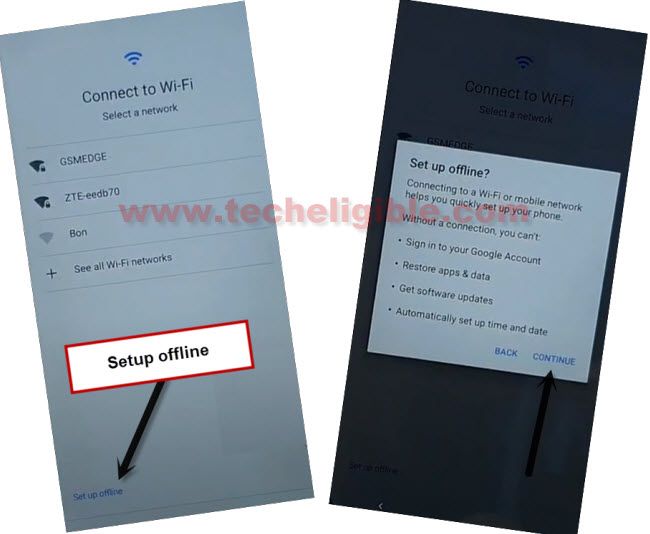
-You will be shown (Connect to WiFi) screen, let’s complete startup steps in offline mode by tapping on > Setup offline > Continue.
-Its all done, you can easily complete all remaining steps on your own. The FRP has been bypassed successfully.
The Conclusion
Firstly, we enabled the (Talkback) function and then, access on the (Settings) screen. From there, we enabled the (Accessibility) function and then, reached back to main settings page. From there, we just disabled the (Google Play Services + Android Setup) applications. After that, we just got back on first (Hi there) screen and enabled talkback function again, after that, using the (braille keyboard) option, we simply accessed back on settings page and enabled google play services application. After that, completed all setup wizard steps successfully.