
You are unable to finish the verification process immediately after conducting a hard reset on the android tablet device? This happens because you are signing with wrong Gmail account that was not previously used before performing the hard reset on this device. The FRP lock feature is designed to protect the device from unauthorized access. If you have made numerous attempts and are still in the same predicament, unable to recall your login details, you can follow our secure instructions to bypass FRP Qilive QT2108BP Tablet without using any PC and paid tool.
Disclaimer: We highly recommend utilizing this method only on your personal device; if you do not own the device or have acquired it from a different source, you should return it to its legitimate owner. This guide is meant exclusively for educational purposes.
How to Bypass FRP Qilive QT2108BP Tablet
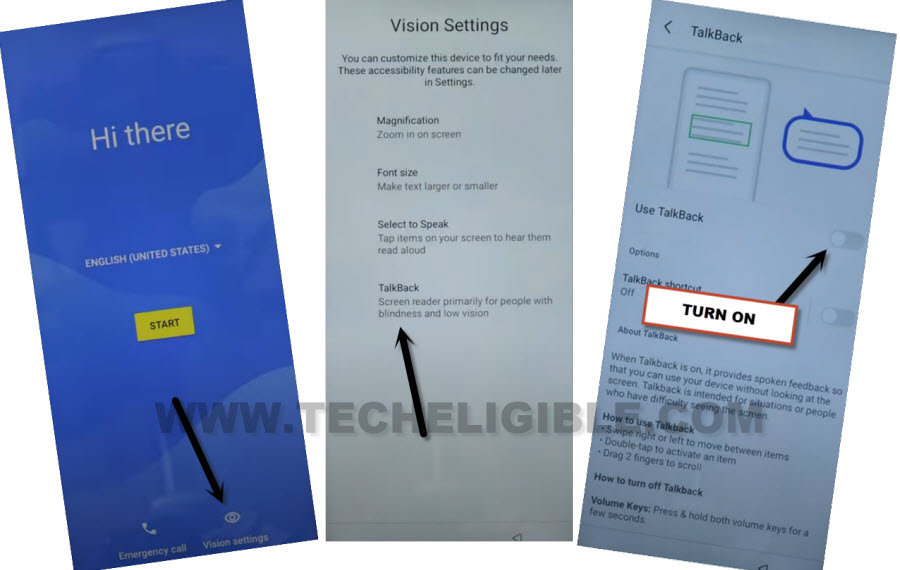
-Proceed by powering on the device and connecting to WiFi. After this is completed, return to the initial (Hi there) setup screen.
-From there, we will select > Vision Settings > Talkback. Following this, enable the option labeled “Use Talkback.”
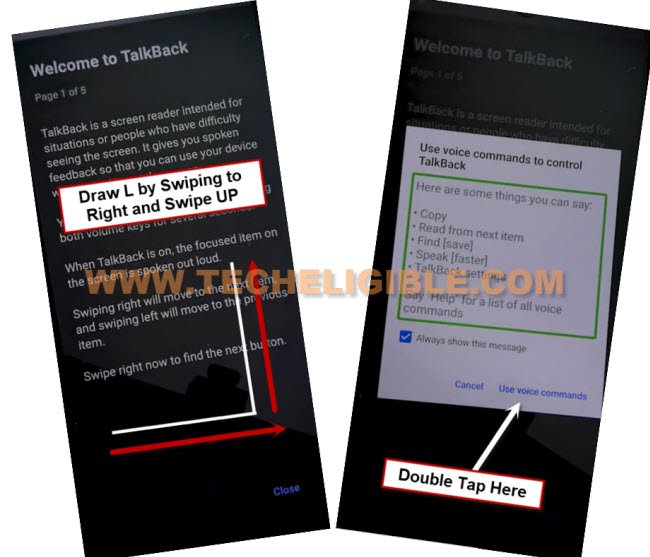
-Now, create a reverse (L) shape on the phone screen by swiping right and swiping up.
-In a few moments, a notification will appear; just double tap on the options > While using the app > Use Voice Command.
-Once you notice the (Green border) on the display, clearly say “Open Google Assistant.”
Note: If, after numerous attempts to say “Open Google Assistant” nothing happens, try saying loudly “Give me the weather.” This should bring up the Google Assistant pop-up window.
Turn on (Talkback & Accessibility) Function
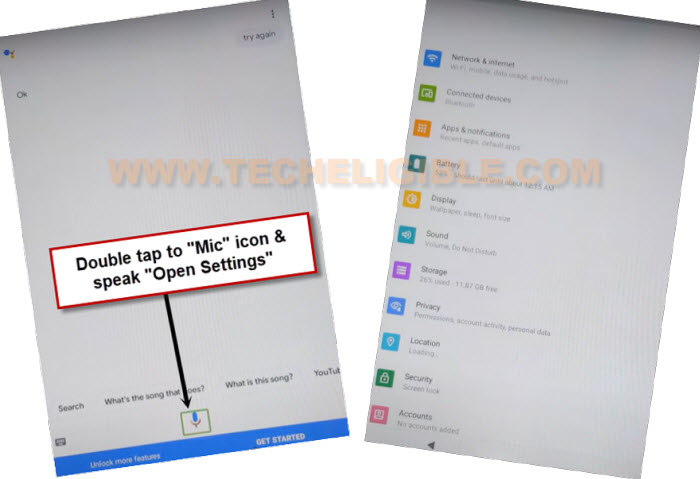
-Once we accessed over the (Google Assistant) screen. From there, we can access to the main settings page just by tapping over the (Mic) option and then, speak loudly “Open Settings”.
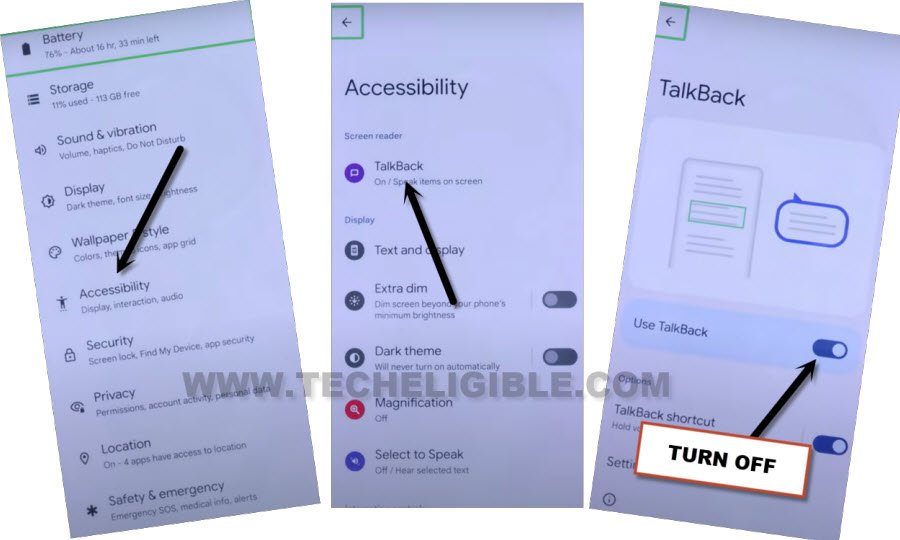
-When you arrive at the (Settings) page, let’s go down and hit over the “Accessibility” option.
-Next, double tap on “Talkback” and disable the “Use talkback” option by tapping twice over this option.
-Through hitting on back arrow icon two times that located at the bottom, just return to the main settings page.
-We have to quickly activate the (Accessibility feature) by selecting options respectively > Accessibility > Accessibility Menu > Turn on (Accessibility menu shortcut).
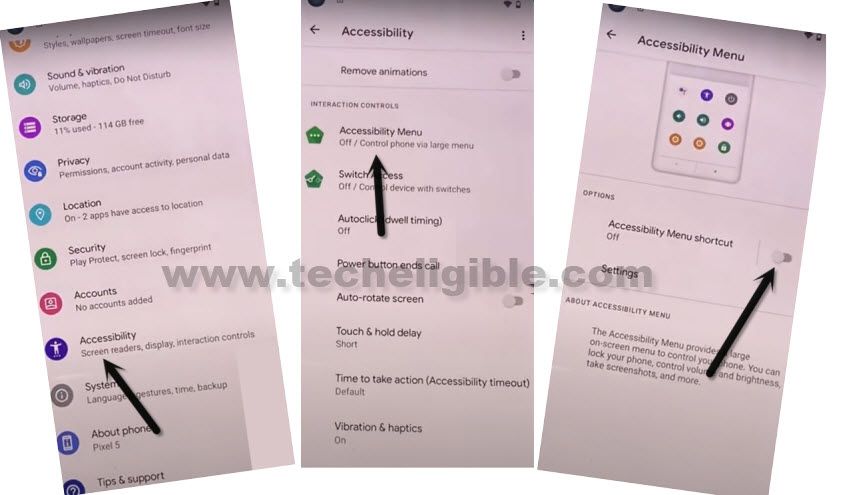
-Once this accessibility feature is fully activated, you will notice the (Menu icon) appearing in the bottom right corner.
Go to Apps & Notification Screen
-You need to return to the main settings page of the tablet once more.
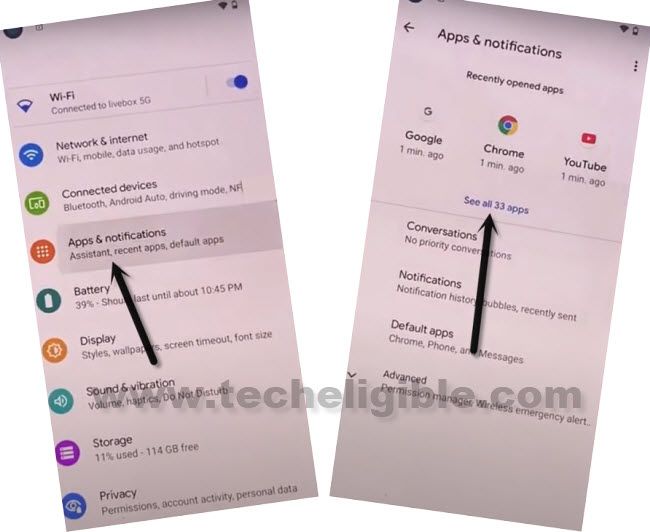
-From there, we will select > Apps & Notifications > See All Apps.
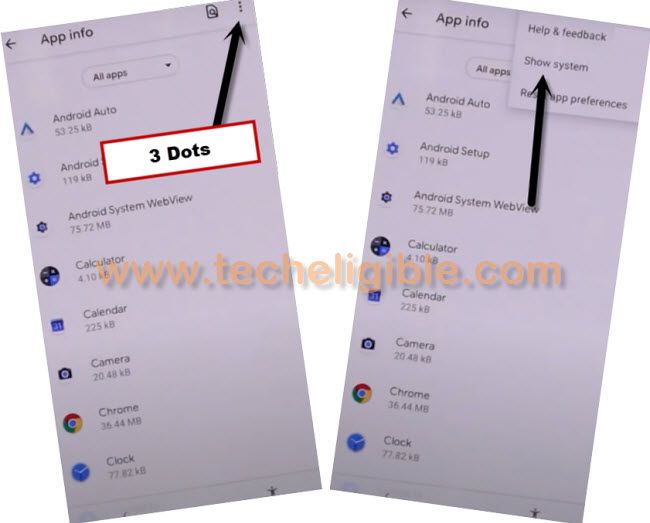
-We have to hit over the (3 dots) option from top corner. Then, we are gonna choose the “Show system” option. This option will display all hidden apps.
Disable Apps
-In the app list page, locate and select the “Android Setup” option. Following this, tap on > Force Stop > Ok.
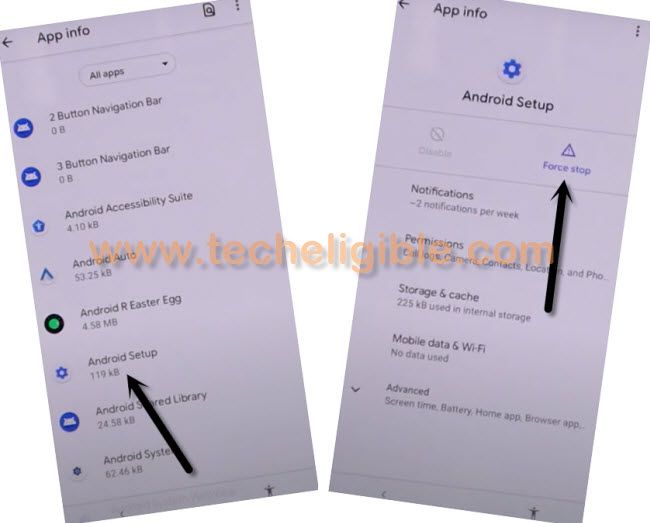
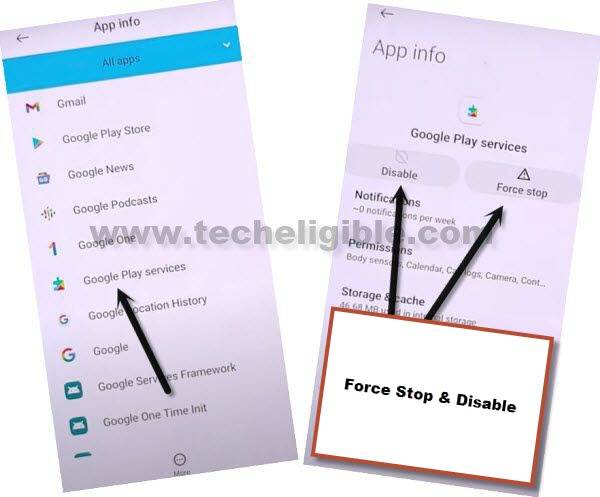
-Navigate back to the app list page. Then, scroll down and look for the “Google Play Services” app same as mentioned in the below screen shot.
-You have to force stop + disable this app too.
Let’s Launch the (Braille Keyboard) Function
-Let’s navigate all the way back to the (Hi there) setup page. For this, start tapping back arrow icon several times.
-Re-enable the talkback function through going to > Vision Settings > Talkback > Enable “Use talkback.”
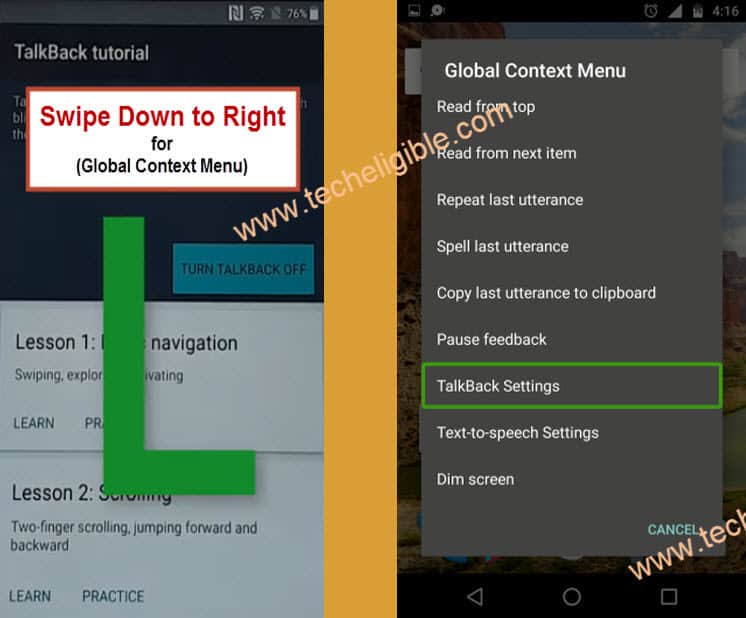
-Get the global context menu popup by drawing (L) shape. Just swipe down to right, then, from popup window, double tap on “Talback Settings”.
-Select options by double tapping > Braille Keyboard > Set up braille Keyboard.
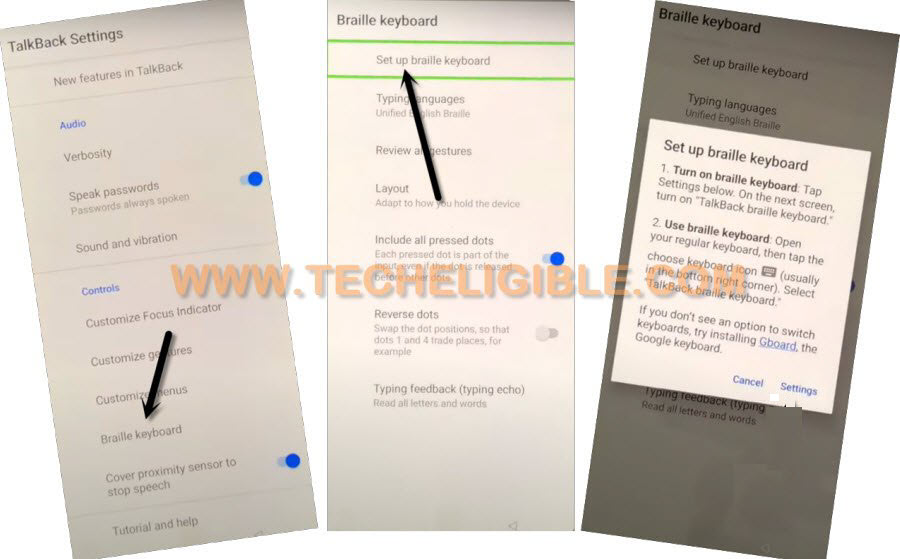
-Afterward, a pop-up window will appear, and we will simply need to click on the “Human icon” at the bottom right corner.
-Let’s tap twice on the “Accessibility Settings” option.
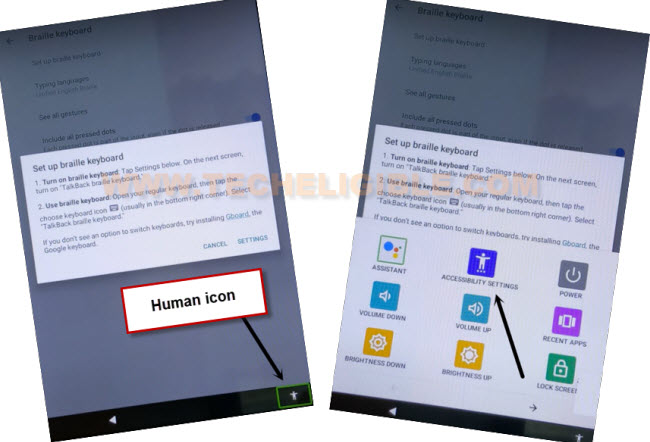
-We can effortlessly disable the talkback feature at this point. To do so, navigate to the “Talkback” setting and deactivate the (Use talkback) function. Following that, a popup will emerge, and simply double-tap “Stop”.
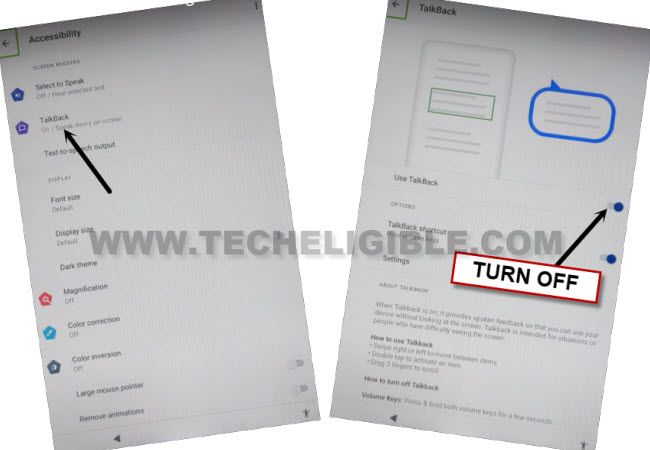
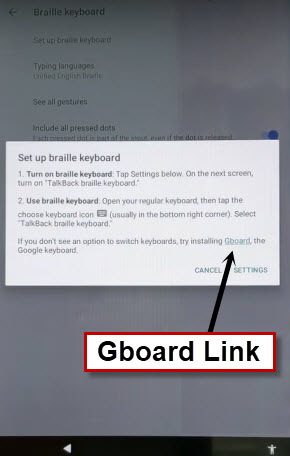
-You need hit two times on the back arrow icon until you arrive at the (set up braille keyboard) popup screen, which resembles the image shown below. From that point, select the link labeled “Gboard”.
Note: If you don’t get the popup window, just tap on “Set up braille Keyboard”.
Revisit Settings for Enabling App
-We have accessed a (Google Play) application interface; just proceed to > three dots > Settings.

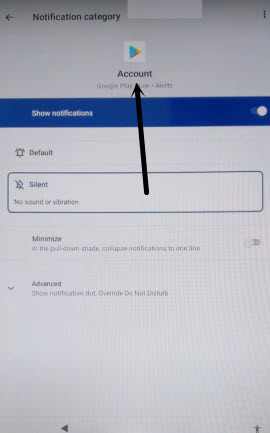
-Next, click on option “General”. And afterwards, choose the “Notifications > Account”.
-Select the “Account” option from top underneath the google play services icon.
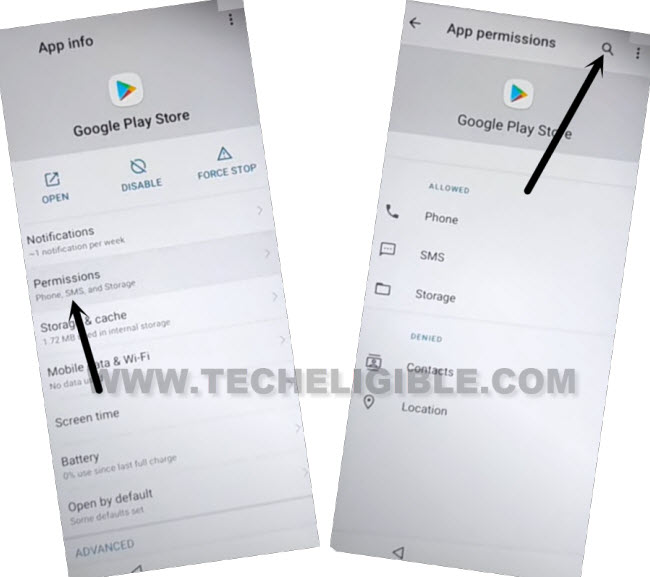
-On the upcoming Google Play Store (app info) page, navigate to the “Permissions”.
-Then, launch the search feature by tapping on the “Search icon” located in the upper corner.
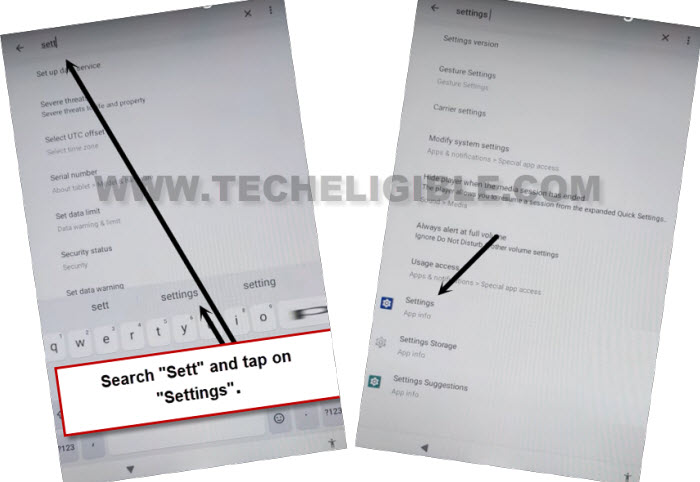
-Enter “Sett” in the search bar and select the “Settings” option from the results.
-Get back to the settings page by pressing the “Settings” gear icon. Click on “Open”.
Access to Apps & Notifications Again
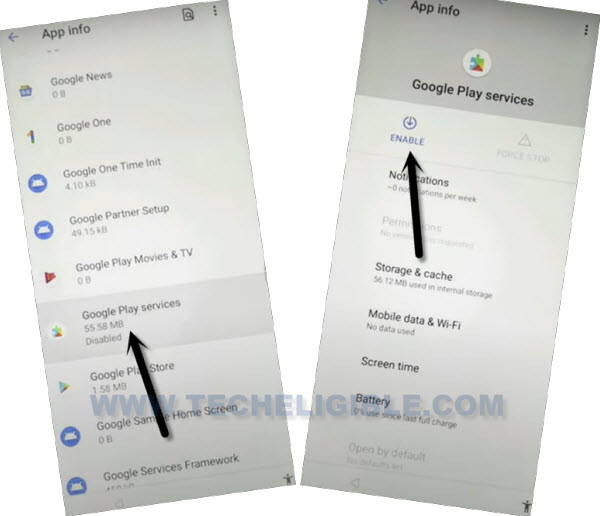
-We are gonna revisit the app list page, for this, tap on > Apps & Notifications > See all apps.
-Enable again the recently disabled app (Google Play Services). Tap over the > Google Play Services > Enable.
Finish All Starting Steps Without Login Account
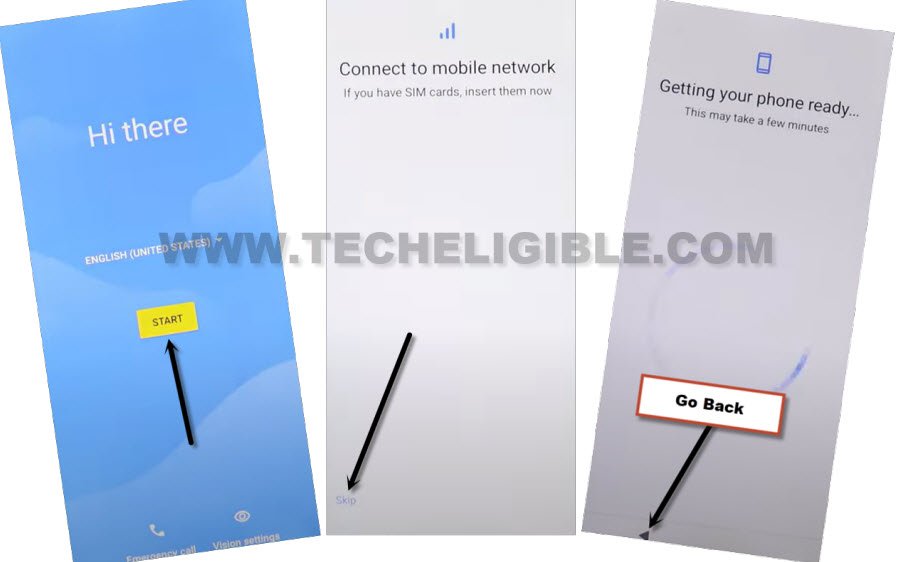
-Navigate back to the (Hi there) page by pressing the back arrow icon for several times. Then click on the “Start” button from that screen.
-Once you reach on the (Getting your phone ready) page, quickly tap to “Back arrow” icon from bottom.
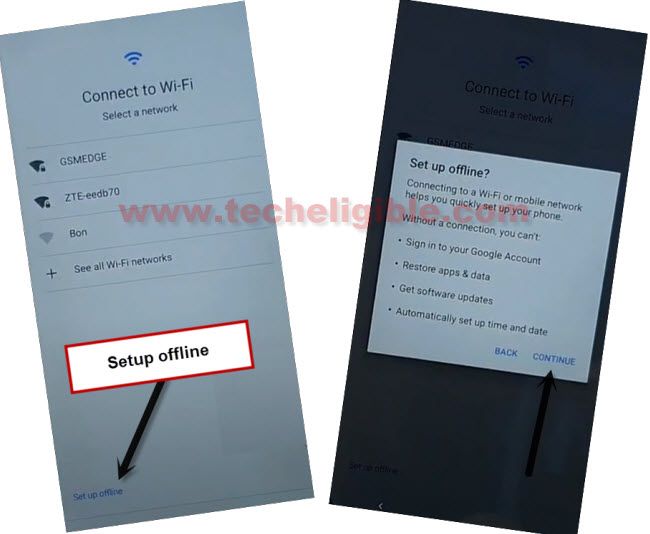
-Once you access to the (Connect to WiFi) screen; let’s finish the startup process in offline mode by selecting > Setup offline > Continue.
-Everything is complete, and you can effortlessly finish all the remaining steps independently. The FRP has been successfully bypassed.
The Bottom Line
Initially, we activated the (Talkback) feature and then accessed the (Settings) screen. From that location, we turned on the (Accessibility) function and returned to the main settings page. There, we disabled the (Google Play Services + Android Setup) applications. Subsequently, we navigated back to the initial (Hi there) screen and reactivated the talkback function.
Using the (braille keyboard) option, we successfully accessed the settings page and enabled the Google Play Services application. Finally, we completed all startup steps easily.