
Remove FRP Protection Galaxy J7 Pro Android 7
Factory reset protection can be bypassed easily on J730G, J730G-DS, J730F devices, Remove FRP Protection Galaxy J7 Pro by flashing device with Odin software, just download from below “Stock ROM” and “Combination ROM” and flash with them your j7 pro device to bypass google verification.
Download Tools List:
We have to download some tools to accomplish this method, below is the list of all tools you are required to download, and we will also leave a link, where from you can downloads all below tools.
1 Samsung USB Driver.
2 ODIN Software.
3 STOCK ROM.
4 COMBINATION ROM.
⇒ Download All Above Tools [CLICK HERE]
Let’s Start to Remove FRP Protection Galaxy J7:
-Extract “Samsung USB Driver” and “Install” in your Desktop.
-Switch off “J7 Pro” device.
-Put your device into download mode by, Press & Hold “Power Key + Home Key + Volume Down” until you see “Warning” screen in your device.
-Press “Volume Up” key to go into download mode.
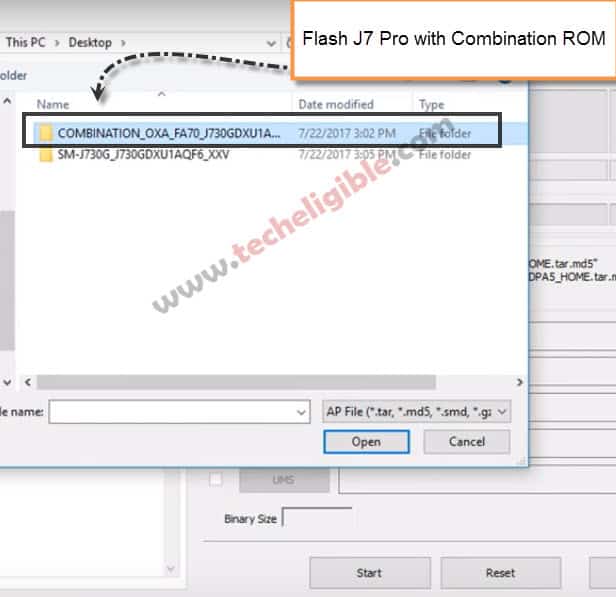
FLASH J7 Pro with Combination ROM:
-Extract Downloaded “Samsung USB Driver” and “Install” in your computer.
-Extract Downloaded “Combination ROM & STOCK ROM” as well.
-Open “Odin Software”.
-Tap on “AP” from Odin, and give path of downloaded “COMBINATION ROM”.
-Connect J7 Pro to COMPUTER or LAPTOP via “Micro USB Cable” to Remove FRP Protection Galaxy J7 with Odin.
-After connecting to pc successfully you will see “ID:COM” is blue means your device connected to Odin.
-After giving file location of “Combination ROM” in “AP”, just click on “START” button to start flashing.
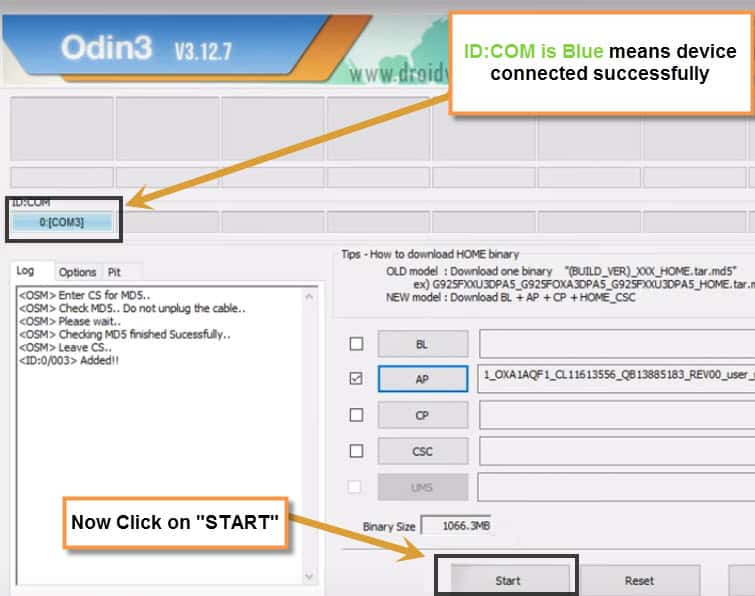
-After flashing done, you will get a green sign of “PASS!” in Odin.
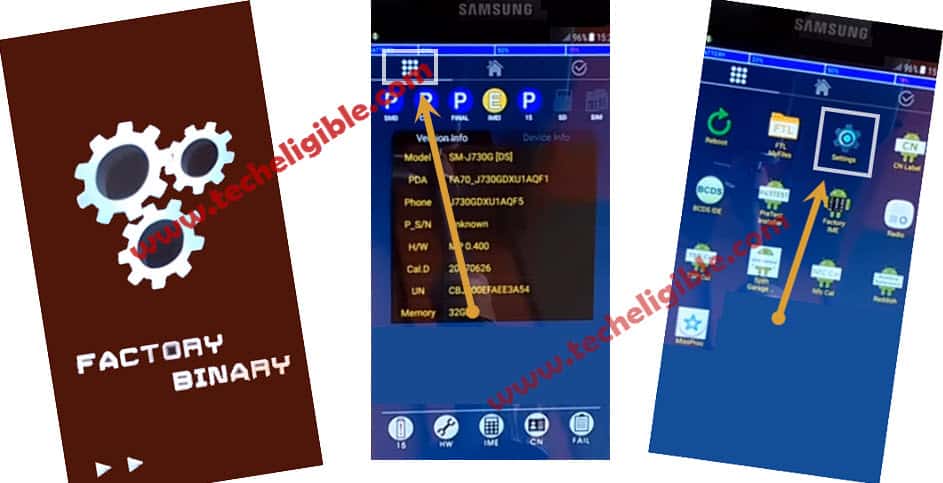
-Now J7 Pro will auto restart to “Factory Binary” screen, now disconnect your device from computer.
-Tap on “MENU”, After that tap on “Settings”.
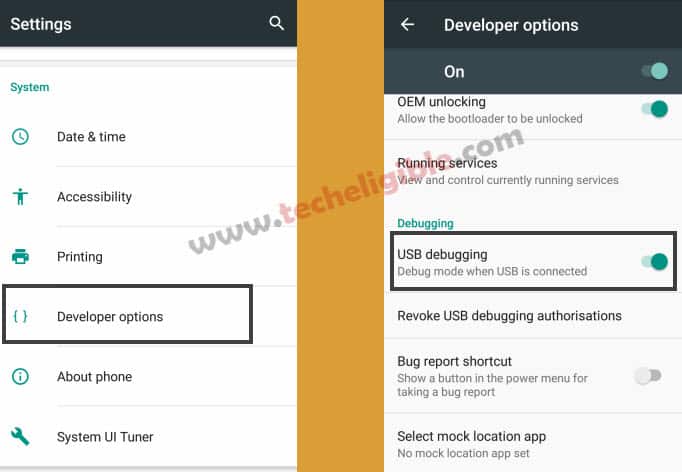
Enable USB Debugging:
-Go to “Developer Options” and then make sure “USB Debugging” is enabled there.
Note: If “Developer Options” is not listed, then tap on “About Phone”, after that tap on “Software Info” and then tap 5-6 times quickly on “Build Number” to enable “Developer Mode” in your device. After that go to “Developer Option” and make sure “USB Debugging” is enabled there.
-Reboot device into download mode again.
-Switch off your device again to Remove FRP Protection Galaxy J7 Pro.
-Press & Hold “Power Key + Home Key + Volume Down” until you see “Download” screen in your device.
-Press “Volume Up” key to go into download mode.
FLASH with Stock Firmware:
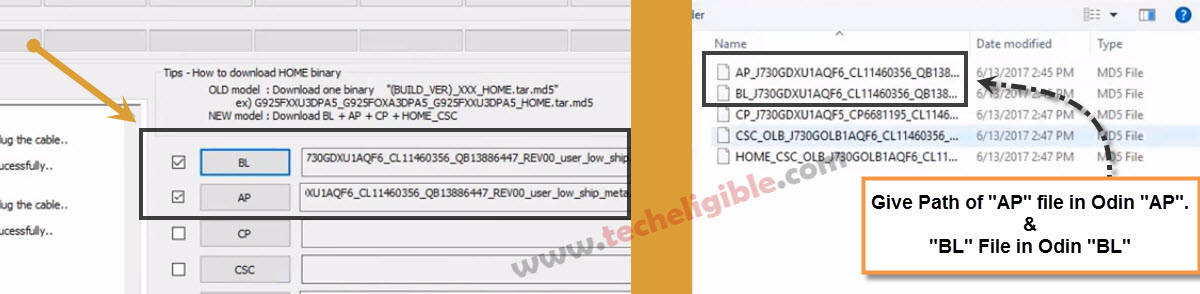
-Open “Odin Software”, and then give path in odin “BL” of “BL” file from download “STOCK ROM” folder.
-Give path in Odin “AP” of “AP” file from download “STOCK ROM” folder.
-Give path of in “Odin CSC” of “HOME CSC” file from stock rom folder as well.
Remember: Give path of “HOME CSC” file in “CSC Odin“. and Leave blank “CP & UMS” in Odin. (See Below Images)

-Make sure you have given right file location in “BL, AP, CSC”.
-Connect Galaxy J7 Pro again to computer/laptop.
-Click on “START” button from Odin software to start flashing and Remove FRP Protection Galaxy J7 Pro.

-After successfully flashing j7 pro device, you will get sign of “PASS!” in Odin software.
-Disconnect J7 Pro device from computer.
Congrats, you have successfully accomplished the method to Remove FRP Protection Galaxy J7 Pro. Don’t forget to comments bottom of the post, Thank You.
Related Posts: