
How to Remove FRP Samsung Galaxy J7 Prime Android 8,7,6
If you are still searching for a way to remove frp Samsung Galaxy J7 Prime (Android 7,6), you can follow up all available 4 methods from here according to your device android version, if you don’t remember your android version, you can apply all methods from below, one of these methods may work on your device.
Warning: Do not try this frp method on a stolen phone, this is a serious crime, if you are trying to bypass frp on a stolen phone, you may also be jailed, this process is for device owner and for educational purpose only.
4 Available Methods Below to Perform FRP Bypass on J7 Prime:
| Method 1: Samsung J7 Prime [New] |
| Method 2: Samsung J7 Prime [Android 6] |
| Method 3: Samsung J7 Prime [Android 7] |
| Method 4: Samsung J7 Prime [Android 8] |
Method 1: How to Bypass FRP Galaxy J7 Prime (NEW) ?
Before starting this process, you are required below list of tools.
⇒ SamFirm Tool V1.4.3 [Download]
⇒ Latest Samsung USB Driver [Download]
-Tun on Galaxy J7 Prime, and Connect WiFi first.
-Connect your device with PC, do make you have successfully installed all proper USB drivers in your PC, so that, you may not face any connectivity issue.
-Open “Samfirm” tool in your PC, after that, go to “Android Tool”.
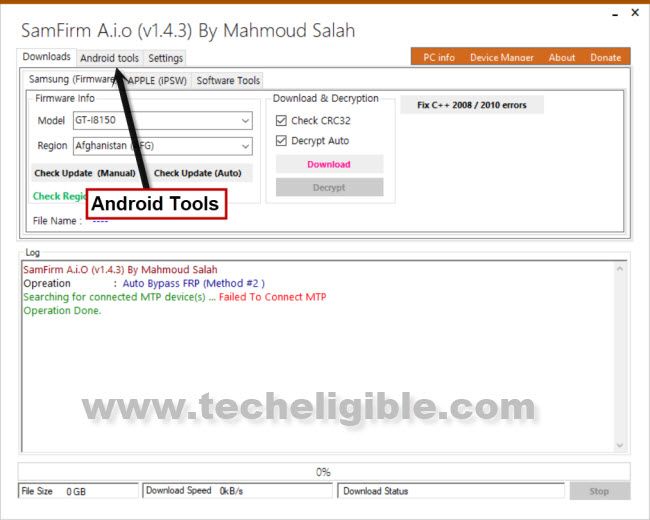
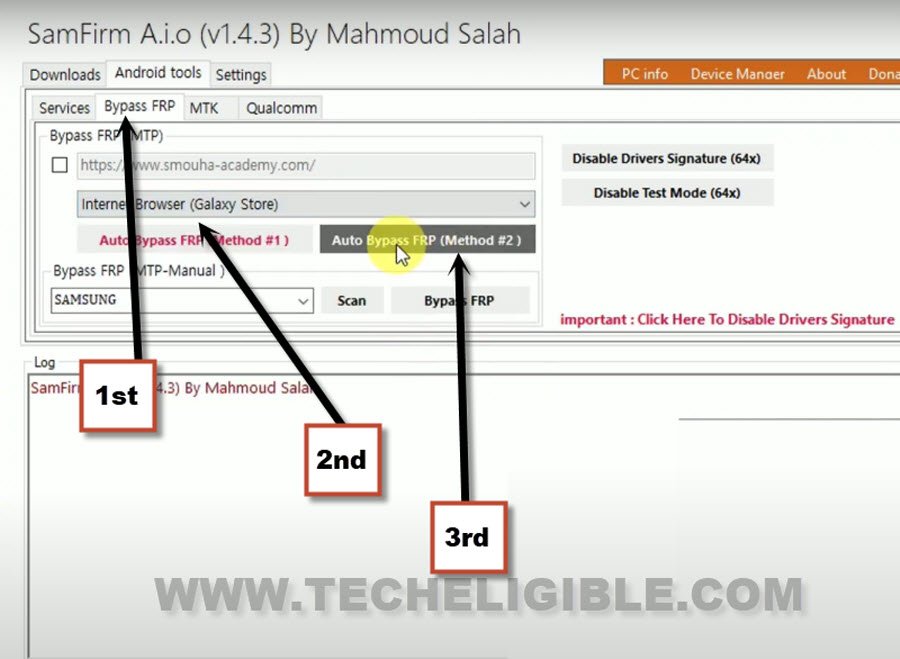
-Hit on a tab “Bypass FRP”.
-Select option “Internet Browser (Galaxy Store)”.
-Click on a button “Auto Bypass FRP (Method #2).
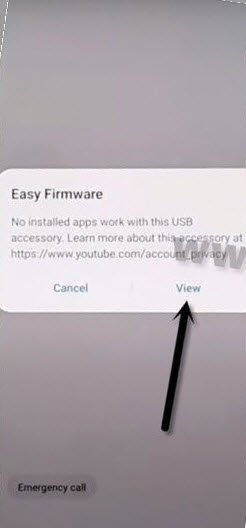
-Within few seconds, you will receive a popup in your J7 Prime, tap on “View” option from there.
-Tap on “Continue” from welcome to the galaxy store screen.
-Tap on “Update” button to update (Samsung internet browser).
-Hit on “later” from sing in to your Samsung account screen.
Note: If you face any trouble while updating or downloading Samsung internet browser, so create your free (Samsung Account) using any valid Gmail account, after that sign in with that Samsung ID to start downloading process.
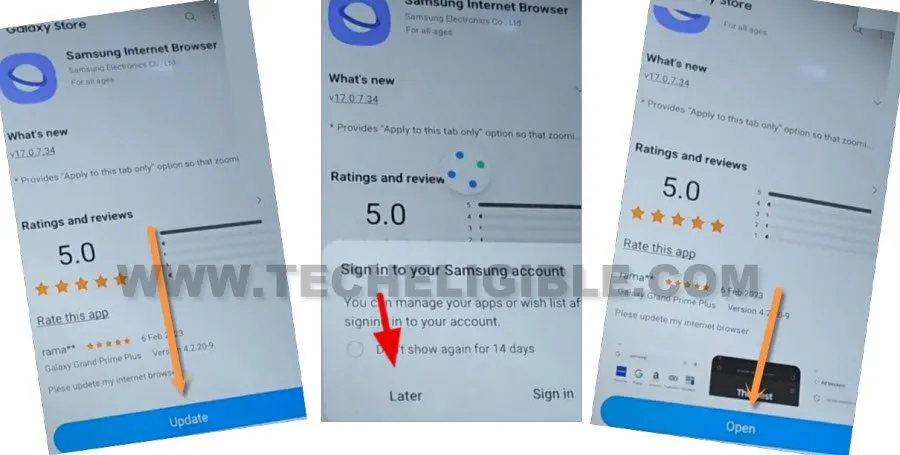
-Once updating process is done, tap to “Open” button, after that hit
-You will be redirected to Samsung internet browser.
Deactivate Android Device Manager:
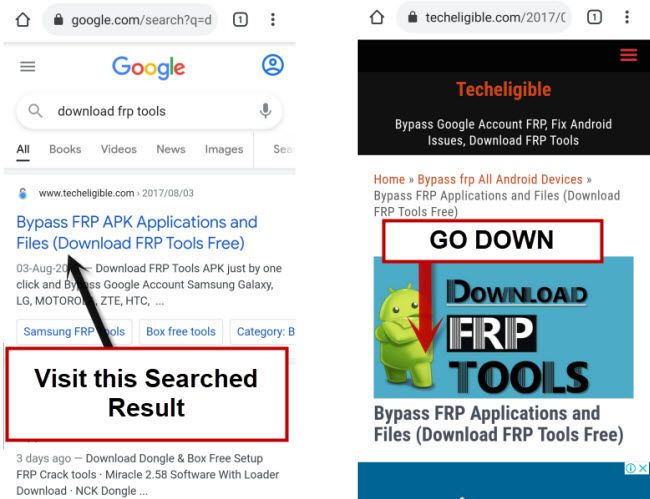
-Search in browser “Download FRP Tools“, and visit our website searched result.
-Download an app named “Google Play Services“, once this app downloading process is completed, just hit on a “MENU” icon from bottom right corner, and then tap to “Downloads” option.
-Tap on a downloaded app to install, you will see there a popup window, just hit on “Settings” from installation blocked popup, after that, turn on “Unknown Sources” option.
-Tap on > Next > Install > Done.
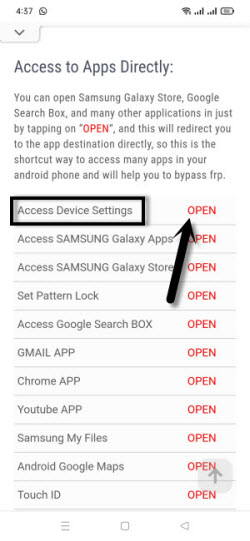
-Go back to frp tools page, from there tap on “Access device settings” option.
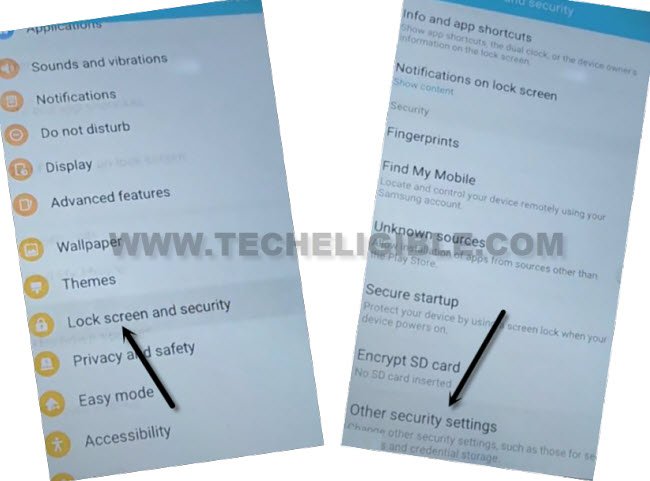
-Once you reached inside the device settings, from there go to > Lock screen and security > Other Security Settings > Device Administrator.
-Hit on > Android Device Manager > Deactivate.
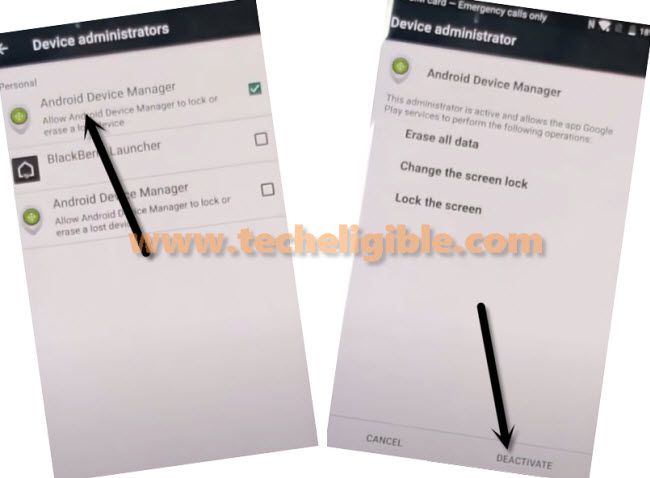
-We have perfectly deactivated android device manager successfully, now we will be able to force stop some apps.
Setup new Account:
-Go back to “Settings”, from there tap to “Applications”, now go to “Application Manager”.
-You will have there an app list.
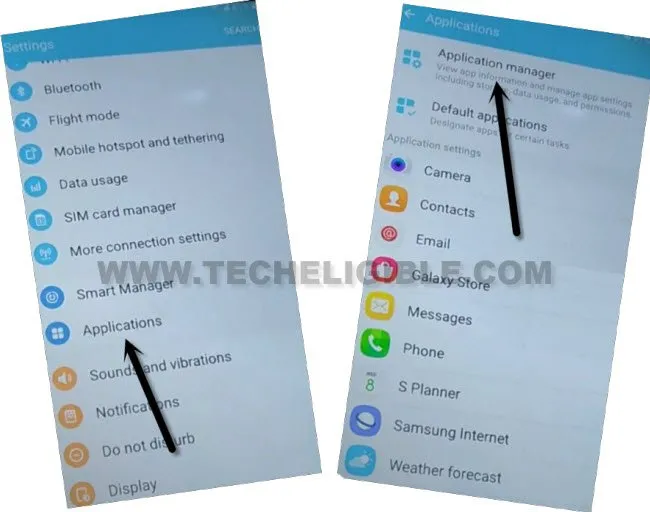
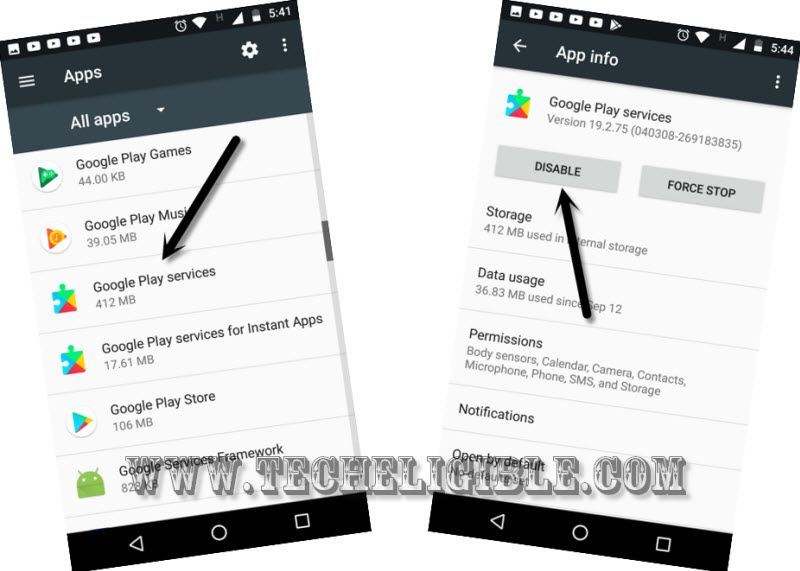
-Find and tap on “Google Play Services” app.
-Tap to > Disable > Disable App.
-Go back to “Settings”, from there tap to > Account > + Add Account > Google.
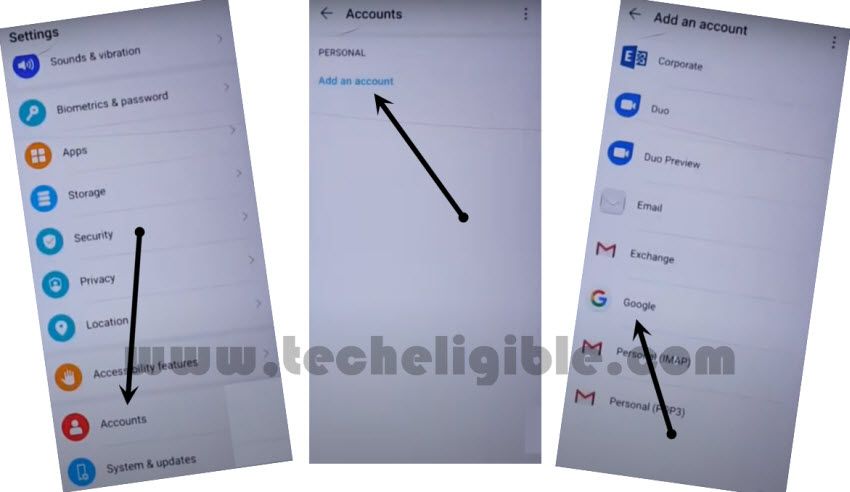
-Sign in with any valid and remembered google account
-Congrats, new account has been added successfully, and you are all done from bypass frp Galaxy J7 Prime, all we have to do here, just to enable back disabled app.
-Go back to > Settings > Application > Application Manager.
-Find and tap to > Google Play Services > Enable.
-Go back on application list, from there, you have to uninstall (Google Play services) clone app as well, which we installed recently, just find out that app in app list, and tap to “Uninstall”.
-Let’s just go back on settings, hit on > Lock Screen and security > Other security settings > Device administrator > Android device manager > activate.
-Go all the way back on first welcome screen, finish setup wizard by yourself, if you see (Google Verification) screen, just tap to “Skip” option. thanks for visiting us.
Method 2: Remove FRP Samsung Galaxy J7 Prime Android 6 Without PC:
Note: This method is successfully tested with Galaxy J7 Prime, SM-G610F, Android Security Patch Level 1 July 2017, Android Version 6.0.1
⇒ Step 1:
• Select Language, tap on “Start” from welcome screen, connect Wi-Fi in your j7 prime.
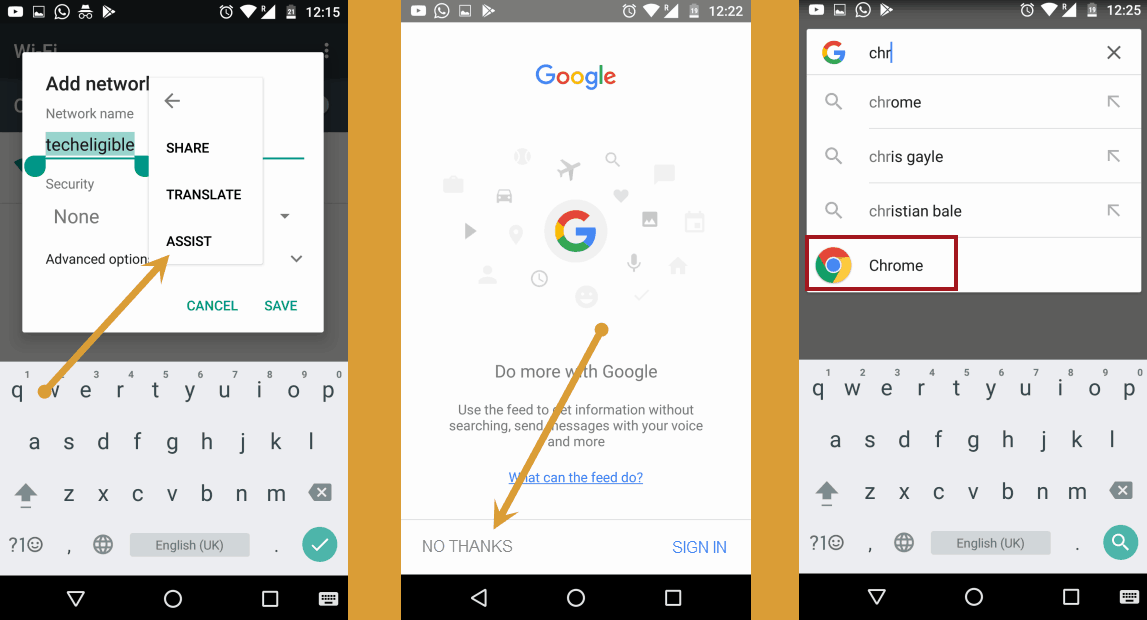
• From Wi-Fi screen, tap on “MORE” from top right corner, then tap on “Add Network”.
• Type there in SSID Field “Techeligible” double tap on “techeligible” words, so that (Cut, Copy, Assist) options appear.
• Tap on “ASSIST”, search in google “Chrome”, tap on chrome to open it.
Download APK Files:
⇒ Step 2:
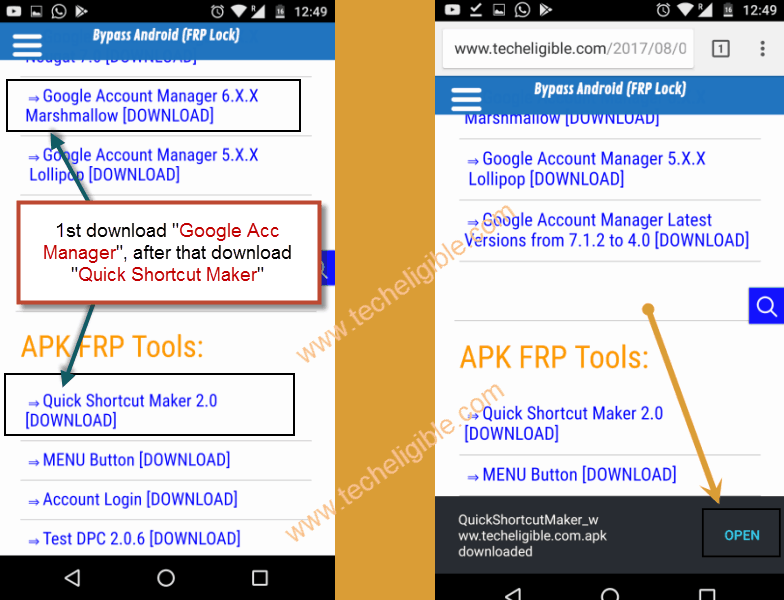
• Search in google “Bypass FRP Applications and Files Techeligible“.
• Tap on most relevant result, as shown in image.

• Download “Google Account Manager 6.0.1” regarding your android version.
• Download “Quick Shortcut Maker” and once downloading finish, you will get popup bottom of your screen, just tap on “OPEN” from that popup to open download folder.
Install APK Files in your Galaxy J7 Prime:
⇒ Step 3:
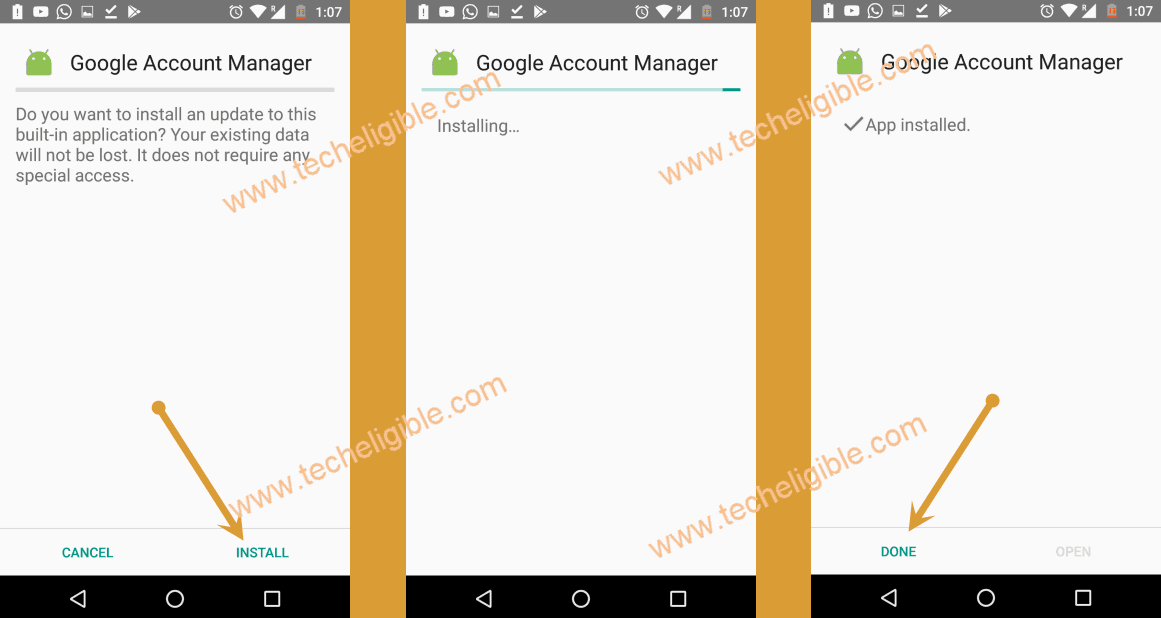
• Tap on “Google Account Manager”, tap on “Install” , then “DONE”.
Note: If you get “Installation Blocked Popup”, just tap on “Settings”, and then enable “Unknown Sources”.
If even then you are unable to download or install apps, try this method (Click Here).
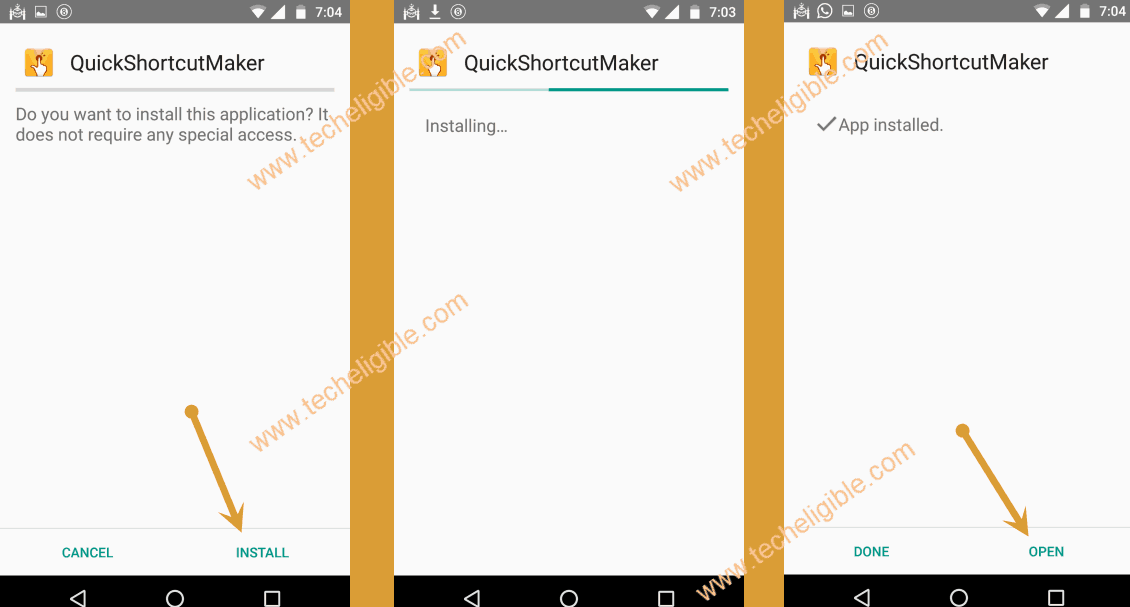
• Tap on “Quick Shortcut Maker”, tap on “Install”, then “OPEN”.
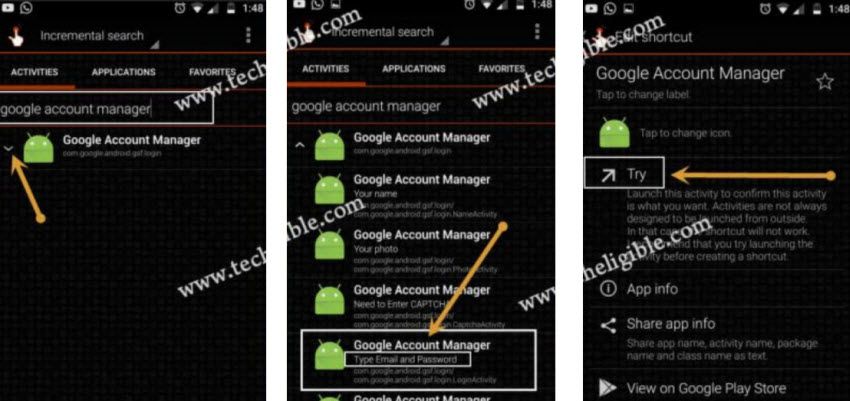
• Type in search bar “Google Account Manager”, tap on google account manager from search result to expend it.
• From the list of Google Accounts Managers, select one “Google Account Manager”, that appear with “Types Email and Password“, after that tap on “TRY” (See in below image).
Add New Gmail Account:
⇒ Step 4:
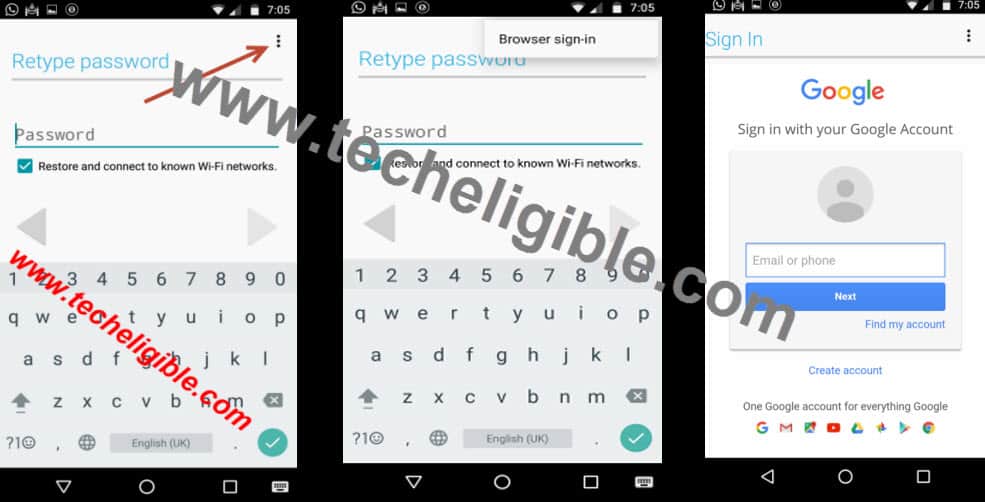
• Tap on “3 dots” from top right corner.
• Then tap on “Browser Sign-in”.
• Now add your new gmail account there to Remove FRP Samsung Galaxy J7 Prime.
• Restart Your J7 Prime.
Complete Initial Setup:
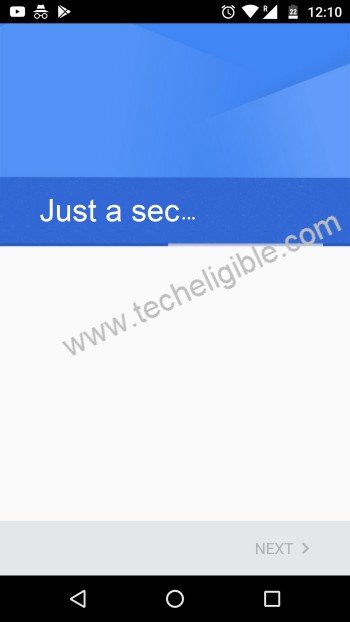
• Tap on > Start > Next > Next > Agree > Next > now wait on “Just a sec..” screen for few minutes until it’s done.
• From “Date & Time” screen, tap on > Next > Not Now > No Thank You > Skip > Skip Anyway.
• Now Swipe Up from “Which Device ?” screen, then tap on “Don’t Restore”, Swipe up from “Sign in” screen, then tap on > Skip > Skip > Next > Agree > Now Now > Next > Finish.
Congratulation, you have successfully accessed to your Samsung Galaxy J7 Prime device.
Add or Remove Multiple Gmail Accounts (Optional):
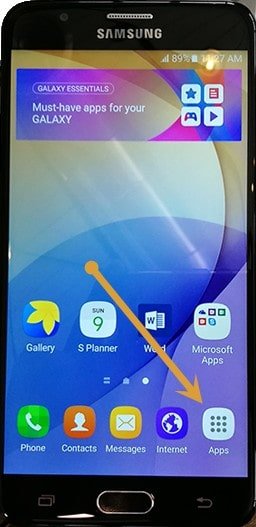
• Tap on “Apps”, then tap on “Settings”, swipe up from there, and then tap on “Add Accounts”, and add or remove multiple gmail accounts.
That’s an extra step, if you need more accounts to add in your j7 prime, you can add as much as you can.
Method 3: FRP Bypass Galaxy J7 Prime Android 7 by Talkback.
This method is very renowned and work perfectly on android nougat devices, you can easily bypass frp lock by enabling USB debugging option on J7 Prime.
Note: This method has successfully been tested with Galaxy J7 Prime (SM-G610F/DS), Android 7.0.
Let’s Begin this Procedure:
-Connect “Wi-Fi” in your device first.
-After “Wi-Fi” connected successfully, go back to “Welcome” screen.
-Press 3 times “HOME BUTTON” to enable “TALKBACK” feature.
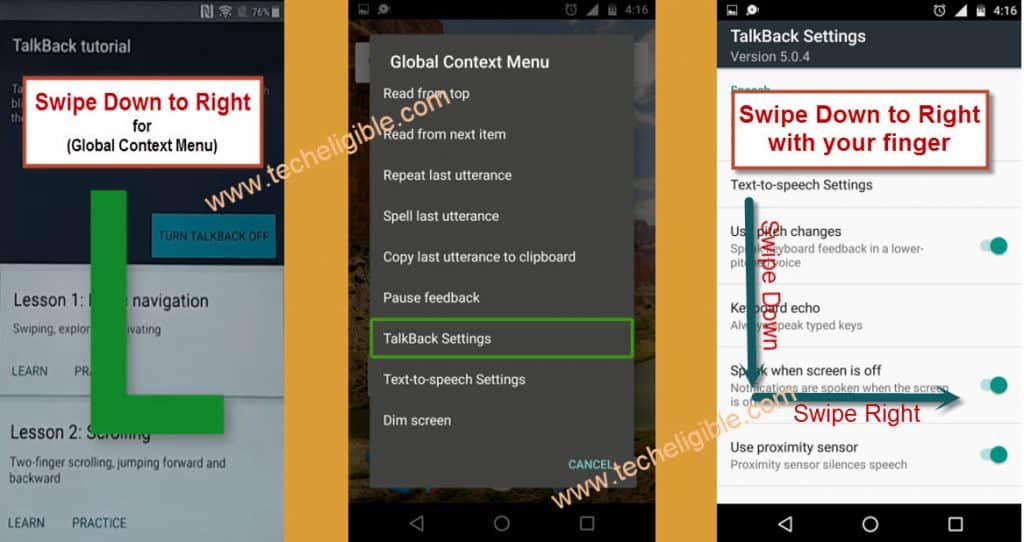
-Once “Talkback” enabled, you will have screen of “Talkback Tutorial”.
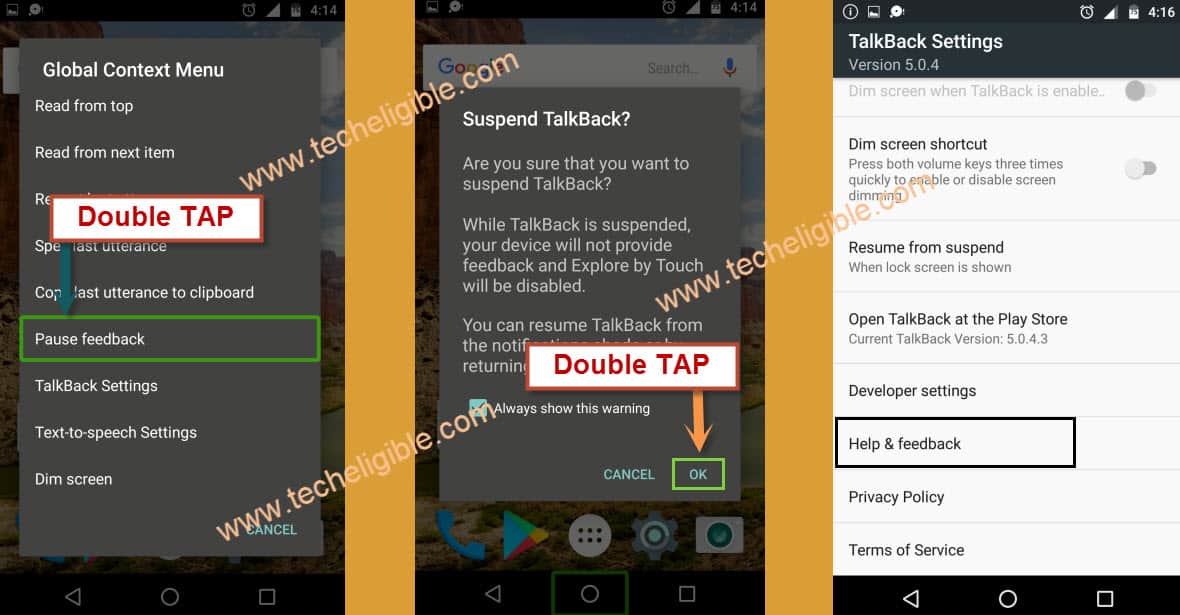
-Draw “L” by swiping down to right to get “Global Context Menu”.
-Double Tap on “Talkback Settings”.
-Again draw “L” by swping down to right on “TALKBACK SETTINGS” screen.
Suspend Talkback Feature:
-Double tap on “Pause feedback”, after that double tap on “OK”.
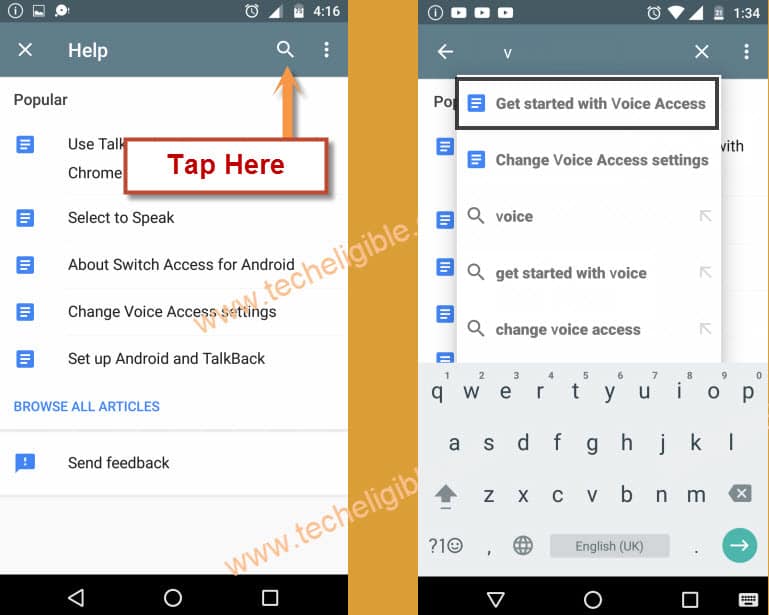
-Now tap on “Help & Feedback”.
-Tap on “Search Icon”, and then type there “V”, after that tap on “Get Started with Voice Access”.
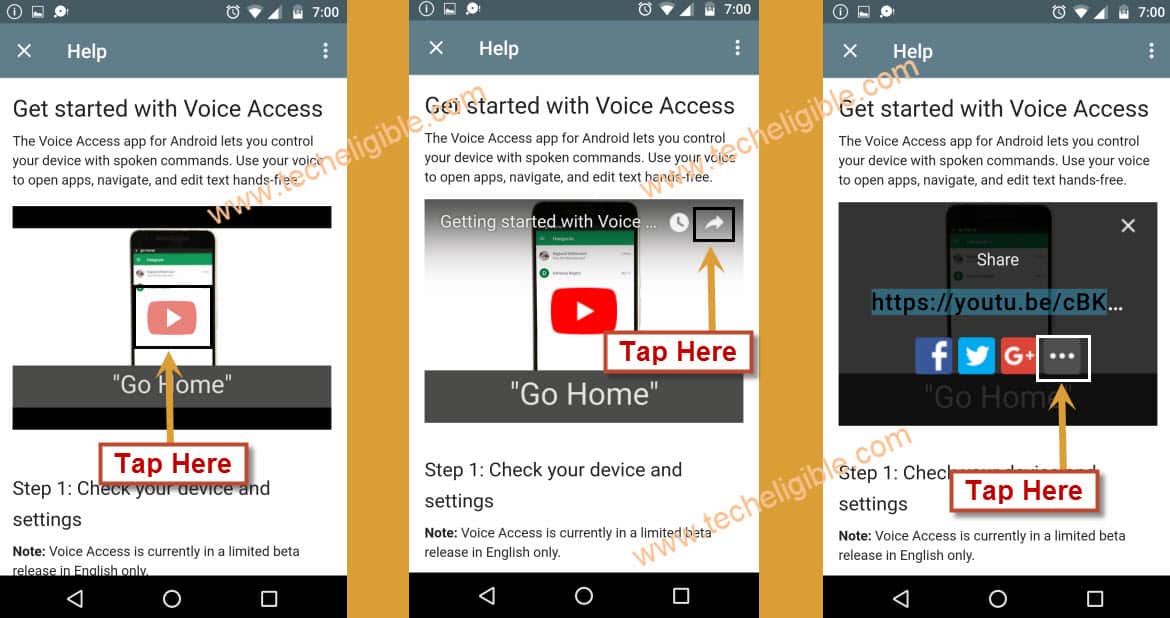
-Now tap on “Play Icon”, after that “Arrow” icon, and then “3 dots”.
-I hope “Youtube” has opened on your J7 Prime, follow further steps to Remove FRP Samsung Galaxy J7 Prime.
Note: If you see “Youtube Update” screen, and you are unable to bypass this screen, for that you should follow this method to bypass youtube update screen.
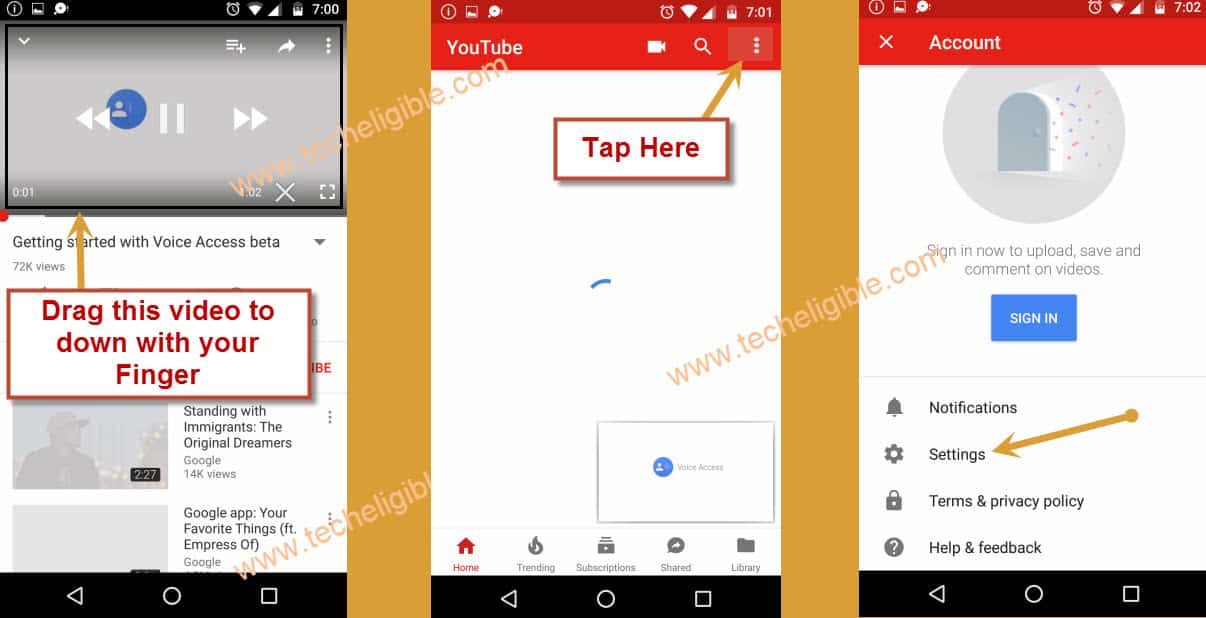
-Drag down “Youtube Video”.
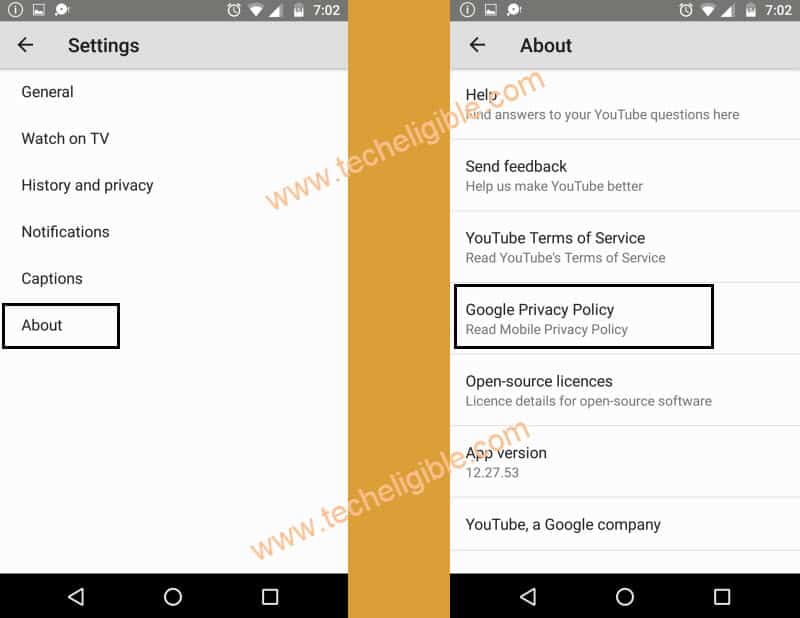
-Tap on “3 Dots” from top right corner, and then tap on “Settings”.
Open Google to Bypass Google Account Galaxy:
-After that, tap on “About”.
-Now tap on “Google Privacy Policy”
By doing that, google will open, and then we can easily Bypass FRP.
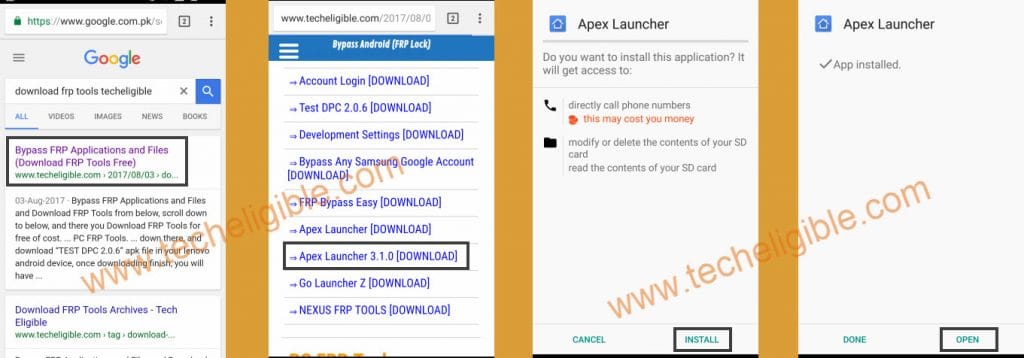
Download Apex Launcher:
-Type “Download FRP Tools Techeligible” in google search bar.
-After that, tap on most relevant search result, as shown in below image.
-Download from there “Apex Launcher 3.1.0“.
-After downloading finish, tap on “Bookmarks” from bottom of your browser bar, and then “History”, after that tap on “Download History”.
-Now you will be able to see “Apex Launcher” there, just tap on that to install it.
-Once downloading finish, tap on “OPEN” to launch Apex.
Note: If you get “Installation Blocked” popup, tap on “Settings”, and then enable “Unknown Sources”, after that you can easily install apex launcher app.
Enable ADB & USB Debugging Option:
-Open “Calculator”, and then type there this code “(+30012012732+ “.
-Now DRParser Mode will open, type there ” *#0808# “
-USB Setting will open, tap on “DM + ACM + ADB“, after that tap on “Reboot“
-After rebooting finish, you will have “Talkback”, press both “Volume up + down” keys together to disable talkback.

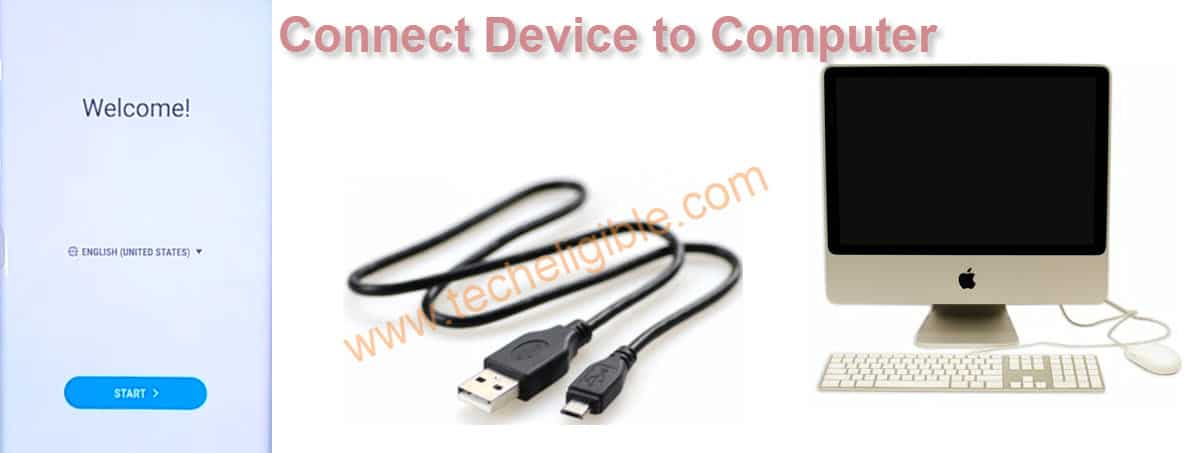
Connect J7 Prime to Computer:
-Make sure, device is switched on.
-Now Connect your phone to computer via Micro USB Cable.
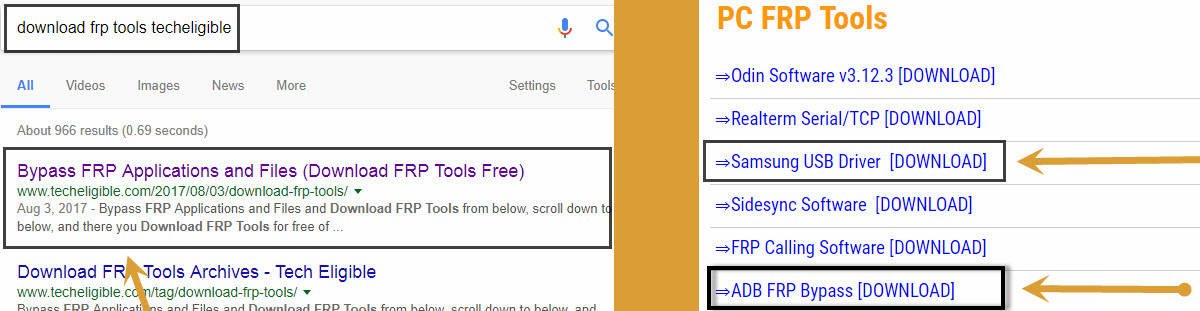
Download FRP Bypass Tool:
-Open Browser in your Computer, and then type in search bar “Download FRP Tools Techeligible“
-Download from there “Samsung USB Driver“, and also “ADB FRP Bypass” tool (See Below Image).
-Extract “Samsung USB Driver”, and install it in your computer.
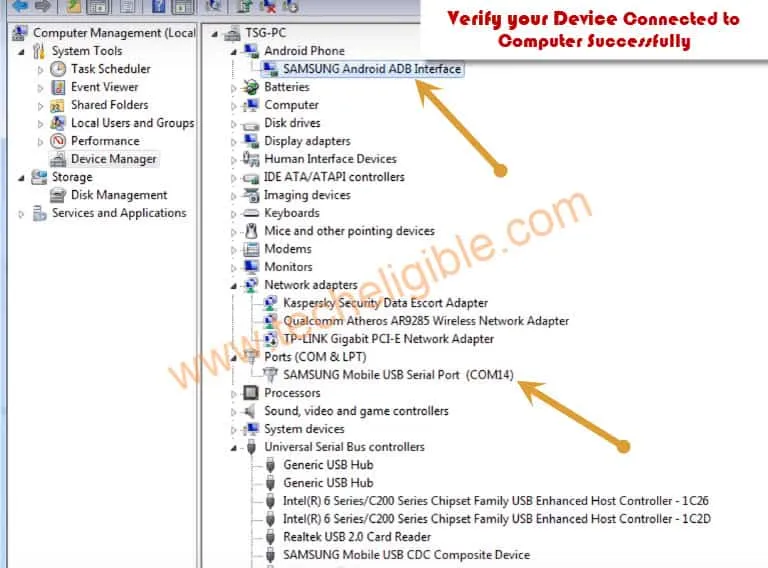
-Now make sure your device has successfully been detected by computer, for that, right click on “MY COMPUTER”, and then “Manage”, after that go to “Device Manager”.
-Now you can see there “Com Port” of your device, this is for sure that your device is connected.
Warning!: Turn off your “Antivirus Software”, to avoid file deleting from ADB FRP Bypass Tool.
-Extract “ADB FRP BYPASS“, and then right click on “RUN.EXE“, after that “Run as Administrator”.
-Now you will have “Window Command Prompt” on your computer screen.
-Press any key from your keyboard.
Note: If you get “Allow USB Debugging” Popup on J7 Prime, just tap on “OK”.
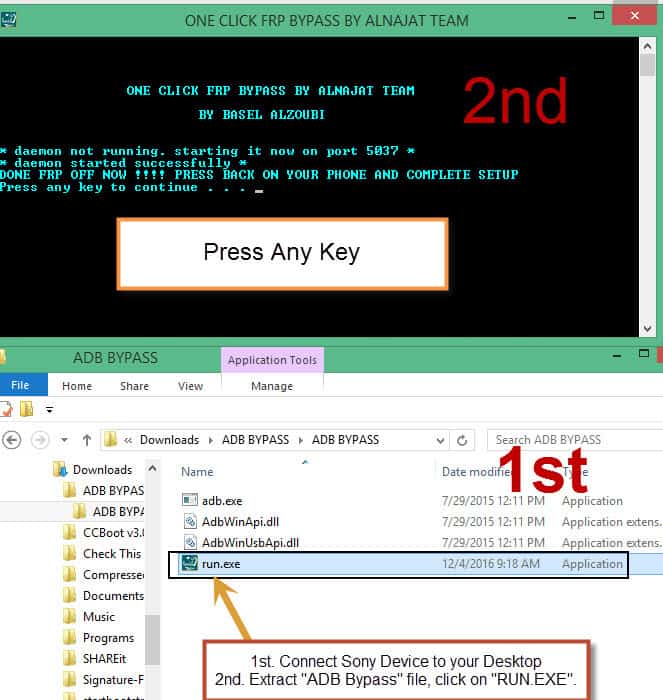
-Once you got “FRP OFF NOW, Press Back on your phone, complete setup”, that means you have successfully bypassed frp lock.
-Disconnect your device, and then go back “Welcome” screen by pressing “Back Key”.
-Now just complete “Initial Setup” to access J7 Prime.
Related Posts: