Delete Google FRP Galaxy J7 Prime Android 8 With Latest Method
Factory reset protection will resist you to sign in or access J7 prime device using another google account for security purpose. If you’ve mistakenly or deliberately hard reset your device without knowing already signed in account. Then, for sure, you must be facing this FRP locking issue with your device, and you can reach inside the device until you Delete Google FRP Galaxy J7 Prime Android 8.
We’ve total 2 methods here on (Android 8, 8.1) version devices, and 1st method is the most updated one, you can follow up both ways one by one in order to get back your Samsung J7 device and bypass frp completely.
Warning: Do not try this frp method on a stolen phone, this is a serious crime, if you are trying to bypass frp on a stolen phone, you may also be jailed, this process is for device owner and for educational purpose only.
| Method 1: Delete FRP Galaxy J7 Prime (Android 8.1) [New] |
| Method 2: Delete FRP Galaxy J7 Prime [Android 8] |
Method 1: Delete Google FRP Galaxy J7 Prime Android 8.1 (New)
-First of all, connect WiFi in your device, and then, put your device back on first (Start) screen.
-Prepare a PIN locked SIM card using any other android device.
-Insert that 4 digits PIN locked SIM in your J7 Prime device, after that, you will be displayed a (Enter SIM card unlock PIN) screen.
-Just remove your SIM card, and then, tap on OK.

-Tap over Emergency Call.
-Insert SIM card again, and this time you will get a (SIM Signal) at the top right corner, just wait on that screen for 20 seconds at least.
-Remove SIM card again, and tap on “Ok” from popup. Afterwards, tap to “Back Arrow” from bottom.

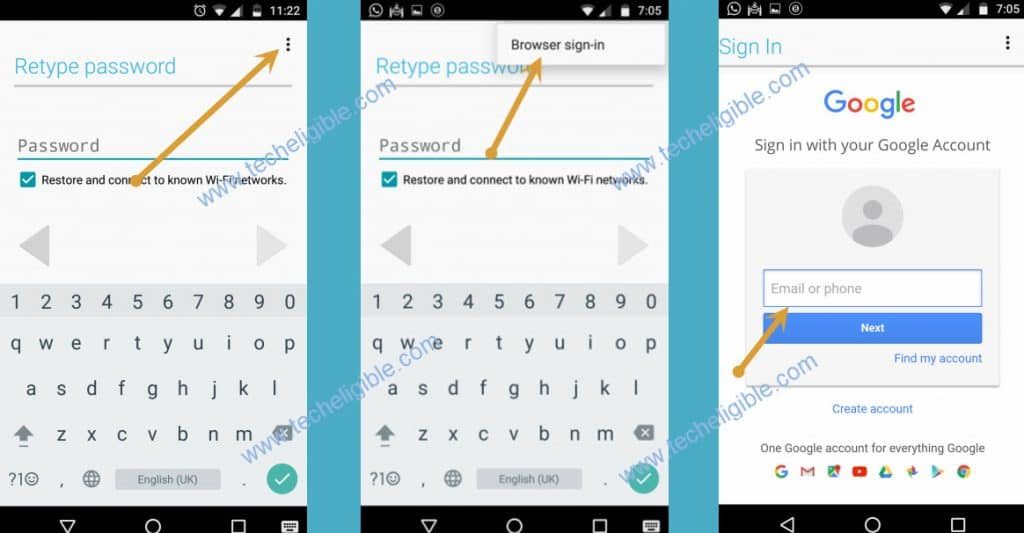
-Now, you will see there a (Not Signed in) message, swipe down that message.
-You will see a top notification bar, but in this new android version 8.1 and new security patch level device, (Settings) is not working, so we are gonna try another new way to Bypass FRP Galaxy J7 Prime.
-Turn on “Bluetooth” option from there, and you will see new window of (Bluetooth).

-Hit on “Stop” option.

-Now tap to “Contact us” link from there.
-Tap > Next > Ok > check mark (i have read and agree) > Agree > Ok.

Note: We have to tap over (Search icon) as quick as possible from top right corner, that will appear right after hitting on (Ok) from check for update popup.
-Tap on back arrow once to go back.
Quickly Tap on (Search icon) form top right corner:
-Tap again on > Contact Us > Next. Wait here for a moment and read below line carefully, because we have to hit over (Search) icon that disappear within few seconds.
-With one of your finger, tap over “Ok” from popup, and before tapping over ok, start tapping on “Search icon” place at the top right corner with other finger. Because as soon as, you hit over “Ok” option. The search icon will appear at the top right corner for mini seconds, if you start hitting on that place before appearing up (Search icon), so by doing this, you will be able to hit on that Search icon successfully. (See below image).
![]()
-So lets apply above step, start tapping on “Top right corner at the search icon” place with other fingers, with other finger, tap on “Ok” from check for update popup.
-After that, search bar will appear successfully.
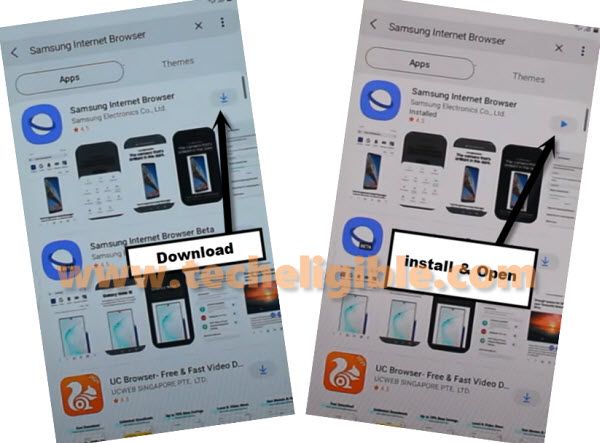
-Search and open (Samsung internet browser).

-Download & install Samsung browser, once installation process is done, just tap on “Open” icon to launch browser. Hit on > More > Continue > Not now.
Download & Install FRP Tools:
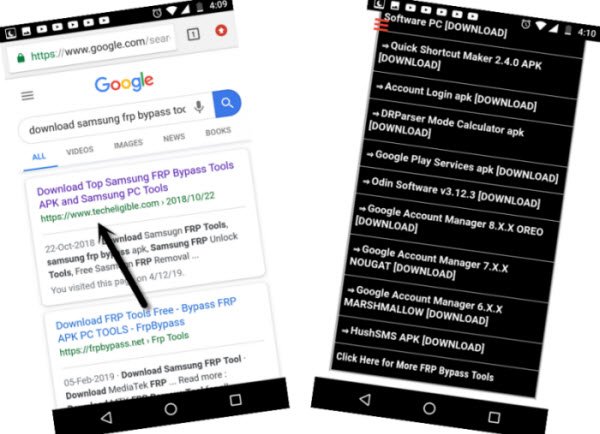
-Search in search box “Download Samsung FRP Tools“, the 1st searched result will be of our website.
-Go to our website searched result to download Samsung tools.
-Scroll down and hit on “Open Samsung Settings“.

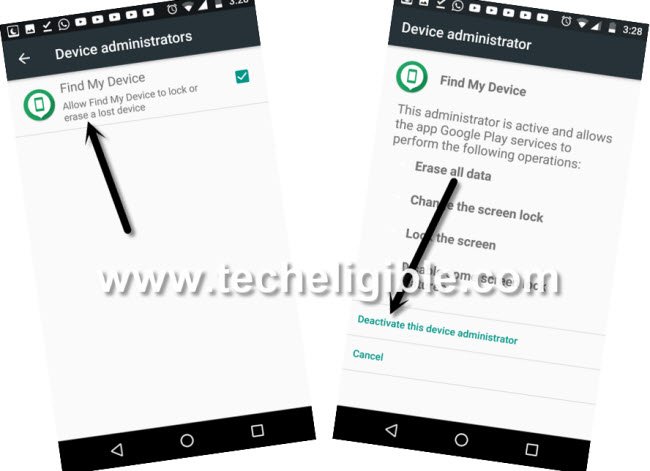
-From there, go to > Biometrics & Security > Other Security Settings > Device Admin apps.

-Hit on > Find My Device > Deactivate.
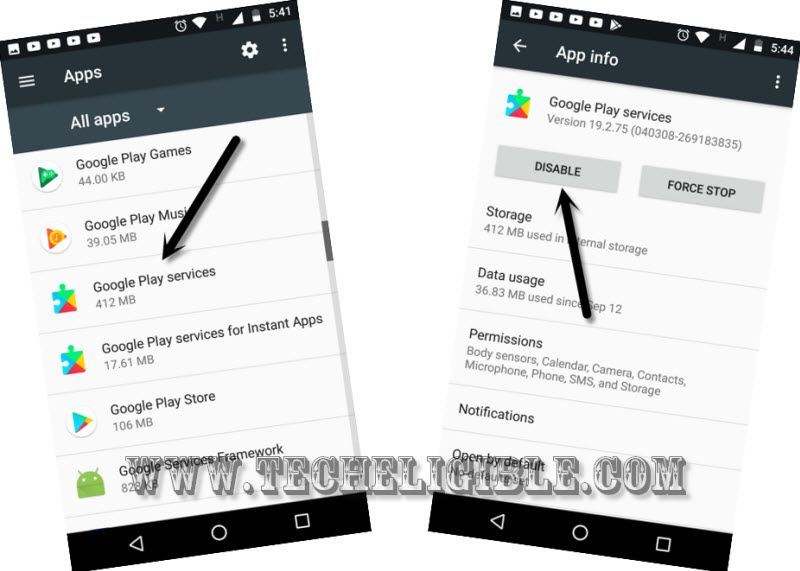
-Afterwards, go back to > Settings > Apps > Google Play Services.
-Just tap to (Force Stop & Disable) that app from there.
-Go back to our (Samsung FRP Tools) page.
-Let’s download (Google Play Services) app from there.
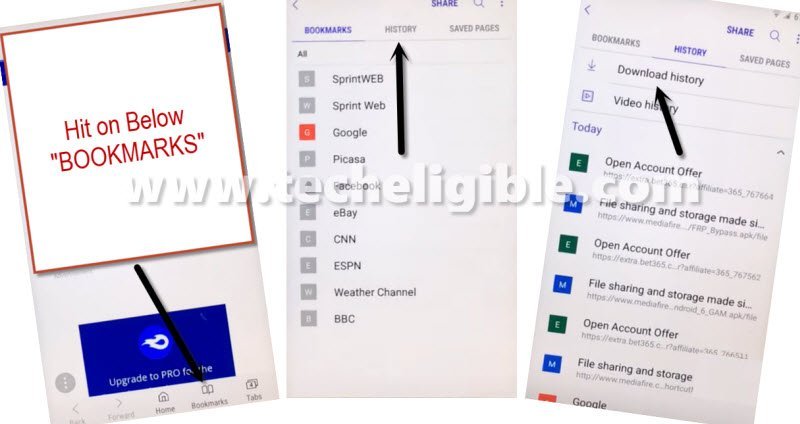
-Once downloading process is done, just hit over “MENU” icon from bottom right corner.
-Afterwards, tap to > History > Download History to see your downloaded apps.
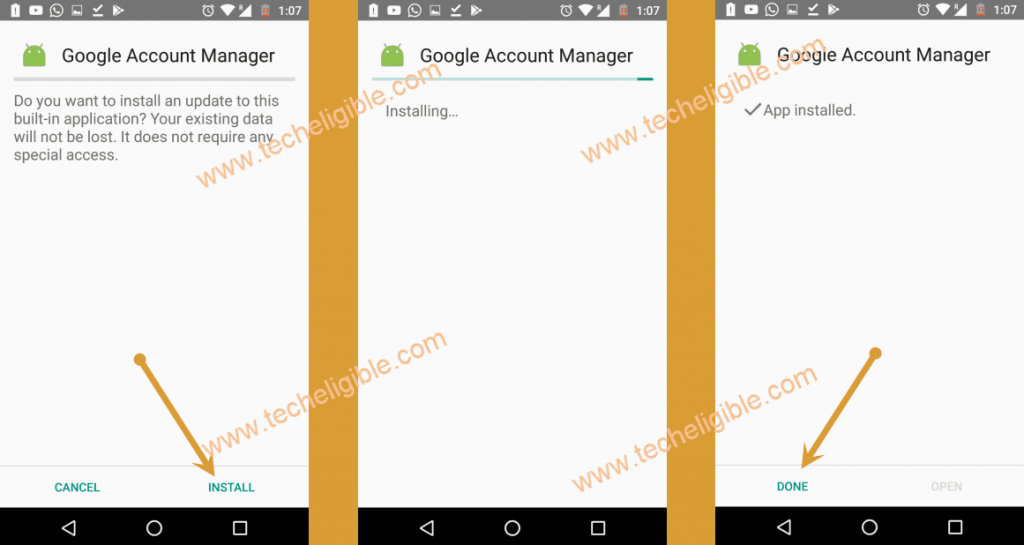
-Install “Google Play Services” app, once installation is done, just hit over “Done” button.
-Go back to (Samsung FRP Tools) page again, hit again on “Open Samsung Settings” option to reach back to J7 Prime settings.
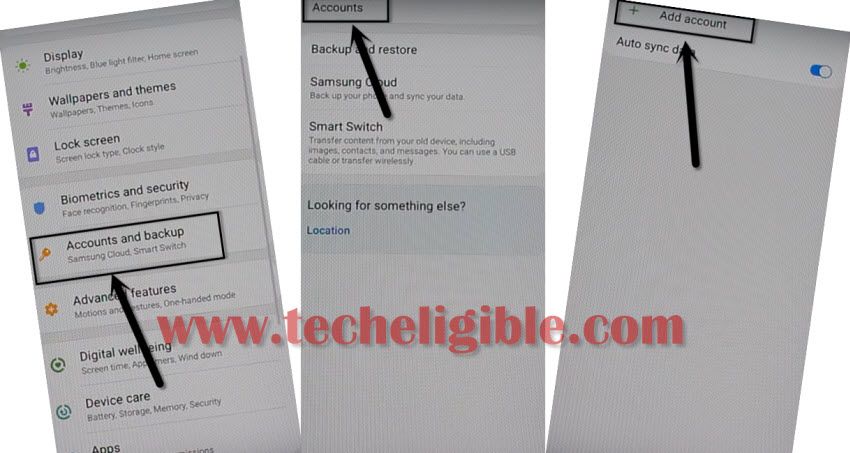
-Add new account by tapping on > Cloud & Accounts > Accounts > Add Account > Google.
-Sign in there with your any valid Gmail account to bypass frp Galaxy J7 Prime Android 8.1
Method 2: Delete Google FRP Galaxy J7 Prime Android 8 (Old)
This is our updated method of 2020, after having lots of comments, that help & feedback option is missing, so we are going to share with you this new process without help & feedback options, with 1 active sim card having pin lock code, you can solve your frp issue.
-Connect WiFi to your phone.
-Get back to “Start” screen.
-Insert SIM Card having 4 digits pin lock code, you can setup 4 digits pin code with other phone, that is very easy to setup.
-After inserting sim card, you will have a screen of “Enter SIM Card Unlock Pin”.

-At the same time, remove sim tray, and also press (Power Button) to turn of screen.
Note: You have to that at that time, means make your both finger standby, and try to popup sim tray, and also press (Power Button) at same time.
-Now press (Power Button) again to wake-up screen, and you will see “Not Signed in” popup window, that means you have succeeded in above steps.
-If you see again “Start” screen instead, that means you are failed, just retry steps, means remove sim tray + press power key at same time, and you will surely succeed after 2-3 attempts.
-Swipe down the “Not Signed in” popup window, and then tap on “Notification Settings”.

-Go down, and tap > Youtube > in-app notification Settings > History and Privacy Policy > YouTube terms of services.
-This will open Samsung internet browser, now just tap to “Start”.
-Congrats, we have got accessed into browser to download apps.
Download Apps for J7 Prime:
-Tap on top search bar, and search “Download top Samsung frp tools“, go to our site searched result same as shown in below image.
-Download from there 2 apps.
1st- Google Account Manager 8
2nd- Account Login.
-Tap on “Bookmarks” from bottom bar, and then tap “History”, after that tap “Download History”.
-Wait until downloading process finish of both apps.
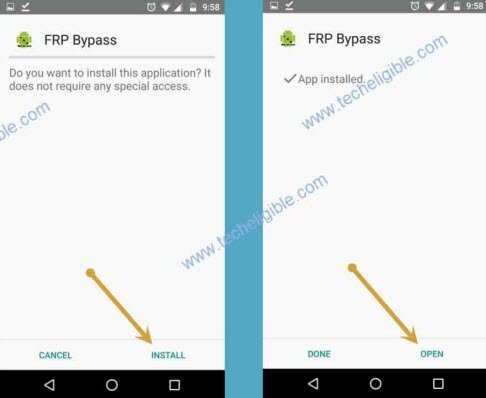
-Now tap “Google Account Manager 8”, from the popup window, just tap on “Settings”, and enable option “Allow from this source”.
-Go to back, and tap on > Install > Done.
-Tap on > Account Login > Install > Open.
-Add your new google account by tapping “3 dots” from top right corner, and select “Browser Sign-in” option.
-Enter your gmail account for Remove FRP Samsung Galaxy J7 Prime.