We have 2 frp unlock guides here on Huawei P9 device. After that, you will be able to use back your device without any restriction. Because, you won’t be allowed to complete setup wizard steps until you bypass frp Huawei P9 phone and setup another active google account. You can try both methods one by one. In case of 1st method not working, then go for 2nd method.
Legal Disclaimer: This guideline is just for educational purpose to train a device owner only, how to regain access to their own phone after loosing complete access because of factory reset protection.
Method 1: Bypass FRP Huawei P9 By Talkback Function [Latest]
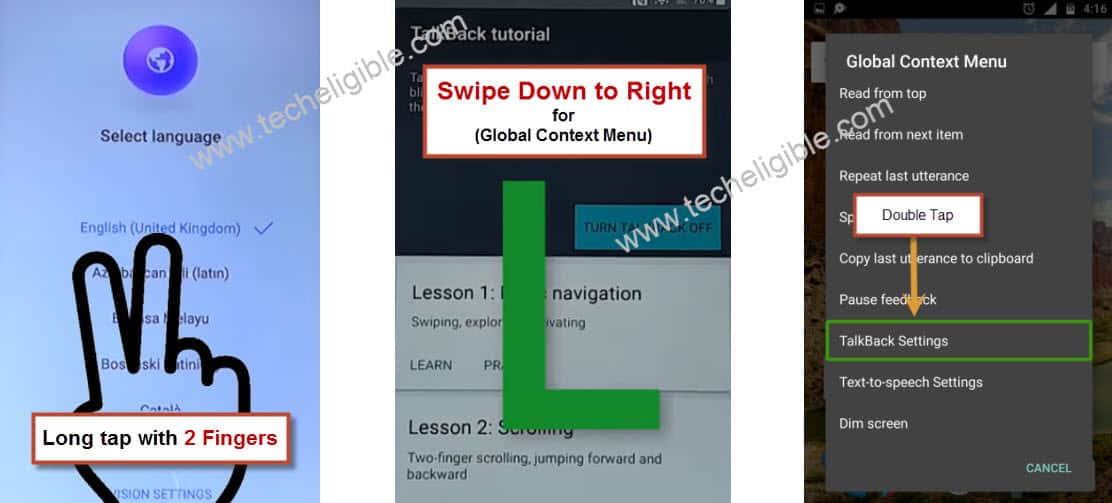
-Turn on P9 device & Connect WiFi, and then go back to first (Select Language) homepage.
-Hold with 2 fingers to enable talkback.
-Draw a “L” by swiping down to right, and then double tap on “Talkback Settings”.
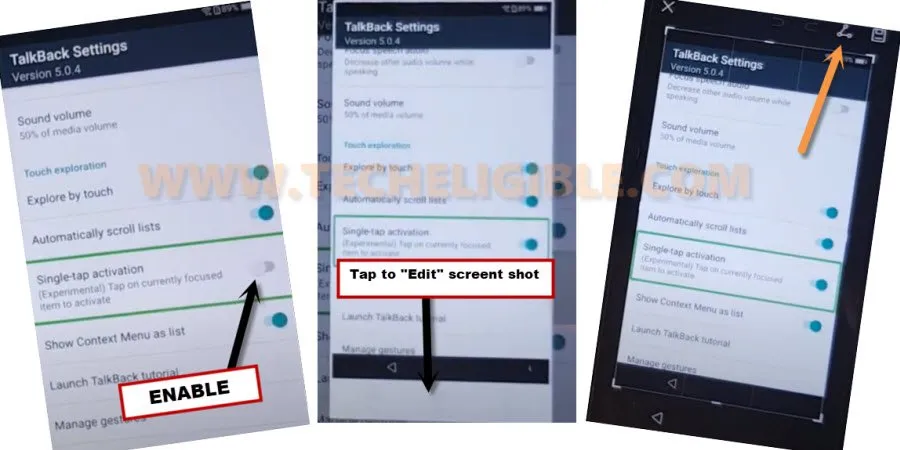
-Using two fingers, swipe down, and enable “Single-tap activation” option.
-Disable talkback by holding both (Volume UP+DOWN) buttons.
-Take screen shot by holding both (Volume Down + Power) buttons.
-Now tap to “Edit Option” from the bottom of the taken screen shot image, and then tap to “Share icon” from top right corner.
-Tap on “Google Map” icon.
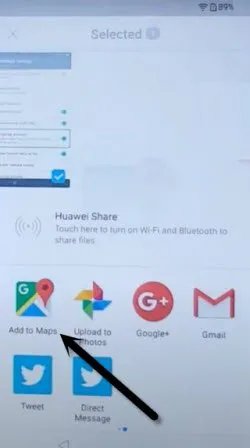
-Hit on “SKIP”, and search any location, and then tap to “Go icon” from bottom right corner.
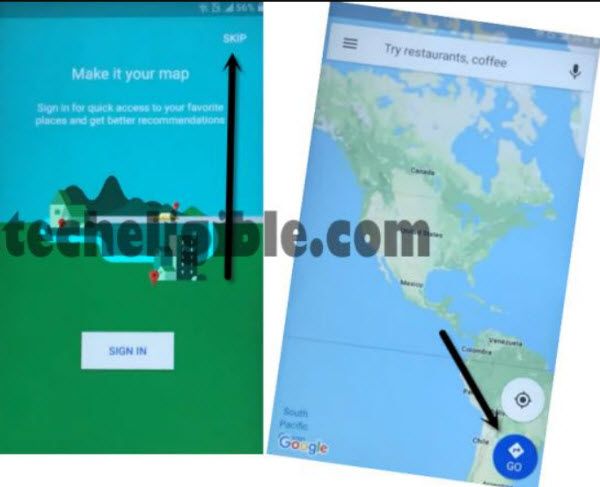
-From popup box, tap on “YES”.
-Now tap on “Start”, and then “Go t it”, after that tap on “Mic icon” from top right corner, and speak loudly “Open Google”.
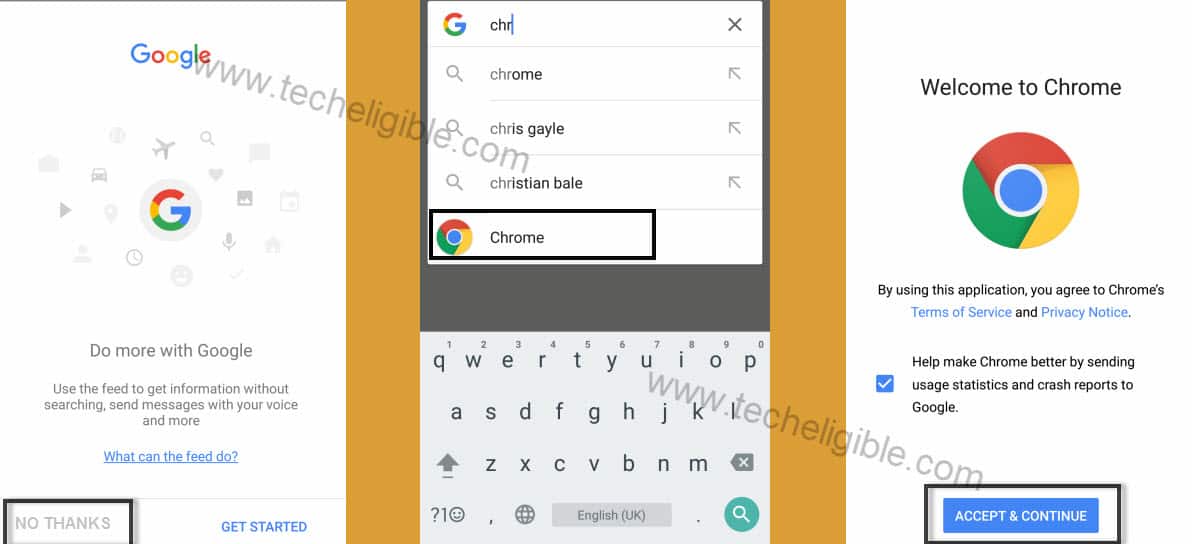
-Tap on “No Thanks”, after that, search and open “Chrome Browser”.
Download Huawei FRP Tools
-You’ve search in browser with “Techeligible” text. Go to 1st searched of our site (See below image).
-Let’s access to frp tools page now by tapping on “Menu” icon. After that, hit on “Download FRP Tools”.

-Download from there “APEX Launcher“, once downloading finish, tap on “OPEN” from bottom popup window, that will appear after downloading process finish.
-Tap to “Settings”, and then enable option “Unknown Sources”.
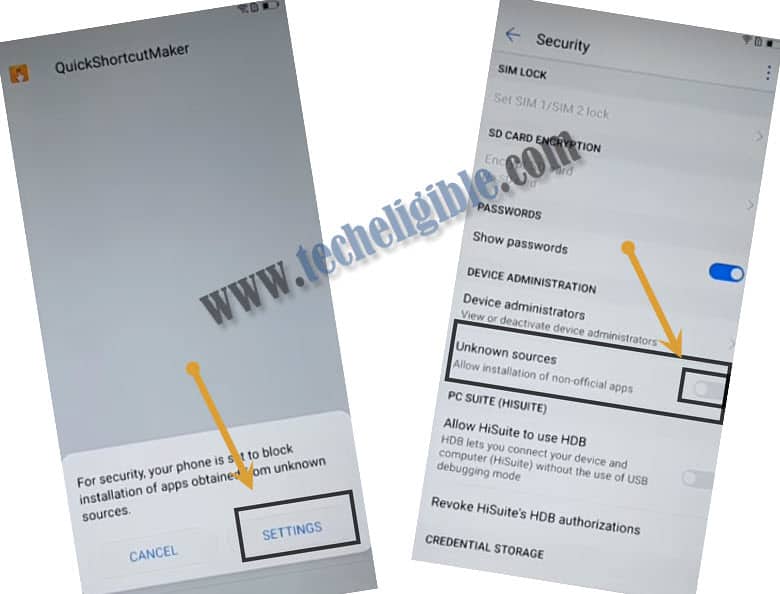
-Go back, and then download again “Apex Launcher” app, once downloading finish, you will firmly receive a popup window bottom of your screen, just tap on “OPEN” from there.
-Install & Open (Apex launcher).
-This will redirect you in your device homepage screen.
Setup New PIN & Reset Settings
-To easily Bypass FRP Huawei P9, we are going to setup new PIN.
-Go to > Settings > Screen lock & Password > Password > PIN > Setup new PIN there.
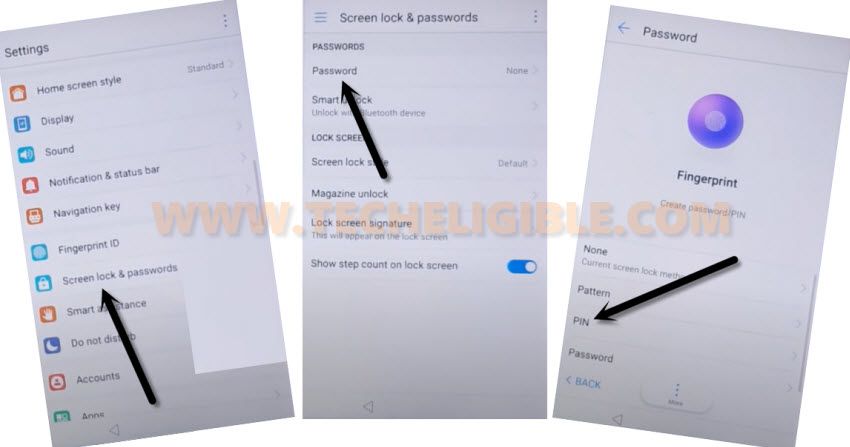
-From the “Enroll Fingerprint” popup message, tap to “Cancel”.
-Go back to “Settings”, and then go to > Backup & Reset > Reset All Settings > Reset All Settings.
-Put your already setup PIN code there, and this will start resetting your phone settings, once this process finish, just restart your device.
-After restarting the device, your phone will reboot normally without having any frp lock, but still we have to factory reset the device.
-Go to > Settings > Advanced Settings > Factory Data Reset > Reset Phone > Reset Phone.
-Phone will be restarted automatically, and you are all done from this post, you can easily add your new Gmail Account for new frp lock protection.
Method 2: Bypass FRP Huawei P9 By Assist Option
Step 1: Select your desire language from “SELECT LANGUAGE” screen on your device, and then tap to “NEXT”, after that select your region, and tap to “NEXT”, now connect “WIFI” in your Huawei Device., once wifi connected, it will auto redirect you to “WIFI SETTINGS” screen again, now from there tap to “NEXT”, then if you get an popup there of “Allow updates to access SD card” just tap to “ALLOW” and again tap to “NEXT”.
Now you will be on “Terms and Conditions” Screen, so now tap on “AGREE’, and then tap on “ALLOW”, after that wait for few seconds, and then you will be asked to put your “GMAIL ACCOUNT”, so to bypass frp huawei p9 from here tap on “Enter your email” area.
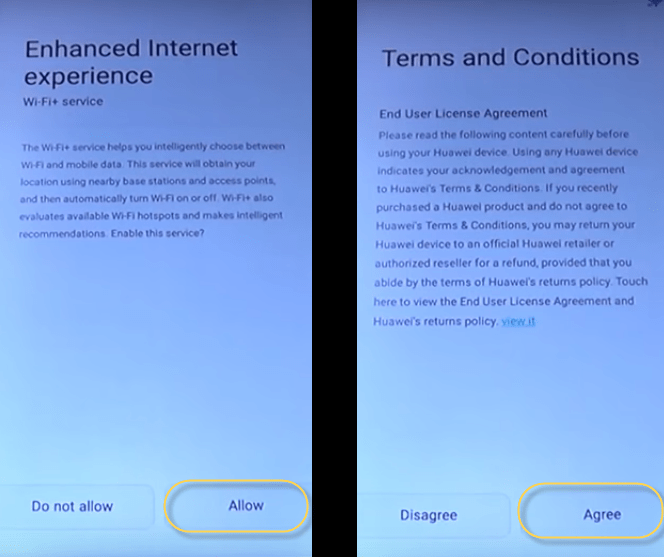
Then type there any word, e,g “Techeligble” and then LONG PRESS on that word for few second, till (CUT, COPY, SELECT ALL) options appear, after these, you will one symbol like that “=”, 3 minus type symbol, just tap on that, then tap on “ASSIST”. for further see below image.

Download and Install Applications via Google
Step 2: After tapping on “ASSIST”, you will have access to “GOOGLE”, so tap on “NO THANKS”.
-Search with “Download FRP Tools Techeligible“.
-Visit 1st searched result same as shown below. After that, download from there an app “Google Account Manager 6“.

Step 3: So simply tap on to “OPEN” > Tap on Google Account Manager, and try to install, if you get a popup there of “INSTALLATION BLOCK”, so tap on “SETTINGS”, enable “Unknown Sources”, and tap to < back, then again tap on downloaded application “GOOGLE ACCOUNT MANAGER”, and wait until installing process finish, after that tap on “DONE”.

Step 4: Now tap to < back, you will be again on same website link, from where you downloaded “Google Account Manager”, from same link page, download “Quick Shortcut Maker” as well, and then tap to > OPEN > Tap on Quick Shortcut Maker > INSTALL > OPEN.
Setup New Account
Step 5: Type in search bar “Google Account Manager“, tap on that to collapse more options, and then tap on “Google Account Manager” the one with “Type email and password”, as shown in below image.

Tap on > TRY > 3 dots from upright corner > Browser Sign-in > OK > now enter your valid Gmail Account there.
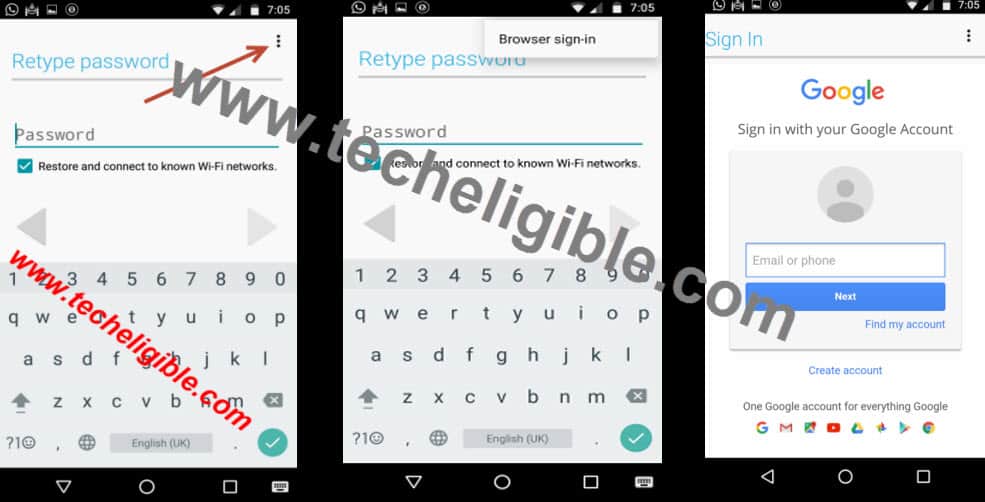
Once you added your new Gmail Account in Chrome browser, restart your huawei device, and then you will have initial setup again. Follow below hints to bypass initial setup.
Step 6: Select desire language, and tap to “NEXT”, select your region, tap to “NEXT”, connect wifi in your huawei, tap to > NEXT > AGREE > ALLOW > Do not allow > Allow > Skip > OK > Skip > Begin > Enable.
Now you are in your Huawei device, to successfully bypass Gmail Account Huawei p9, we have to do “DATA FACTORY RESET” our device.
Perform Data Factory Reset from Settings
SETTING > Advance Settings > Backup & Reset > Factory Data Reset > Reset Phone, now wait until your device restart successfully, and then you will have initial setup again, now complete your initial setup, and you have finished from frp bypass.
The Verdict
In the 1st frp bypass guide, we just turned on the talkback function through long long holding on (Select Language) with 2 fingers together. After that, accessed over the chrome browser and installed frp unlock apps. Finally, we setup another PIN lock protection and completed setup wizard steps.
In the 2nd guide, we just accessed to the google chrome browser directly through (Assist) option. Then, downloaded 2 frp bypass app. After that, we accessed over the google sign in page and signed with new Gmail account to delete the forgotten account.