
This method is very easy and has been used most of time with so many devices, so to Bypass FRP Gionee X1, we are going to get help of a android feature (Talkback Method), so just by enabling the talkback, we will access to (UC Browser) to install a frp tool.
Warning: Do not try this frp method on a stolen phone, this is a serious crime, if you are trying to bypass frp on a stolen phone, you may also be jailed, this process is for device owner and for educational purpose only.
Let’s Start to Bypass FRP Gionee X1:
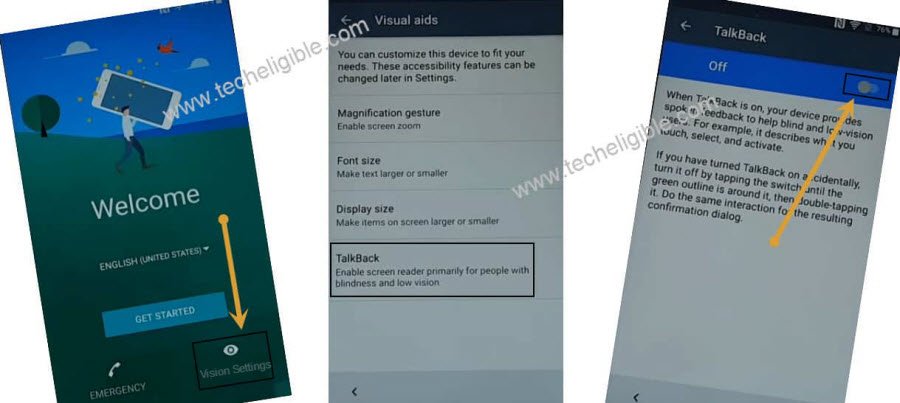
-Connect WiFi first, and go to first “Welcome” screen.
-Tap to > Visions Settings > Talkback > Turn on.
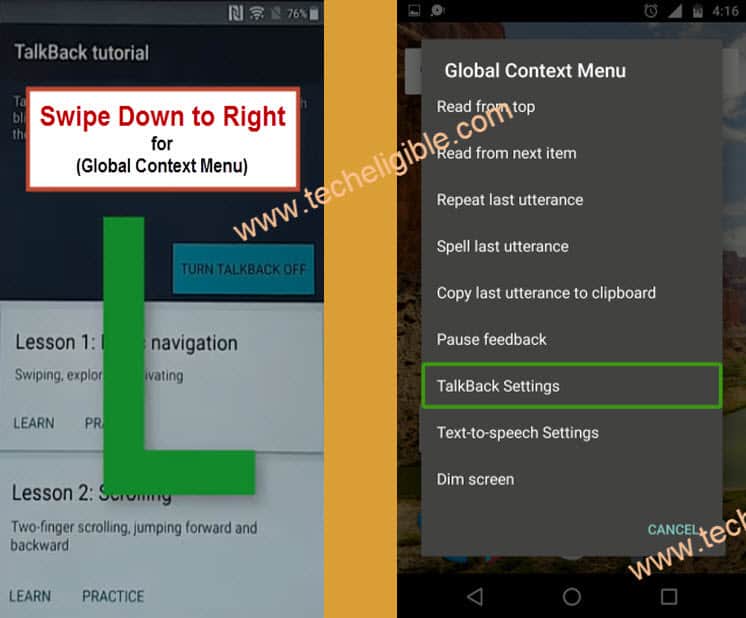
-Draw “L” on talkback tutorial screen, and then double tap to “Talkback Settings”.
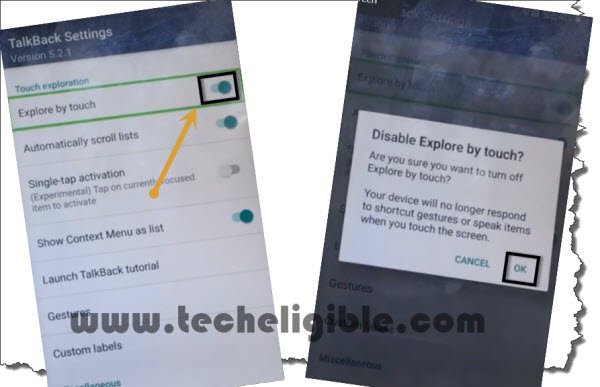
-Disable option “Explore by touch”.
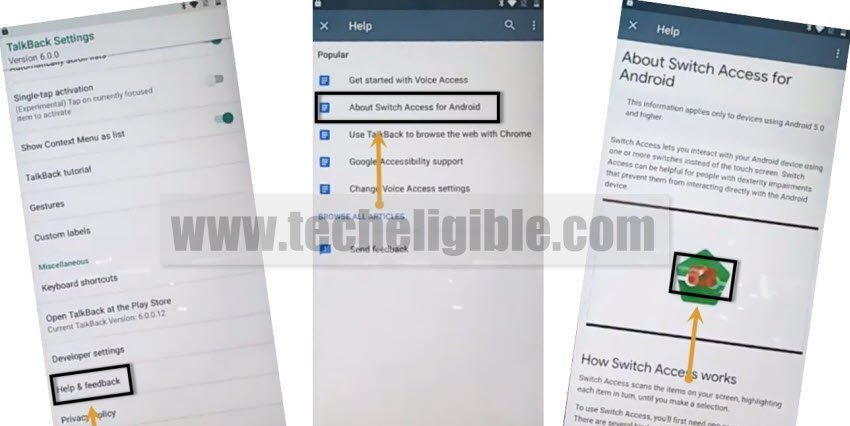
-Tap on > Help & Feedback > About Switch Access for android > Video Play icon
-Tap “3 dots” from top video corner, and then tap on “Watch Later”.

-From the (Open With) popup window, tap on “UC Browser”, and then tap to “Just Once”.
Download FRP Applications from UC Browser:
-Search in browser “google.com”.
-Make a search in search bar of the browser with “Techeligible“. Go to 1st searched result same as shown in below screen shot.
-From techeligible site, just hit on a > Menu > Download FRP Tools.

-Download from there “Apex Launcher“.
-Once the downloading process done, tap on “MENU icon” from bottom of the UC browser, and then tap to “Download icon”, afterwards, tap on > Files > APK.
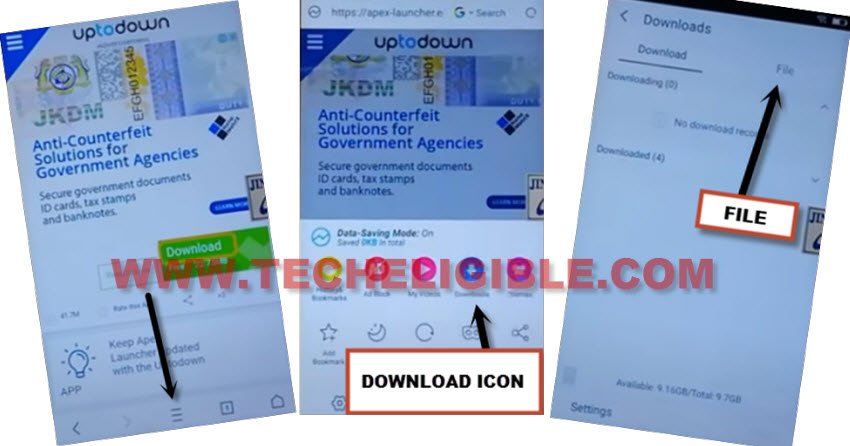
-There you will see your downloaded app, just tap on “Apex Launcher”.
-If you see “Popup window” of installation blocked, just tap to “Settings”, and turn on option “Allow from this source”.
-Go back, and then tap to > Install > Open (Apex Launcher) app.
-Complete initial setup of apex launcher by tapping > Next > Next > HomeScreen.
-Open “MENU”, and go to “Settings”.
-Go to “About Phone”, after that tap 7 times quickly on “Build Number”.

-After that, you will see there a popup flash message “You Are now a Developer”, that means we have enabled the developer option successfully to Bypass FRP Gionee X1.
-Go back to “Settings”.
-Now go to > Security > Device Administrator > Android Device Manager.
-Tap on “Deactivate this device administrator”.
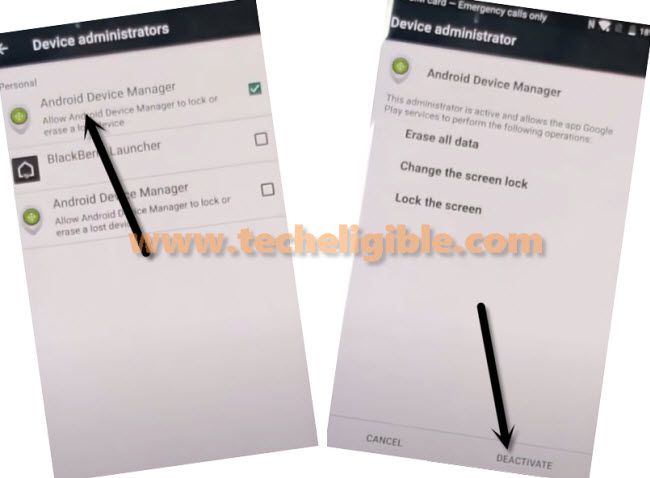
-Go to back to “Settings”.
Final Step to Bypass FRP:
-Go to > More Settings > Backup & Reset.
-Tap to “Factory Data Reset”.
-Tap on “Are You Sure you want to restore > OK.
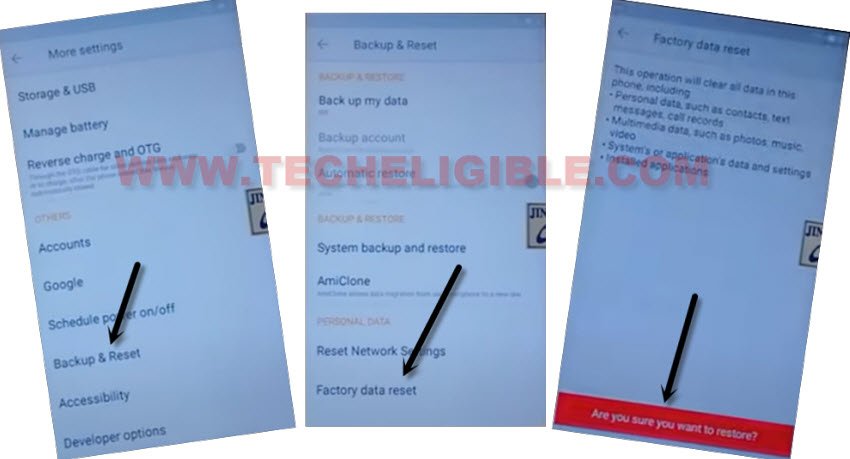
-The Gionee X1 will restart automatically, and wait until this factory reset task finish.
-Now just complete setup wizard, and you are all done from Bypass FRP Gionee X1.