
How to Remove FRP Moto X (2nd Gen) – Reset FRP Android 6
Hey, if you are still in search for a working frp method, then follow this method to Remove FRP Moto X (2nd Gen) Android 6 with the help of single app (Test DPC), and access to the device directly without entering already added google account, afterwards, we will perform soft reset from settings to remove old account.
Warning: This Article is only for educational purpose, try this frp method only to bypass frp your Own Phone.
Let’s Begin to Remove FRP Moto X (2nd Gen):
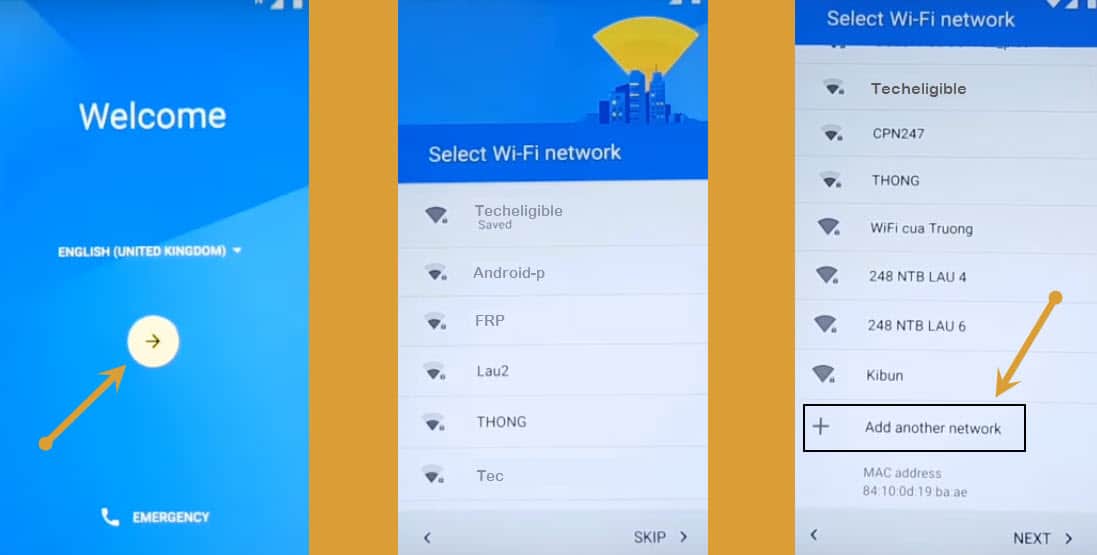
Step 1: Turn on device & Connect WiFi, tap on “Add Network”.
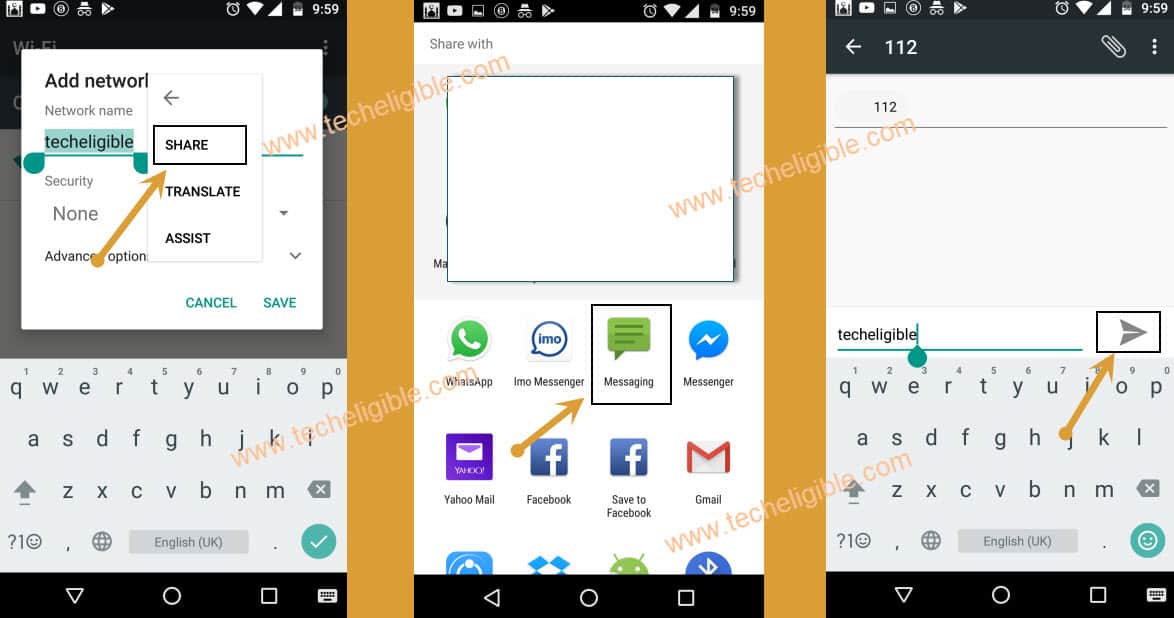
Step 2: type any text such as (Techeligible), and long tap on typed text, after that tap to “Share”.
Step 3: Tap to “Message ico”, and type “112” code where to send this message, and then hit on “Send Button”.
Step 4: Hit on “Call Icon” from the top, and then tap on “Phone Call”, and type code ( *#*#4636#*#* ).
Note: If you are unable to remove frp, you can try our latest method to bypass Moto google account.
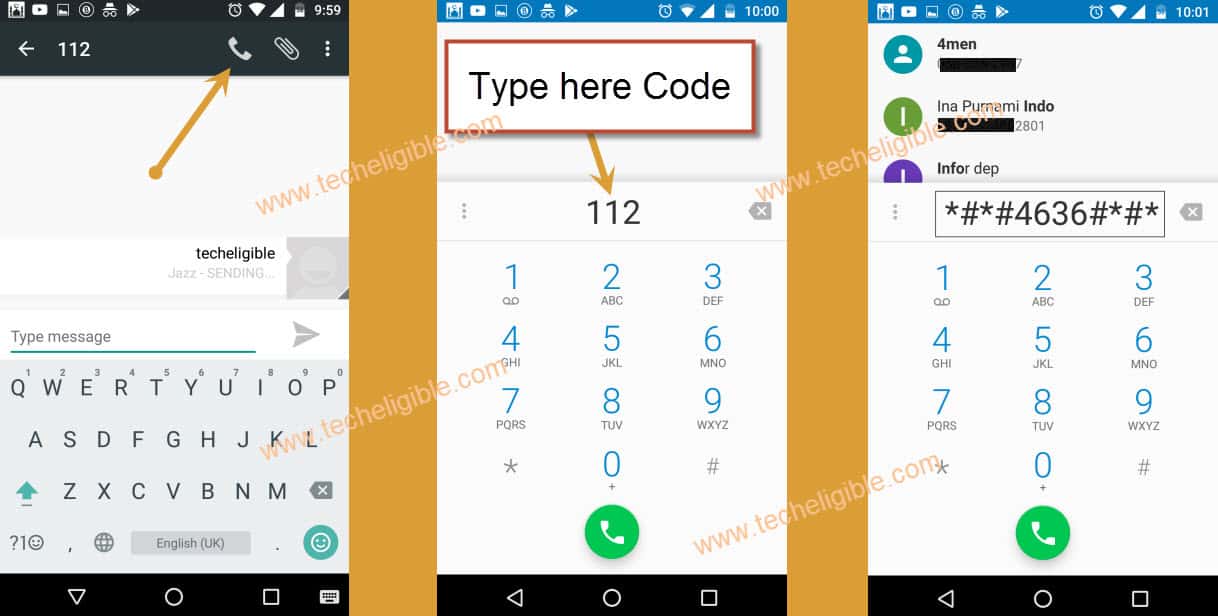
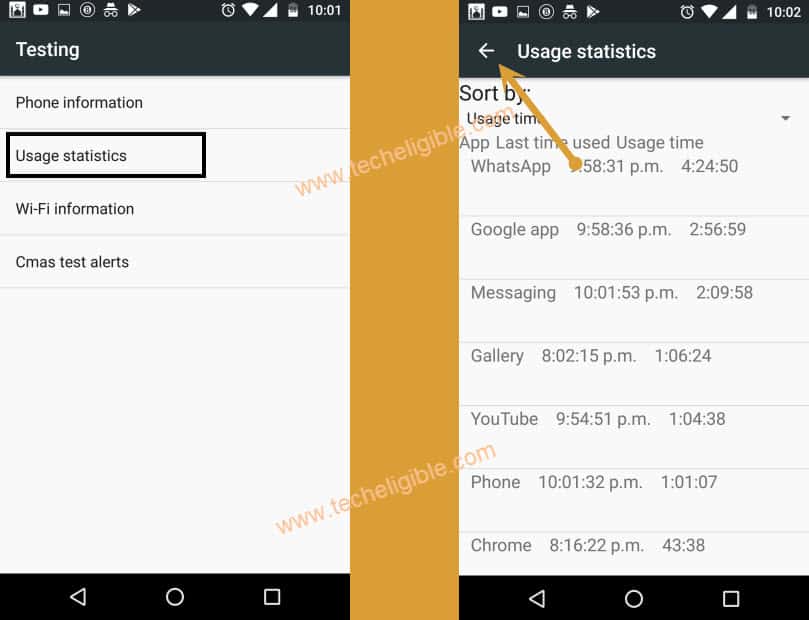
Step 5: Go to “Usage Statistics”, and then hit on “Back Arrow” from top left corner.
Access to Browser:
Note: Check in settings, is there any (Developer Option), If you don’t have “Developer Options Enabled”, then tap on “About Phone”, after that tap 5-6 times on “Build Number” until you get message of “Developer Options Enabled”. Now go back to “Settings” screen.
Step 6: Go to > Apps > Google App > Notification.
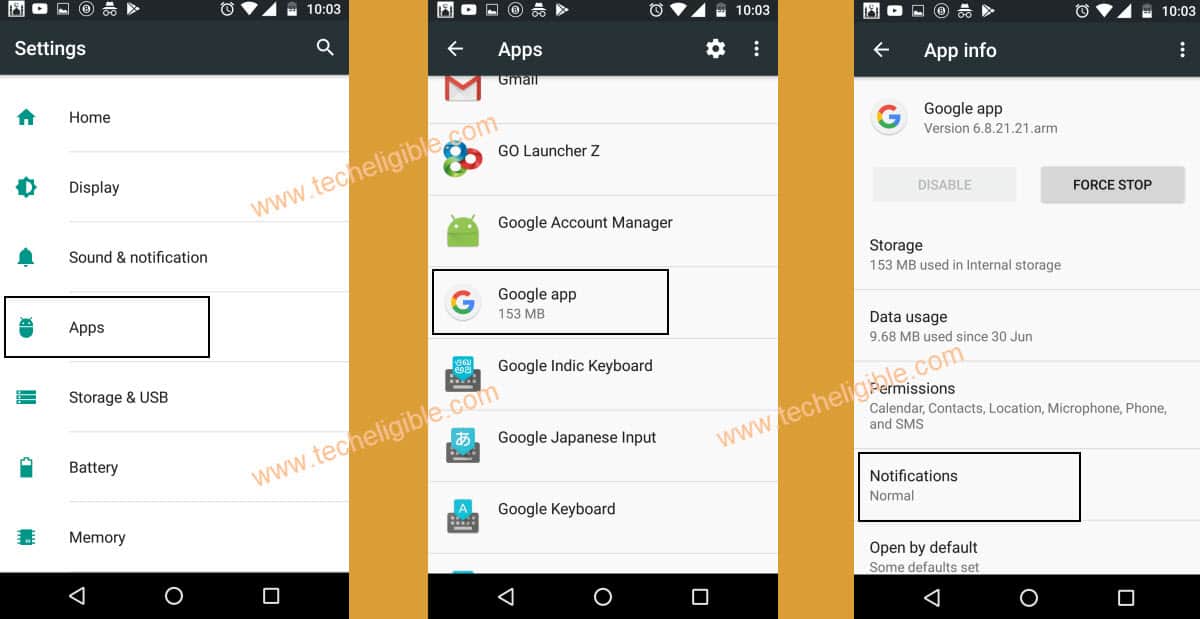
Step 7: Hit on > App Settings.
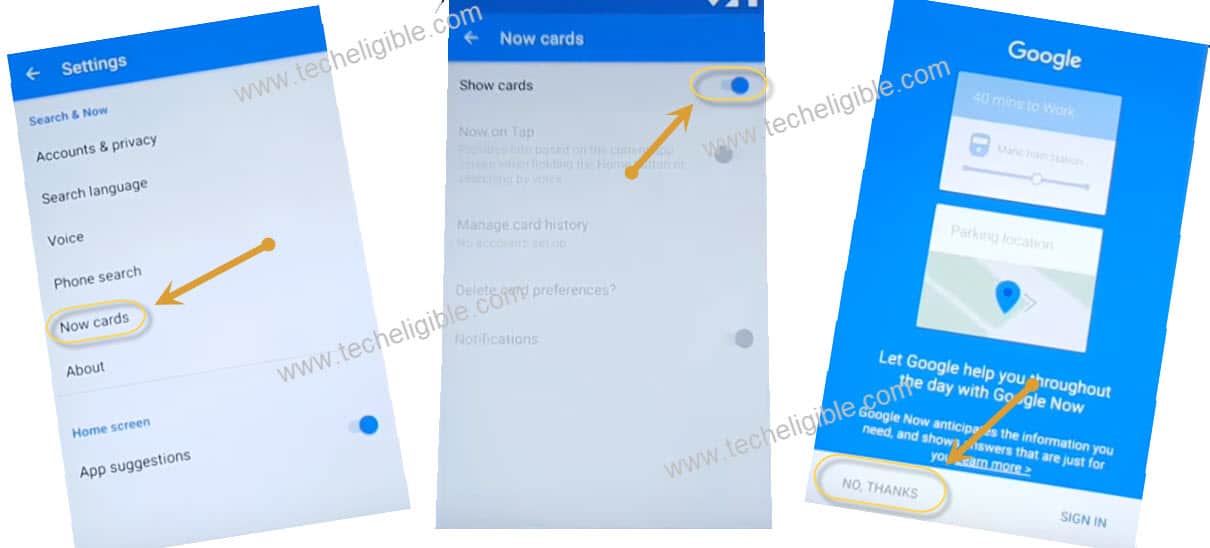
Step 8: Go to “Now Cards”, and then enable “Show Cards”, after that tap on “No Thanks”, to open google.
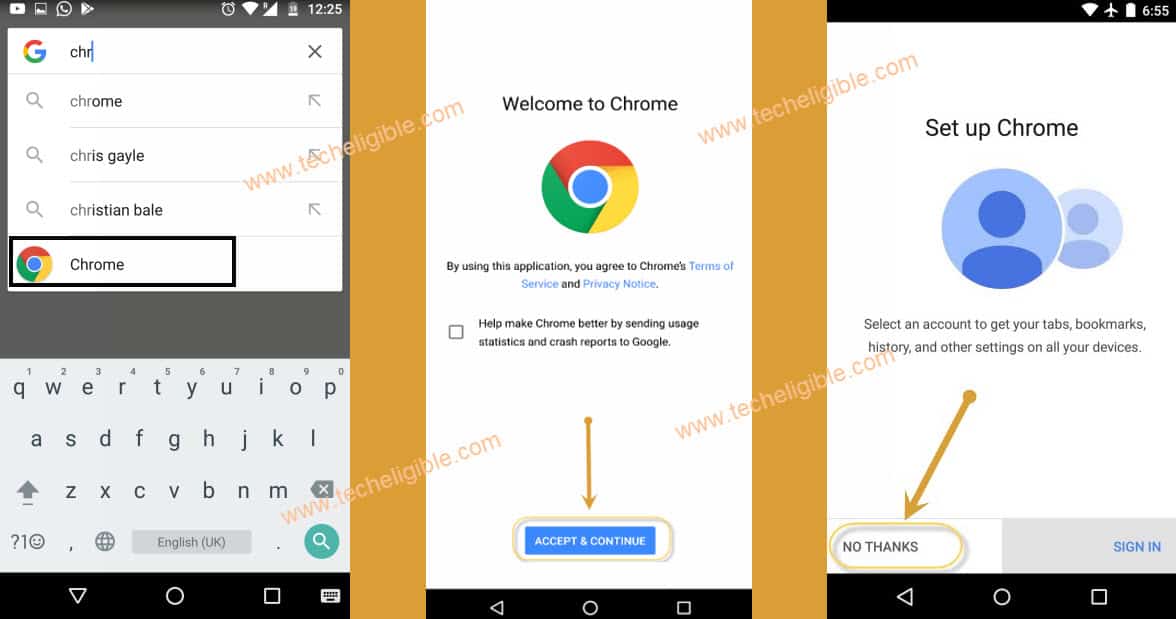
Step 9: Search and access to “Chrome” browser, and then hit on > Accept & Continue > No Thanks.
Download An App:
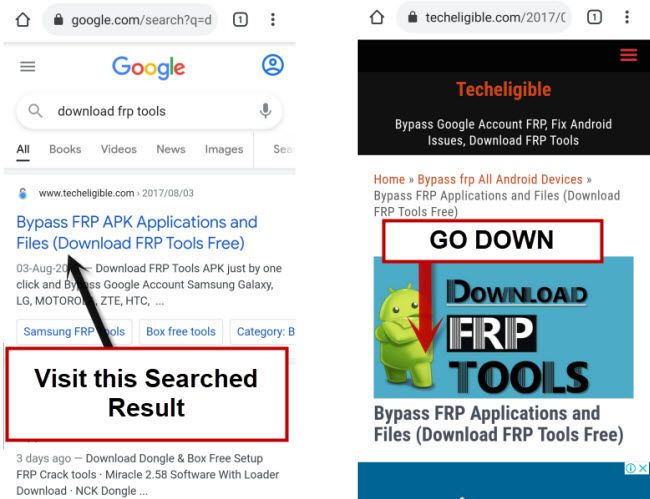
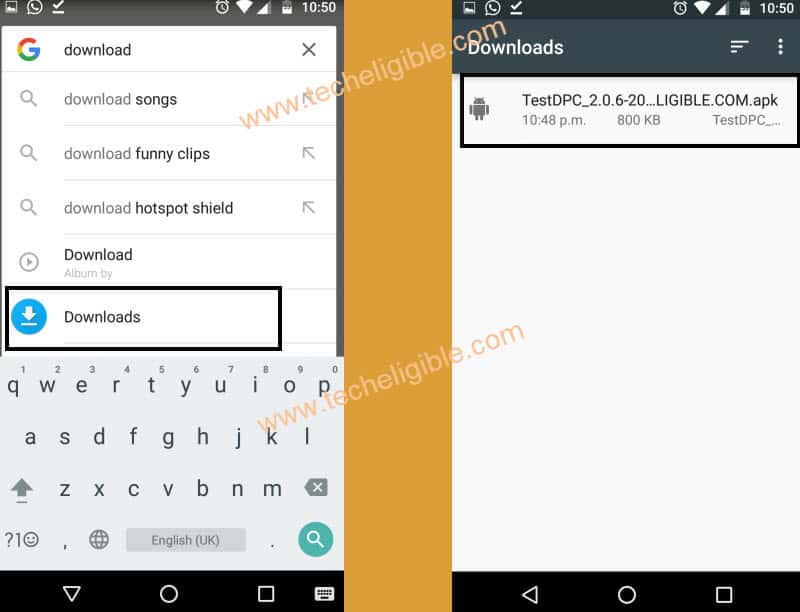
Step 10: Type in search bar “Download FRP Tools“, open first searched result same as shown in below image.
Step 11: Download an app “Test DPC 2.0.6 or 4.0.5“.
Let’s Install Test DPC to Remove FRP:
Step 12: Get to “Now Cards” by tapping on back arrow few times, see below image.
Step 13: Turn on “Show Cards” option, and tap to “No Thanks”.
Step 14: Search and Access to “Download” folder.
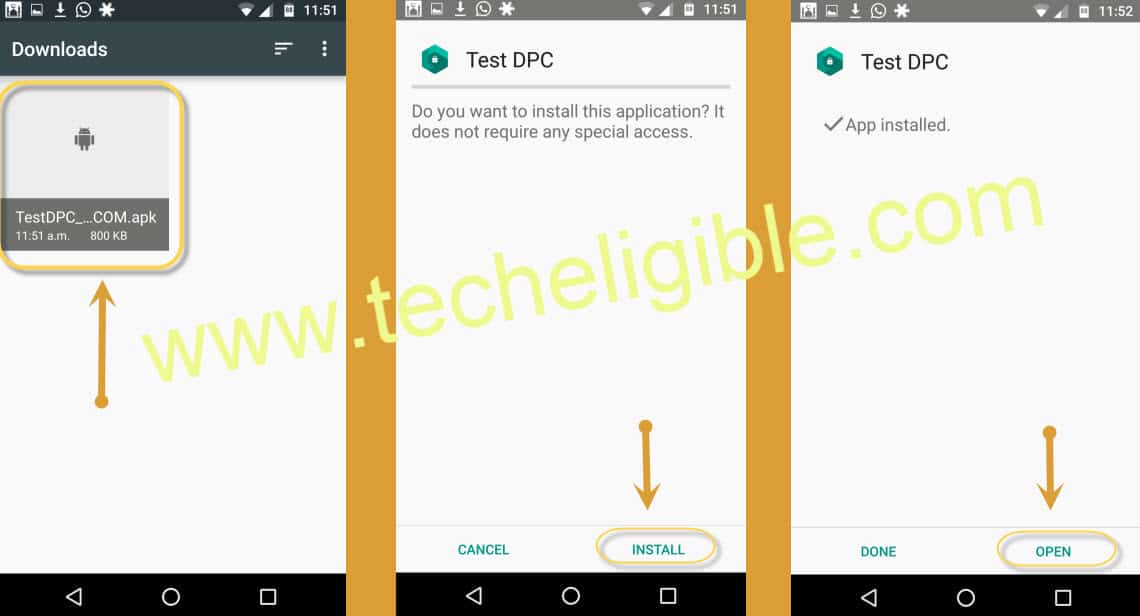
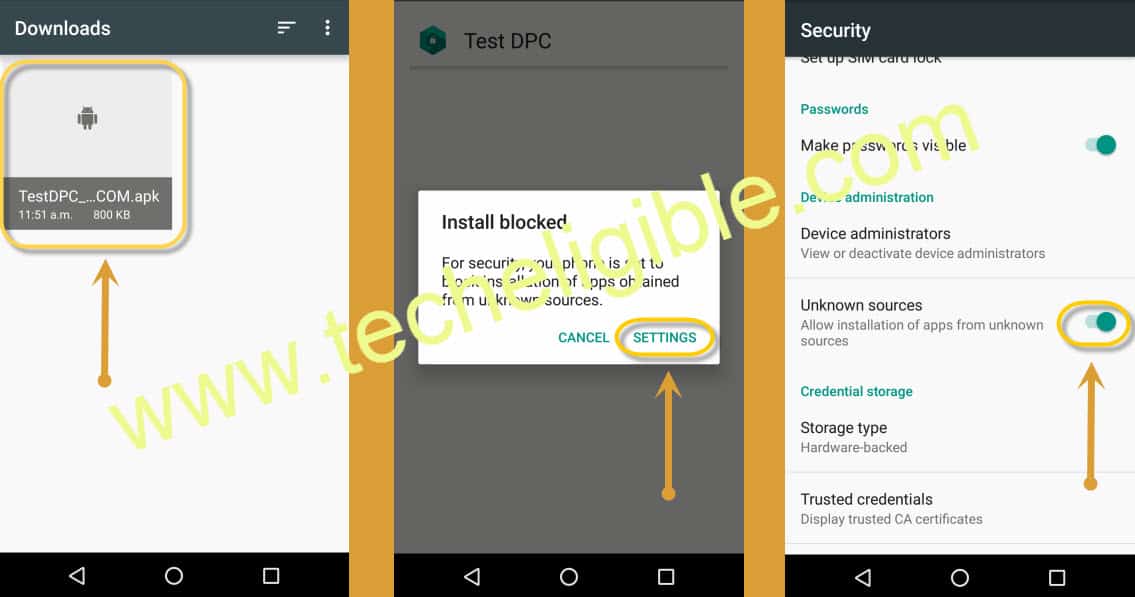
Step 15: Hit on a “Test DPC Apk” app to install and Remove FRP Moto X.
Step 16: Install & Open (Test DPC) apps by following below image.
Note: If you get “Installation Blocked” popup, tap on “Settings” from popup, and then enable “Unknown Sources”, then again install “Test DPC“, and open it.
Encrypt your Moto Device:
Step 17: Now tap on “Set up device owner” from “Setup Management” screen, after that tap on “SET UP”.
Step 18: Tap on “ENCRYPT”.
Note: Your Moto Device must have 90% Battery, and put your Moto Device on “Charging” via charger, so that “ENCRYPT PHONE” option highlight.
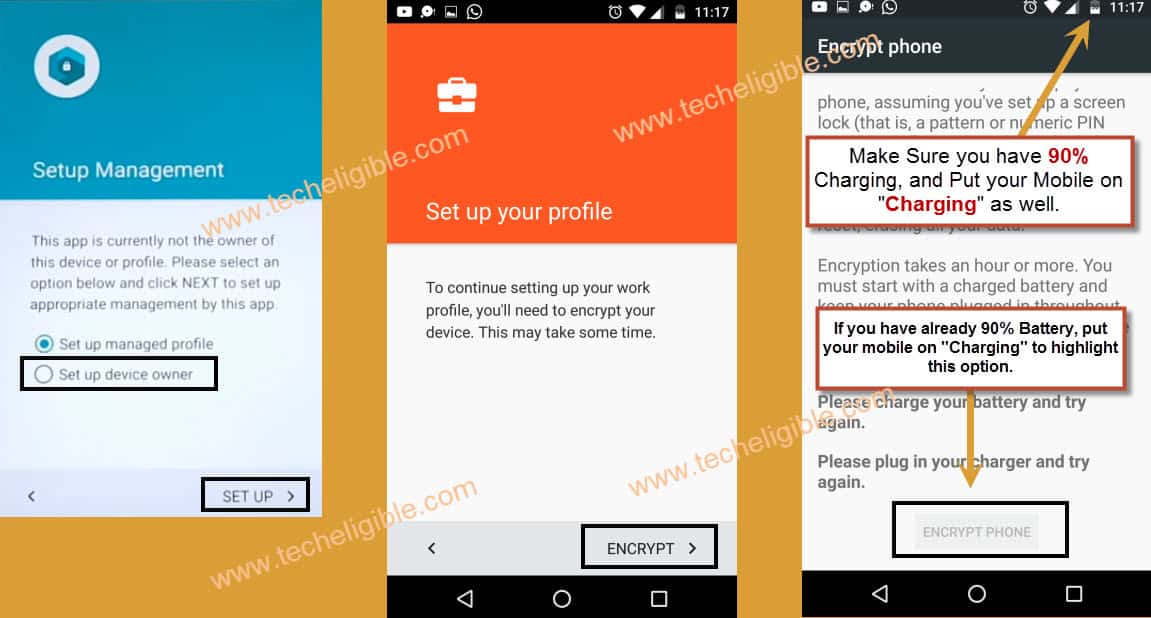
Step 19: Tap on “ENCRYPT PHONE” option, and then the device will reboot to start encrypting process.

Step 20: After that the device will restart automatically, from the (HOMESCREEN) tap on “START”.
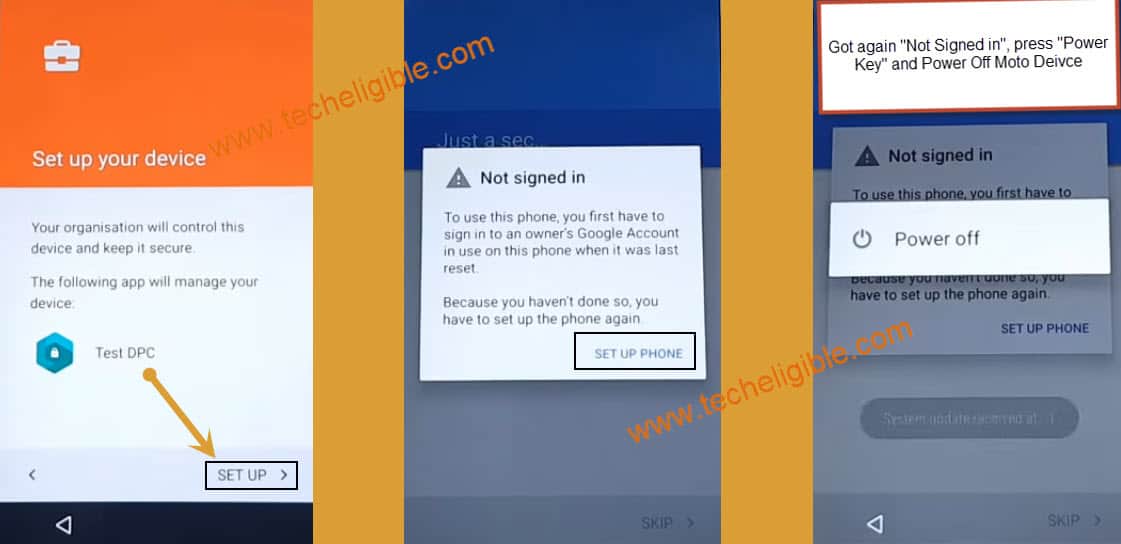
Step 21: Once the “Wi-Fi” auto connected, then it will redirect you to “Set up your device” screen.
Step 22: From there tap on “Setup”, then you will get a pop up of “Not Signed in”, from pop up tap on “Set up Phone”.
Step 23: Tap to > Setup > Setup Phone, but you will receive this (Not Signed in) popup window again, just hit again on “Setup Phone”, after that long press “Power key” and tap to “Power Off” option.
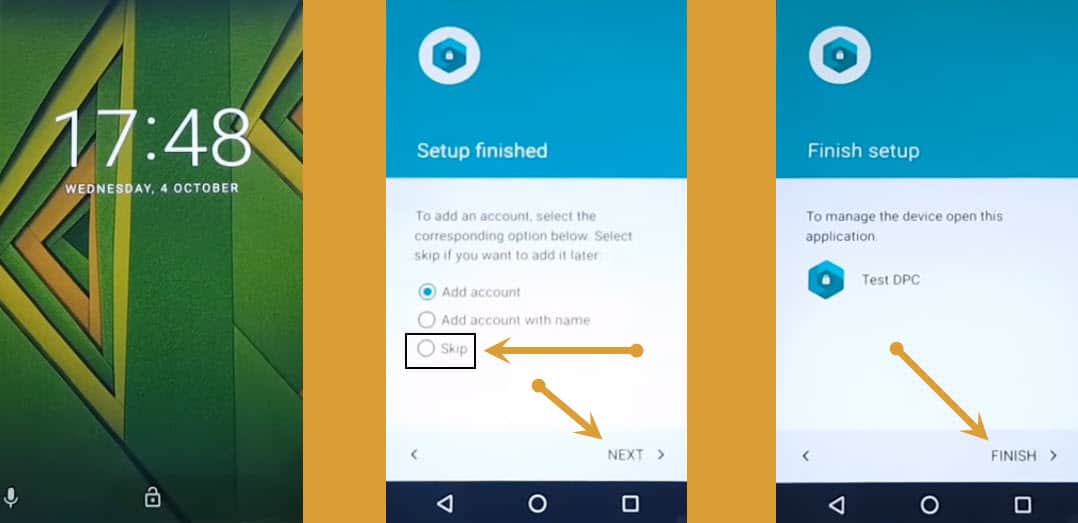
Step 24: Turn on Moto X device to Remove FRP Moto X.
Step 25: Swipe up the screen, and select “SKIP” option, after that tap to > Next > Finish.
Turn on Developer + OEM Unlocking:
Step 26: Go to “Settings”, then tap on “About Phone”, now tap 5-6 times on “Build Number” until you get pop up of “You are now a Developer”.

Step 27: Go back to “Settings”, from there hit on “Developer Options”, and enable “OEM unlocking”.
Step 28: Tap on “Back Key” to go back to “Settings”.
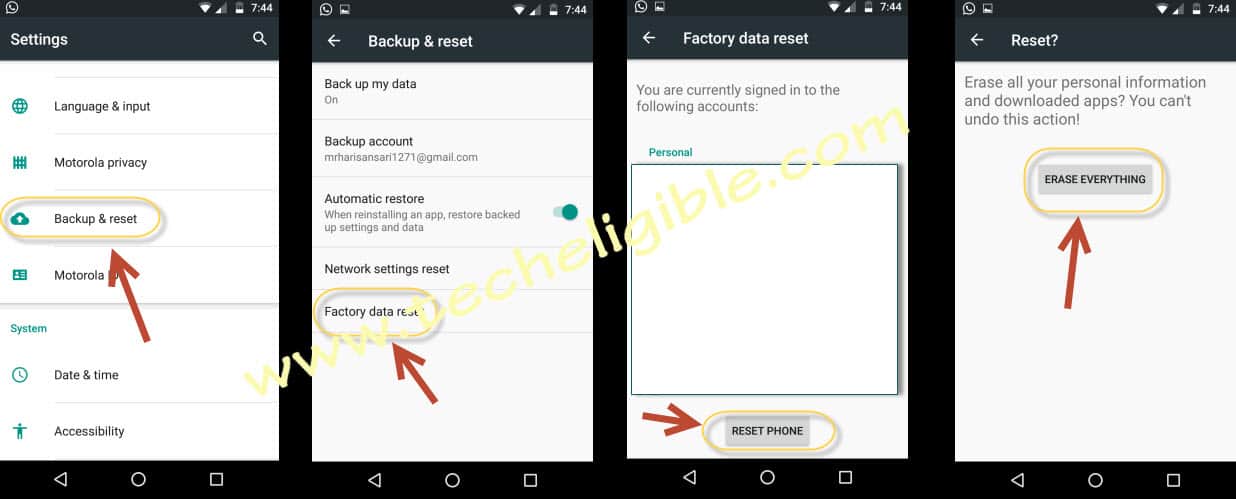
Backup & Rest Moto X:
Step 29: Go to “Backup & Reset”, then “Factory Data Reset”, after that “Reset Phone”, then “ERASE EVERYTHING”.
The device may take several minutes in finishing the factory data reset process, just wait and after that you are all done, just finish setup wizard to access the device normally without any previously added google account, Thank You.