
How to Remove FRP Account Moto G10 Android 11 Without PC
Remove FRP Account Moto G10 Android 11 with this best method, if you are confuse, and searching here and there the working method for this device, so i would suggest you to try this below method once, we hope this work on your device and you can easily remove frp without paying anything to anyone, or without wasting your time. the method is bit long, so have a look all steps carefully, and try on your own, you will enjoy our method the way we described.
Warning: This method is only for device owner and for educational purpose only.
Remove FRP Account Moto G10 Android 11:
Step 1: Connect WiFi, and from “Hello” startup screen, tap to “Emergency Call”, and double tap to “Emergency Information”.
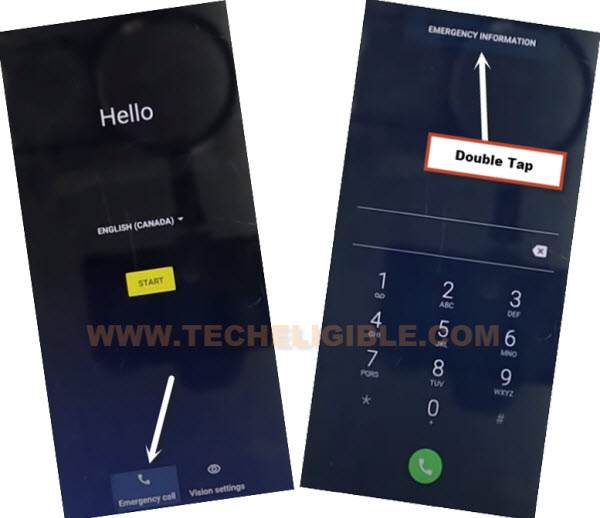
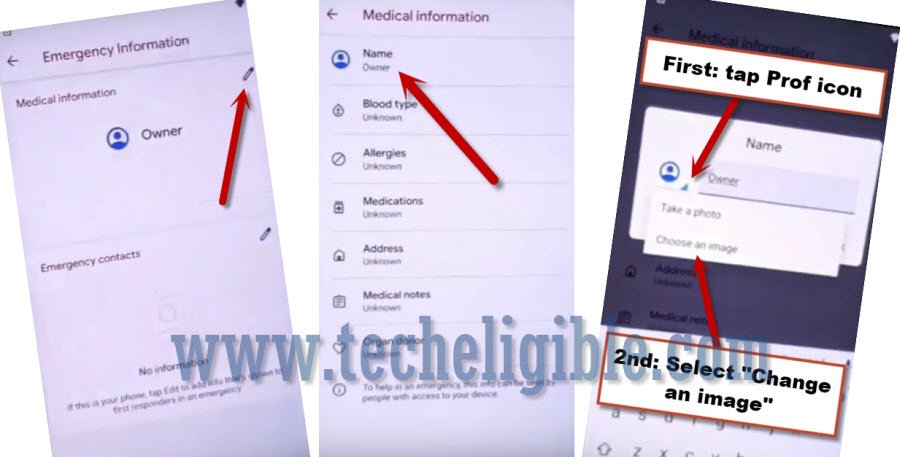
Step 2: Tap > Pencil icon > Name > Profile icon corner > Choose an image.
Step 3: Tap to > Menu icon > Photos > Permissions.
![]()
Step 4: Contacts > See All apps with this permissions.

Step 5: Hit on “Search icon”, and search there “Settings”, afterwards, tap to “Settings App info“, now hit on “Open”.

We’re Gonna Enable Shortcut Menu:
Step 6: Go to > Accessibility > Accessibility Menu > Turn on.
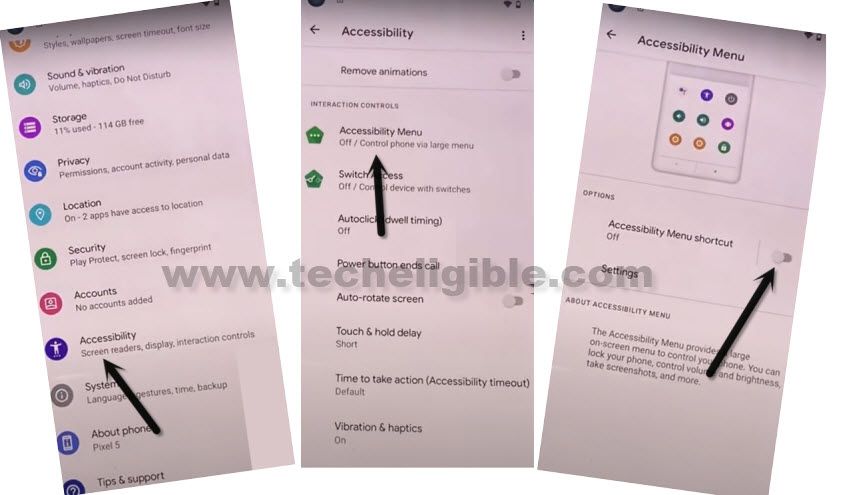
Note: Just for verification, swipe from bottom to top using two fingers, and the MENU Shortcut will appear, that means you have successfully turned on this option. this will assist us to Remove FRP Account Moto G10.
Step 7: Go back to (Settings), from there tap to > Apps & Notification > App info.
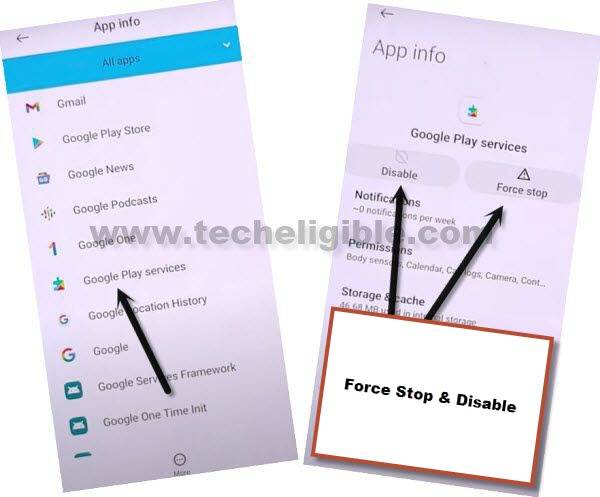
Step 8: Tap on > 3 dots > Show system Apps.
![]()
Let’s Disable Apps from App info:
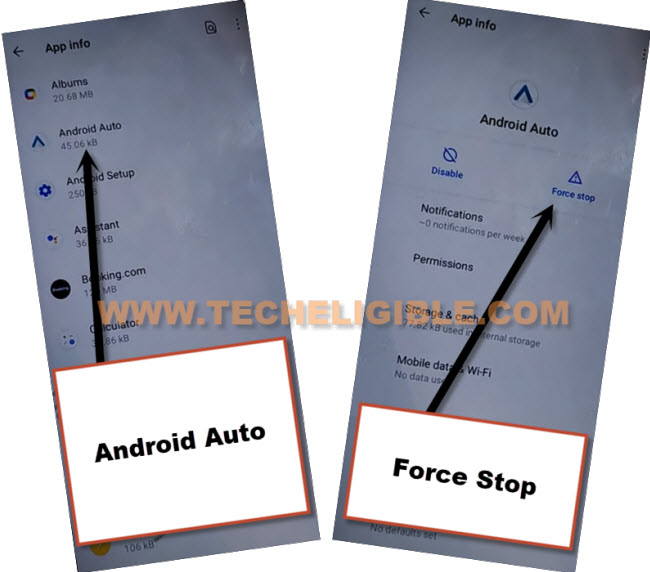
Step 9: Find and hit on > Android Auto > Force Stop > OK.
Step 10: Find blue color settings icon “Android Setup” same as shown in below image, so just tap to > Force Stop > OK.
![]()
Step 11: Find and tap to > Google Play Services > Force Stop > OK, now hit on > Disable > Disable App.
Now we have successfully disabled and force stop above 3 apps, lets get back to first homescreen to finish setup wizard without entering the previously added google account.
Go to (Hi There) Startup Screen:
Step 12: Go back to “Hi There” screen by tapping on “Back Arrow” several times, from there tap to > Start > Skip to Remove FRP Account Moto G10.
Step 13: There you will see a loading screen (Just a sec…), this won’t disappear until we enable (Google Play Services).
Step 14: Go back to (Connect to WiFi) screen by tapping on back arrow.
Step 15: Bring (Shortcut Menu) through Swiping up from the bottom of the screen using two fingers.
![]()
Follow Steps Quickly:
Step 16: Quickly tap to > Assistant > Settings > Enable (Google Play Services).
Note: You may have to repeat below steps for many times, because after hitting on “Assistant” option, this wont show you (Settings) at first time, so you will have to try this for almost 10-20 times to reach (Google Play Services) screen.
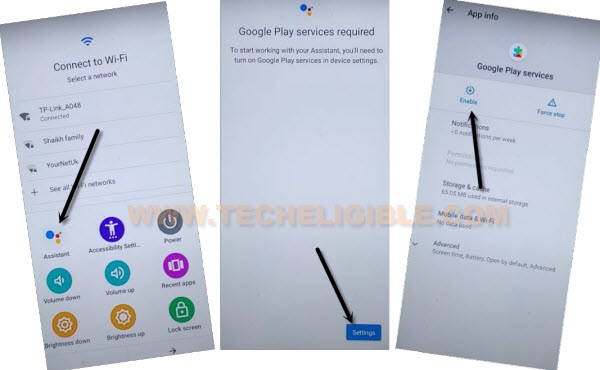
Step 17: After successfully enabling (Google Play Services), just tap “Back Arrow” from bottom, and wait few seconds on “Checking for update” screen, this will show you next screen.
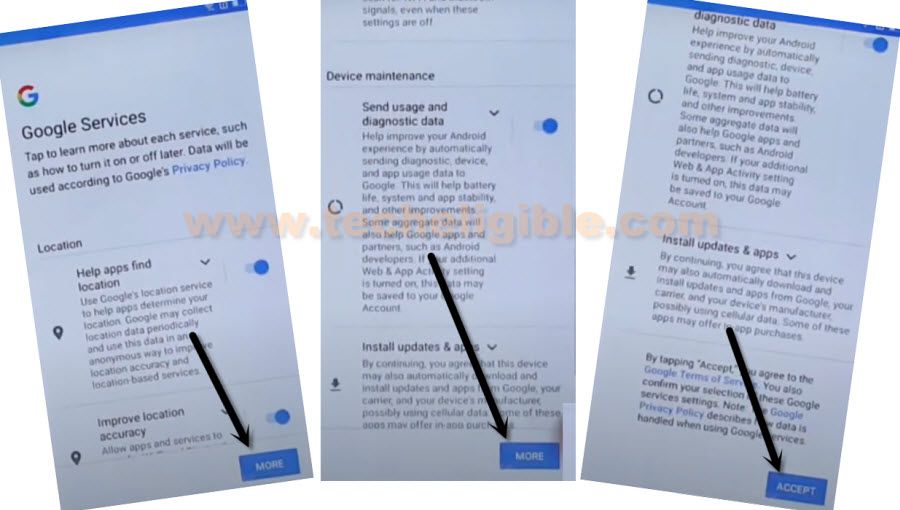
Step 18: From there, tap to > More > More > Accept.
Step 19: From (Set Screen Lock) screen, tap to > SKIP > SKIP > OK > Accept & Continue, finish remaining steps to reach homescreen.
![]()
Step 20: Go to > Settings > System > Advanced > Reset Option, now hit on “Erase (All Data) option 3 times.
-The device will be restart, and wait until factory reset task is done, afterwards, your device will be just like a brand new one, just finish setup wizard and add your new google account and new security PIN lock, and you are all done from Remove FRP Account Moto G10.
Read More: