
Bypass FRP itel A48 Android 10 Without PC [Updated Method]
Bypass FRP Itel A48 (Android 10) in simple few steps and setup new new pattern lock to skip google verification screen, we will access to (Google Go) browser from (Emergency Call) option, and this is very simple way, just follow steps from below, we have updated another latest method with this post, you can try both ways one by one to get into your itel device homescreen without entering google account.
Warning: This process is just for device owner and for educational purpose only.
2 Methods Available here:
| ⇒ Method 1: Remove Google FRP Itel A48 (New) |
| ⇒ Method 2: Remove Google FRP Itel A48 (Old) |
Method 1: Bypass FRP Itel A48 (New)
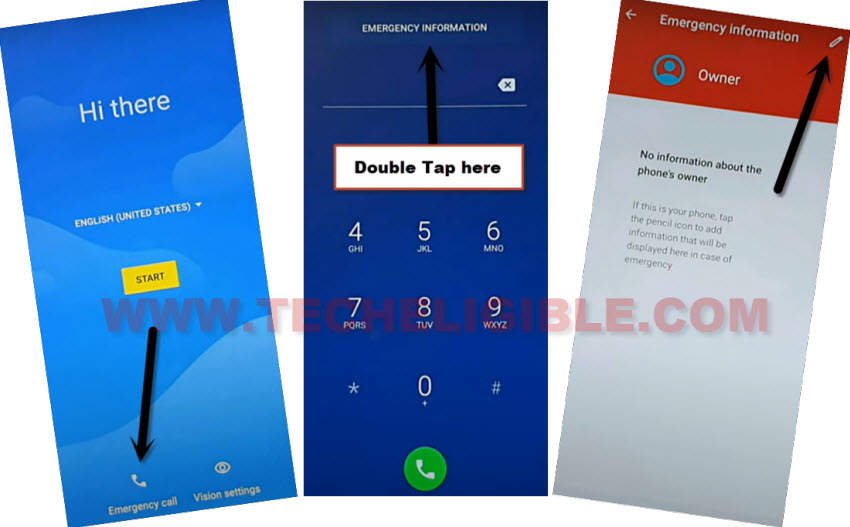
-Begin this new guideline by turning on device & Connect to WiFi first.
-Afterwards, go back first (Hi there) Screen, from there tap on “Emergency Call” option.
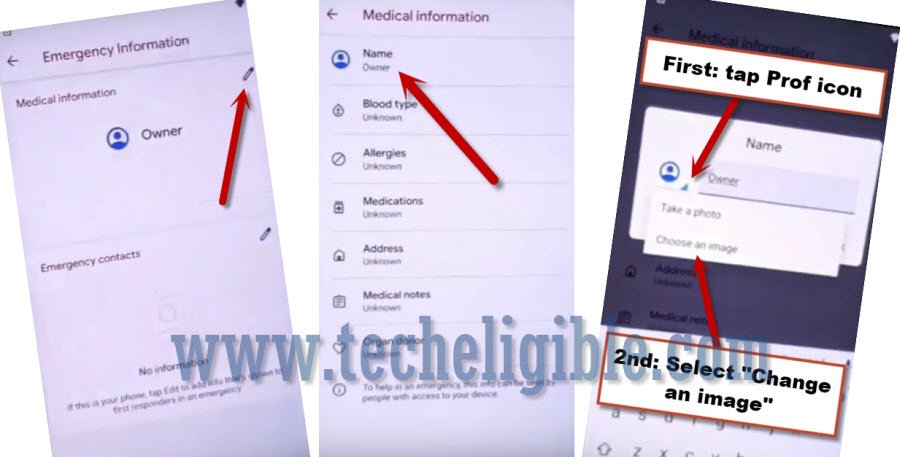
-Double tap on “Emergency Information”, and then tap on “Pencil” icon from top right corner of screen page.
-Now hit on a “Name”, after that, tap over (Down Arrow) from profile icon same as shown in below image.
-Now, hit over “Chose an image” option.
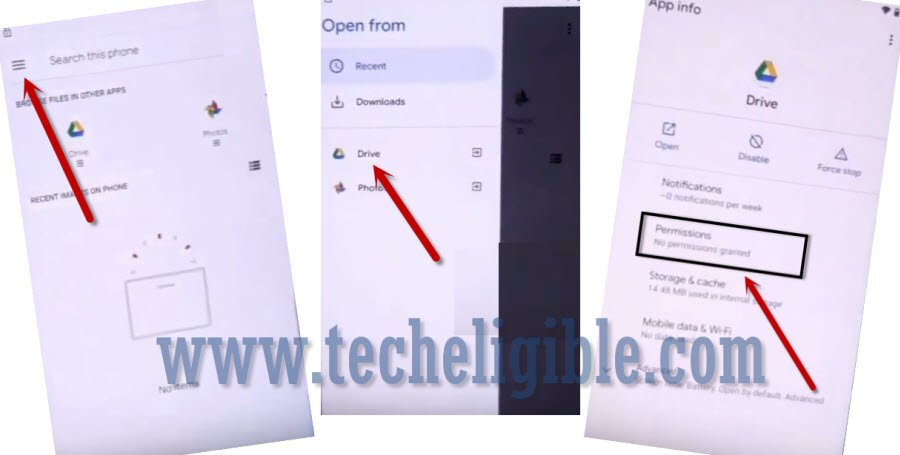
-Go to “MENU” icon from top left of the screen, and then go to > Drive > Permissions.
-Tap over “search” icon form top right corner, and search with “Screen”.
-Hit on “Screen Pinning” from searched result,
-Again go to > Screen Pinning > Turn on the toggle off option. (See below image).

-Turn on also “Lock Device When unpinning”, and then hit on “Fingerprint + Pattern”, tap to “Yes”.
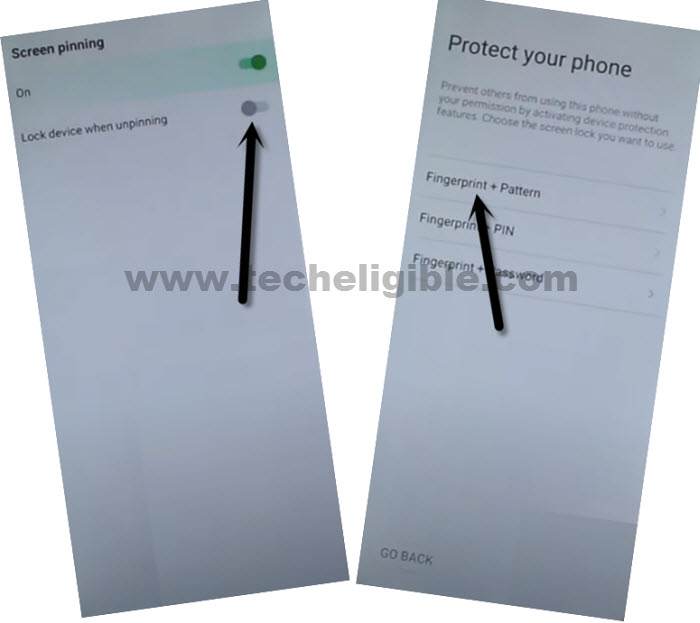
-Setup your any desire pattern lock on screen to bypass frp itel A48.
-Once you setup pattern successfully, the next screen would of (Touch the sensor), that means, the pattern has been setup successfully, now we can easily go back on first (Hi there) startup screen to finish up setup wizard easily.
-Hit over “Skip” from touch the sensor screen.
-Just go all the way back on (Hi there) screen by hitting over (Back Arrow) multiple time.
-Tap over > Start > Skip > Don’t Copy.
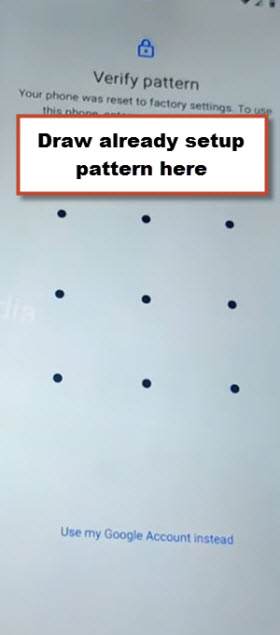
-You will have a(Verify Pattern) screen, just give your same pattern lock, that is already recently created.
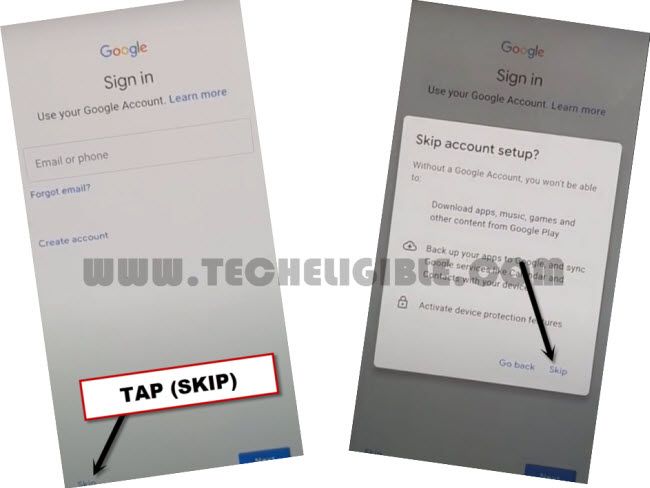
-Wait on (Checking info) loading screen, after that, you will be shown a (Google Sign in) screen, but don’t worry, this time you also have (Skip) option at the bottom left corner screen, just tap over that skip option to bypass this screen and finish setup wizard easily.
Method 2: Bypass FRP Itel A48 (Old)
-Firstly, turn on itel phone & Connect WiFi, afterwards, go back to first (Hi there) homepage.
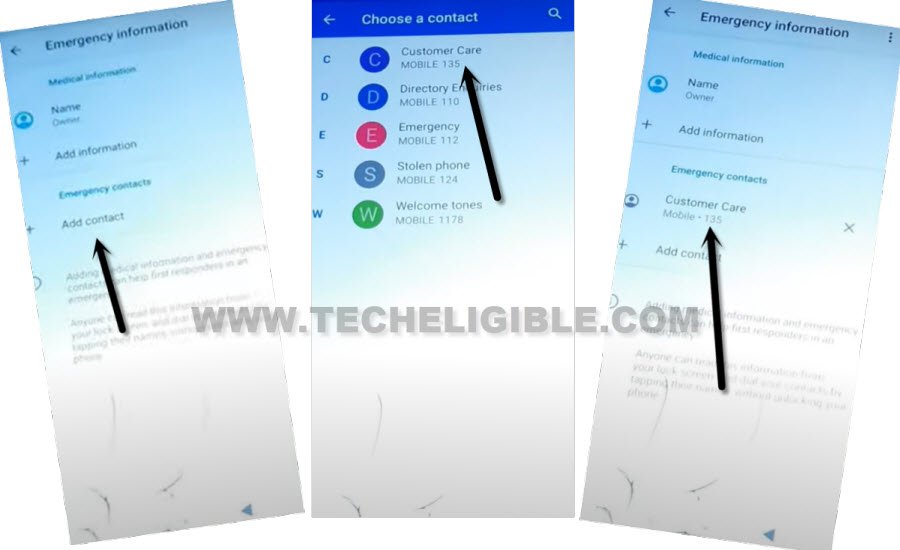
-Tap on “Emergency Call”, and double tap on “Emergency Information”, and then tap “Pencil icon”.
-Tap to “Add Contact”, and choose any already saved contact, we are choosing “Customer Care”.
-Hit again on “Customer Care” name.
-Tap to “Message icon” which is right next to this contact name.
-Tap on “3 dots” from top corner, and hit on “Help & Feedback”.
![]()
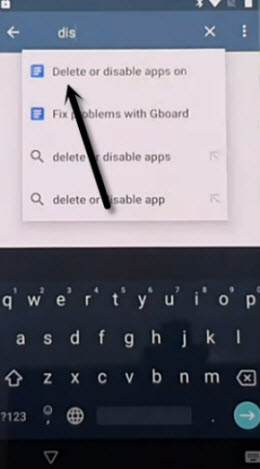
-Search there “Delete”, and go to “Delete or Disable app on android”.
-Hit on “Share” icon from top, and select “Google go” from popup window.
![]()
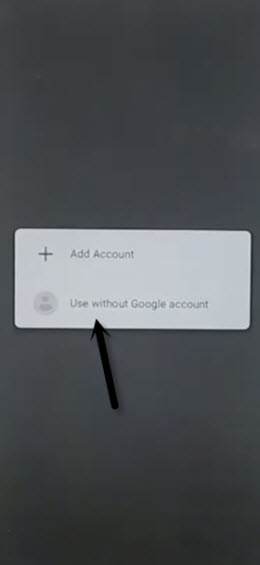
-Tap on “Use without google account”, and tap to “Done”.
-From google searched result, tap on “Manage your google Settings – Nexus Help”.
-Tap to “‘MENU” icon from bottom, and hit on “Open in browser”, this will launch google chrome browser, just tap to > Accept & Continue > No Thanks.
![]()
Set New Pattern Lock:
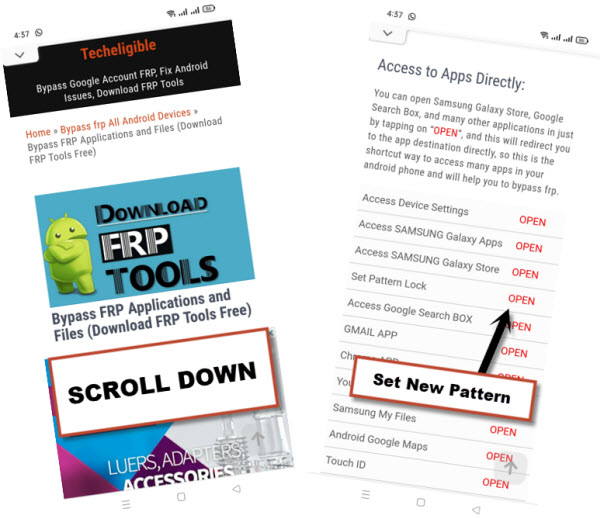
-Search in browser “Download FRP Tools“, and visit our website searched result, from there tap on “Setup Pattern Lock“. (See below image).
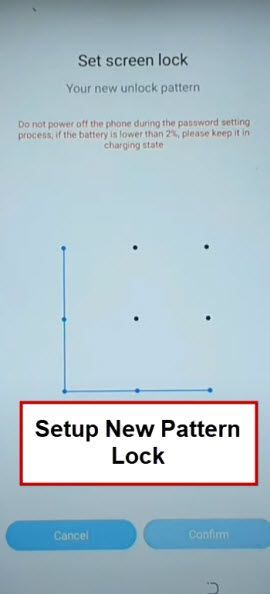
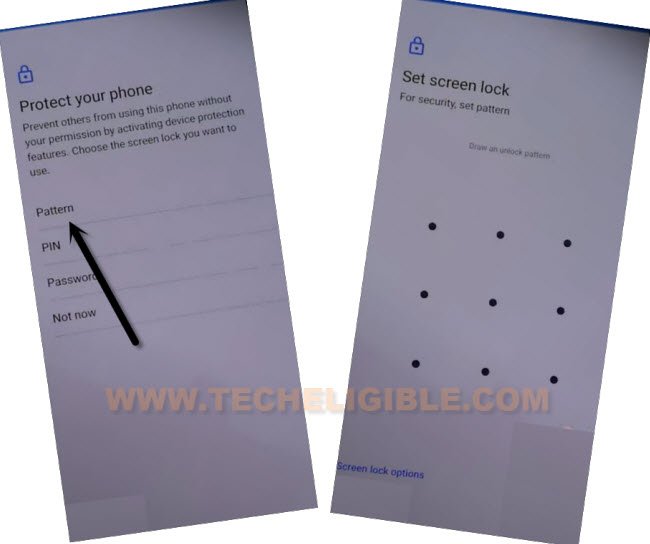
-Tap on “Pattern”, now draw your pattern twice time, and then tap on “Confirm”.
-Here, you can setup new pattern, that will allow you to easily Bypass FRP itel A48 Android 10.
-Go to “Pattern”, and draw your any desire pattern, and tap on “Next”.
-Draw same pattern again, and tap on “Confirm”.
-You will see there screen of (Keep your device unlocked, while it’s on you), that means your pattern or pin has successfully been added in this device, let’s get back to first (Hi there) homepage by hitting on back arrow multiple times.
-Finish setup wizard again and you will have (Verify Pattern) screen, just give there your recently new setup pattern lock.
-From google sign in screen, tap on > Skip > Skip.
-Thanks for visiting us, once you reach to your device don’t forget to setup new google account from > Settings > Add account.
Read More: