This brilliant method is now available for Galaxy A40 device as well, you can Bypass FRP Galaxy A40 (Android 11, 9) just by following below easiest steps, if you are stuck on a (Google Verification) screen, and cant find out your old signed in Gmail account. In this case, you must follow up this way to delete forgotten google account from this device, so that you could use this phone again.
Specification of Samsung Galaxy A40:
The Samsung A40 device was launched on April 2019 with android version 9. Upgradable up to (Android 11). This device came in two variant 64GB & 128GB Storage, 4GB RAM. This device has Super AMOLED screen with 5.9 inches. Resolution is 1080 x 2340 pixels. come with screen protection Corning Gorilla Glass 3.
LED flash, panorama, HDR are the features of this phone. There is 25 MP selfie camera. Samsung A40 device is available in 4 different colors (Black, White, Blue, Coral). Battery capacity is bit low 3100mAh.

What is FRP & How to Bypass it from Samsung A40:
As you know, Samsung Galaxy A40 phone has Android version 9 to 11. For sure, FRP protection feature has already been launched these both android version. FRP is the security measure that protect Samsung A40 phone device personal info from an unauthorized and unwanted access without your permission. No once can reach to your phone even after hard reset or factory reset. FRP is auto activated when a device owner login with any Gmail account while first time set up this phone.
To bypass frp Samsung Galaxy A40, there 2 methods available. You can follow methods from below according to your device android version. In (Method 1), we used (Samfw/Amazing FRP Tool), this is a free PC tool available to bypass frp with one click from Samsung A40 phone.
In (Method 2), we simply downloaded firmware of Samsung Galaxy A40, after that, flashed using odin tool. After that, we just manually bypassed FRP using frp bypass app applications. Check out stepwise frp guide from below.
Disclaimer: We are creating this post to educate people about how to get back their lost device due to forgetting Google account. This method is only for device owner and for educational purpose only.
Method 1: Bypass FRP Galaxy A40 By Free PC Tool (Android 11)
-Lets begin this process by turning on device and connect WiFi in your Samsung A40.
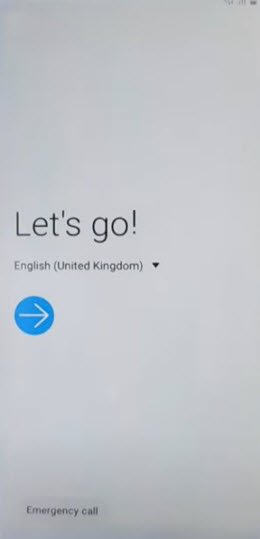
-You are required below tools to achieve this process and completely remove frp account from Samsung A40.
| Amazing FRP Tools 2022 | [DOWNLOAD] |
| Samfw Tool V4.9 | [DOWNLOAD] |
| All in One USB Driver Installer | [DOWNLOAD] |
Pass: techeligible.com
Note: If you are facing trouble in downloading (Amazing FRP Tool), don’t worry, you can use (Samfw Tool). Procedure is same, simply, download & install the tool on PC.
-Before extracting tools from winrar, you are required to turn off (Antivirus) software first, otherwise the tool will be removed because of Antivirus.
-First of all, install “All in one USB Driver”, all essential drivers are packed in this one software, this will fix up your device detection issue.
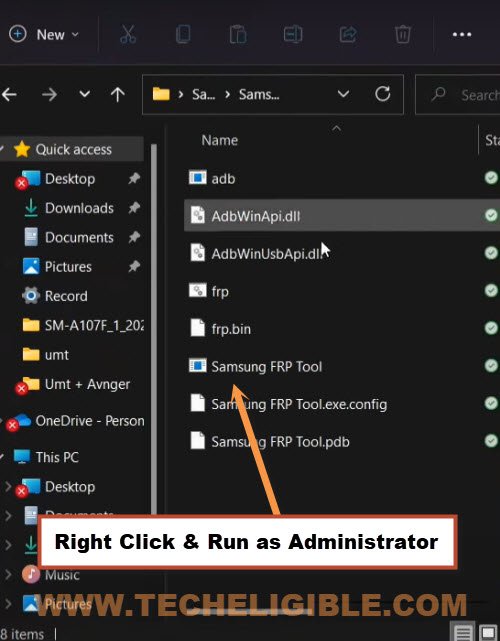
-Lets just go to “Amazing FRP Tool” folder, and from there right click on “Samsung FRP Tool“, and run as administrator to install this tool in your PC.
Note: Proper installing of all USB drivers, your device will not have any connectivity issue.
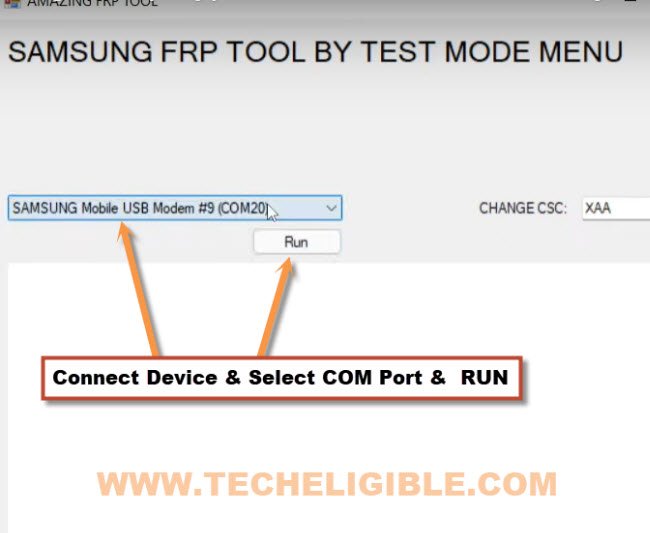
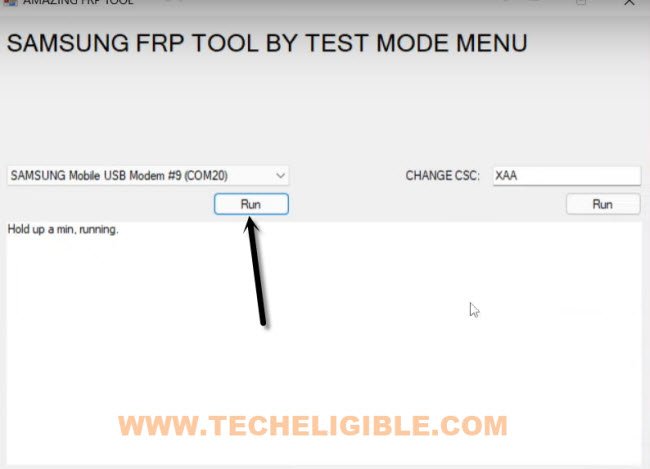
-Let’s just connect your Samsung A40 device with PC, and go to (Amazing frp tools) software.
-You will see blank in arrow indicated box, just wait there after connecting the device with PC, this will show you your device (Com port), and this for sure, the device has been detected by the PC and by tool.
-Once you get your device (Com Port) there, just click to “RUN” button.
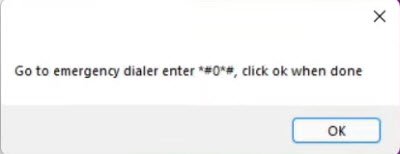
-You must get a popup message same as shown in below image in your Samsung A40 device screen.
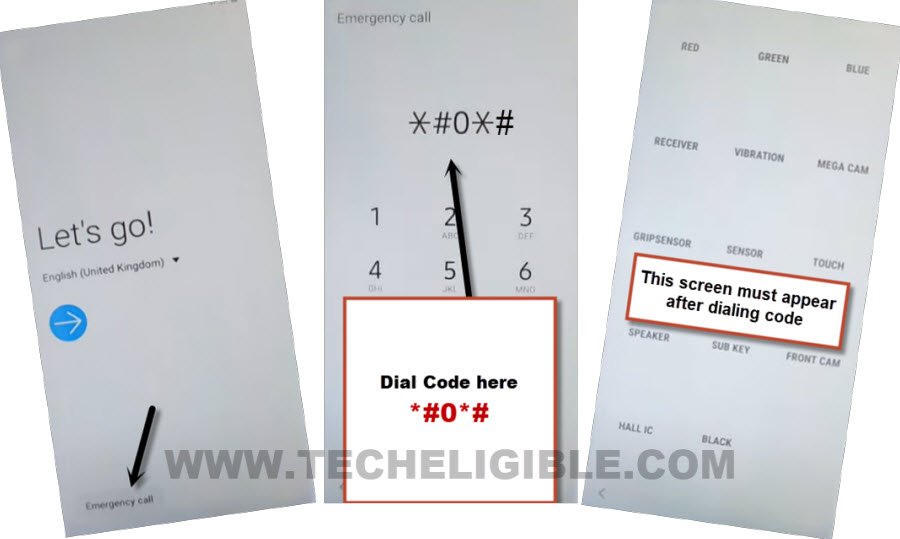
-There will be a “Emergency” option at the first screen of galaxy A40 device, just tap on that “Emergency” option.
-Dial a code there *#0*#, now you will have there a blank boxes screen, same as shown in below image.
-Get back to software, and click on “RUN” button again.
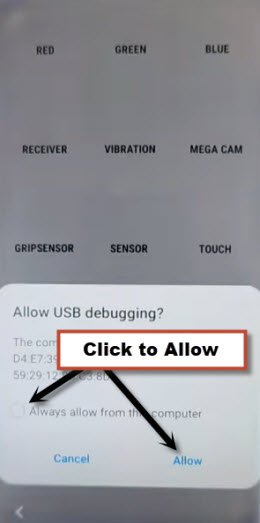
-After that, you will receive another popup in Samsung A40 device, just check mark the box (Always Allow from this computer), and then click to “Allow” option.
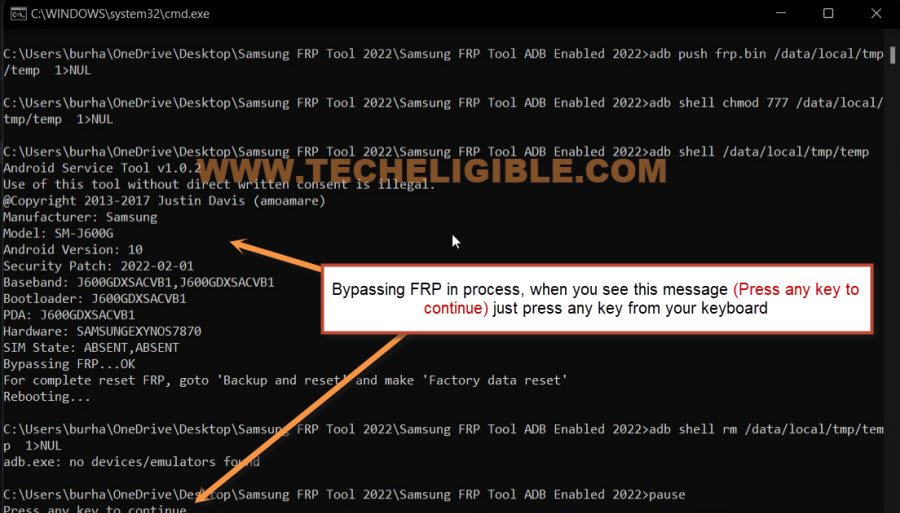
-The new command prompt window will appear and there you will see the FRP Bypass of google account is in process, once the process is done, you will see a message of (Press any key to continue…), so press any key from your keyboard to continue, after that you are all done.
-The device will be auto restart, after that disconnect our device from PC, now you are all done.
Method 2: Bypass FRP Galaxy A40 By Flashing With Odin Software (Android 9)
With the help of flashing device with fresh firmware, we can easily bring top bar menu from the first “Let’s Go” screen from Galaxy A40 Android 9, so what are you waiting for? follow steps from below, and don’t be confuse from firmware, we will describe you each and single step from downloading firmware to flash with firmware.
-Firstly, we need to check our exact firmware code by going to “Android recovery mode”.
-For that, just turn off your phone, and Long press both (Volume UP + Power Key) to get into “Android Recovery Mode”.
-Release only “Power key” after you see “Galaxy A40 LOGO”.
-Now you have successfully entered into your device recovery mode.
-Check on top, there will be your device firmware code with resembling (A405FNXXU3BTC4), just write down in your notepad.
Download Samsung Galaxy A40 Firmware:
–Click Here to Download Firmware in PC/Laptop.
-Type your firmware code in “Search Box”, and you will be able to see the list of firmware.
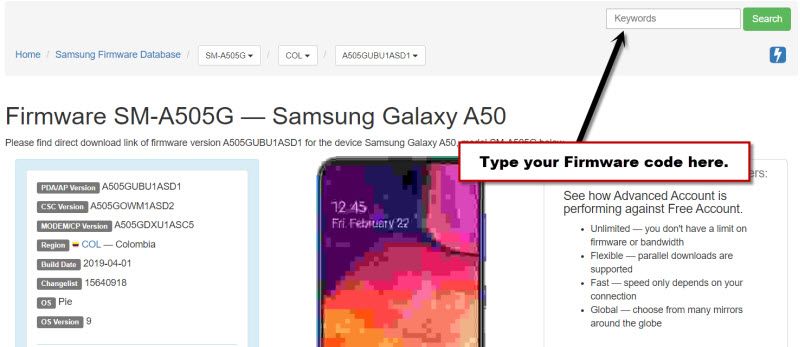
-Download Firmware Android 9 version only, because your device version is also android 9.
Note: Don’t worry about language, we can easily change that after flash.
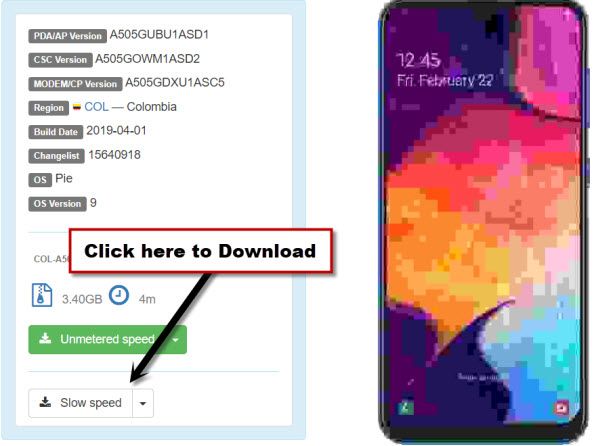
-Click on “Slow speed” button to download firmware.
-After downloading firmware, just extract firmware from winrar archive.
-Now download software Odin 3.13.1 in your PC.
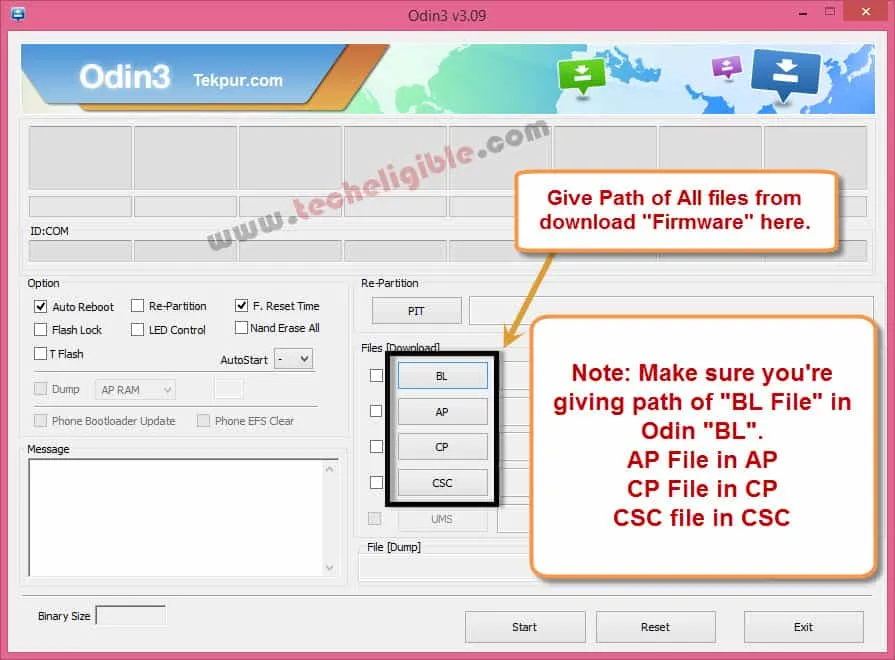
-Open “Odin Tool” in your PC, and give file path respectively from firmware same as shown in below image.
-Once you are all set, now put your device into “Downloading…” mode.
-For putting device into download mode, just turn off device.
-While holding both (Volume UP + Down) keys, plug the Type-C USB cable.
-Release all keys once you “Warning!” screen.
-Select “Continue…” by pressing volume up key.
-Perfect, now you are in downloading mode.

-As your device is already connected to PC with USB Cable, so your device should also be detected by Odin software.
-Now just click on “Start” button from Odin software.
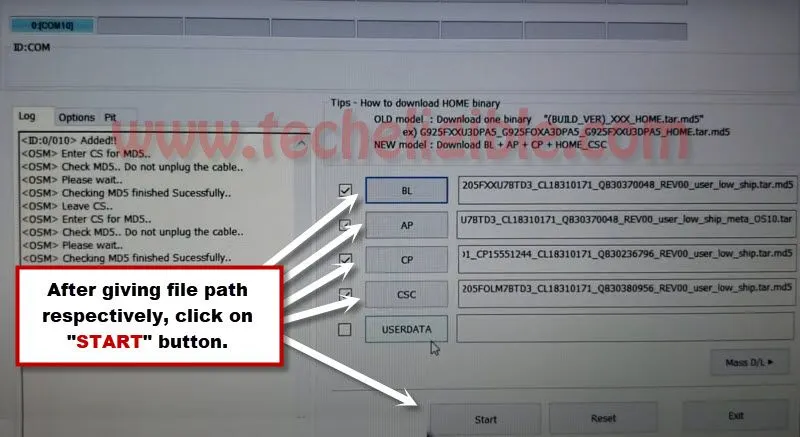
-Wait until flashing process finish.
-Once your device restart, and you see “Galaxy A40 Logo”, just disconnect from PC.
Final Step:
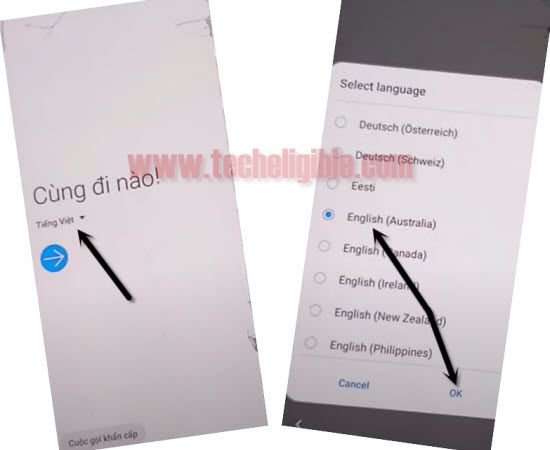
-If your device language has been changed, so you can change language to English by following below image.
-Connect “Wi-Fi” first.
-Get back to “Let’s Go” screen.
-Insert any pin locked “SIM Card”.
Note: If you do not have any pin locked card, you can easily set any 4 digits pin using other phone.
-After inserting sim card, keep on trying to bring “Top Bar Menu“, do that multiple times, once the “SIM Card Unlock Pin” screen pops up, you will be able to bring top bar menu easily, and do not leave that, keep touching your screen.
-While holding “Top Bar Menu”, just remove your card.
-After that, top bar menu will auto disappear, and you will get dialog box of “No Sim card inserted”, just hit on “OK”.
-Now bring “Top Bar Menu” again, this time it will drop down easily, and then tap on “Notification Settings”.
-Now tap on > See All > Most Recent > All.
-Go down, and Tap on “Youtube”.
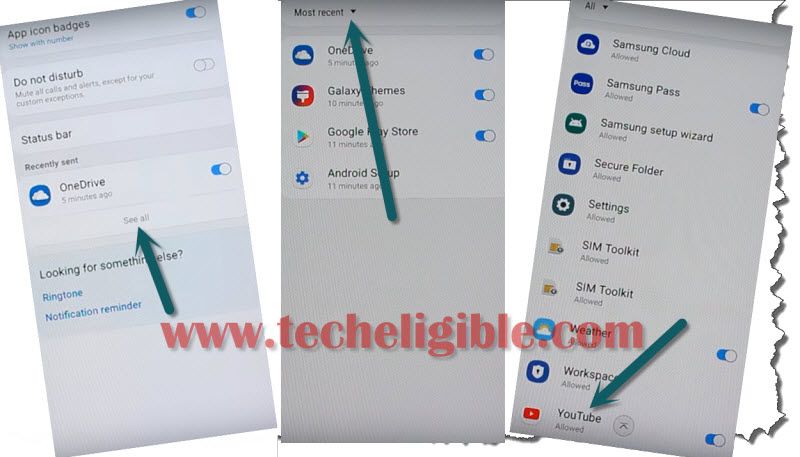
-Tap on > in-app-notification settings > About > Youtube Terms of service
-If you get dialog box of “Update Samsung internet”, just tap on “Cancel”.
Let’s Download Samsung A40 Frp Tools:
-Lets download and install apps to Bypass FRP Galaxy A40.
-Make search there with “Techeligible“. After that, go to techeligible site.
-Navigate to “Menu” option from top corner.
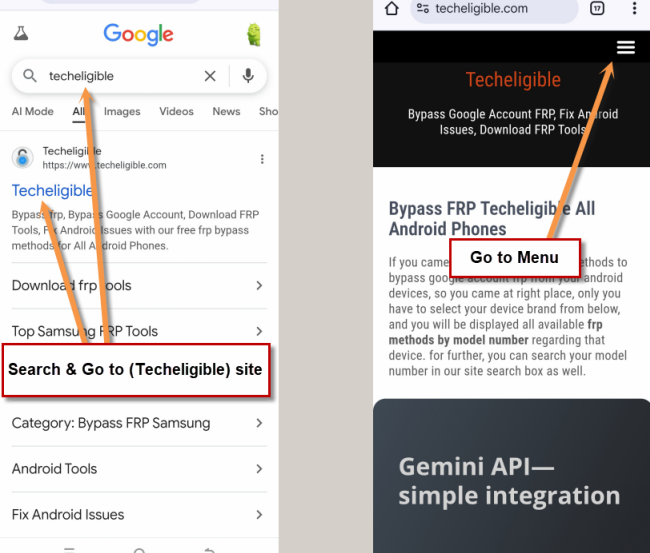
-After that, simply, hit on > Other Free Tools > Samsung FRP Tools.
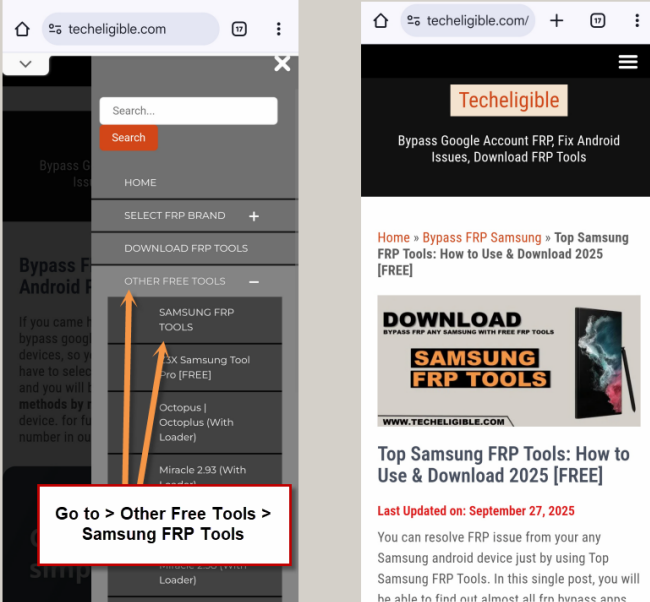
-Download below 2 apps.
1-Account Login.
2-Google Account Manager 8.
-Wait until downloading process finish. after that, tap on “MENU” icon from bottom right corner, and then tap on “Downloads”.
-There you will be able to see your both downloaded apps.
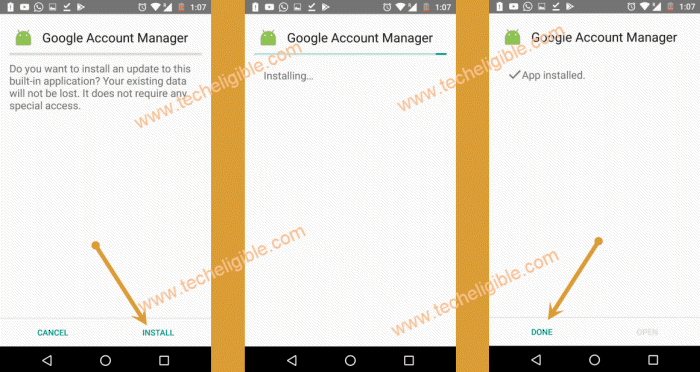
-Tap on “Google Account Manager”, and then tap on “Settings” from popup window, and enable option “Allow from this source”.
-Tap on “Back Arrow”, and then tap on > Next > Next > Install > Done.
-Now we have installed google account manager successfully.
-Now we have to install last app “Account Login”.
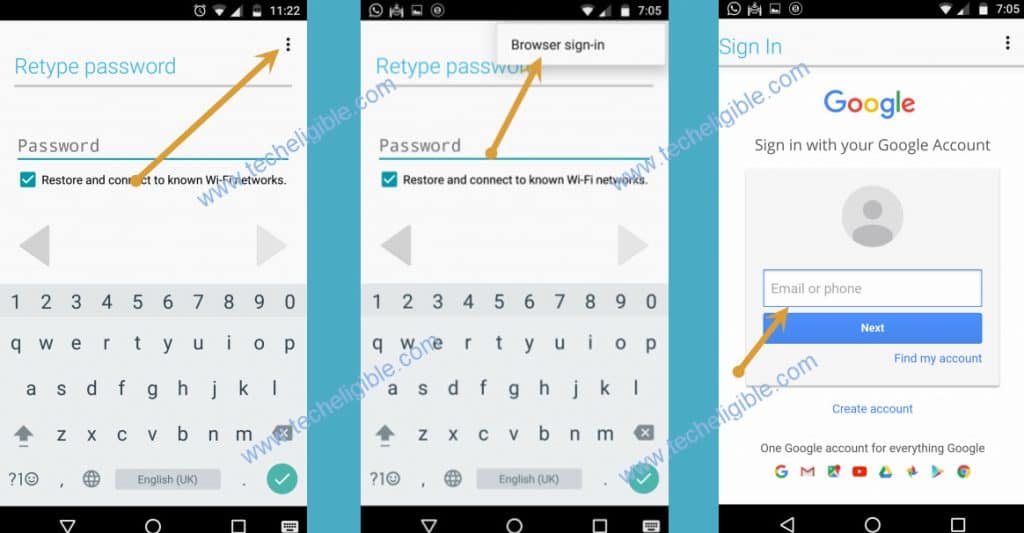
-Tap on > Account Login > Install > Open.
-There you will have a window of “Retype Password”, so just hit on “3 dots” from top right corner of your screen, and select “Browser sign-in”.
-Now sign in with your any other valid Gmail account.
-After signing in successfully, restart your device.
-Now complete setup wizard, because you are done to Bypass FRP Galaxy A40.
Related Methods: