2 Methods to Remove FRP Itel A60, A60s Android 12, 13
If your Itel device is on a FRP protection. And, you can’t remember and recover already signed in google account on this phone. So, you ought to follow this guideline to successfully Remove FRP Itel A60, A60s (Android 12, 13) . We have mentioned 2 method below, 1st method is with PC Software, and 2nd is without PC.
Note: We highly recommend you to apply this method only on your own device, if you are not owner of this Itel A60 | A60s device, or you found this from some where, you must return this device to its real owner.
| Method 1: Bypass FRP Itel A60 | A60s By SamFw Tool [Android 13 | 12] |
| Method 2: Bypass FRP Itel A60 | A60s Without PC [Android 13 | 12] |
Method 1: Remove FRP Itel A60, A60s By SamFw Tool
Fix FRP issue right now with the help of free (Samfw) tool. You don’t need to follow any old method, such as using (Xshare) application etc. Follow easy steps from below to get back your device without spending single penny.
-We are going to being steps here by turning on (Itel A60) phone. Connect WiFi first.
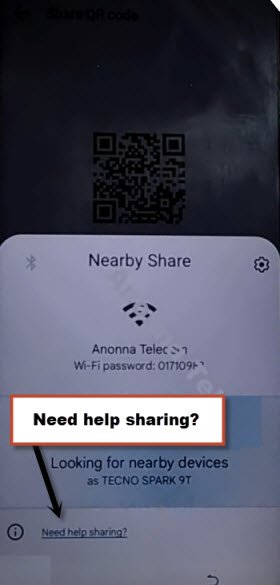
-Get back to (Connect to WiFi) page, from there, hit over > Share > Nearby > Turn on.
-There is blue colored link with the name of “Need help sharing”. Just tap over that link.
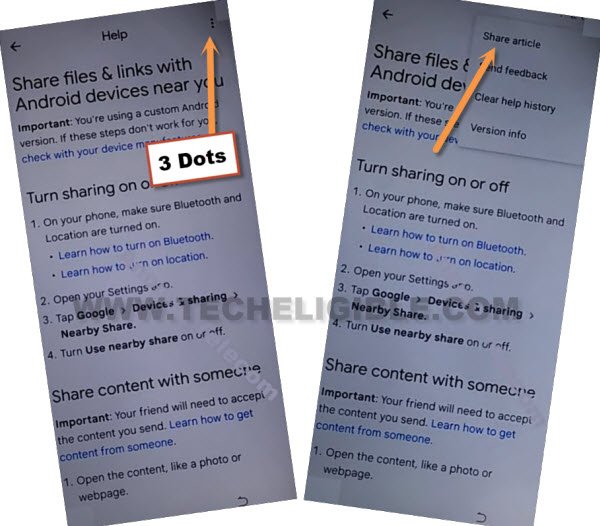
-Once you reach on (Help) screen. We’re gonna launch phenix browser from here just by going to > 3 dots > Share Article.
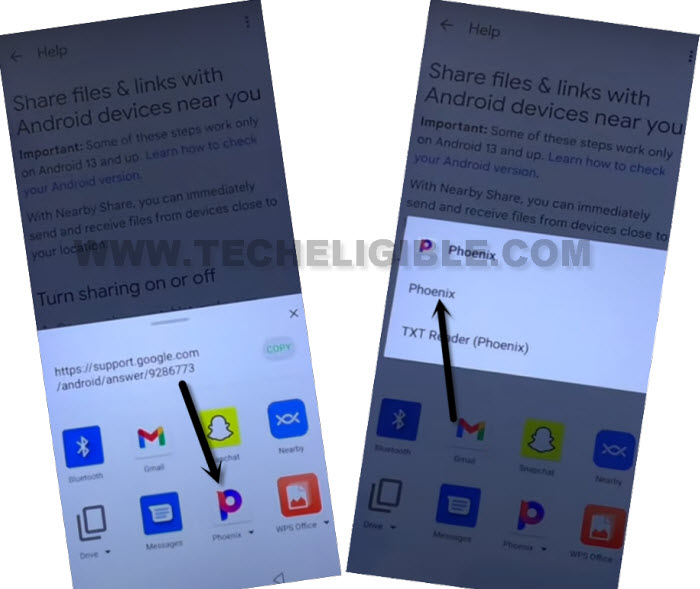
-Afterwards, you will have some share icons in new popup window.
-Let’s launch internet browser by tapping over > Phoenix > Phoenix > Agree & Start > Skip (From top right corner).
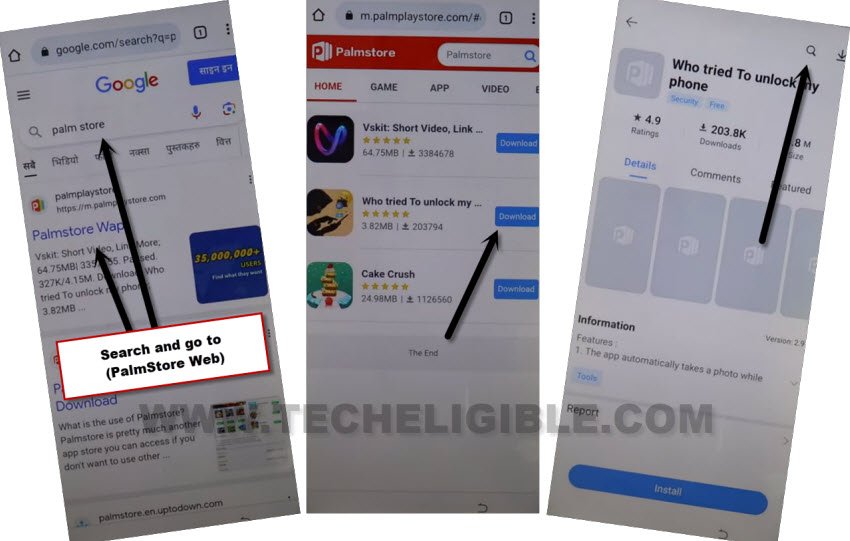
-The Phoenix browser will be launched, we have to search and go to (Palm Store Web).
Access to Activity Launcher through PalmStore:
-On phoenix browser screen, search with “Palm Store”.
-You will get some searched result, just go to 1st searched result named “Palm Store Web”.
-Hit on “Download” button from any application. After that, tap on “Open”. If nothing happens, repeat this step, tap again on > Download > Open.
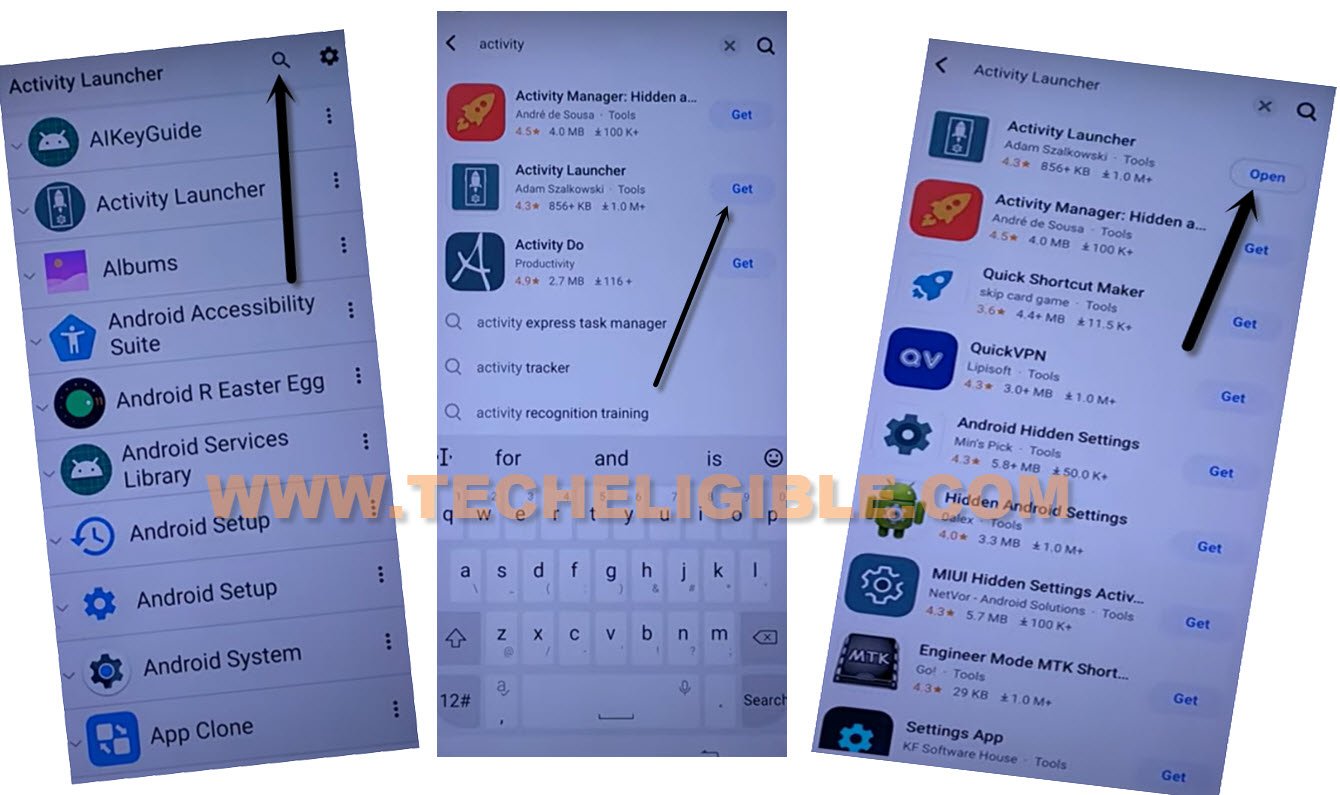
-You will get inside that app information page, from there, we have to hit on “Search” icon. (See below image).
-Search there “Activity Launcher”.
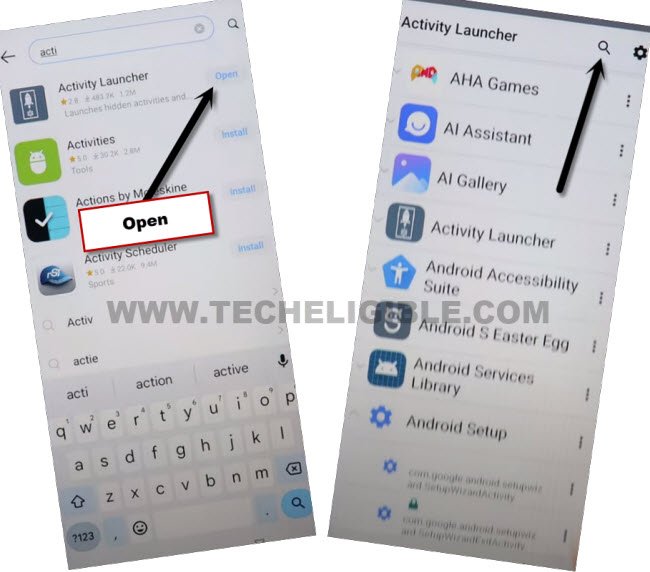
-Install & Launch “Activity Launcher” app from there.
-Tap on “Search icon” from top right corner of the activity launcher app.
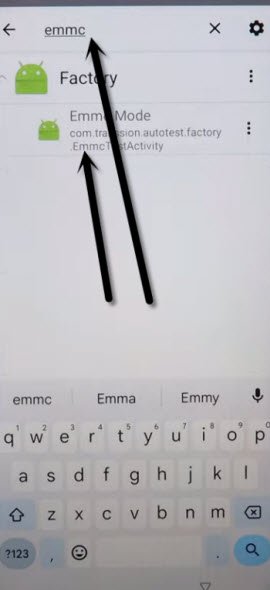
-Search there with “EMMC”.
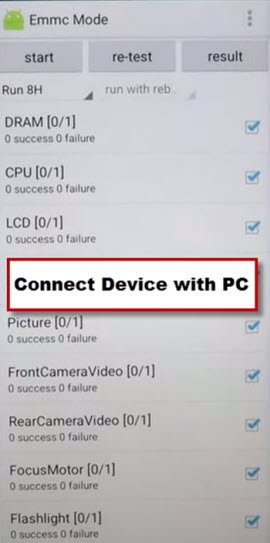
-Hit on “Emmc Mode”. Now, we can easily use (Samfw V4.8.1) tool to successfully Remove FRP Itel A60, A60s.
Use SamFw Tool to Bypass FRP:
-You have to download & install Samfw PC software in your PC or laptop. All instructions has been mentioned already on Samfw Download Page tool.
-Comeback here after installing Samfw Software in your PC.
⇒ Samfw Tool V4.8.1 [DOWNLOAD & INSTALL]
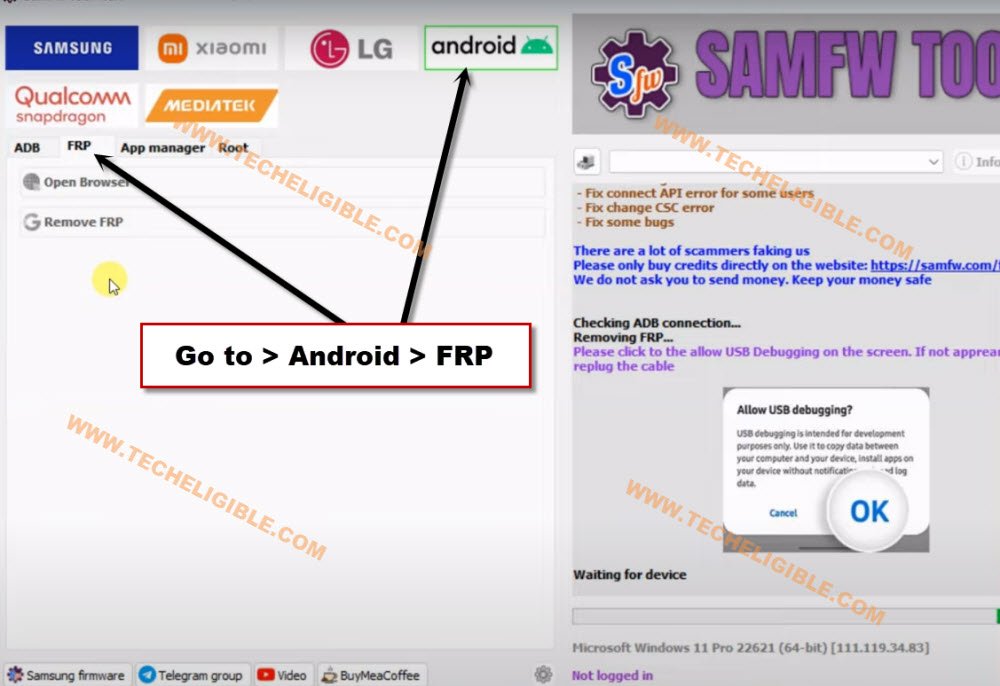
-From Samfw tool, go to > Android > FRP.
-Connect your Itel phone with PC using DATA/USB Cable.
Note: Do make sure, your Itel A60, A60s is on a (EMMC Mode) screen.
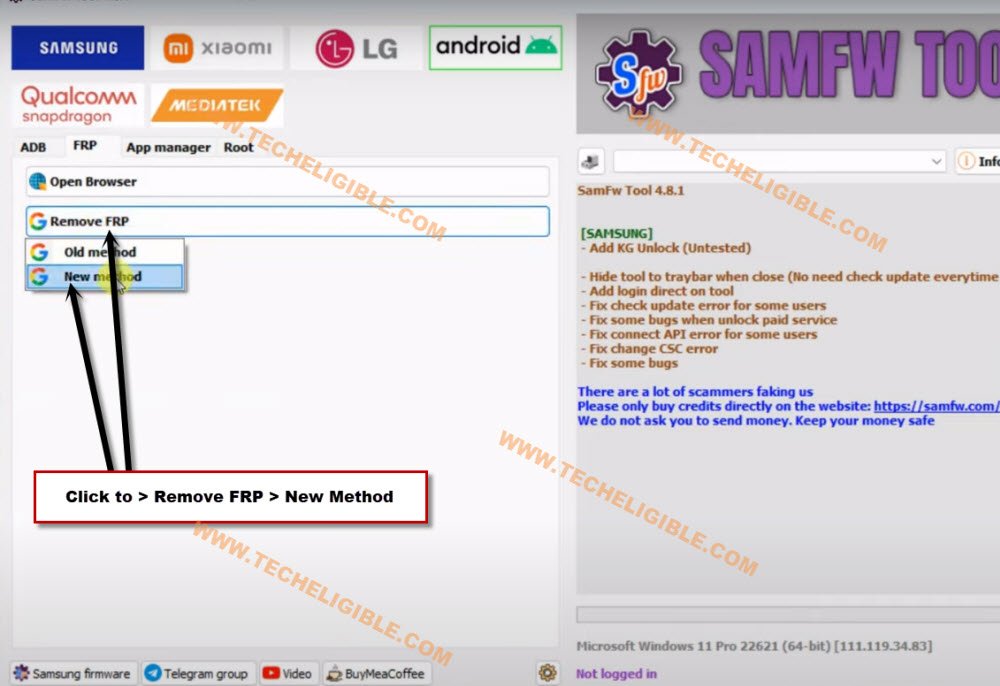
-Click on > Remove FRP > New Method.
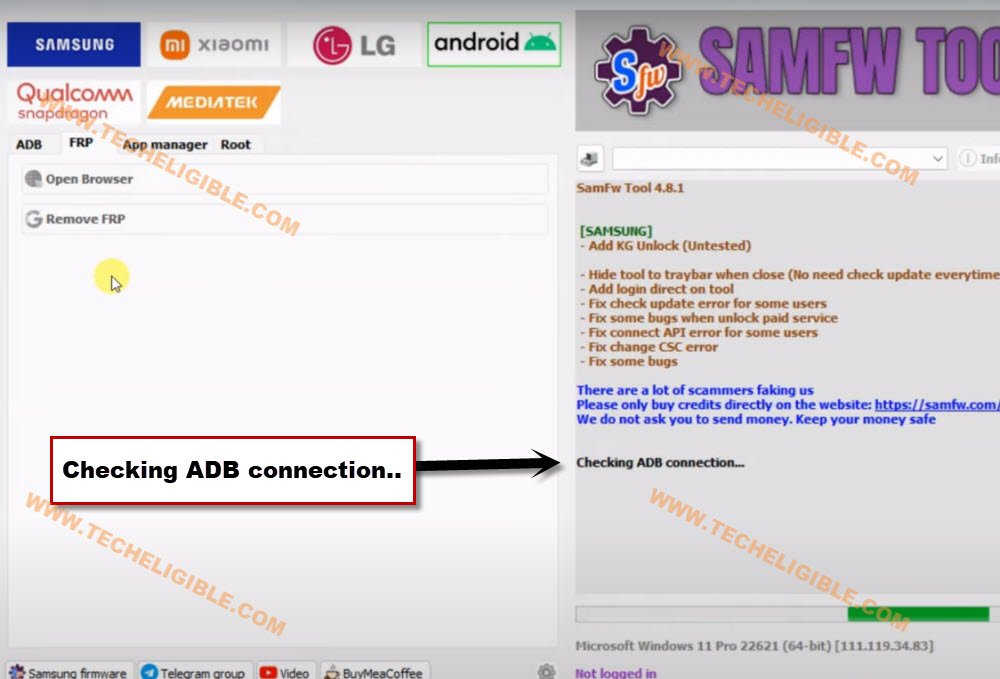
-After that, the tool will start checking ADB connection. Wait on checking screen till its done, and the device is detected successfully to Remove FRP Itel A60, A60s.
-If the device is not detected, reconnect Itel Phone with PC. And, try to install prober USB driver, so that, you may not face any connectivity issue.
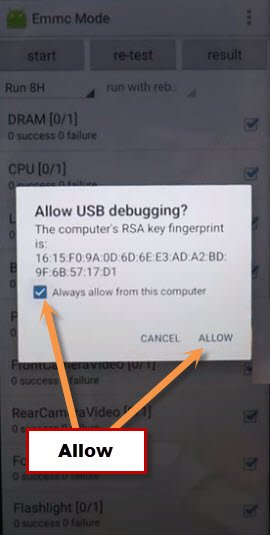
-You will have a popup screen on your phone of (Allow USB debugging), so, check mark “Always Allow from this computer”, after that, tap on “ALLOW” button. After allowing this option, the device will be detected by Samfw tool.
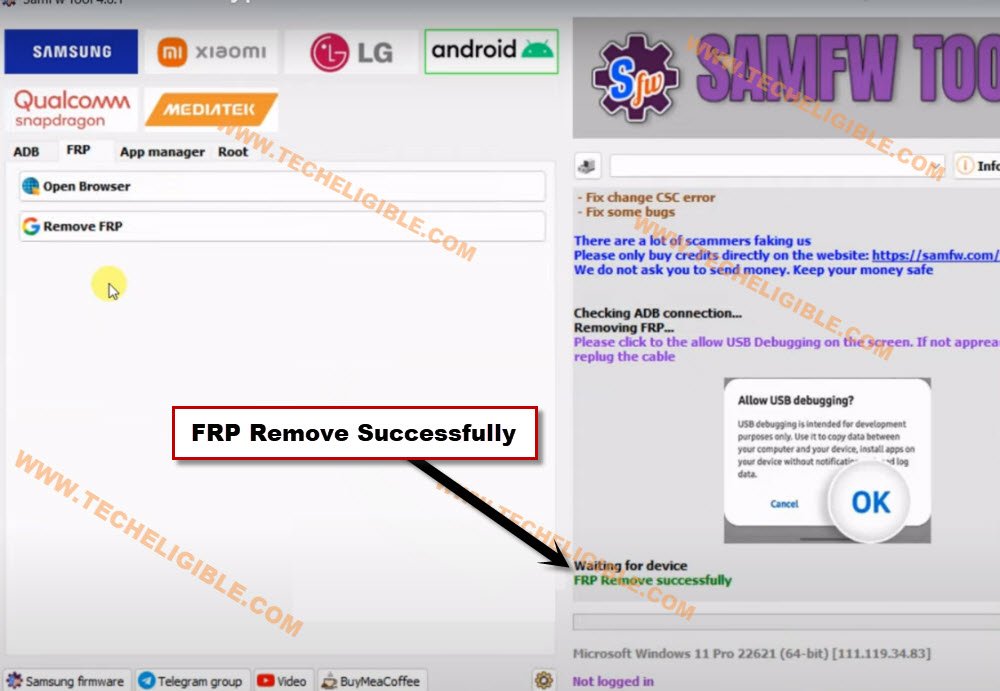
-Let the tool to work and bypass frp completely, do not disconnect your device from PC until you see (FRP Remove Successfully) message on tool screen.
-Congrats, you are all done with the help of using free (Samfw V4.8.1) tool. The device will auto restart, and you will be inside your device main HOME-SCREEN. Thanks for visiting us.
Method 2: Remove FRP Itel A60, A60s Without PC
We will fix FRP problem from this phone without using any PC and PC tool. This method has been applied successfully on (Itel A60 Android 12) device.
-First of all, remove “SIM card” if its inserted.
-Turn ON Itel A60 phone, after that, go to (Connect to WiFi) page to connect WiFi.
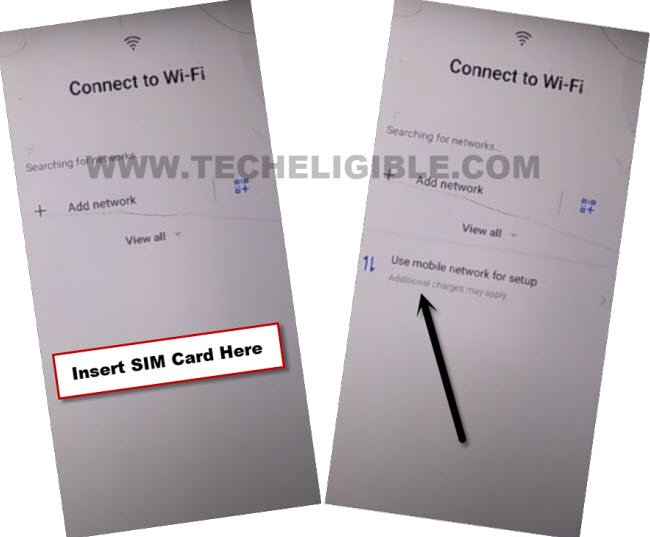
-Insert SIM card while your device is on a (Connect to WiFi) screen.
-You must have a (Use Mobile Network for Setup) option on that screen.
Note: If you do not see (Use Mobile Network for Setup) option right after inserting SIM card, that may be because of the SIM card DATA is not ON.
-Go to > Use Mobile Network for setup > Next.
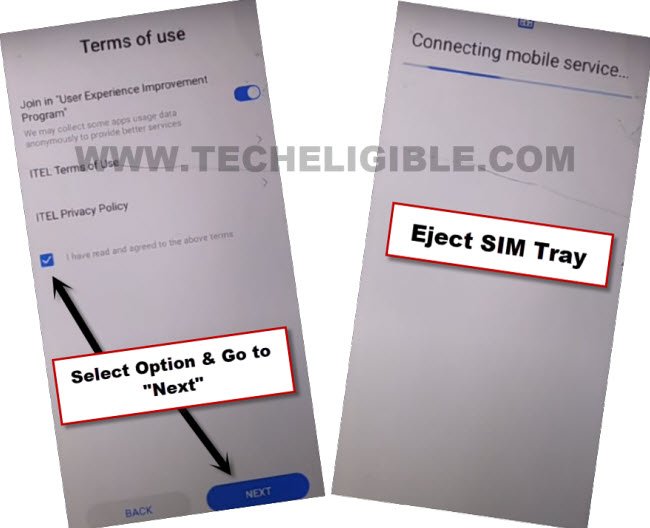
-Check mark option (i have read and agreed to the above terms), after that, tap to “Next” option.
-Eject SIM tray as soon as you see (Connecting mobile service) screen.
-Tap on “Ok” from the popup of (Can’t connect to the mobile data).
-You will get back on (Terms of use) screen, from there, tap to “Next”.
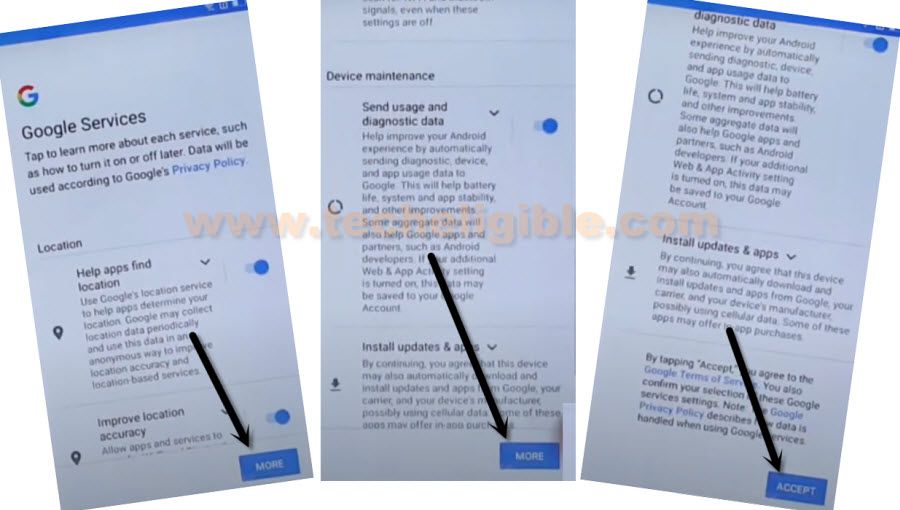
-After that, you will see (Google Services) screen, just hit on > More > More > Accept.
Setup new Screen Lock to Bypass FRP:
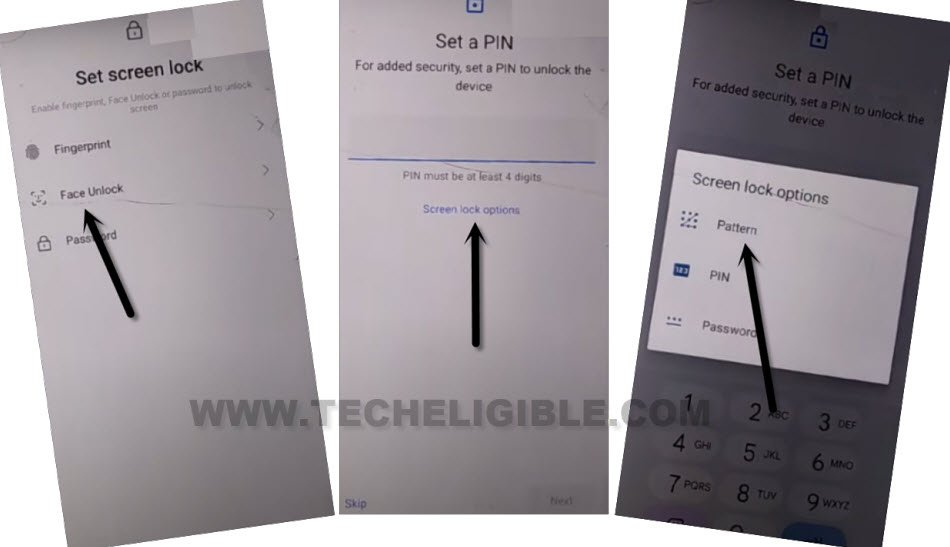
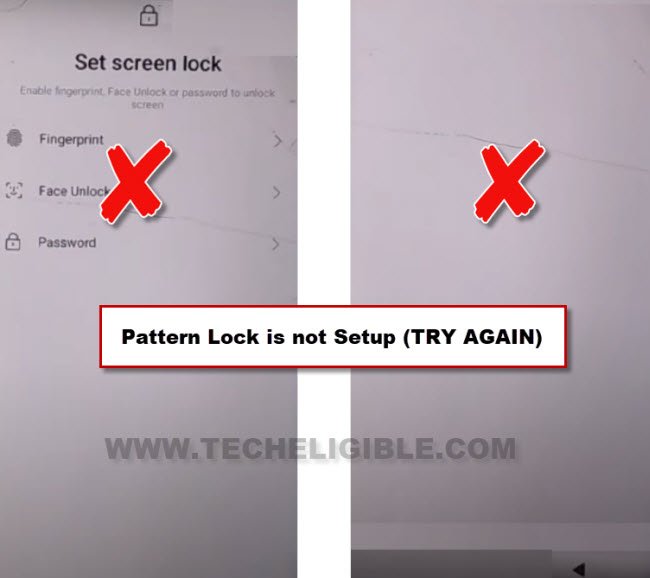
-From the screen of (Set Screen Lock), just tap on “Face Unlock” option.
-After that, hit on “Screen lock Options”.
-Select “Pattern” option from there.
Note: We have to setup new pattern lock on this device with multiple tries. Because, at first few attempts, you won’t be able to setup pattern lock, you just have to repeat pattern lock setup steps multiple times and follow steps too quickly as much as possible to Remove FRP Itel A60, A60s.
-Lets setup pattern by > Draw Pattern > Next > Draw Pattern > Confirm.
-If, after setup new pattern, you see (Blank Screen or Set Screen Lock) screen, that means, the pattern lock is not setup yet.
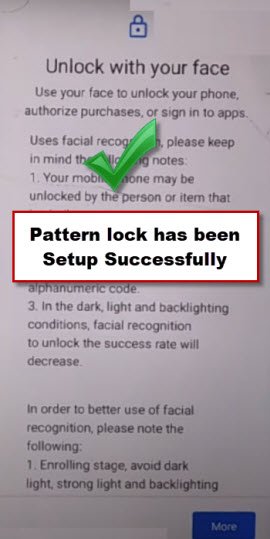
-You’ve to repeat above steps to setup pattern again, and keep repeating until the pattern is setup successfully, and you have a screen of (Unlock with your Face).
-Once you get a (Unlock with your Face), that means, the pattern lock has been setup successfully.
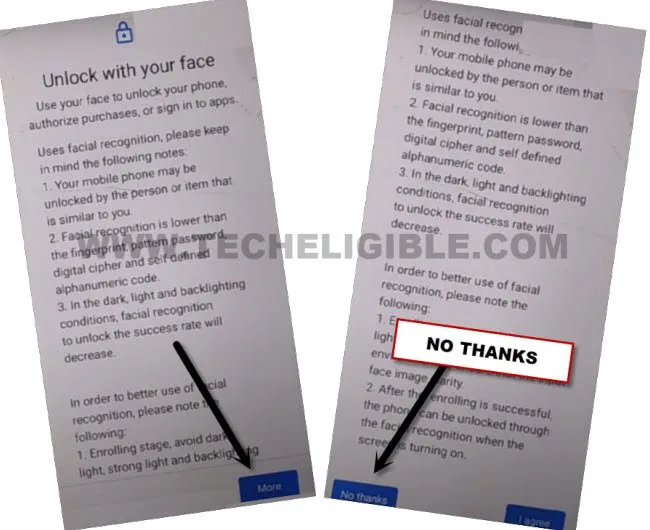
-From there, tap to > More > No Thanks.
-Press once the “Power Key” to only switch off screen just to check the pattern is working or not.
-Press again “Power key” to wake up the screen, and, you will have a lock screen there, draw your already setup pattern lock to unlock the screen. That means, the pattern is working very well.
-Long hold “Power” key, and restart your Itel device.
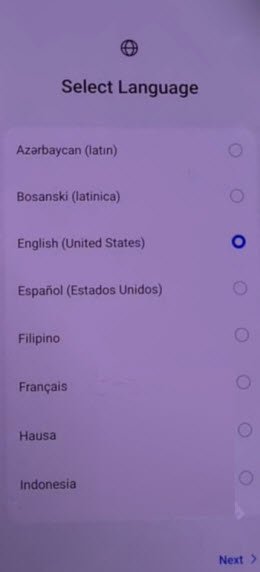
-After restarting is done, just draw pattern to unlock the screen. Now, you will be on (Select Language) screen. From there, tap to > Next > Next > Skip.
-You will be on (Connect to Wi-Fi) page.
-Insert SIM card, after that, tap on “Use Mobile Network for Setup”.
-Tap to “Next”, after that, check mark option of “i have read and agree”, and then, hit on “Next”.
-Wait on loading screen until its done, this may take 2-3 minutes to be done. After that, tap to “Don’t Copy”.
-Give your correct pattern lock on a (Verify pattern) screen.
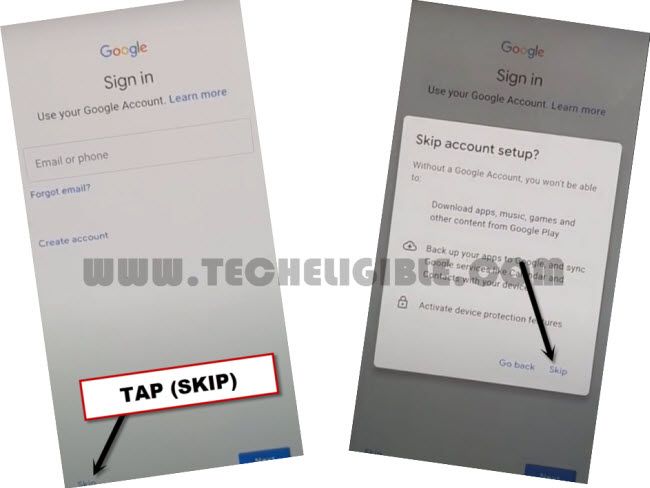
-From google sign in screen, tap to > Skip > Skip to Remove FRP Itel A60, A60s.
-On google services screen, tap to > More > More > Accept > Next > Next.
-Within few seconds, you will be inside your Itel main home-screen.

