How to Fix Custom Binary Blocked By FRP Samsung Galaxy J7 Prime
Fixing this issue of Custom Binary Blocked By FRP in Samsung galaxy j7 prime is very simple, and this error can easily be fixed using “ODIN FLASH” tool, only you have to download stock firmware, and then flash J7 Prime with Odin, that’s it.
Note: This method has been tested on Samsung Galaxy J7 Prime (G610F), Android 7.0.
Download Tools in PC to Fix Custom Binary Blocked By FRP:
-Download tools from below to fix Custom Binary Blocked By FRP issue.
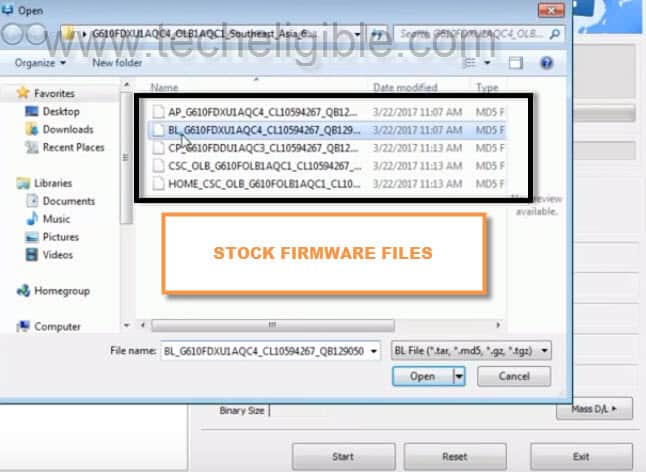
⇒ STOCK FIRMWARE J7 Prime (G610F) [DOWNLOAD]
-After downloading, extract “Stock Firmware”
Open Odin & Give Files Path:
-Open “Odin Software”.
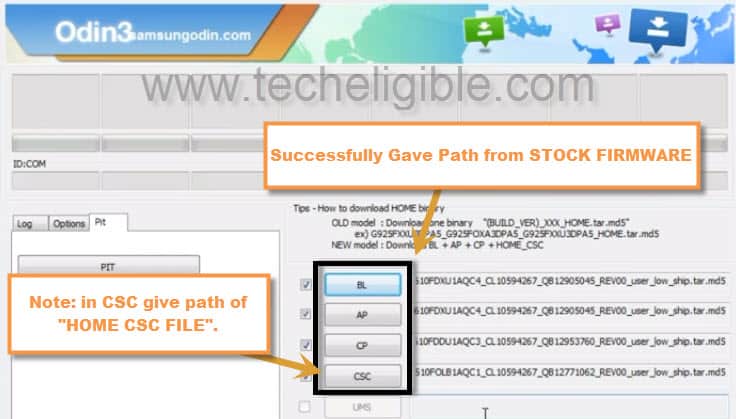
-Click on “BL” in Odin software, and give “BL FILE” path from downloaded stock firmware.
-Now Click on “AP” in Odin software, and give “AP FILE” path from downloaded stock firmware.
-After that, Click on “CP” in Odin software, and give “CP FILE” path from downloaded stock firmware.
-Click on “CSC” in Odin software, and give “HOME CSC File” path from downloaded stock firmware.
Note: Make sure, you are giving path in “CSC ODIN” of “HOME CSS File” instead of “CSC FILE”.
Connect Device to Computer:
-Switch Off J7 Prime.
-Go to download mode by Press & Hold (Power + HOME + VOLUME DOWN) buttons together until you see “Warning!” screen.
-Now press “Volume UP” key to enter in download mode.
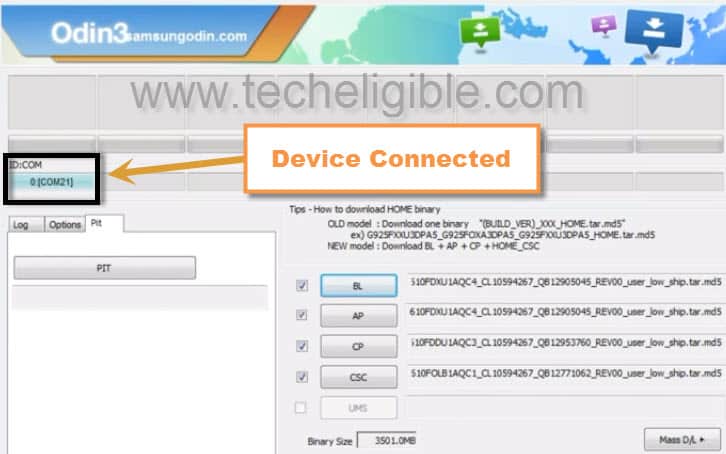
-Now connect your device to computer using “Micro USB Cable”.
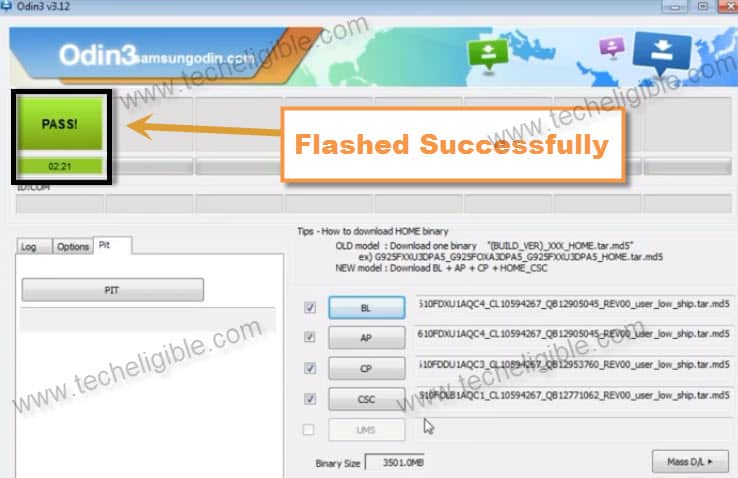
Note: In Odin software, the “ID COM” part will show you “COM ID” and it will convert to “BLUE COLOR”, this is proof your device has successfully been detected by “ODIN SOFTWARE”.
-Click on “START” button to flash and remove Custom Binary Blocked By FRP Samsung Galaxy J7 Prime.
-Wait until it finish, and you see “PASS!” sign in Odin software.
-After that, J7 Prime will auto reboot, and it will get into normal screen.
-Now you’ve successfully fixed Custom Binary Blocked By FRP lock.
-Only you’ve to remove and bypass google frp lock from your device for that click below.
Related FRP Methods: