
How to Bypass Google Account BQ AQUARIS U Lite Android Version 7.1.2
This is updated method of Bypass Google Account BQ AQUARIS U Lite Android 7.1.2, in this method we will download 2 android apk applications, and then we can easily add new google account to bypass frp lock permanently from BQ AQUARIS U Lite device.
Warning: This method is only for DEVICE OWNER.
Let’s Start to Bypass Google Account BQ AQUARIS U Lite:
-Switch on BQ Aquaris device.
-Connect “Wi-Fi” to your device.
-Go back to very first “Welcome Screen”.
-Now we have to enable “Talkback Feature” to Bypass Google Account BQ AQUARIS U Lite.
-From very first “Welcome Screen”, tap on “Vision Settings > Talkback > Turn On Talkback feature.
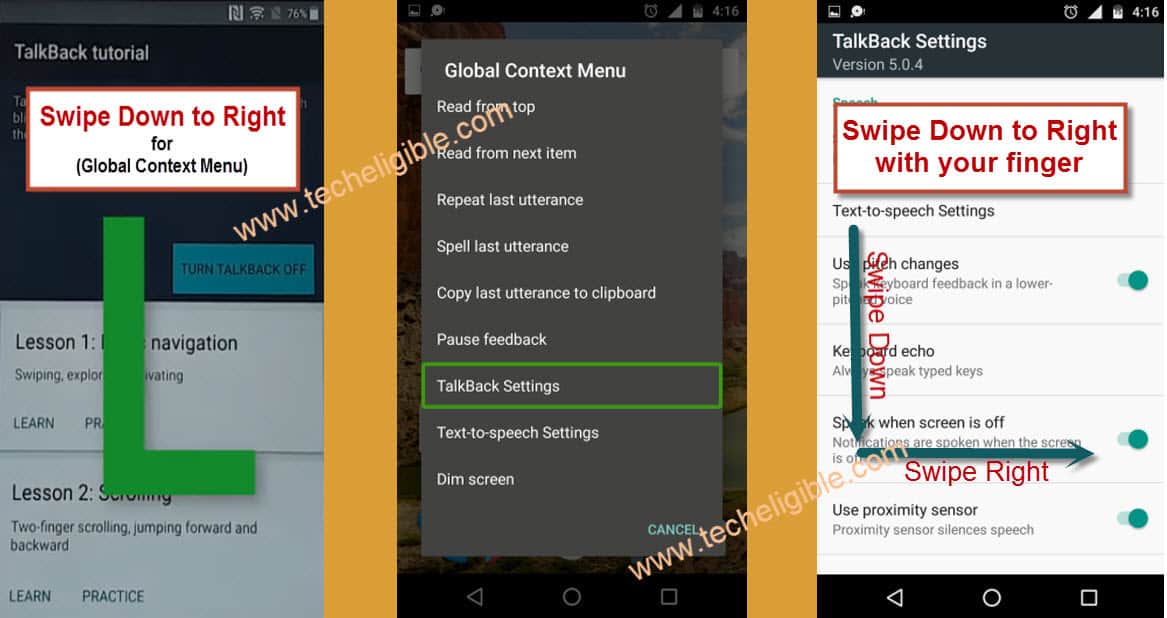
-After that, you will have “Talkback Tutorial” screen on your BQ AQUARIS device.
-Draw “L” on your screen to bring “Global Context Menu”.
-Once global context menu screen pops up on, double tap on “Talkback Settings”.
-Now we need to turn off talkback.
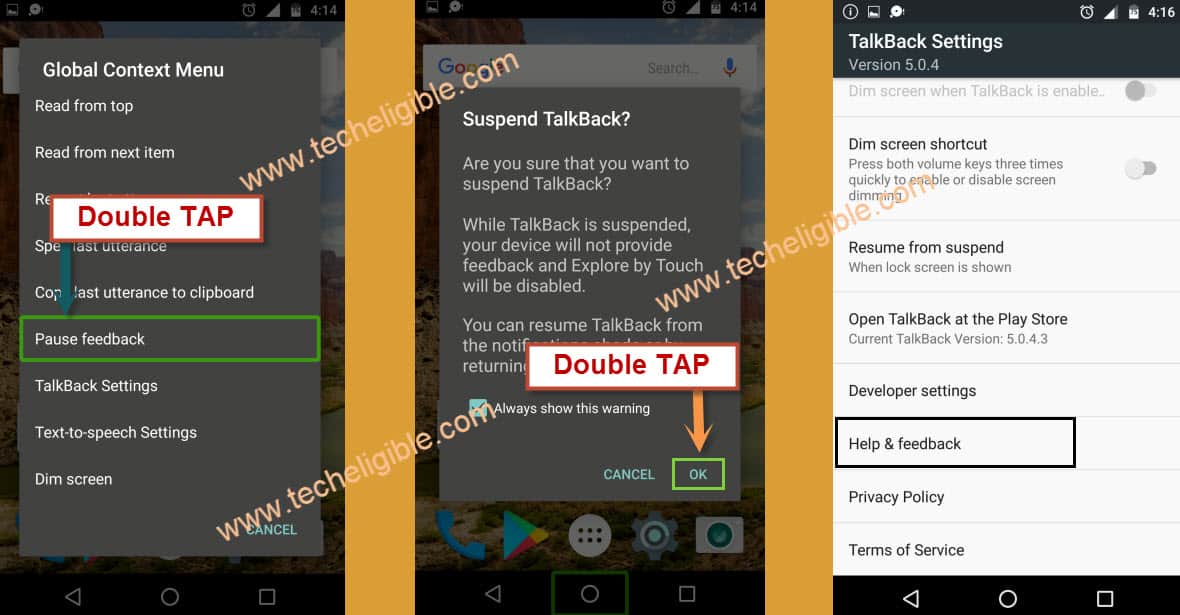
-From “Talkback Settings” screen, you have draw “L” again to bring global context menu, as you did before.
-Now double tap on “Pause Feedback”, and then tap on “OK”.
-Now you’ve successfully suspended talkback feature.
-From “Talkback Settings” screen, go down, and then tap on “Help & Feedback”.
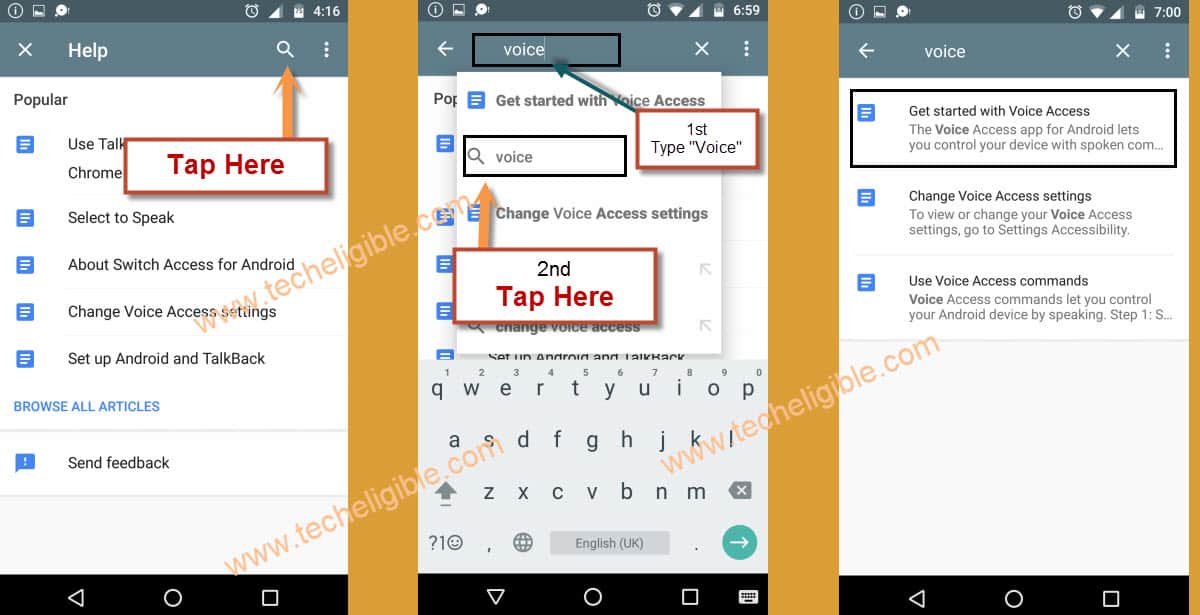
-Type “Voice” in search bar and then search it.
-From result, select “Get Started with voice access”.
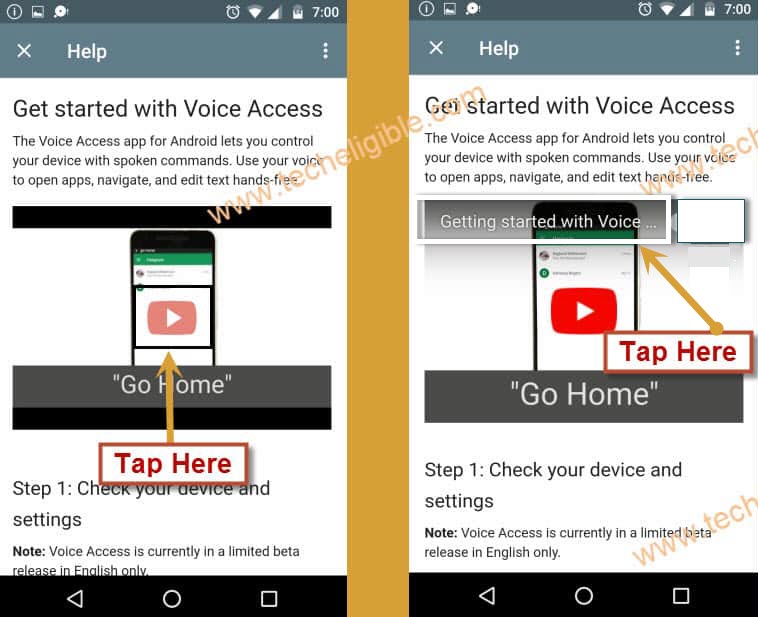
-Now you will be able to see “YOUTUBE VIDEO” on your screen.
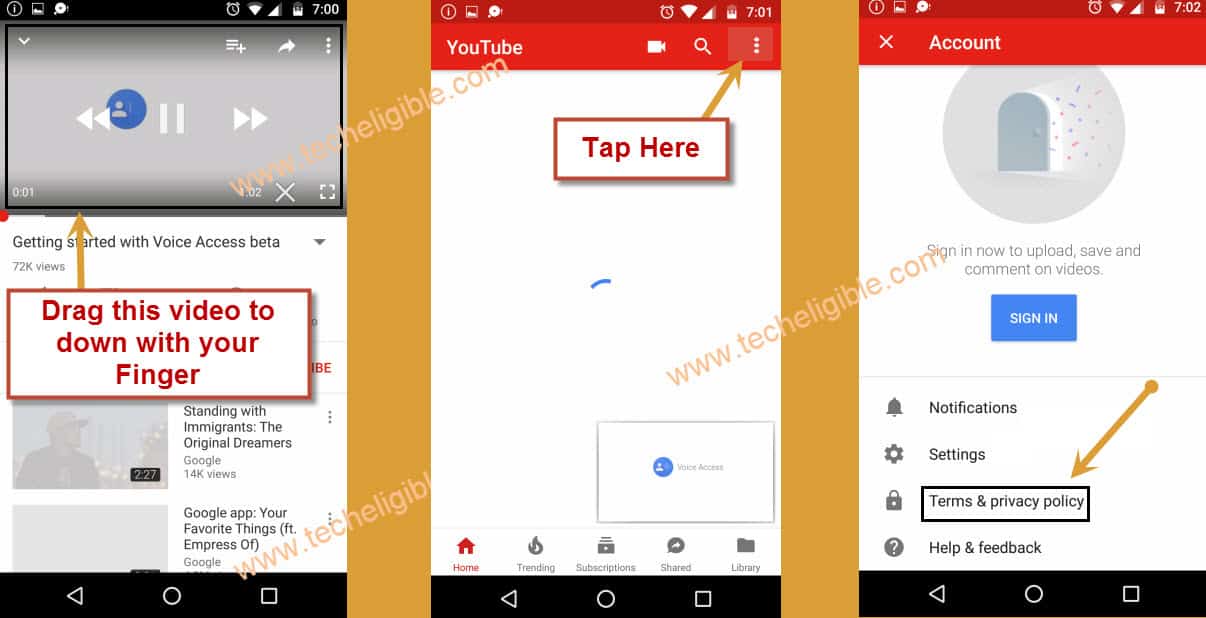
-Tap on “Youtube Video”, and wait few second until you get extra sharing options.
-After that, tap on “Video Title”, this would lead you to the “Youtube.com” website.
How to Access to Chrome Browser:
-Drag down youtube video.
-Tap on “Profile icon” from top right corner.
-Select “Terms & Privacy Policy”.
-Now you will see a “chrome browser” screen.
-Just tap on “Accept & Continue”, and after that select “No Thanks”.
-Congratulation, now you’ve successfully accessed to “Chrome Browser”, we need to download android frp tools to Bypass Google Account BQ AQUARIS U Lite.
Download BQ AQUARIS U Lite FRP Tools:
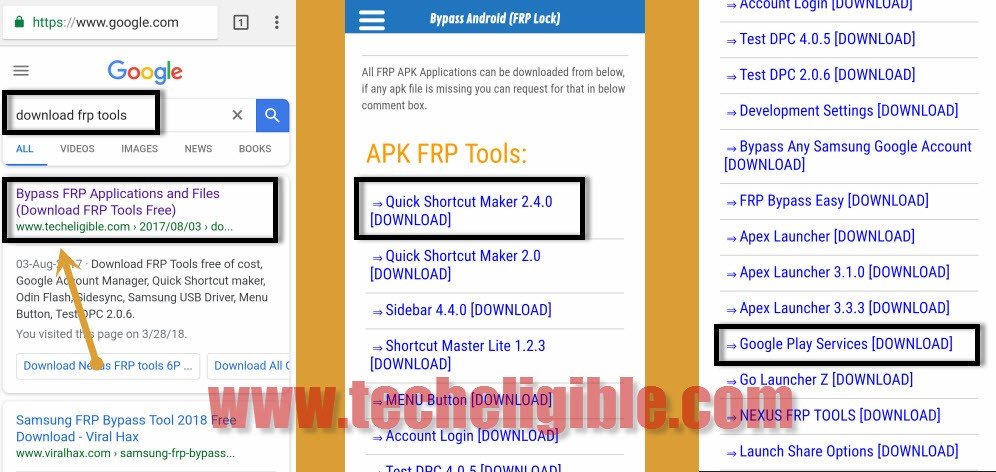
-Type in search bar “Download FRP Tools Techeligible“.
-Go to very first search result, that is according to “techeligible.com” site.
-Download from there “Quick Shortcut Maker” and also “Google Play Services” applications.
-Once downloading finish of both apk apps.
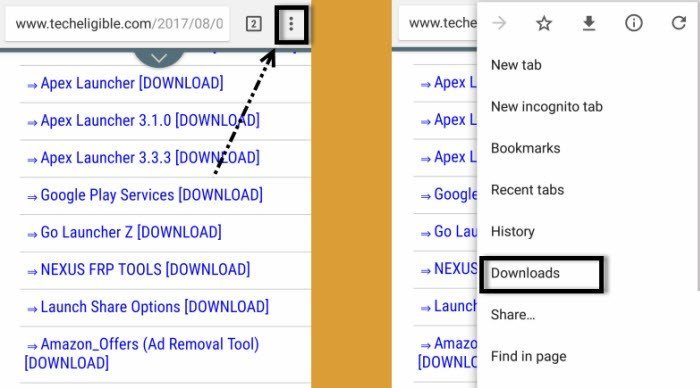
-Tap on “3 dots” from top right corner, and then select “Download”.
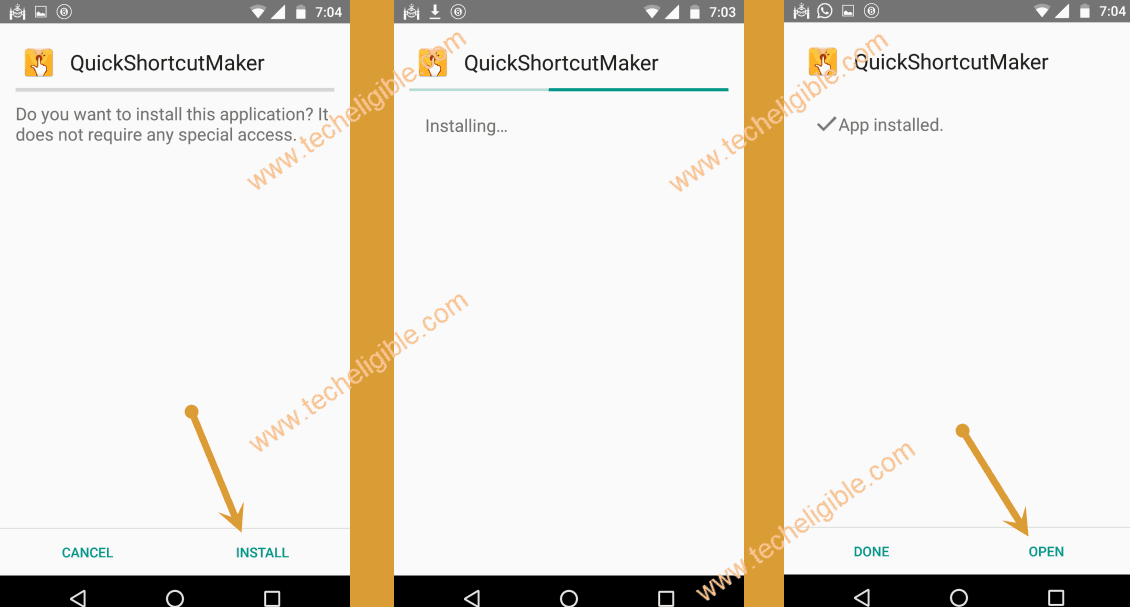
-Now tap on “Quick Shortcut Maker” app to install it.
-You will see an “Installation Blocked” popup, just tap on “Settings” from that popup screen.
-Now you need to enable “Unknown Sources” option from there to easily install apk applications.
-Go back to “Download Folder” by tapping on “Back key”.
-Now tap on “Quick Shortcut Maker” app, and then tap on “Install”, after that tap on “OPEN” to launch this app.
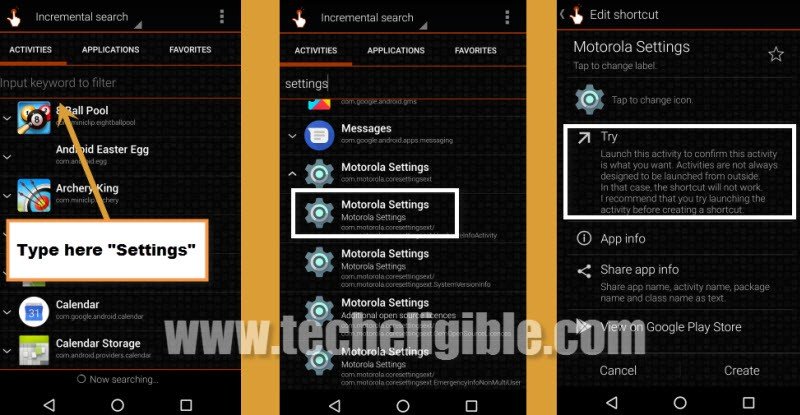
-Now in quick shortcut maker app, there is search bar.
-Type in search bar “Settings”, and then go to “Settings”.
-Now select very first “Settings” from list, after that tap on “TRY’.
-You will be redirected to the “Settings” screen.
-Go to “Security > Device Administrator > Android Device Manager> Deactivate this device administrator.
-By tapping on back key, go back to “Settings”.
-Go to “APPS” from there.
-Tap on “3 dots” from top right corner, and select “Show System”.
Disable Google Account Manager & Google Play Services:
-Find “Google Account Manager” from apps list.
-Go to > Google Account Manager > Disable > Disable APP.
-Now Find “Google Play Services” from apps list.
-Go to > Google Play Services > Disable > Disable APP.
-Now you have successfully disabled both (google account manager + google play services).
-Go back to “Quick Shortcut Maker” app by tapping on back key several times, you have to get back where we typed “Settings”.
-Now type in quick shortcut maker search bar “CHROME”, and then tap on “CHROME icon”.
-Now select very first “CHROME” from chrome list, after that tap on “TRY” (See Below Image).

-After that, you will taken to the “Download frp tools” page.
-Simple tap on “3 dots” from top right corner, and then go to “DOWNLOAD”.
-Now you are in “download folder”.
-Tap on “Google Play Services” app, and then tap on > NEXT > INSTALL > DONE.
-Go back to “download folder”.
-Tap on “Quick Shortcut Maker > Install > Open.
-Once you accessed back to “quick shortcut maker”, type in search bar “Settings”, and then tap on “Settings icon” to collapse down.
-Now select very first “Settings” from the list of settings, and then tap on “TRY”.
-Now we can easily add new google account to Bypass Google Account BQ AQUARIS U Lite.
-From settings, go to > Account > Add Accounts > Google.
-Add your any valid gmail account to Bypass Google Account BQ AQUARIS U Lite.
-Once you signed in successfully, you will have some options there to allow, allow for sync, so you have to allow all options of “calendar, Gmail, Contacts”.
-Go back to “Settings” by tapping on back key.
-Now go to “APPS”.
-Enable again “Google Account Manager + Google Play Services” applications.
-Reboot BQ AQUARIS by pressing “Power Key”.
-Congrats, now you have successfully bypassed google verification from BQ Aquaris device, now complete initial setup to access your device.