
Remove FRP BQ Aquaris U2 Android 8, 9 with New Method
Remove FRP BQ Aquaris U2 Android 8, Android 9 without talkback or PC or any language change process, with this latest one, you are required only a WiFi connection and PIN Locked SIM, this PIN locked sim can easily be prepared using any other android phone, and off course, everyone has SIM, so nothing new, just follow steps and reach BQ U2 device homescreen without any restrictions.
Remember: This method is only for device owner and for educational purpose only.
Let’s Begin to Remove FRP BQ Aquaris U2:
Step 1: Turn on device & Connect WiFi, go back to first “Welcome” homepage.
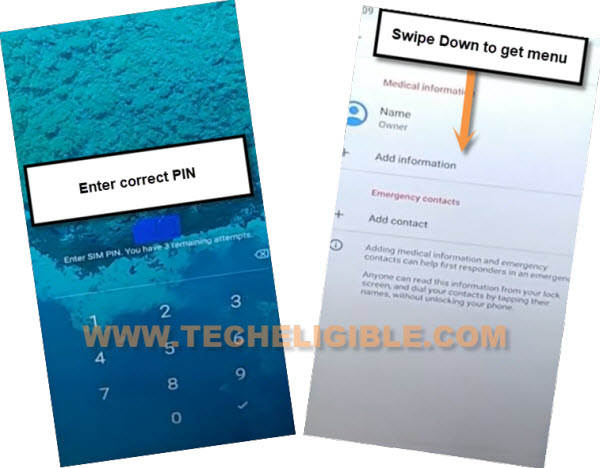
Step 2: Tap on “Emergency Call”, and double hit on “Emergency Information”, after that tap on “Pencil” icon from top corner.

Step 3: Setup PIN code on your SIM card using any other android device.
Step 4: Insert that prepared PIN Locked SIM card in BQ Aquaris U2.
Step 5: Enter correct PIN code to unlock.
Step 6: Swipe down from top to get top menu bar, and this will appear easily.
Step 7: Swipe left the (Not Signed in) message.
Step 8: Tap to > Settings gear icon > Exclamation Sign.
![]()
Step 9: Hit on > Browser App > Opening Links.
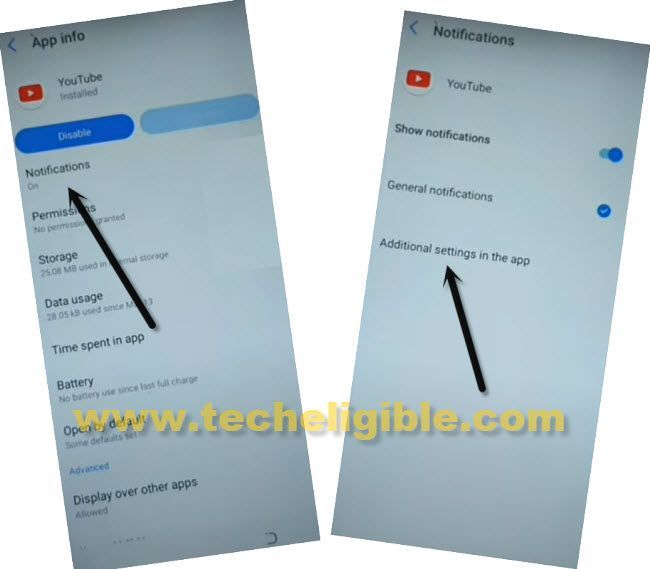
Step 10: From list of app, just scroll all the way down, and tap on > Youtube > Youtube icon.
![]()
Step 11: Go to > Notifications > Advanced > Additional Settings in the app.
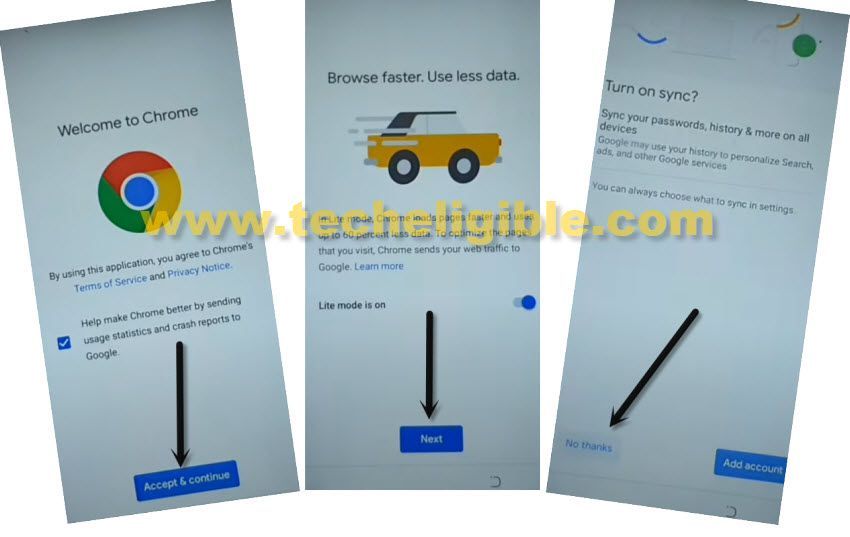
Step 12: Hit on > About > Youtube Terms of Service.
Step13: Accept & Continue > Next > No Thanks.
Download FRP Tools:
Step 14: We have to download and install small sized frp bypass tools in BQ device to easily Remove FRP BQ Aquaris U2.
Step 15: Search in browser “Download FRP Tools“, and visit our website searched result.
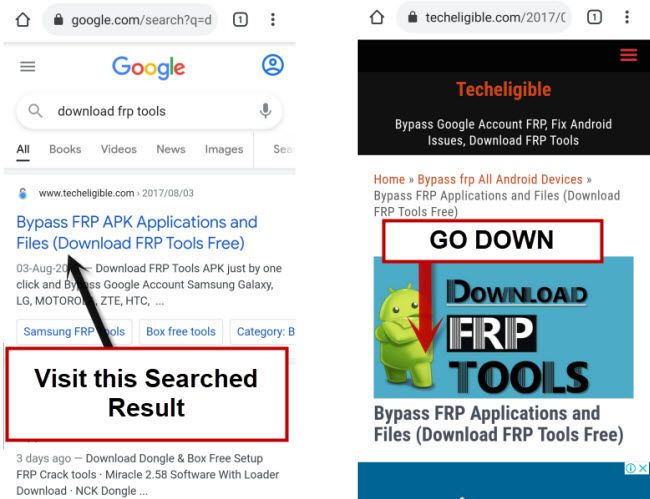
Step 16: Download an app “Google Account Manager 9“.
Step 17: You will receive an “OPEN” link at the bottom after downloading process completes, just hit on that “OPEN” link.
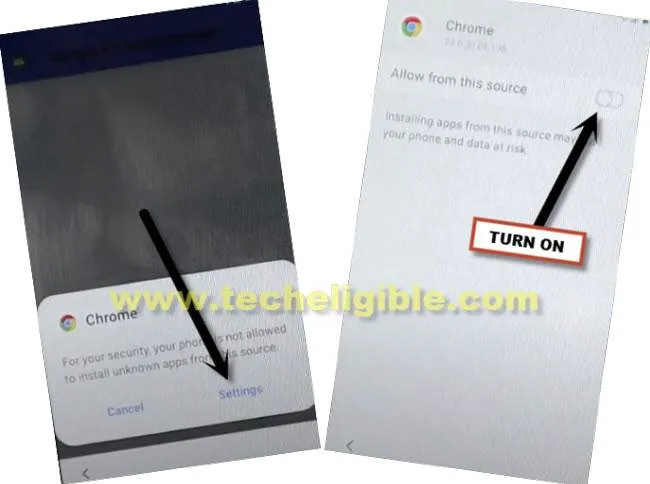
Step 18: Tap on “Settings”, and enable option “Allow from this source”, after that tap on “Back Arrow”.
Step 19: Download another app “Account Login“.
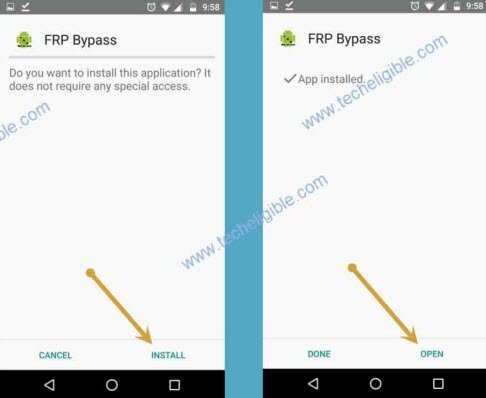
Step 20: Tap on “OPEN” link again which will appear after downloading done.
Step 21: Tap > Install > Done.
Step 22: Tap > Account Login > Install > Open.
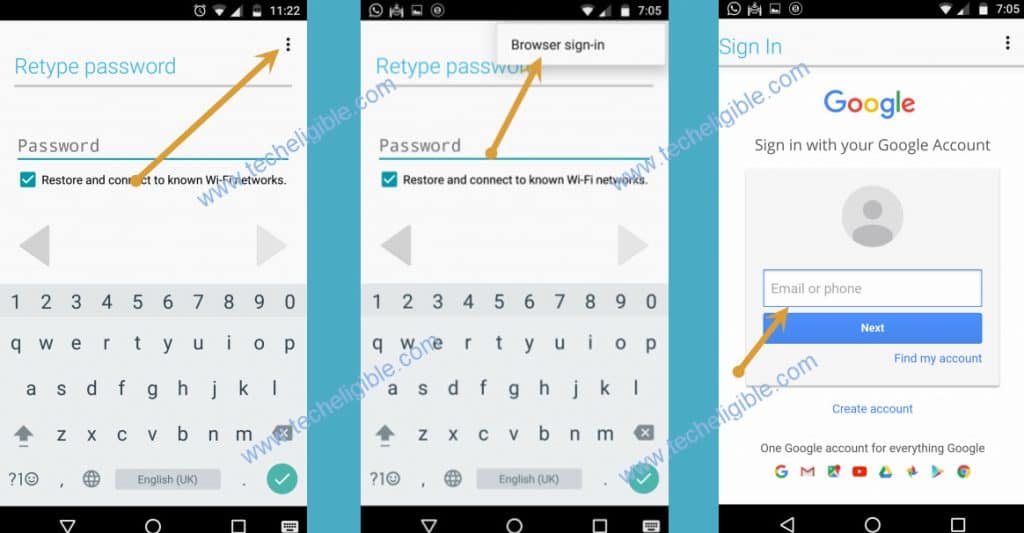
Step 23: Add your Gmail account by tapping “3 dots” from top right corner & tap “Browser Sign-in”, and sign in with your active Gmail Account to Remove FRP BQ Aquaris U2.
Read More: