
How to Bypass FRP Galaxy A9 (2018) Android 10 [New Method]
If you are facing a frp issue, then you can Bypass FRP Galaxy A9 easily just using 1 free tools, which is (SamFirm Tool), with this free latest version software, we can resolve our issue, and will login with our new Gmail ID, so to follow steps carefully, just stay with us.
Note: This method has been applied successfully on a device Samsung Galaxy A9 (2018) Android 10.
Let’s Start to Bypass FRP Galaxy A9 (2018):
Before starting this process, you are required below list of tools.
⇒ SamFirm Tool V1.4.3 [Download]
⇒ Latest Samsung USB Driver [Download]
⇒ Other Android Device.
⇒ OTG + USB Cable.
Note: Above 2 tools (Driver + Samsung FRP Tools) will be used for PC.
1. Download & install (Samsung USB Driver) in your computer.
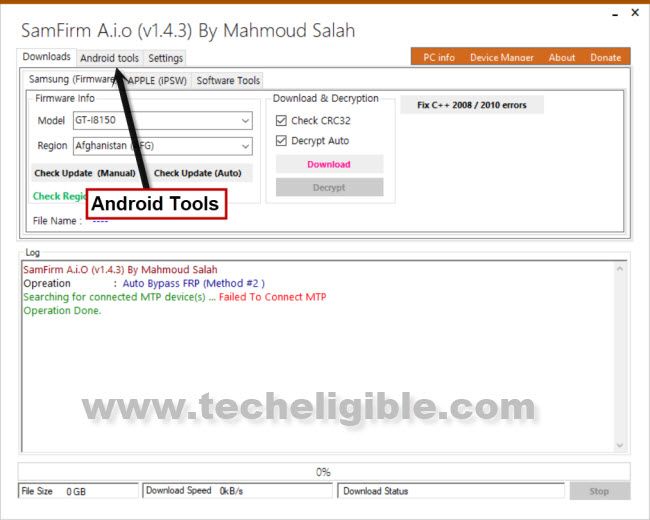
2. Open (Samfirm Tool) & go to “Android Tools” (See below image).
3. You have to connect WiFi first in Galaxy A9, otherwise you won’t be able to complete this process.
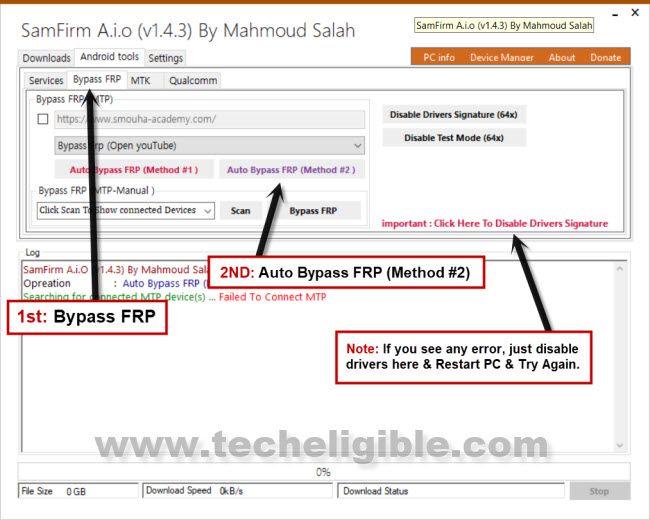
4. Now from SamFirm tool, just tap to > Bypass FRP > Auto Bypass FRP (Method #2).
Note: In case of any error, please click to “Disable Driver Signature” button, and then restart PC, and try again.
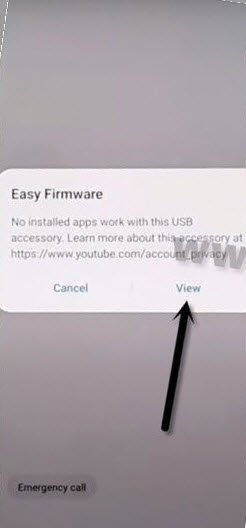
5. Tap on “View” to access YouTube website.
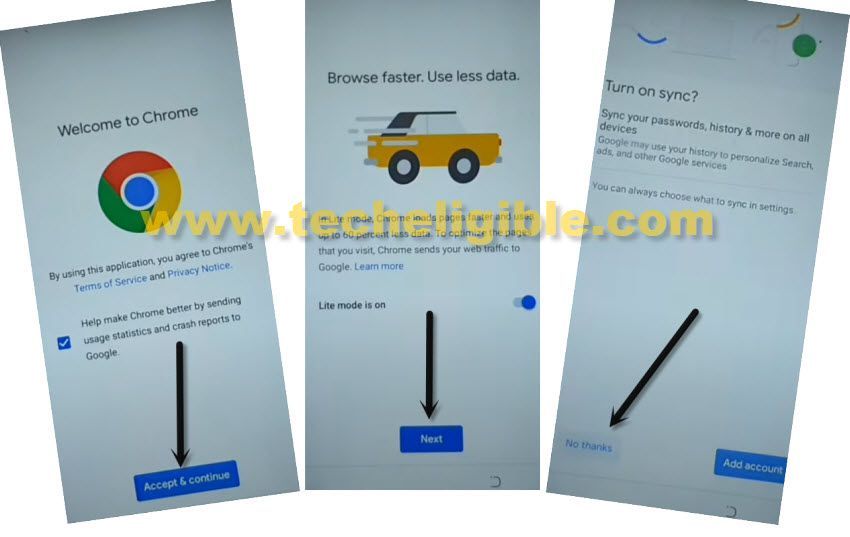
6. Hit on > Accept & Continue > Next > No Thanks.
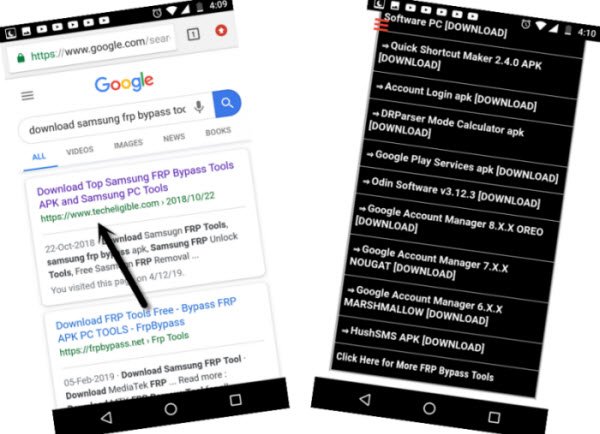
Open Google App:
7. Search in top search box “Download Samsung FRP Tools“, and go to our website searched result. (For help, see below image).
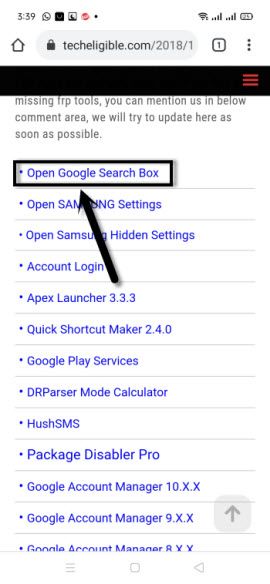
8. Scroll down and tap on “Open Google Search Box”.
9. Search in google search box “Galaxy St”, and tap on “Galaxy Store” icon from the searched result.
10. select “i have read and agree….”, and then tap to “Agree” option.
11. Tap to > Update > OK.
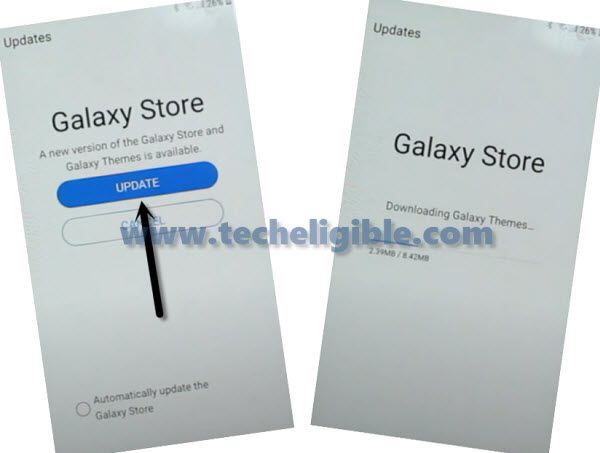
12. Once updating process completes, you will get back to first (Let’s Go) screen.
Access Back to Google Search BOX:
13. We have to go back to google search box, and will open again (Galaxy Store), we are going to repeat all above steps.
14. Connect phone with PC, and Open “SmpFirm” tool, and using above lines, just receive the msg “View”.
15. Tap to > View > Accept > Next > No Thanks.
16. Search “Download top samsng frp tools“.
17. Hit on “Open Google Search box“.
18. Search & Open “Galaxy Store”, this time you wont face any updating screen.
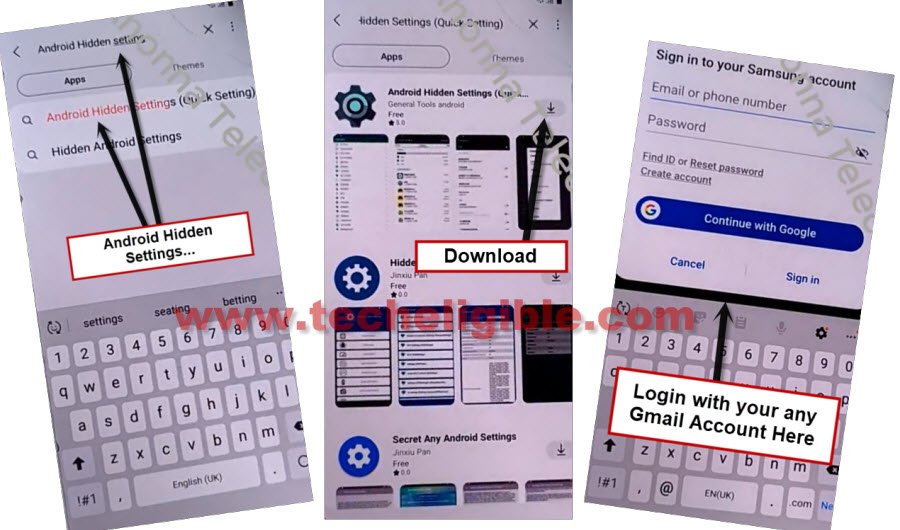
19. In Galaxy Store, search there “Hidd Settings”, and then tap on the searched result “Android Hidden Settings (Quick Settings)”
20. Tap on “Download icon”, and then you will see Google Sign in screen there, just enter your any valid Gmail Account to sign in and for Bypass FRP Galaxy A9.
21. After entering Gmail ID and Pass, just hit on “Sign in” button.
22. Wait until downloading process done, after that, open “Android Hidden Settings (Quick Settings)”.
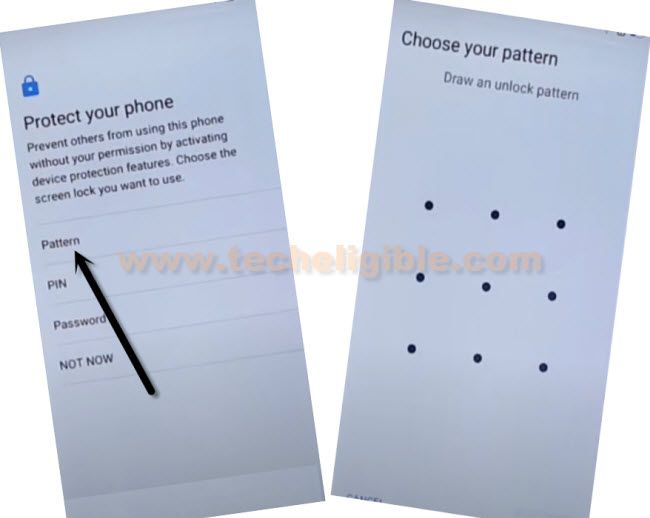
22. Tap “search icon” from top right corner, and search there “Screen Lock”, and then tap on “Choose Screen Lock” from searched result.
23. Setup new pattern by hitting on > Pattern > Continue > Set new pattern lock.
24. Get back to new “Let’s Go” screen by hitting at back arrow several times.
25. Finish initial setup, and you will not receive any previously synched Gmail account, because you have already added new google account for Bypass FRP Galaxy A9 (2018) Android 10.
READ MORE: