
2 Methods to Bypass FRP Galaxy S9, S9 Plus (Android 11, 10)
Bypass FRP Galaxy S9, S9 Plus Android 11 and Android 10 versions with below latest and working methods, follow any one method according to the device android version, and we hope, this will work on your device to bypass frp completely, after that you can setup your new security PIN as well as new google account, this method is only for device owner.
Warning: This method is only for device owner and for educational purpose only.
| Method 1: Remove FRP Samsung S9, S9 Plus [Android 11] |
| Method 2: Remove FRP Samsung S9, S9 Plus [Android 10] |
Method 1: Bypass FRP Galaxy S9/S9+ Android 11:
You can easily bypass google account on Samsung Galaxy S9, S9 Plus Android 11 without any paid frp tool, this is the latest frp method of the year, you can easily remove frp from the device using a new (Alliance Shield X) app, because we will transfer account through this app.
Required Tools:
Arrange below tools before starting this method, you are required one more android device to accomplish this process, otherwise you won’t be able to remove frp.
1/ WiFi Connection
2/ Samsung Account (Gmail Account)
3/ Any Other Android Device.
4/ Easy Samsung FRP Tools
5/ PC or Laptop
Let’s Start Method 1:
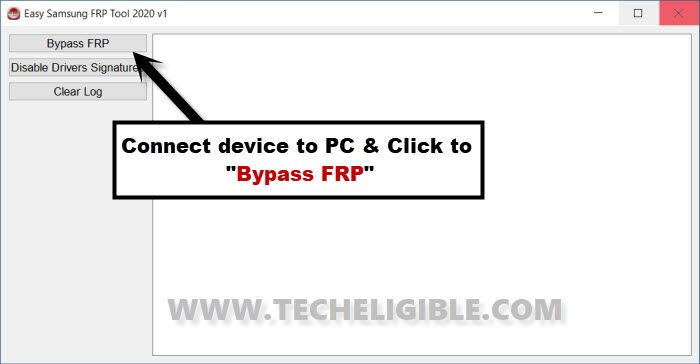
–Download & Open Easy Samsung FRP Tools in PC [Click here to Download].
-Connect WiFi, and then connect the device with PC using Data cable. (Make sure the Device is turned on).
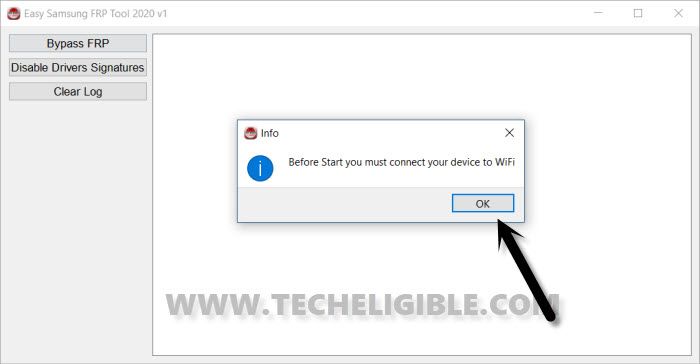
–Once the device is detected by the PC, just hit on “Bypass FRP” button from the software, and from the popup window, hit also on “OK”.
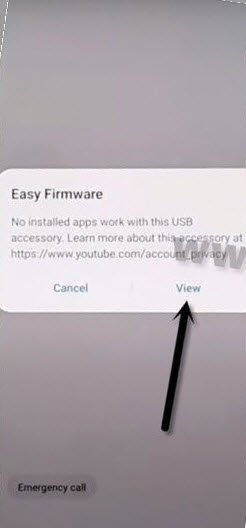
-You will receive a popup box of (Easy Firmware), tap to “View”.
Note: If you don’t receive (View) option on your device screen, follow steps here to fix this launching browser issue.
–From the Chrome screen, tap to > Accept & Continue > Next > No Thanks.
Open Directly Samsung Galaxy Store:
-Search in browser “Download Top Samsung frp tools“, and access to our website searched result.
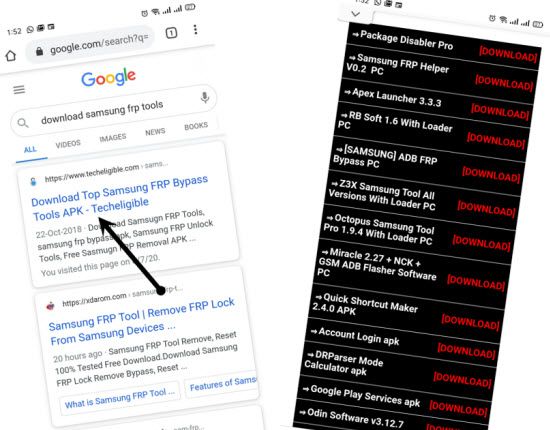
-Go down and tap on “Open Samsung Galaxy Store“.
-Tap to “Cross icon” to close the popup message, and then hit on “Centered Option”.
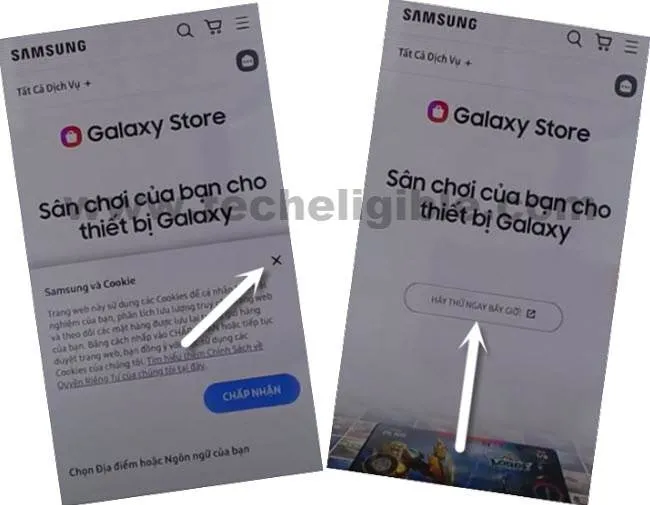
-Check mark the option “Get new and special offer…”, and then hit on “Agree”.
-Check mark the option “Automatically update the Galaxy Store”, and then tap to “Update”.
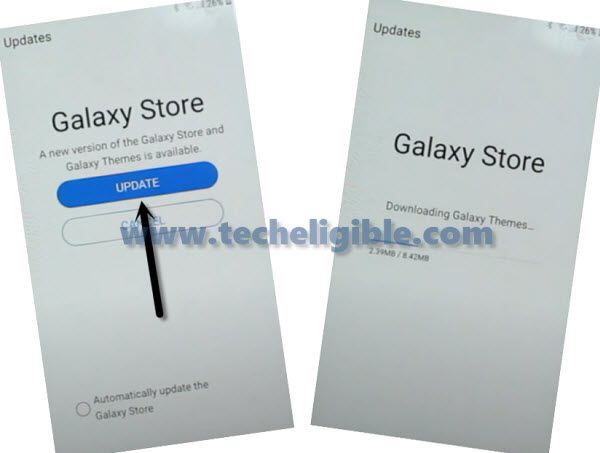
-Tap on “Centered Option” again by following below image to open Galaxy Store app.

-Tap to “Search icon” from top corner, and search there “S9 Launcher”.
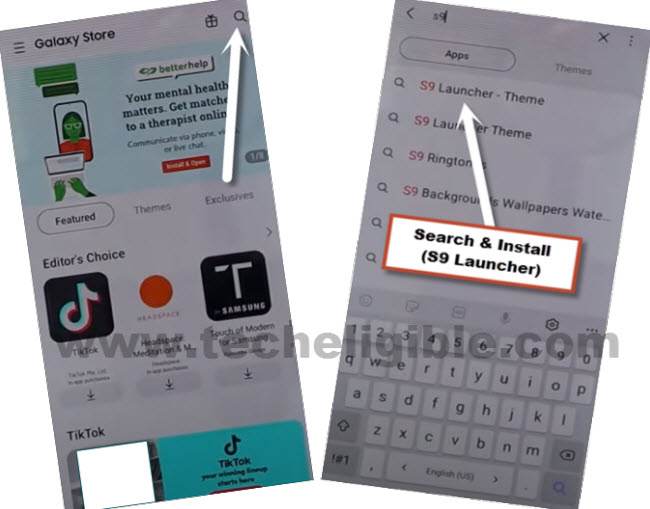
-Install & Open “S9 Launcher – Theme” app.
Note: Before the installation starts, you will have to sign in with your Gmail Account.
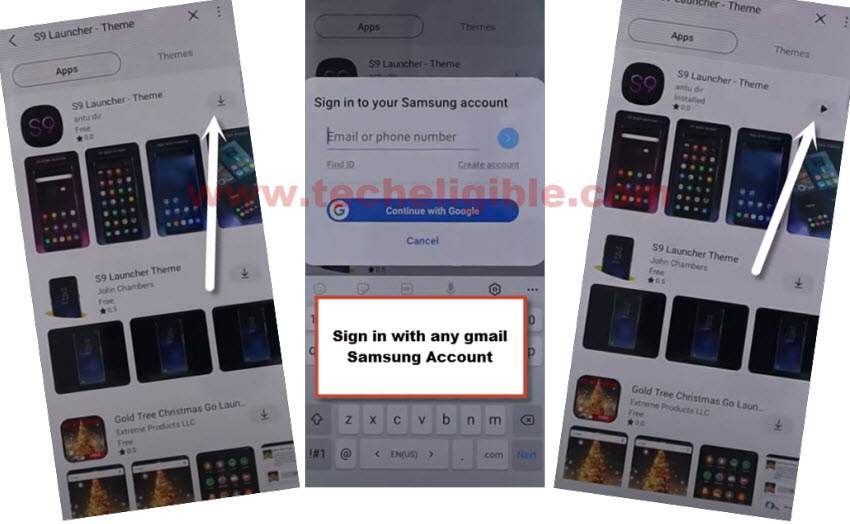
-Congrats, you have reached to your device home screen, but still plenty of steps remaining to bypass frp completely.
Follow Steps in Other Android Device:
We will add same Samsung account in other android device, and also will install a (Alliance Shield X), for doing all these, follow steps below.
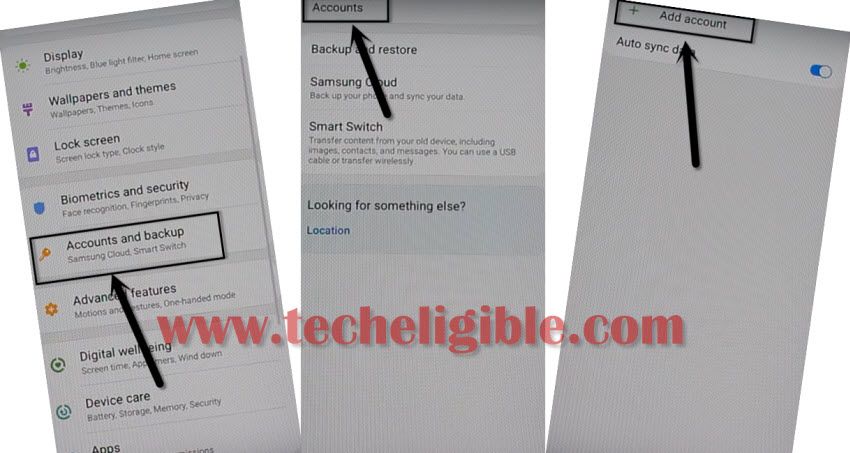
-Go to > Settings > Accounts & Backup > Accounts.
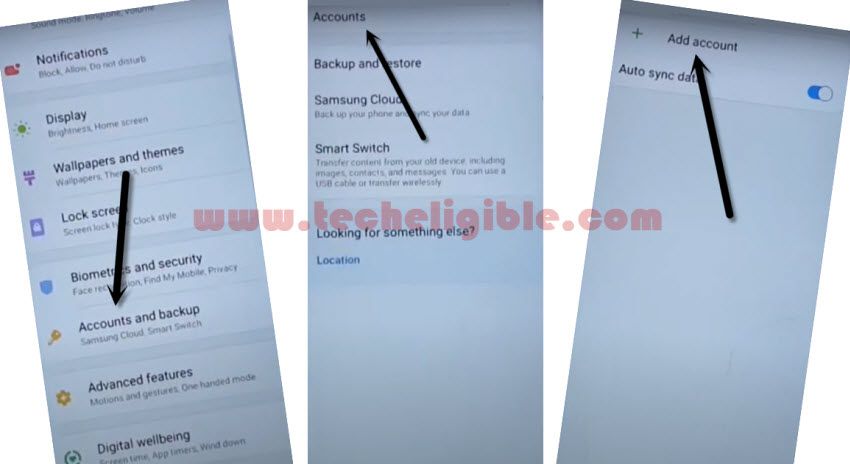
-Add your Same (Google & Samsung Account) which you have already added in your Galaxy device.
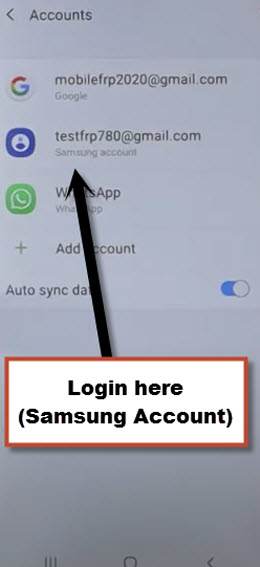
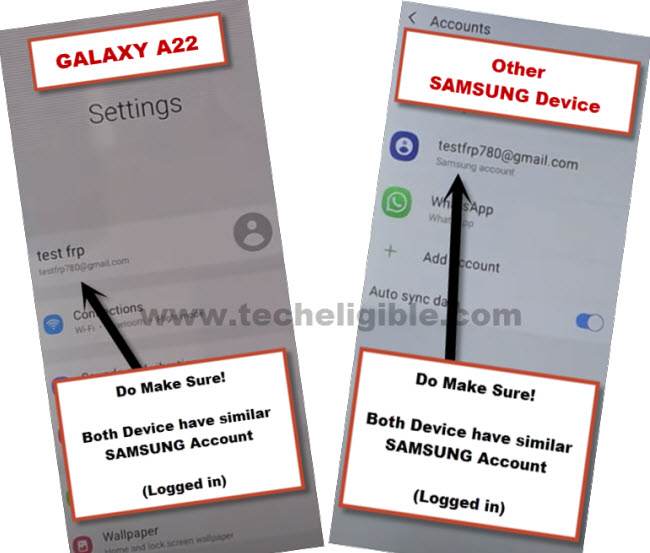
Note: Make sure, your both android devices are on same WiFi network and on Same Samsung Account.
-Open “Play Store” in other android device, and install “Alliance Shield X” app.

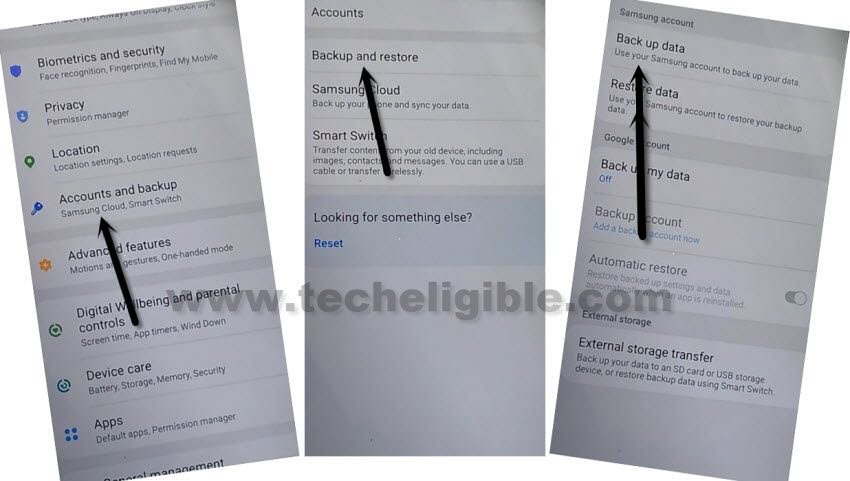
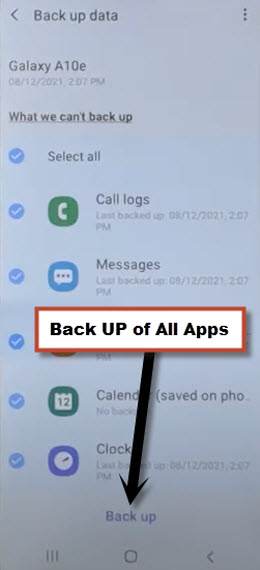
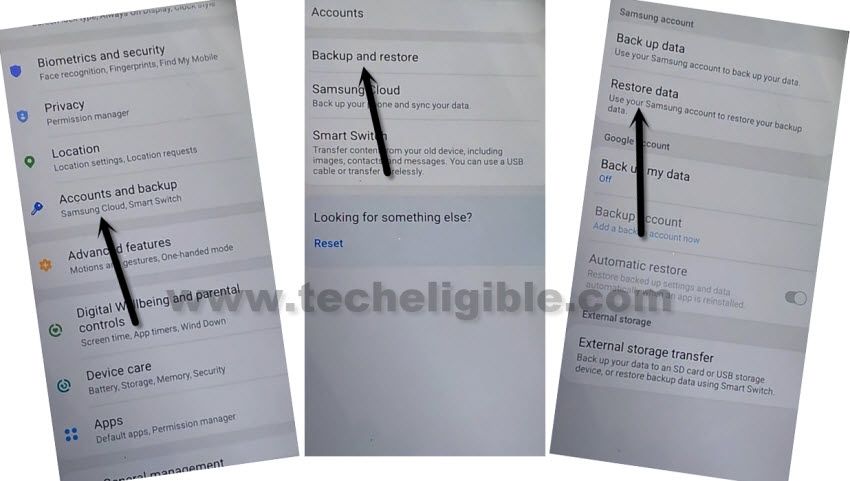
-Go to > Settings > Accounts and Backup > Backup And Restore > Back up data.
-Tap to “BACKUP UP” button from below to backup all your apps in Samsung Account, which is already signed-in in your frp locked device.
Follow Steps in Galaxy Device:
-In Samsung Galaxy S9, S9 Plus (frp Locked) device, we will restore all data.
-Once more time, do make sure, your both devices are on same Samsung Account, for that, we will check in Galaxy S9, S9 Plus as well, to check that, just go to “Settings”, and the top you will have your signed in (Samsung Account), just match that with your other android device.
-From (Settings), just go to > Accounts & Backup > Restore Data > Update.
-Wait for few minutes, this will take time in updating all apps.
-Again hit on > Restore Data > Select all apps > Restore > Install, now wait until restoring data process completes.
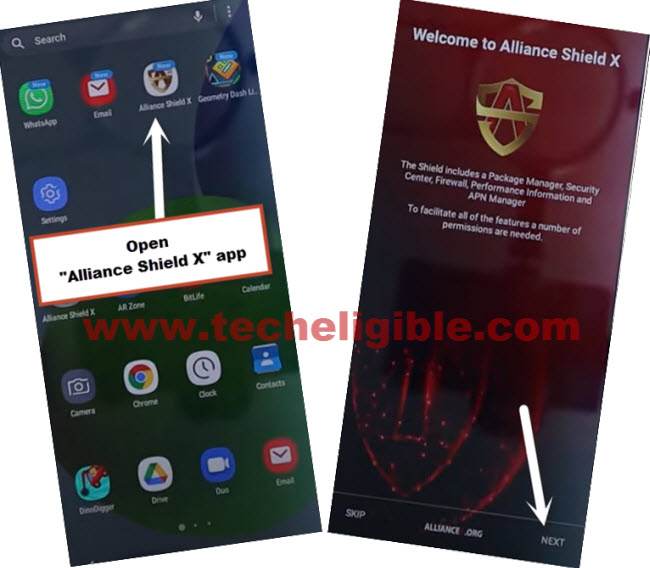
-Open your device MENU, and open “Alliance Shield X” app from there, this app will be there, because we have already restored that from our other device through (Samsung Account).
-From the (Alliance Shield X) app, tap to > Next > Next > Next > Got it.
-Register your new account in (Alliance Shield X) .
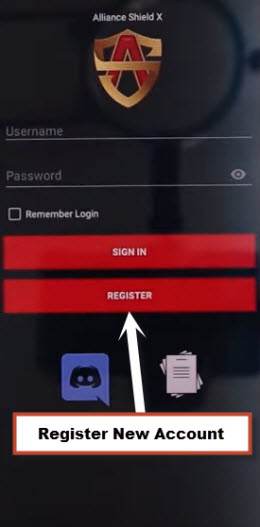
-Sign-in with your registered account in (Alliance Shield X) app.
-Type any “Device Name”, and then tap to “Next”.
-Turn on “Device Admin”, and hit on > Activate > Next.
-Turn on “Knox”, and select option (i have read and agree…), and tap to > Confirm > Next > Finish.
-Go to “App Manager”, and tap to “Close” from popup box.
-Hit on “Search icon” from top corner, and search there “Mode”, and tap to “Service Mode”.
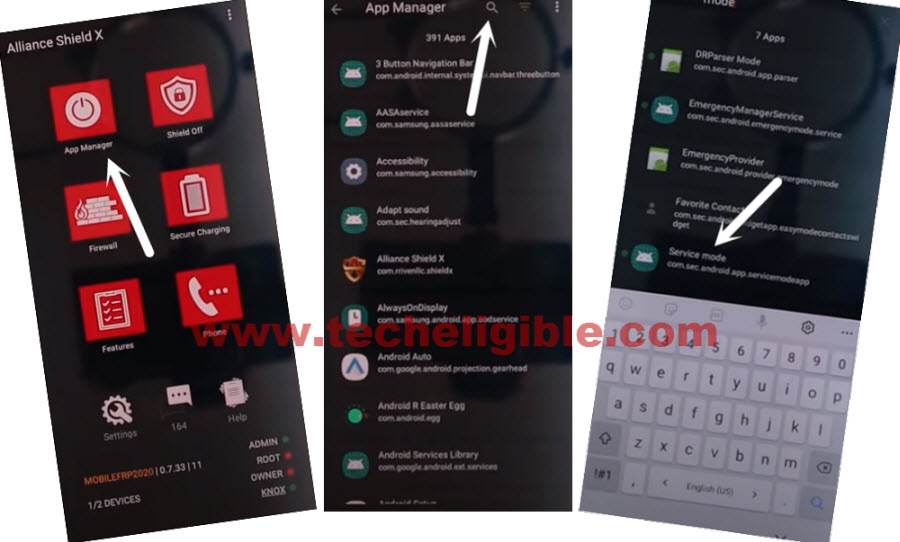
-Tap to “Activities”
-Go all the way down, and tap on option (com.sec.android.app.modemui.activities.usb.settings).
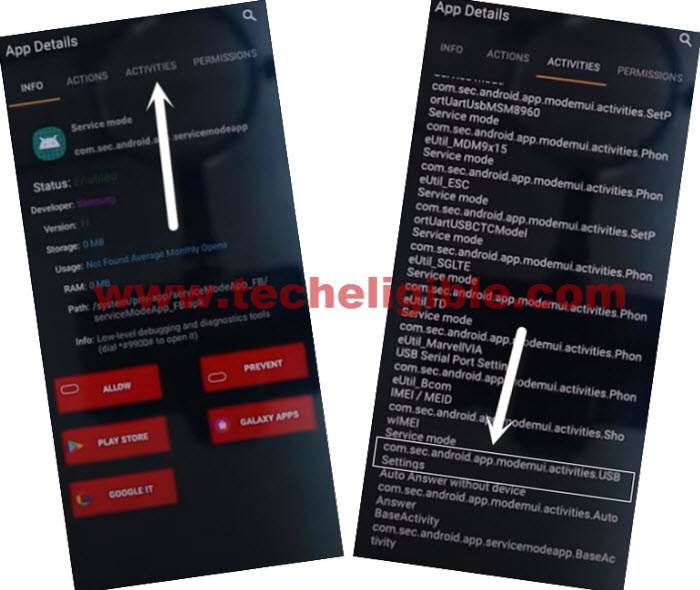
-Tap again on (com.sec.android.app.modemui.activities.usb.settings), and again hit on “OPEN”, and then select (DM+MODEM+ADB).
Bypass FRP Galaxy S9, S9 Plus With ADB :
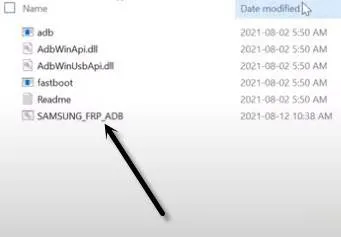
-Download & Open (Samsung FRP ADB) tool in your PC
⇒ FRP-BYPASS-ADB Tool [DOWNLOAD]
-Connect device to the PC using a USB Cable.
-Extract & Open “FRP Bypass ADB Tool” in PC
-This tool will start automatically, and will Bypass FRP Galaxy S9, S9 Plus in few seconds, wait until this process finishes.
Note: In your Samsung Device, you will have a popup widow, just tap to > Allow > Allow, afterwards, the ADB Tool will detect your device and will start bypassing frp lock.

-Now the device will be restart automatically.
-Select the (Setup Wizard) icon, and boom, you are in your device HOME SCREEN.
Perform Factory Data Reset:
-We are going to perform a factory reset task from the device settings to completely Remove Google FRP on Samsung Galaxy S9, S9 Plus.
-Go to > Settings > General Management > Reset > Factory Data Reset > Reset > Delete All.
-You will be asked to enter your Samsung account password, just give password, and then tap to “OK”.
-The device will be reboot automatically to finish this factory data reset process, afterwards, you can use your device without restrictions, and you can easily add add new google account, new security lock, thank you for visiting us.
Method 2: Bypass FRP Galaxy S9/S9+ Android 10:
In order to Bypass FRP Galaxy S9, S9 Plus Android 10, you are just required a WiFi connection, we will bypass frp easily without Talkback, SIM, PC, only through 2 easy frp apps, we will be able add our new Gmail Account.
-First of all, turn on your Samsung phone, and connect to a WiFi network, and then go to “Verify your Account” screen, from there tap on “Email or Phone” field to get bottom keyboard.
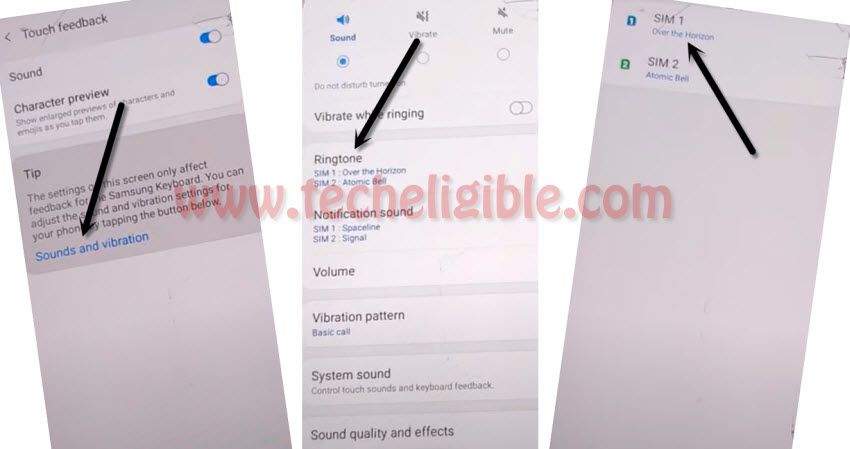
-From the bottom keyboard, tap on “Settings gear icon”, and then tap on > Swipe, Touch and Feedback > Touch Feedback.
![]()
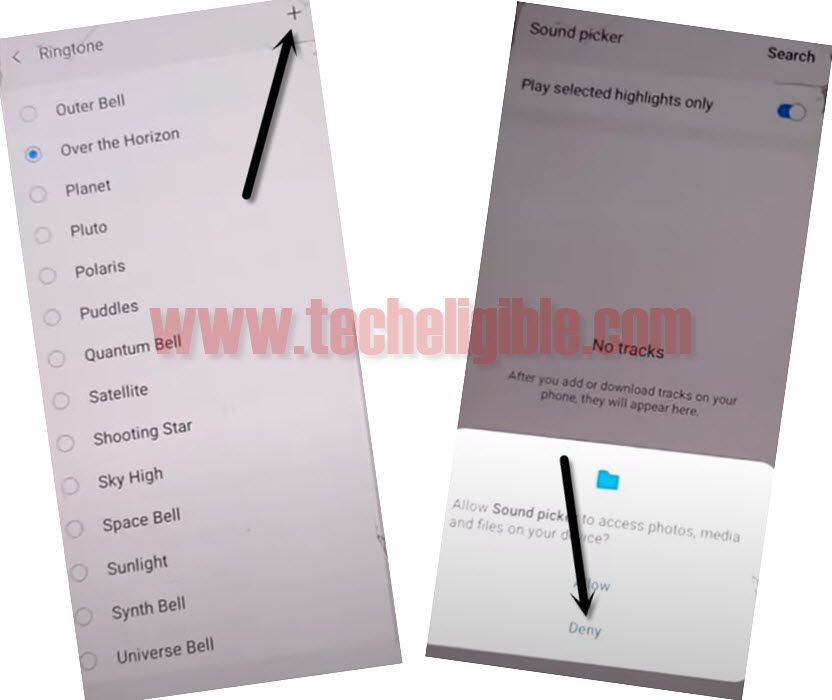
-Tap on > Sound & Vibration > Ringtone > SIM 1.
-You have to tap on “+” sign from top right corner, and then you will be displayed a bottom popup box, from that box, hit on “DENY” option.
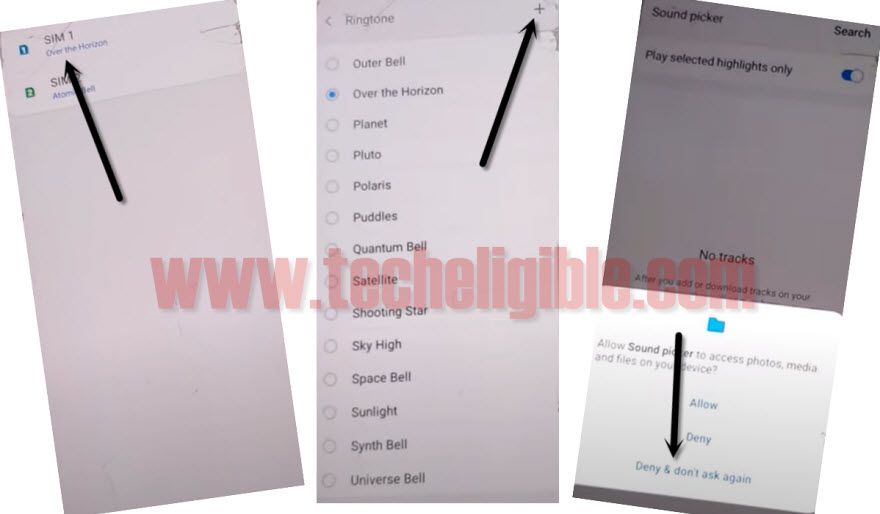
-Repeat process, Tap on > SIM1 > + Sign > Deny & Don’t Ask Again.
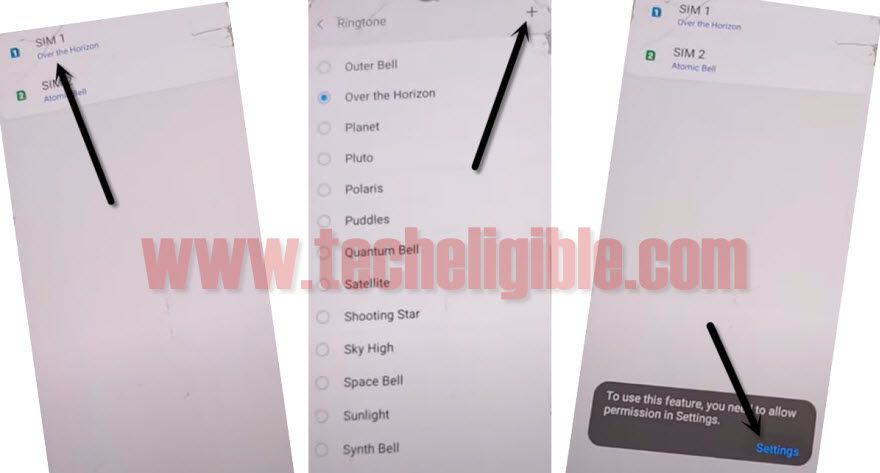
-Repeat process one more time, Tap on > SIM1 > + Sign > Settings (from the popup window).
-Tap on > Permission > Search icon.
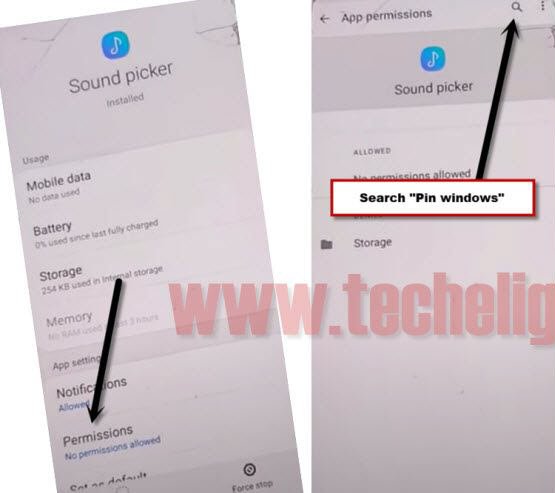
-Search there “Chrome”, and tap on “Chrome icon”, and then tap to > Accept & Continue > Next > No Thanks, after accessing to the web browser, we will be able to Bypass FRP Galaxy S8 through downloading 2 simple and easy apps.
Download FRP Tools:
-Search “Download frp tools“, and visit 1st searched result.
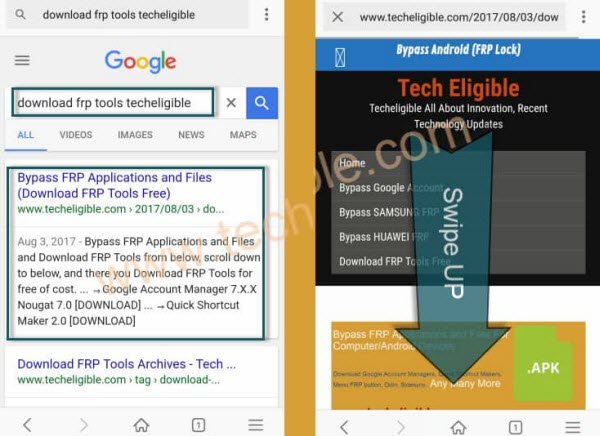
-Download below 2 apps.
1/ Apex Launcher 4.0.1.
2/ Google Play Services.
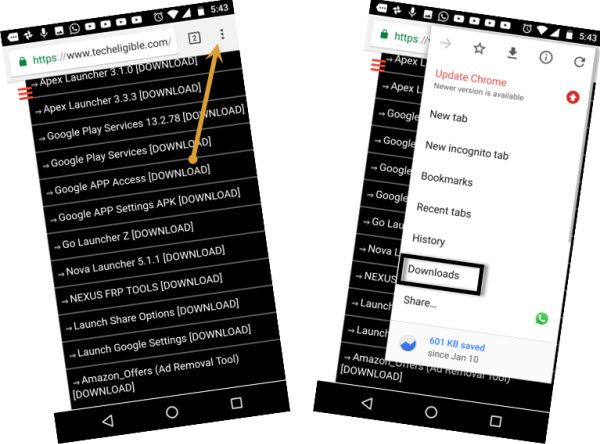
-After that, go to top of the web page, and hit on “3 dots”, and then tap to “Downloads”.
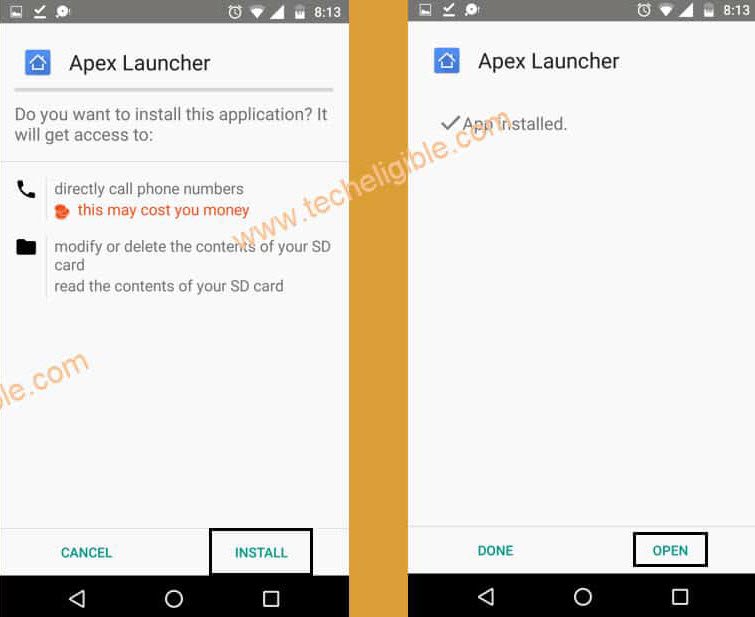
-Tap on > Apex Launcher > Settings > Enable option “Allow from this sources”, and then tap to “Back”.
-Install & Open “Apex Launcher” app.
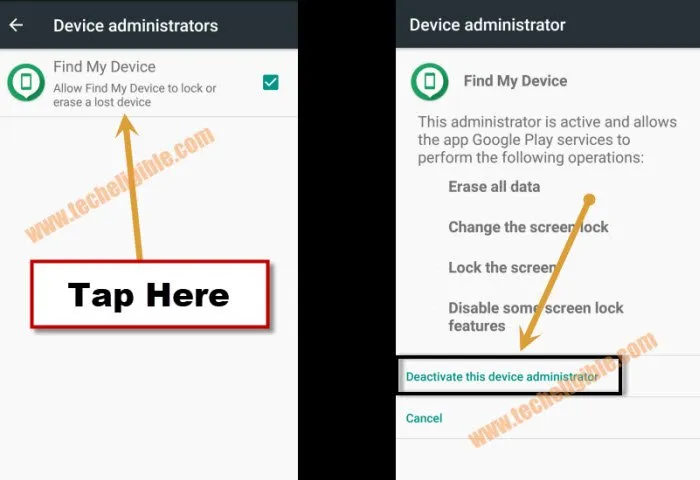
-Access to > Settings > Biometrics & Security > Other Security Settings > Device Admin.

Tap to > Find My Device > Deactivate this device administer.
-Go back to “Settings”, from there tap on “Apps”, tap on > Google Play Services > Disable.
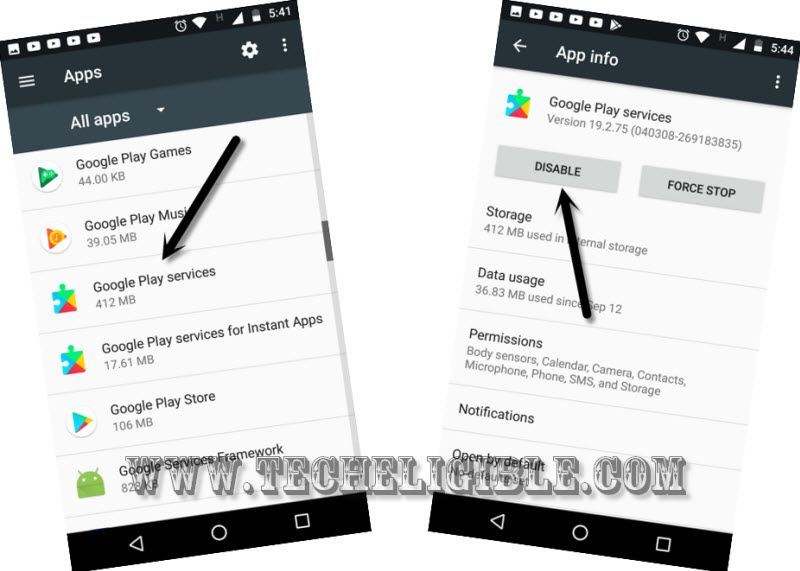
-Go back to phone MENU, from there tap on > My File > Internal Storage > Downloads.
-There you will be able to see your downloaded app (Google Play Services).
-Install “Google Play Services” app in your device to Bypass FRP Galaxy S9, S9 Plus.
-Add new Google Account by going to > Settings > Accounts & Backup > Add Account > Google.
-Go back to your phone “Apps”, and then enable “Google Play Services” app from there.
-Uninstall “Apex Launcher” app from there,
-Find the “Google Play Services” clone app, which we installed, just uninstall that app as well, do make sure you are uninstall the app, that we installed, do not uninstall your device original (google play services) app.
-By hitting “Back Arrow” several times, just get back to very first “Let’s Go” screen.
-Now Finish Setup Wizard without having any frp problem.
Read More: